What you will have
By the end of this tutorial you will install Ghost on a VPS from nothing: a bare Ubuntu 24.04 slice becomes a real publication, run by the Ghost node process, backed by a MySQL 8 database, and served through nginx over real HTTPS at your own domain. Along the way you create an admin account and write and publish a first post from the Ghost editor.
No hosted plan, no per-member fee, no platform between you and your readers. This is for anyone who wants a fast, clean place to write, a blog or a newsletter they own outright, instead of renting space on Substack, Medium, or a WordPress install bent into a blogging tool.
Here is the destination, shown first so you know what you are building toward. The screenshots are not mockups. They come from a genuine install we ran at ghost.boxlab.space while writing this, so the version and the layout match what you will see.
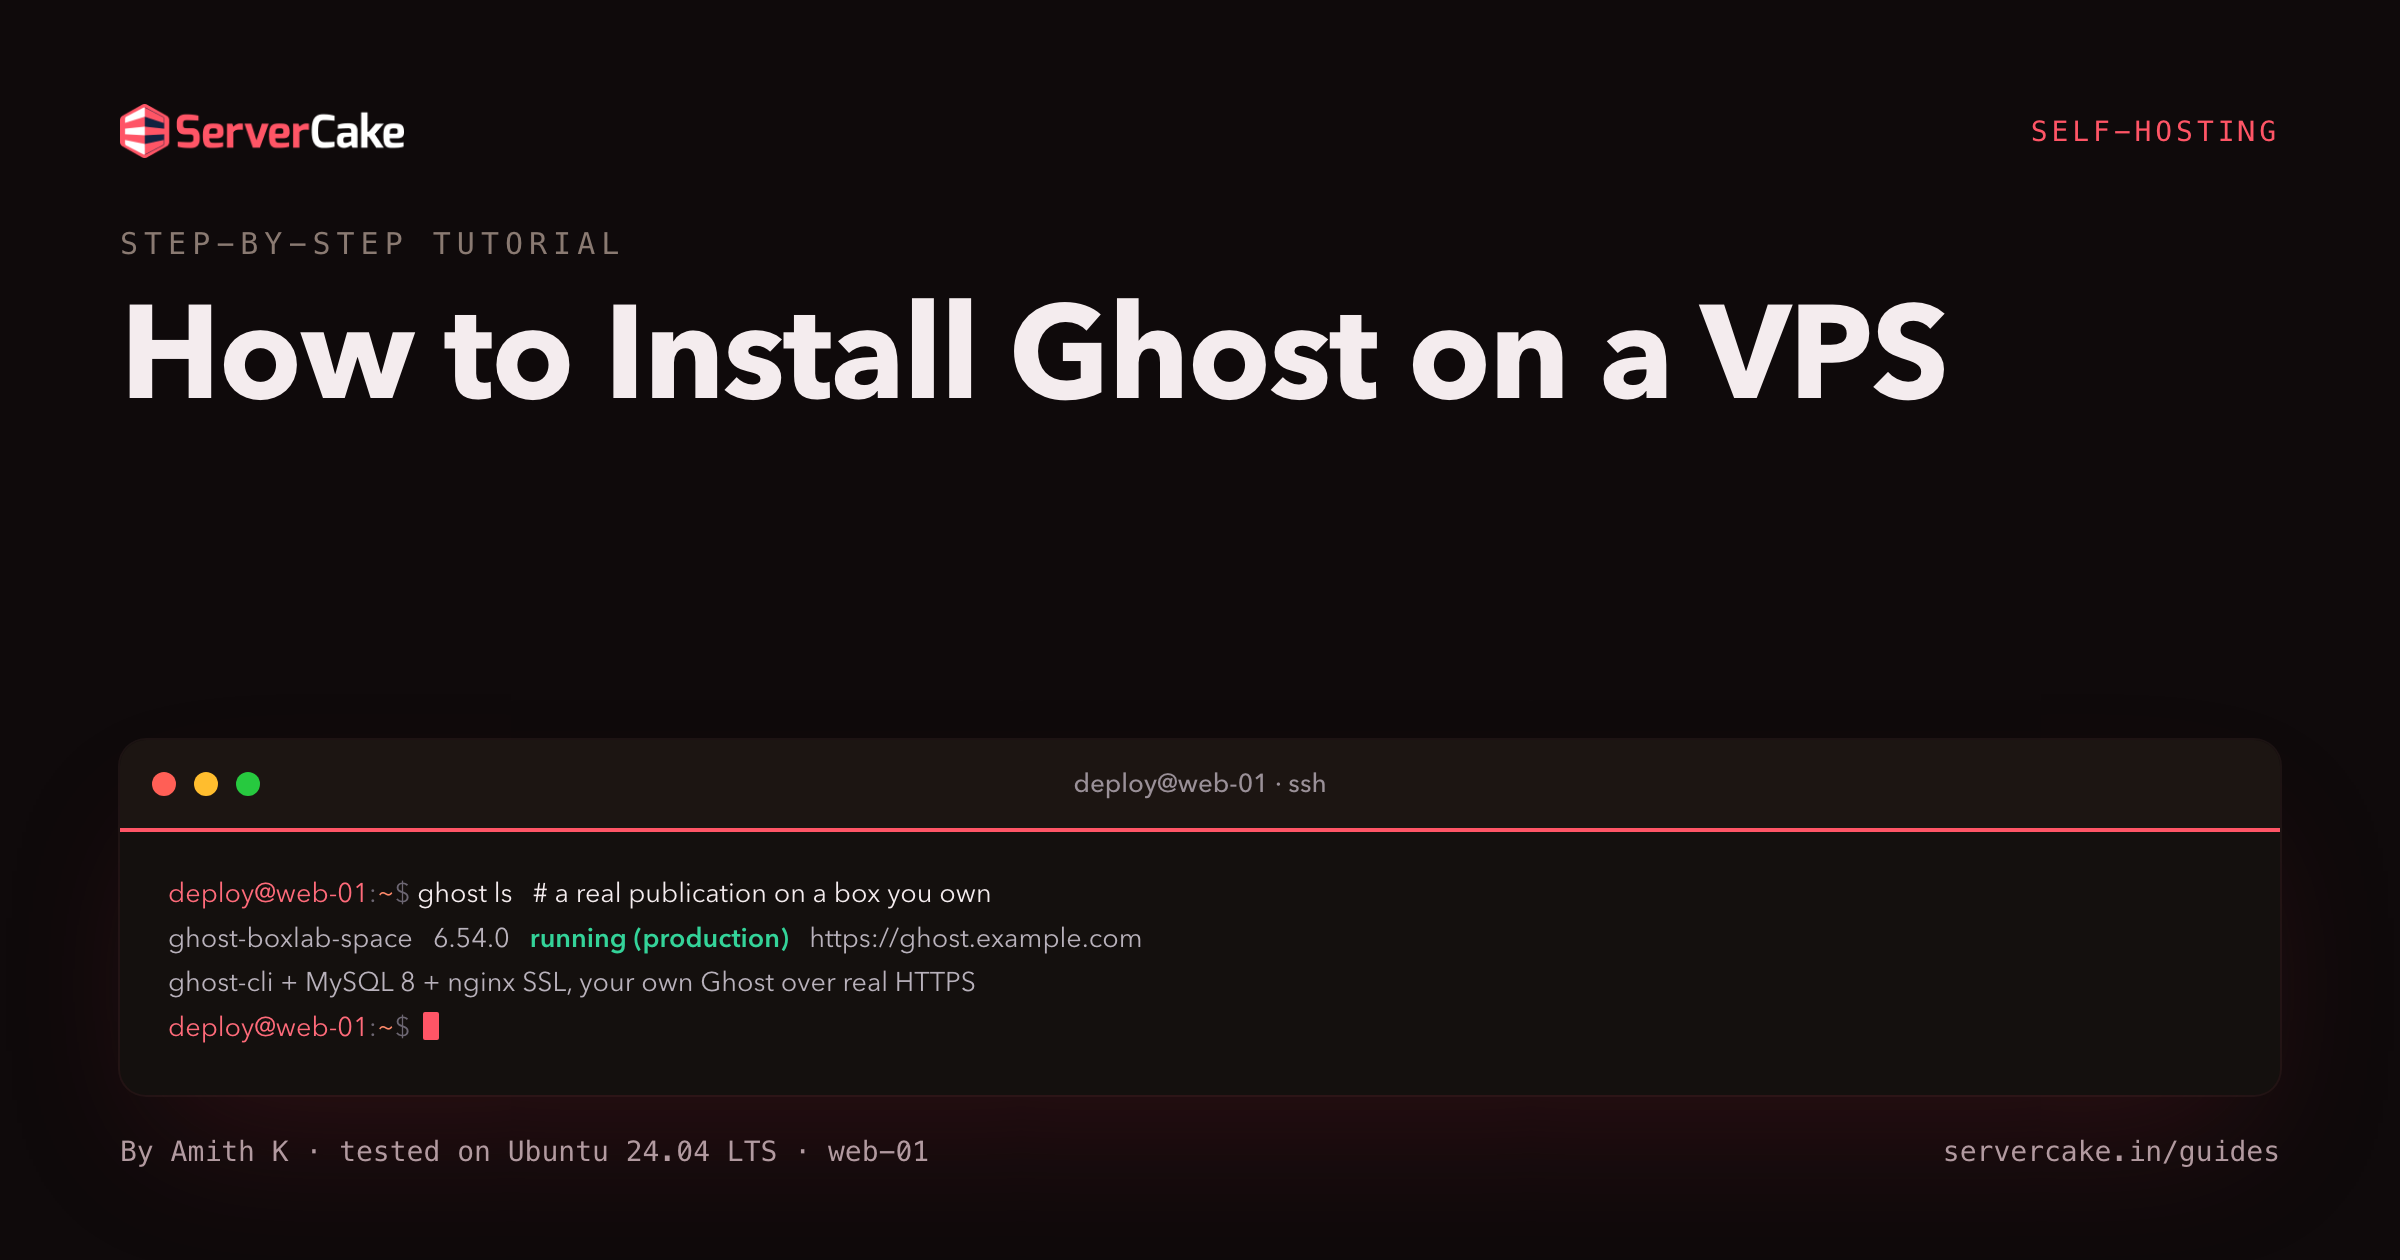
ghost ls
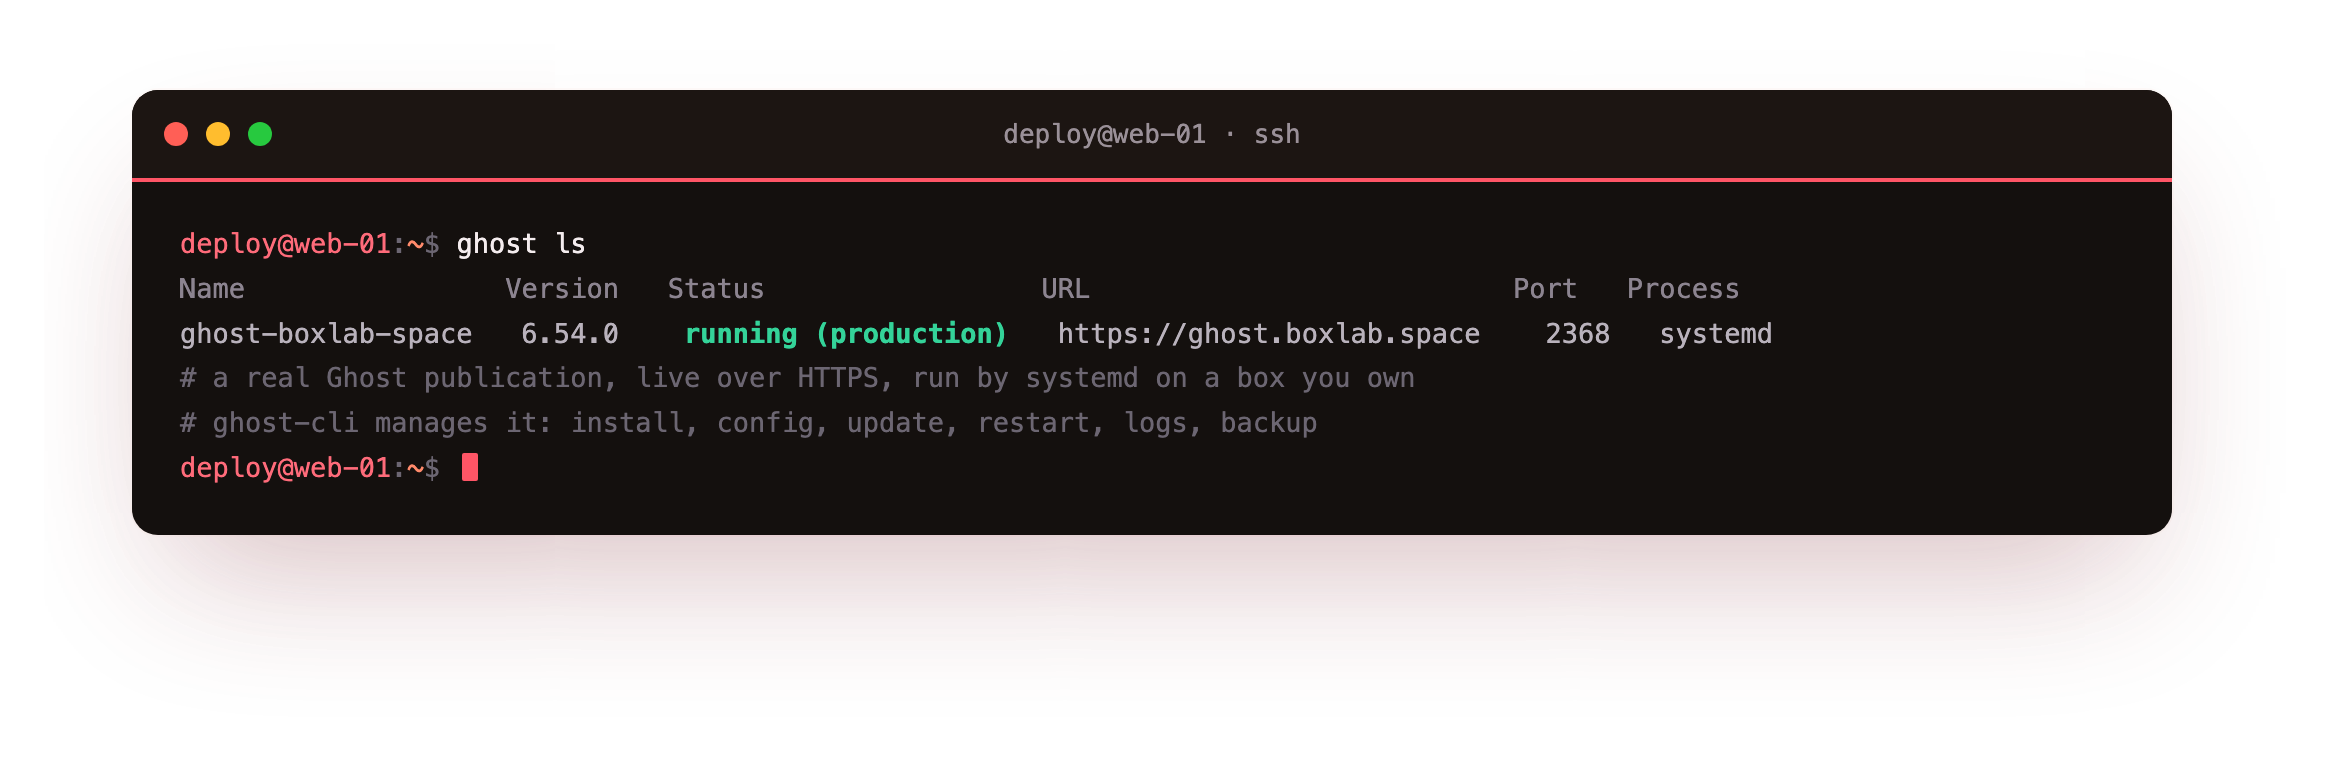
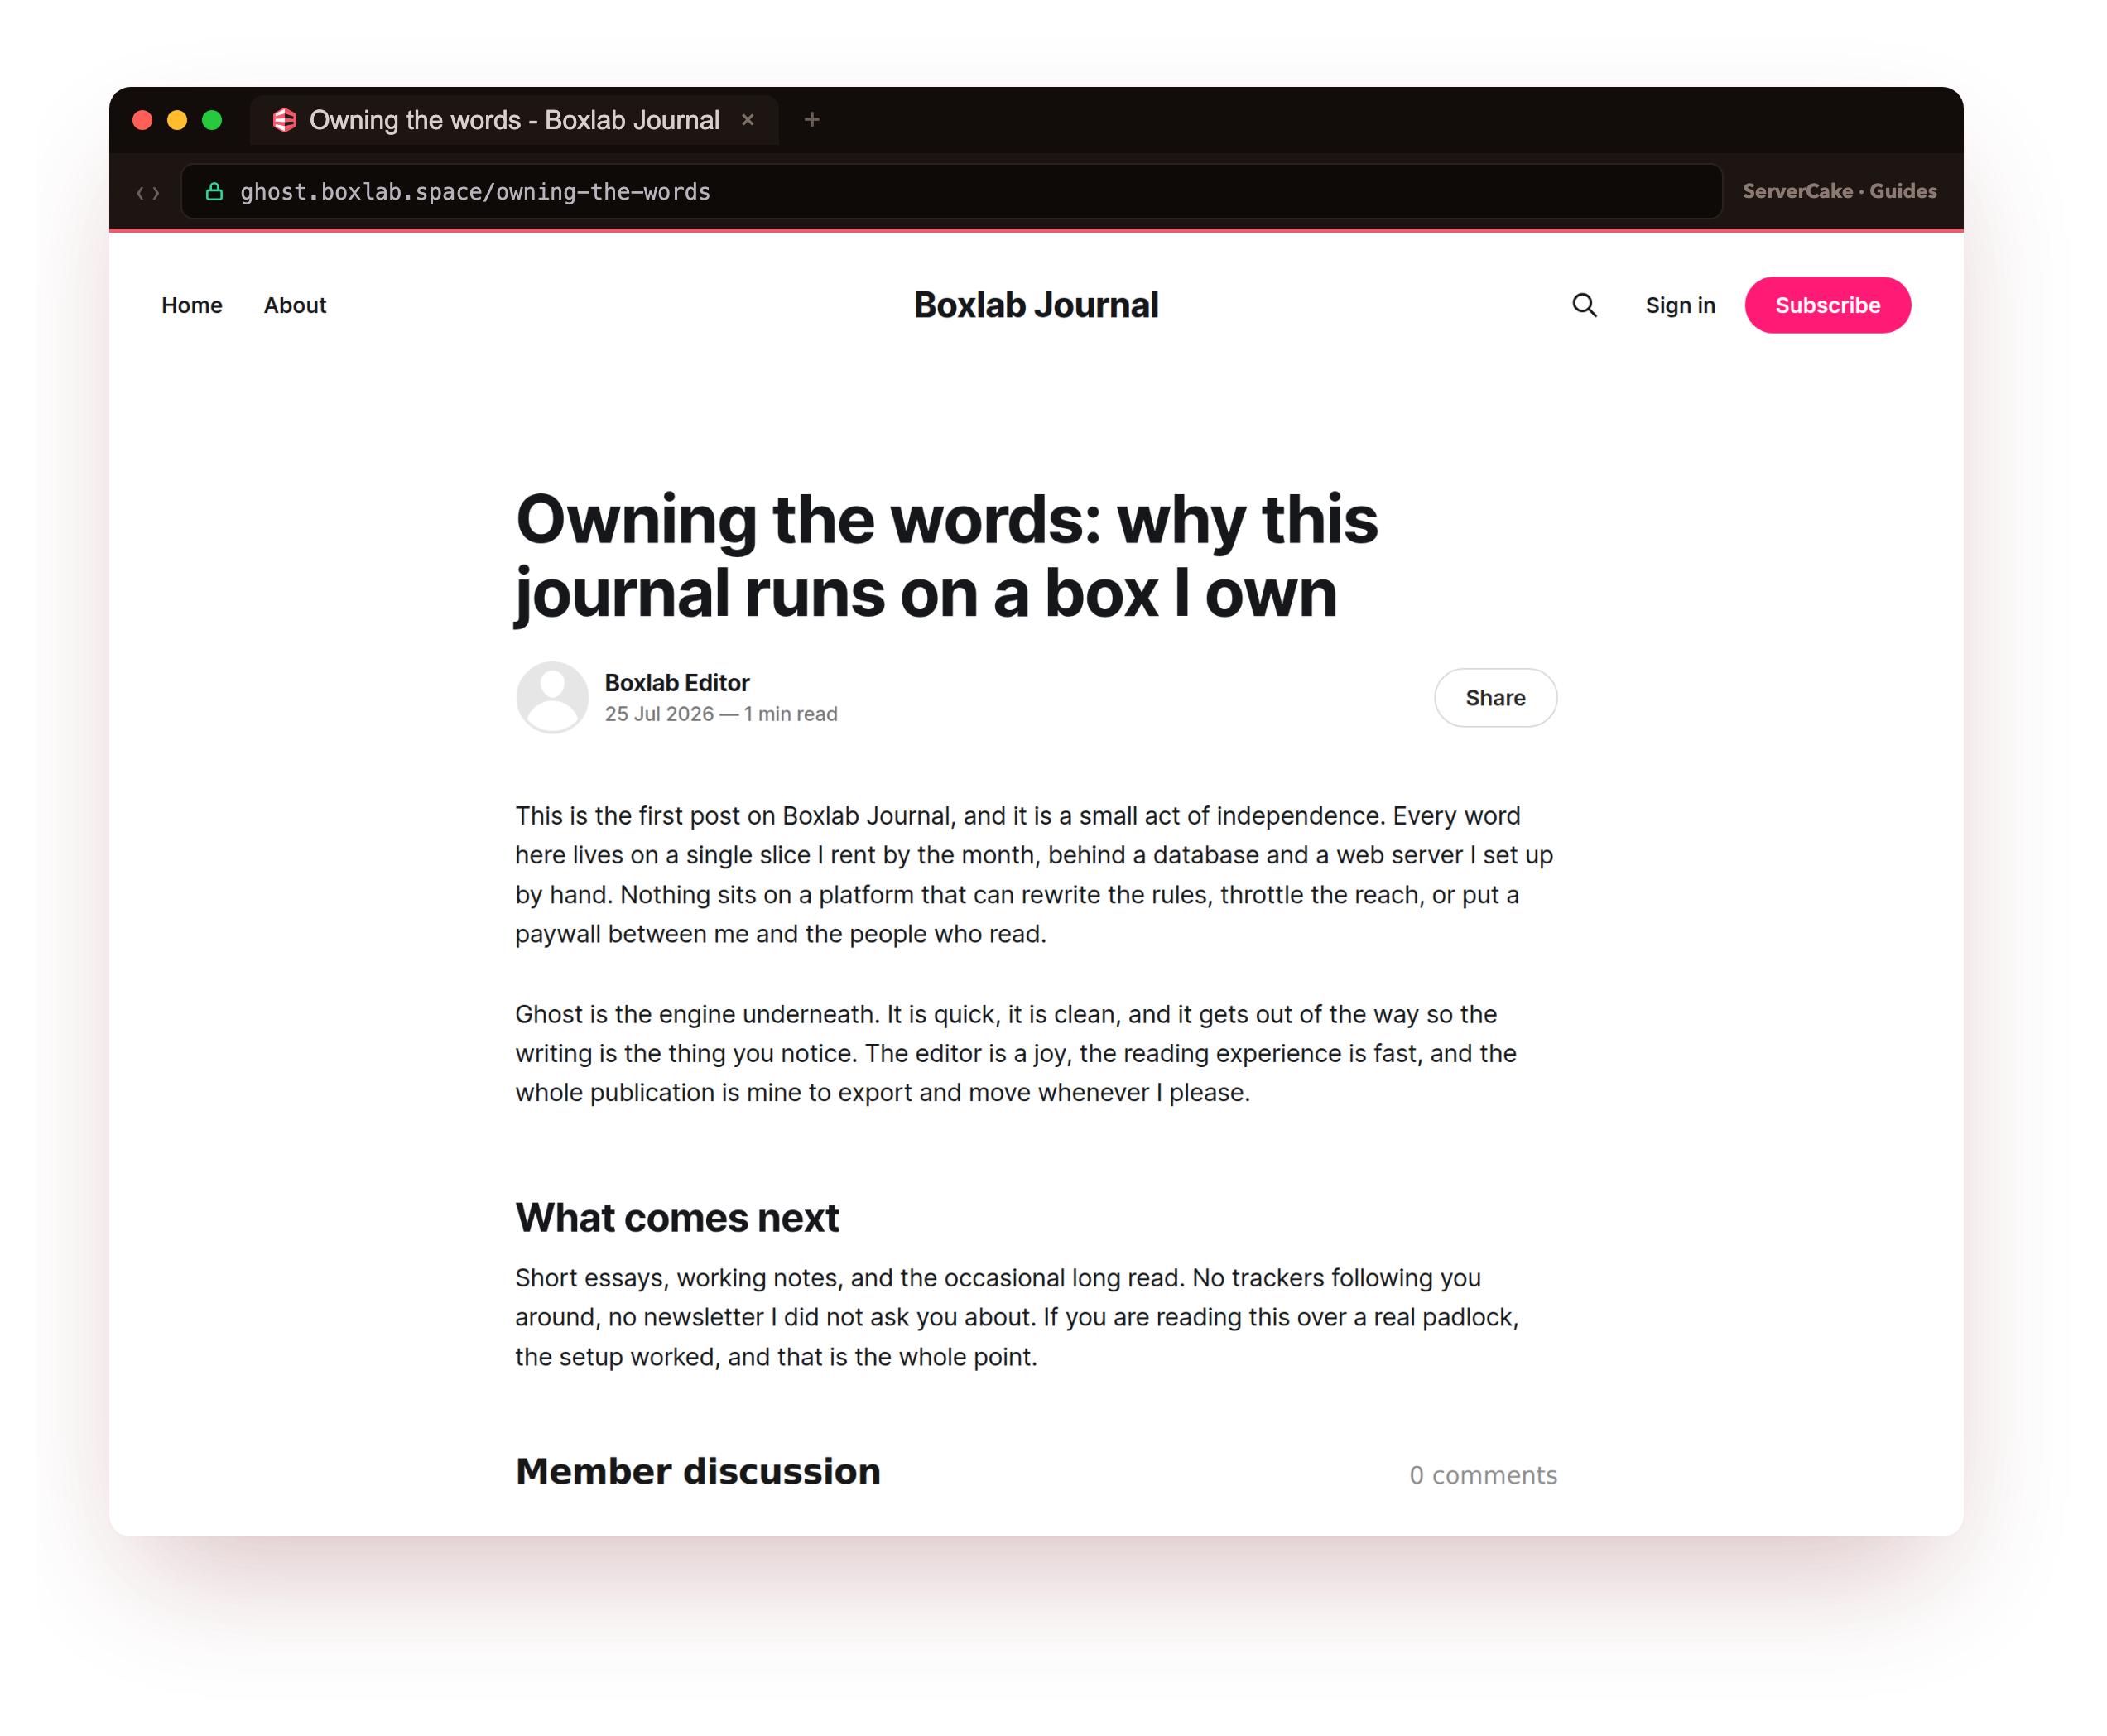
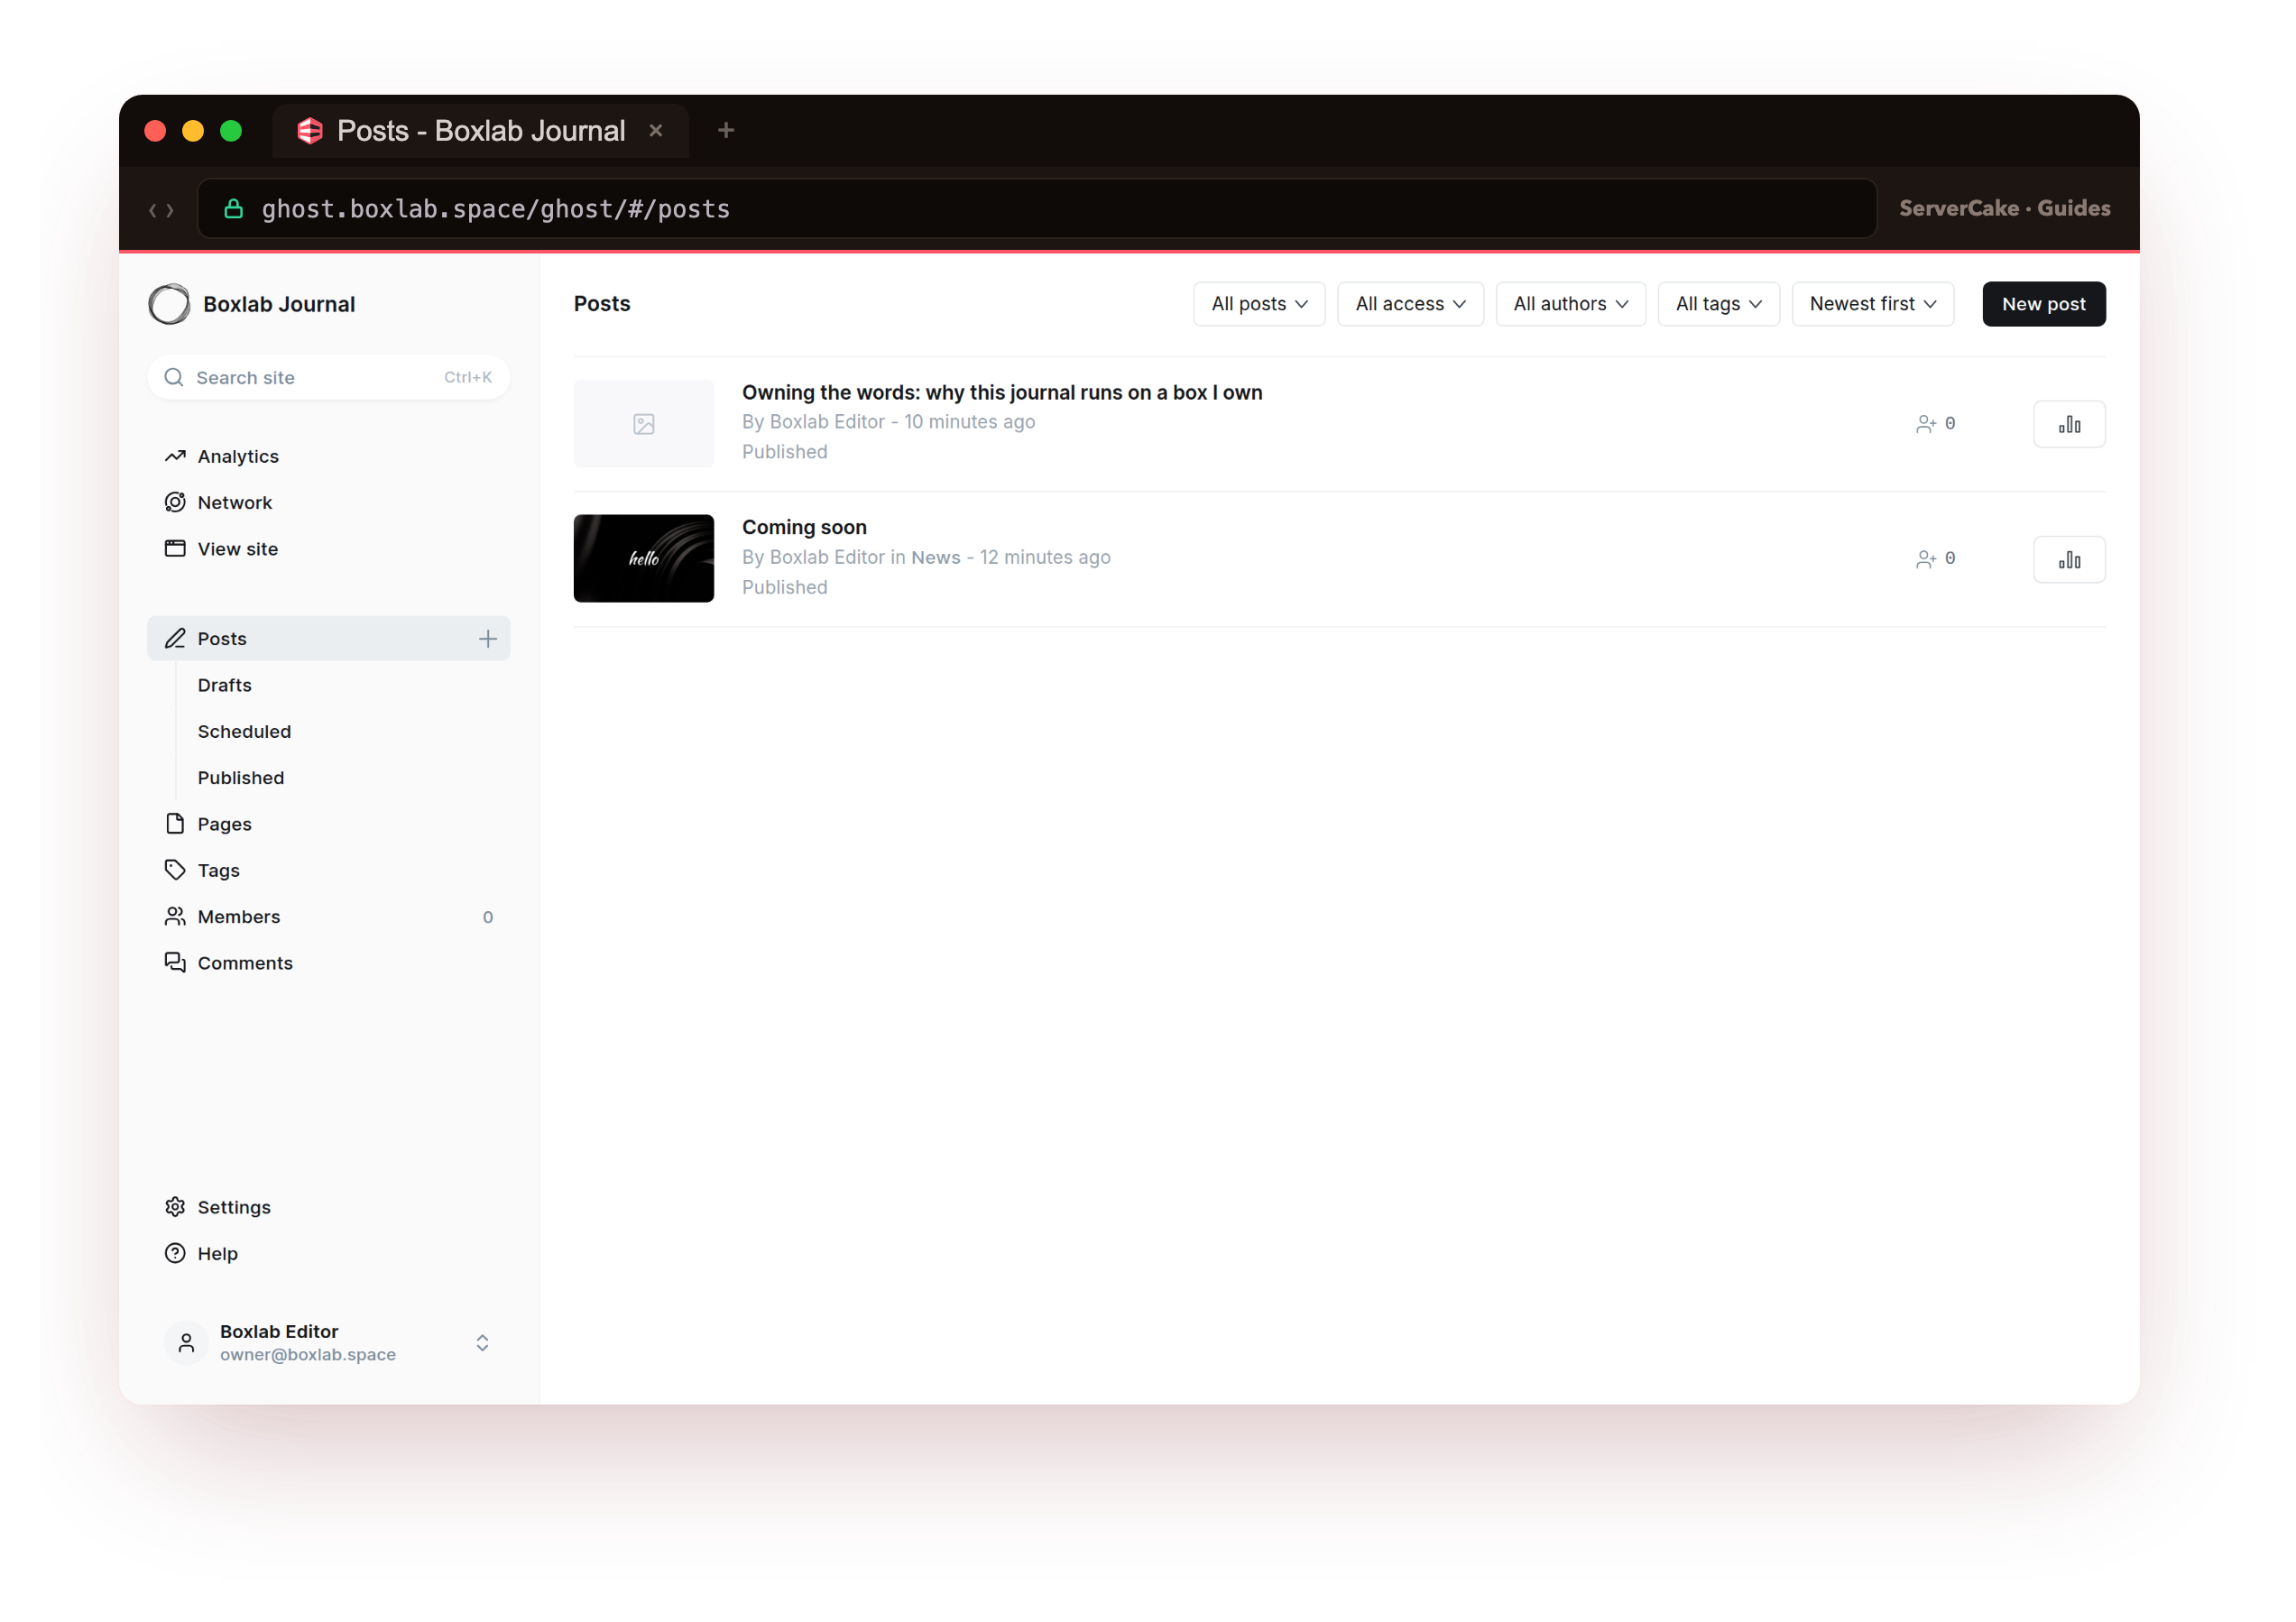
That one command is how you check on a Ghost install for the rest of its life: the version, whether it is running, the URL, and the process manager keeping it alive. Below it is the first post from that same install, live on the front-end over a real padlock.
- Putting the stack on a bare Ubuntu 24.04 slice: the Node.js LTS, MySQL 8, nginx, and the ghost CLI.
- Creating a dedicated directory and a locked-down system user for Ghost to run as.
- Running
ghost installand understanding each prompt it asks you. - Creating the admin account and publishing a real first post from the Ghost editor.
- Hardening the install and keeping it updated with ghost-cli.
Before you begin
Ghost is friendly to install, but it does expect a few things in place first. None of them are heavy.
- A slice running Ubuntu 24.04 LTS that you reach over SSH as a normal user with
sudo. Ghost itself is light, but MySQL likes a little room, so a slice with 1 to 2 GB of RAM is a comfortable starting point. - A domain or subdomain you control, with access to its DNS. A dedicated subdomain such as
ghost.example.comis the usual choice for a publication. - The public IPv4 address of your slice, which one DNS record will point at.
- A non-root user for the install. This one matters: the ghost CLI refuses to run as root, so do not try to install as the root account.
Every command below runs as that ordinary sudo user. Where a step needs root it uses sudo, so you never log in as root directly, which is exactly the habit ghost-cli is enforcing.
Install the stack from a bare box
Ghost is a Node.js application that stores its content in MySQL and sits behind nginx. So before Ghost itself, four pieces go on the box: the Node.js runtime, the MySQL 8 database, the nginx web server, and the ghost command line tool that installs and manages everything. Start with Node, and use the version Ghost supports rather than whatever ships by default.
curl -fsSL https://deb.nodesource.com/setup_22.x | sudo -E bash -
sudo apt install -y nodejs
node --version && npm --version
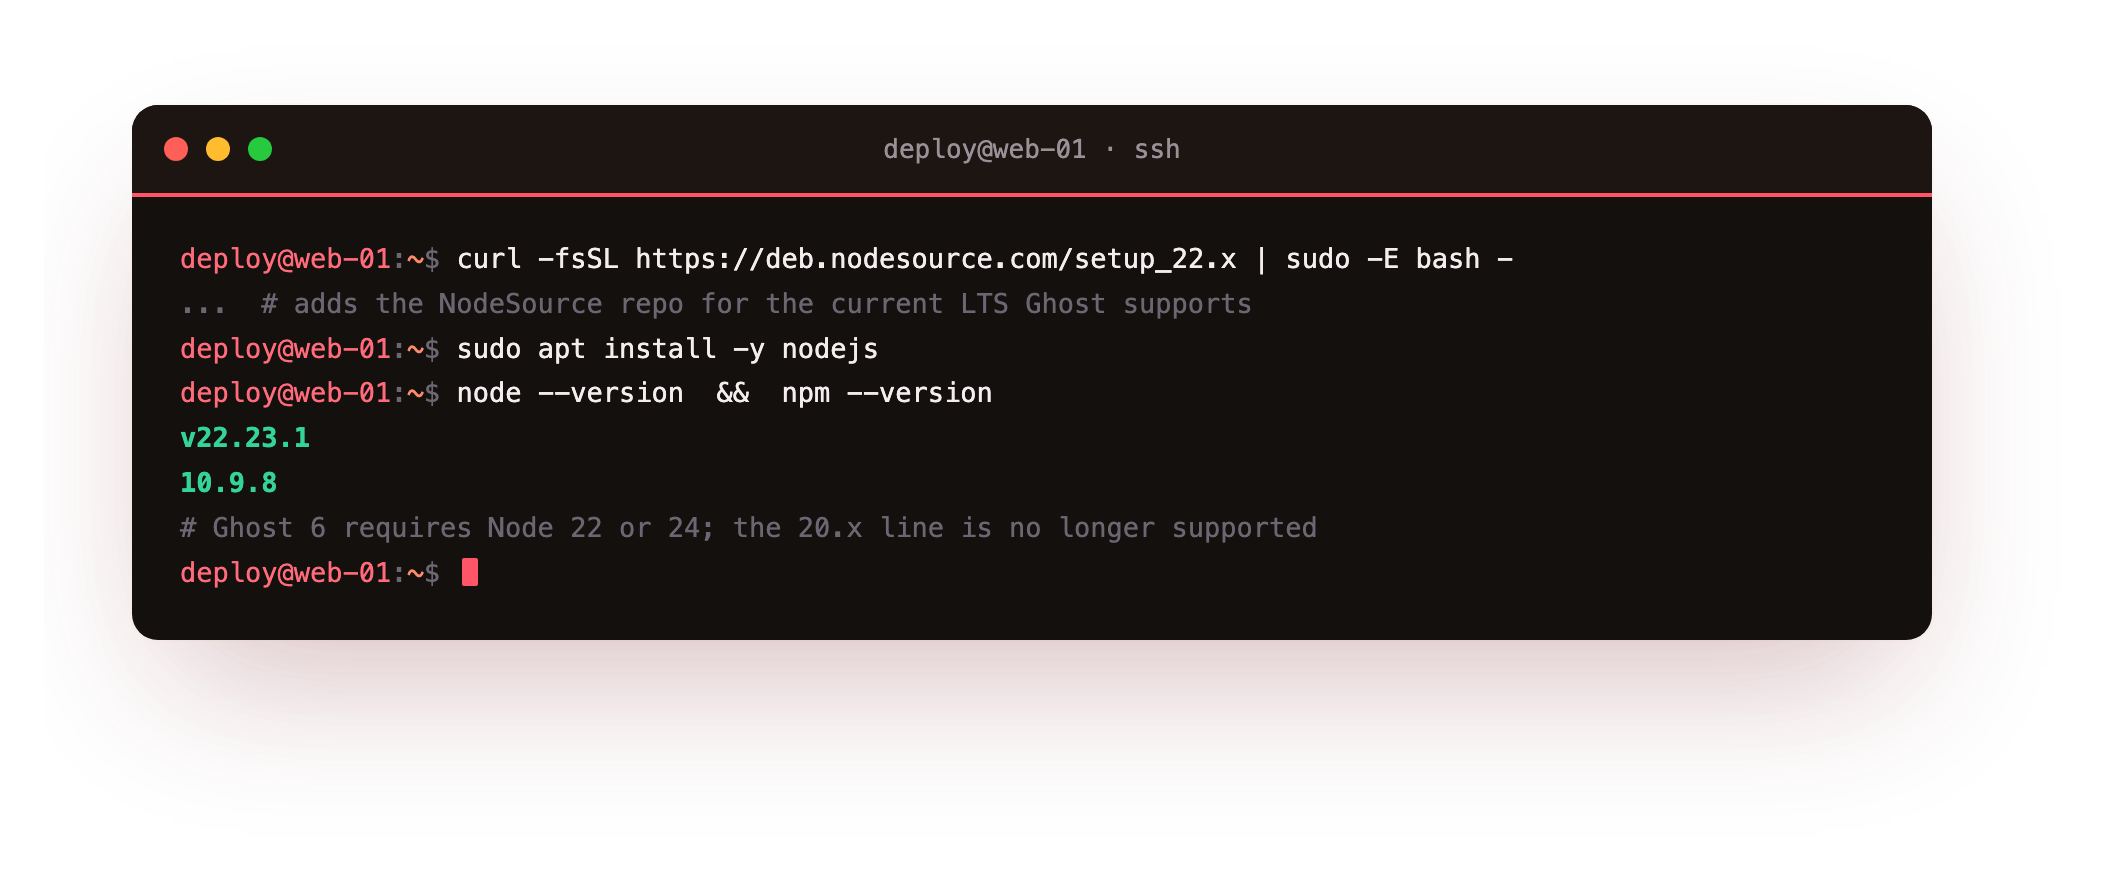
Read the versions back so you know what you are on. Ghost 6 supports the current Node LTS lines only, so the 20.x series will be refused at install time. On our box these came back as Node v22.23.1 and npm 10.9.8.
node --version should print a v22 or v24 release. If it prints v20 or older, the NodeSource step did not take; re-run it and re-open your shell before moving on, because ghost install checks this first and stops if it is wrong.Next the database and the web server, then the ghost CLI itself. MySQL 8 is the database Ghost is built and tested against, so use it rather than MariaDB here. Install both, run the bundled MySQL hardening script, and read the versions back.
sudo apt install -y mysql-server nginx
sudo mysql_secure_installation
mysql --version && nginx -v
sudo npm install ghost-cli@latest -g && ghost version
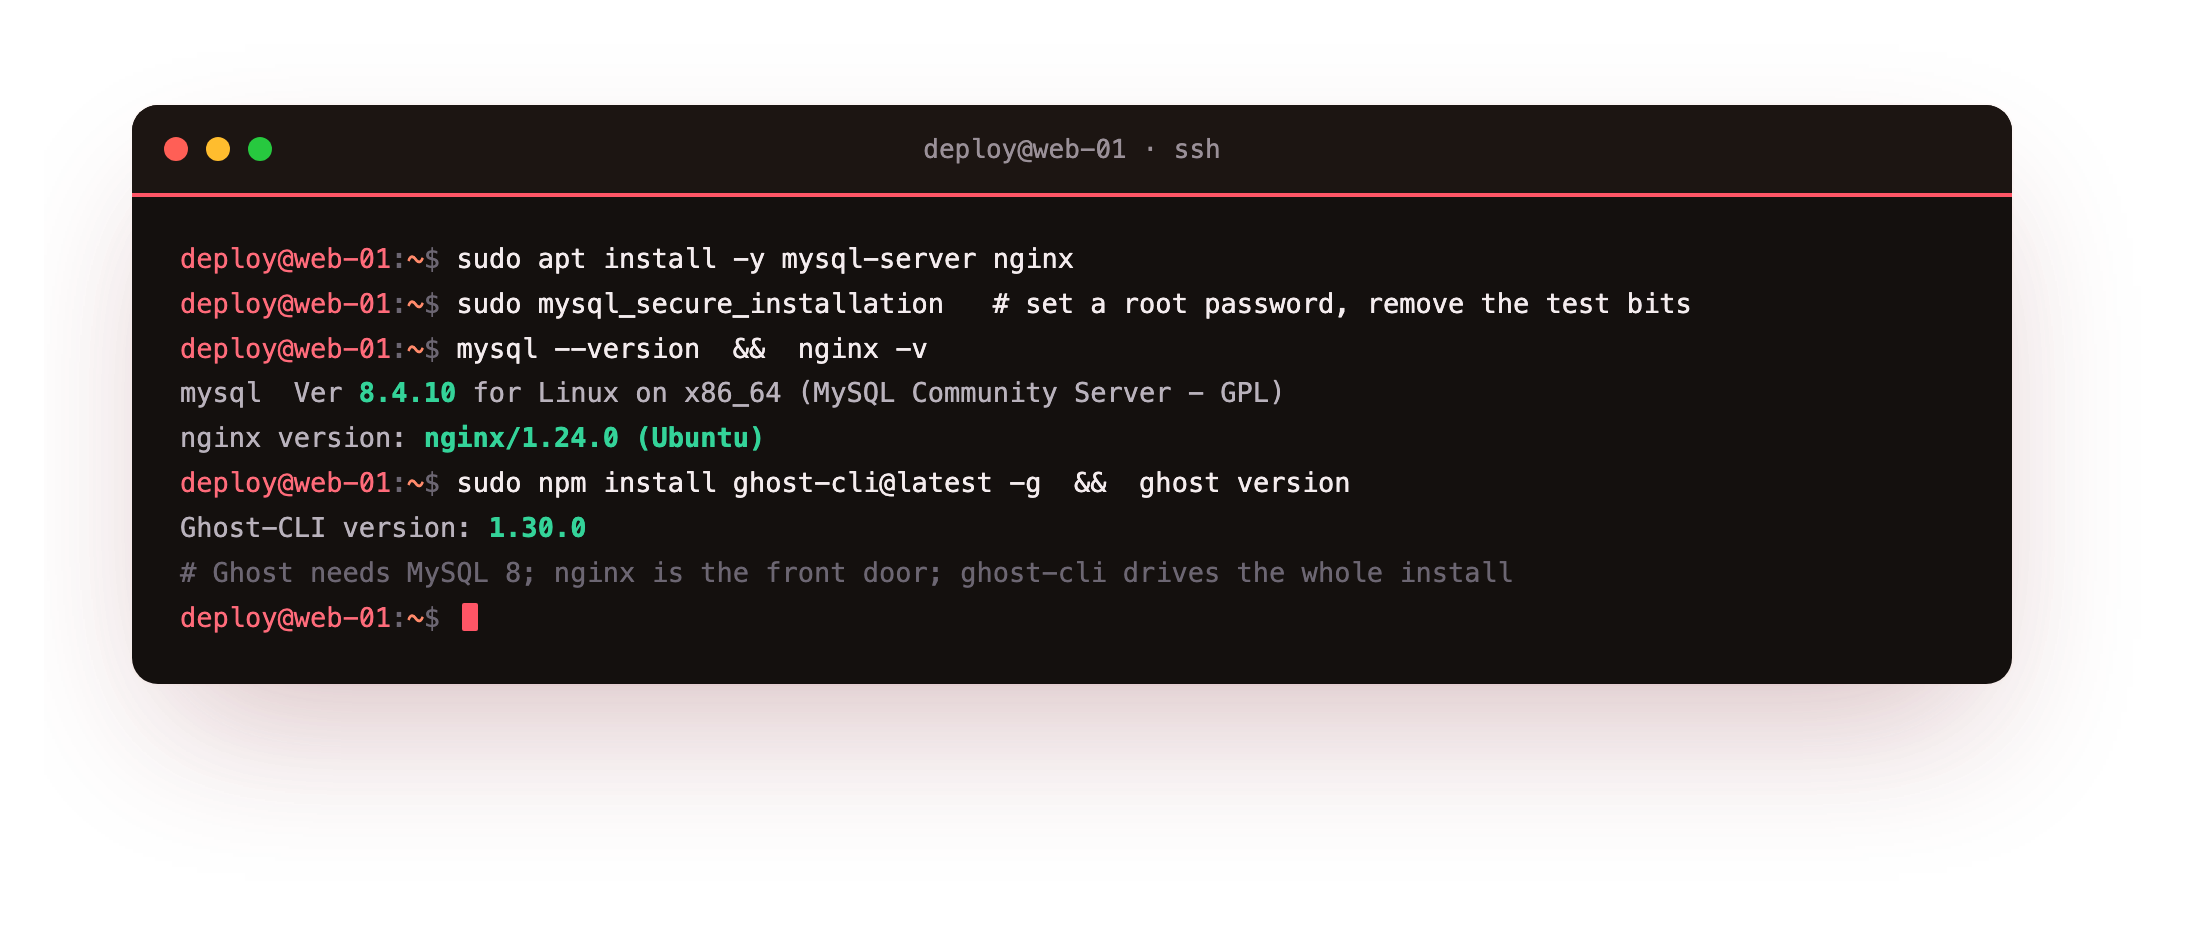
mysql_secure_installation sets a root password and removes the anonymous account and test database in one pass; answer yes to each prompt. On our box MySQL reported 8.4.10 and nginx 1.24.0, and ghost-cli installed at version 1.30.0. That ghost command is the tool that does the heavy lifting from here: install, configure, update, restart, and read logs.
Ghost wants its own home and its own user. Make a directory for it and hand that directory to your normal sudo user, because ghost-cli installs as you and then creates a separate, unprivileged ghost account to actually run the process.
sudo mkdir -p /var/www/ghost
sudo chown $USER:$USER /var/www/ghost && sudo chmod 775 /var/www/ghost
cd /var/www/ghost
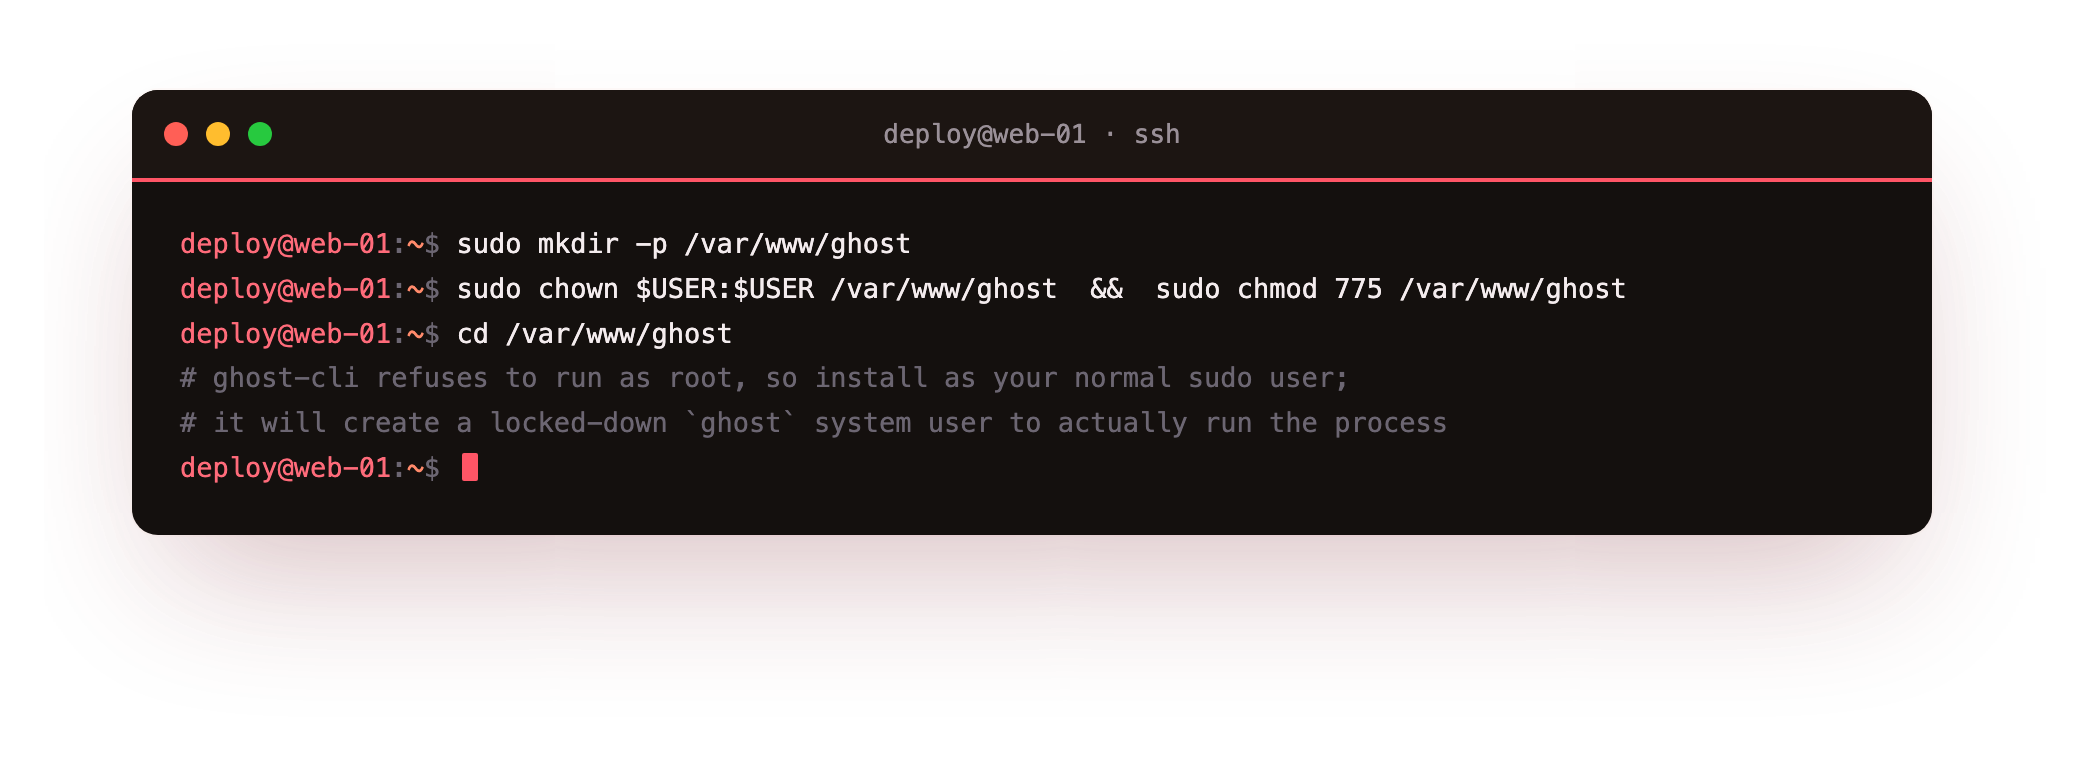
/var/www/ghost owned by your user, with Node, MySQL and nginx installed and ghost version answering. That is the whole stack, ready for Ghost to be dropped into it.Install Ghost on a VPS with ghost-cli
Before you run it, point your domain at the slice. In your DNS, add an A record for the hostname you want, for example ghost, aimed at the slice's public IPv4 address, and give it a few minutes to take effect. This matters because ghost-cli asks Let's Encrypt for a certificate during the install, and that check only passes once the domain actually resolves to your box.
With DNS in place, run the installer from inside the empty directory. It is interactive: it downloads Ghost, asks a short series of questions, and wires up nginx, HTTPS and a system service for you.
ghost install
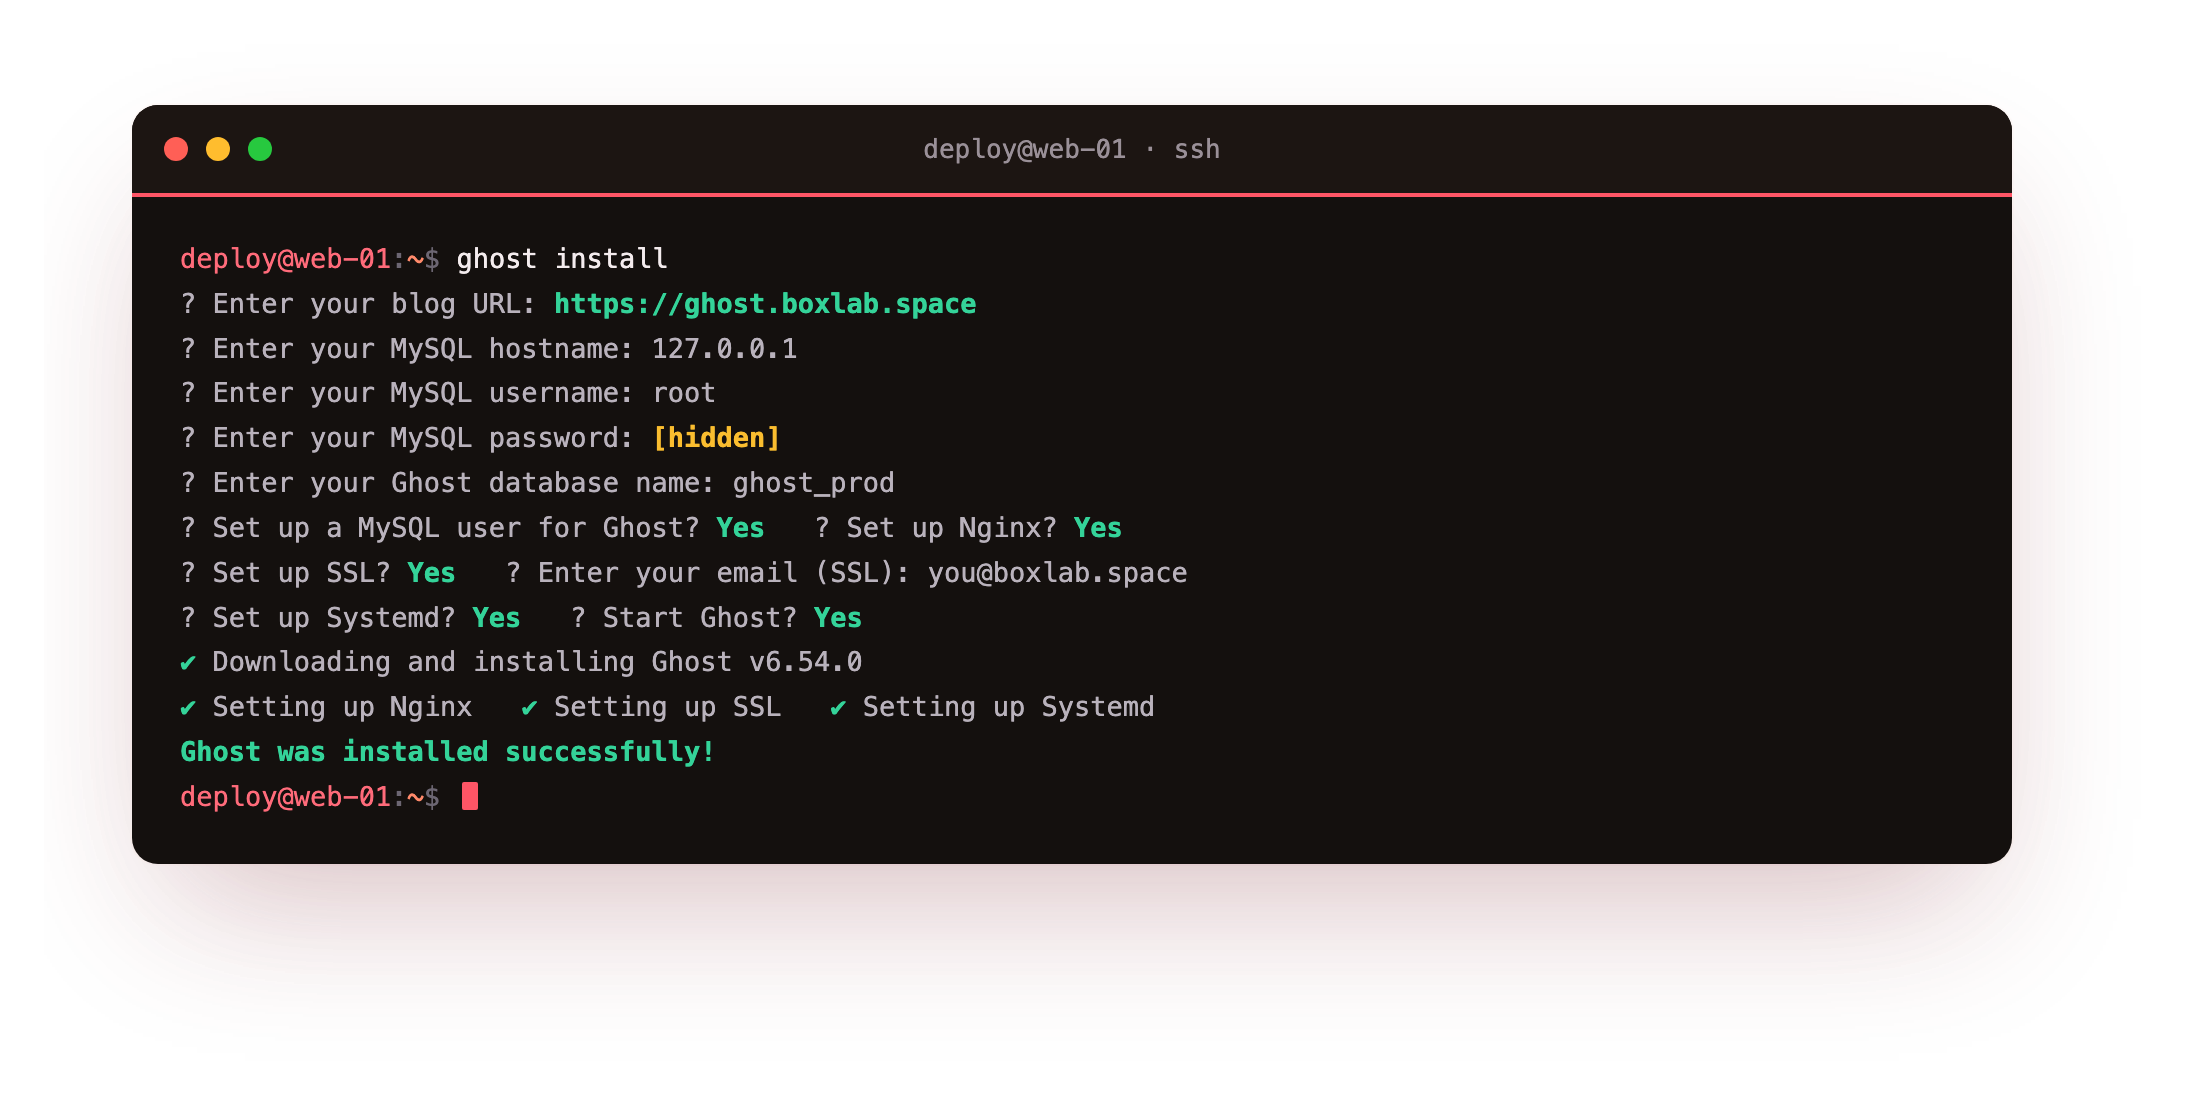
Walk each prompt with intent, because the answers become your configuration. Enter your blog URL as the full https:// address, for example https://ghost.example.com, so Ghost writes secure links from the start. For the database, give the MySQL host (127.0.0.1), the root user and the password you set a moment ago, and a database name such as ghost_prod.
Then say yes when it offers to set up a MySQL user for Ghost: it creates a dedicated account scoped to that one database, not root, which is the least-privilege habit you want. Say yes to nginx, yes to SSL and give an email so Ghost can request a free Let's Encrypt certificate, and yes to systemd so the service survives reboots.
When it finishes you will see Ghost was installed successfully!. In those few seconds ghost-cli wrote an nginx server block, obtained and installed a real certificate, created the ghost system user, registered a systemd unit, and started the site. Confirm the whole path answers over HTTPS.
curl --http2 -sI https://your-domain/
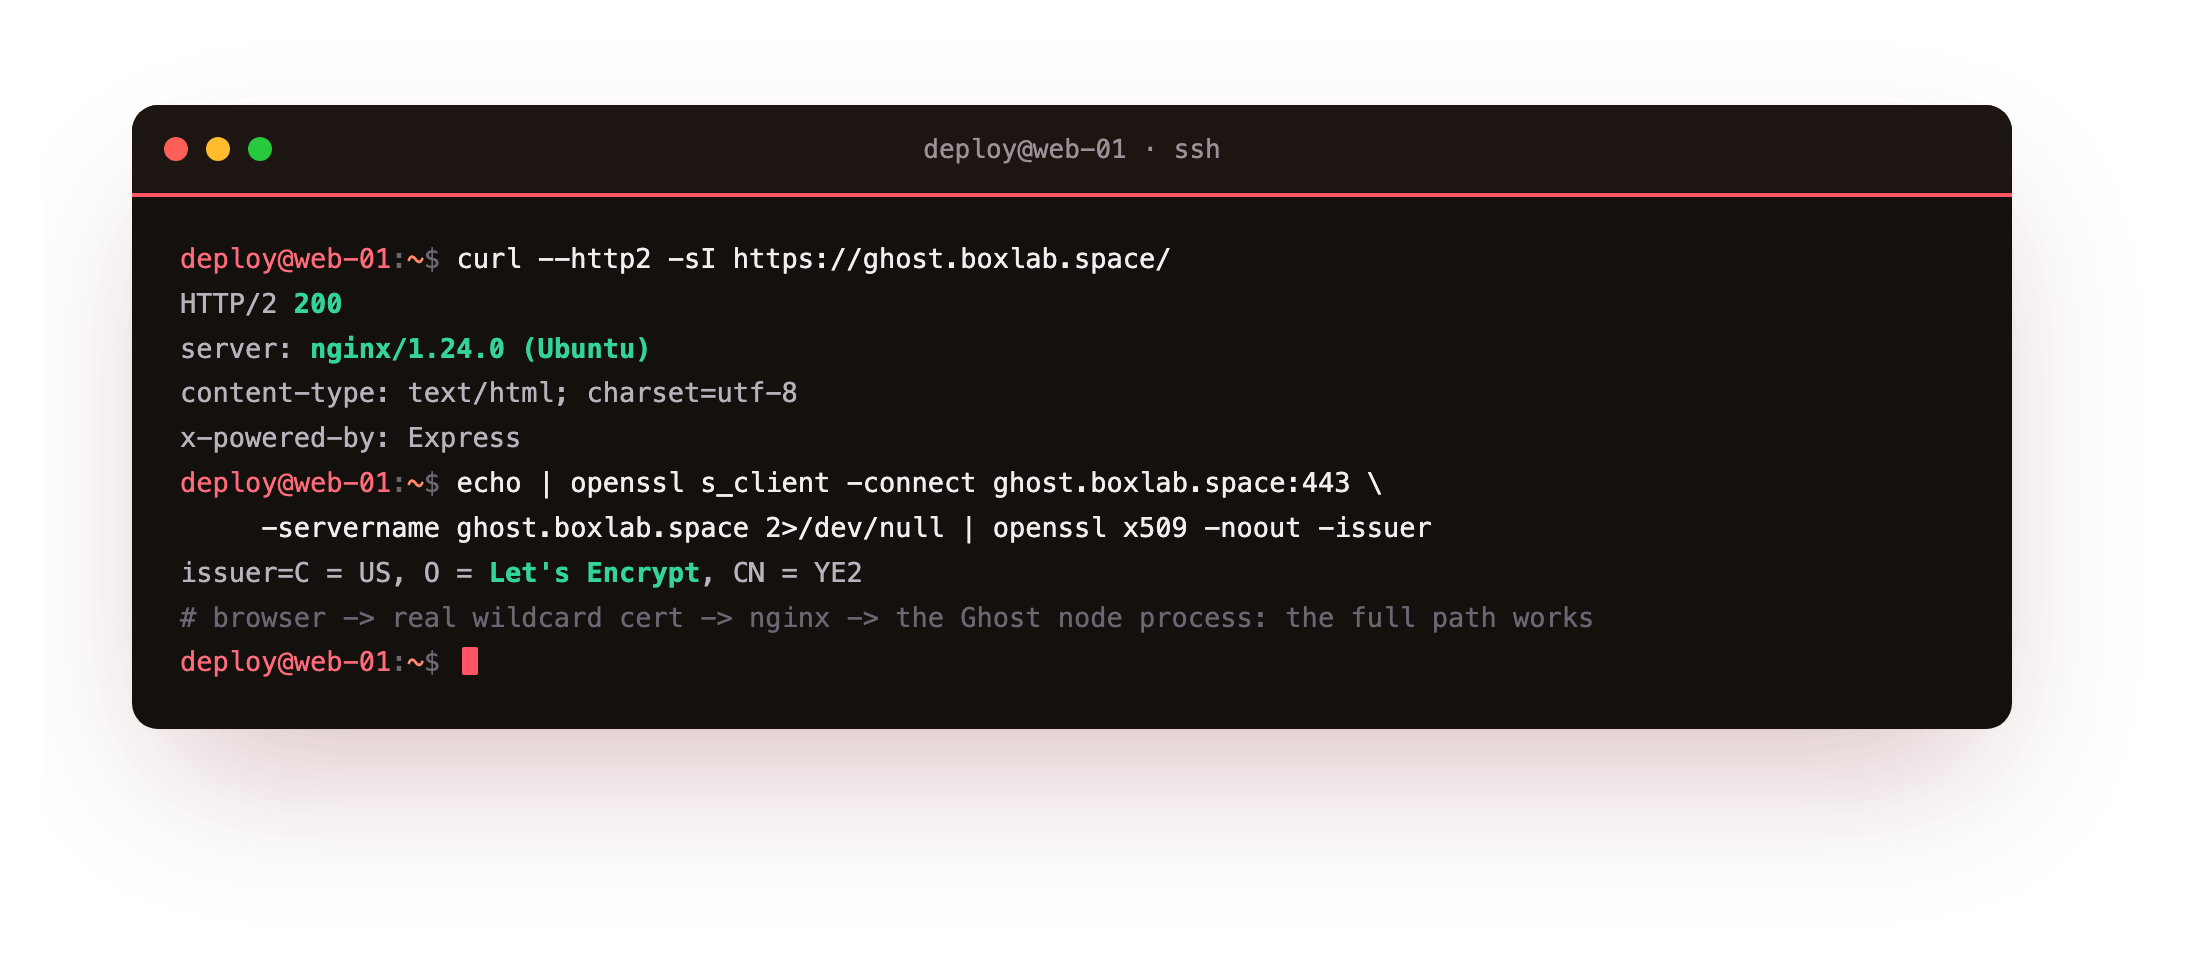
A 200 over HTTP/2 with server: nginx is your live site, and the certificate behind it is issued by a public authority, so the padlock is the real thing rather than a self-signed placeholder.
ghost ls should list one instance as running (production) at your URL. If the site does not answer, check ghost log for the reason; a wrong MySQL password or a DNS record that has not pointed at the slice yet are the two usual causes.First run: your admin, the editor, your first post
Open your domain with /ghost on the end, for example https://ghost.example.com/ghost. On a fresh install Ghost shows its setup screen and asks you to create the first account, the owner, who administers everything. Give it your name, your email, and a strong password, and a title for the publication. That account is the one you will sign in with from now on, so pick a real password and store it safely.
Once the owner exists, you land in the Ghost admin. You can confirm from the shell that the publication is set up and reporting its version.
curl -s https://your-domain/ghost/api/admin/site/ | jq '.site.version'
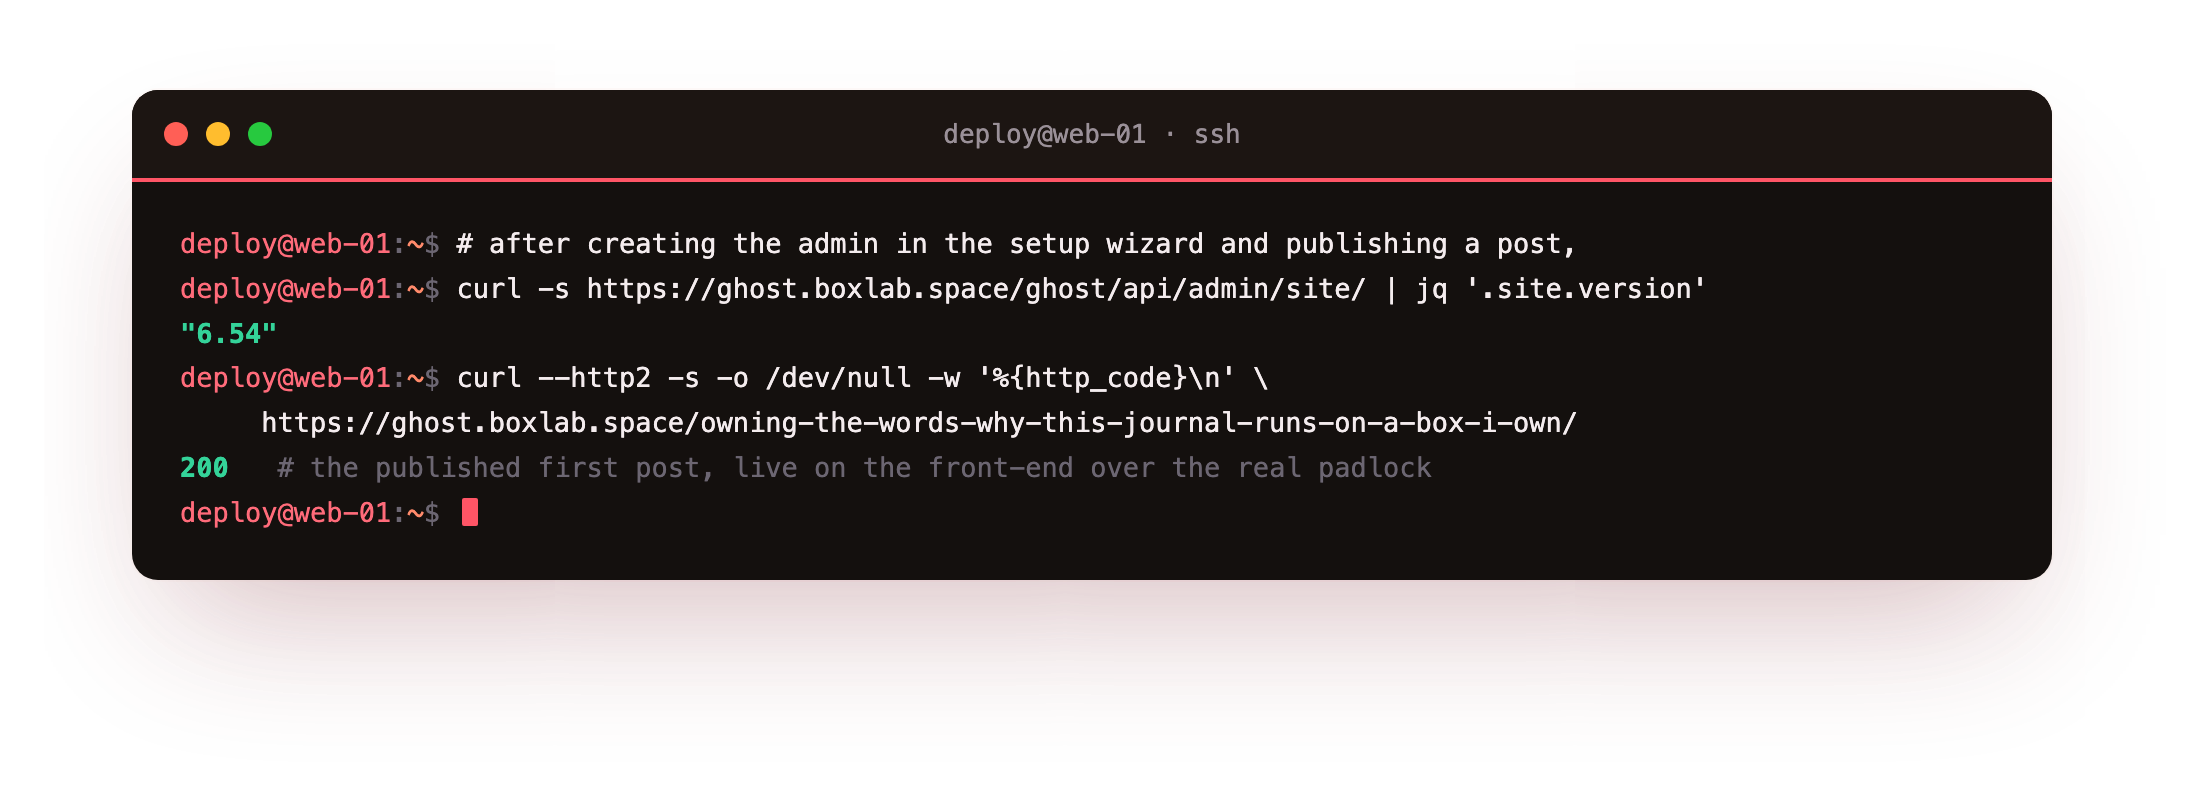
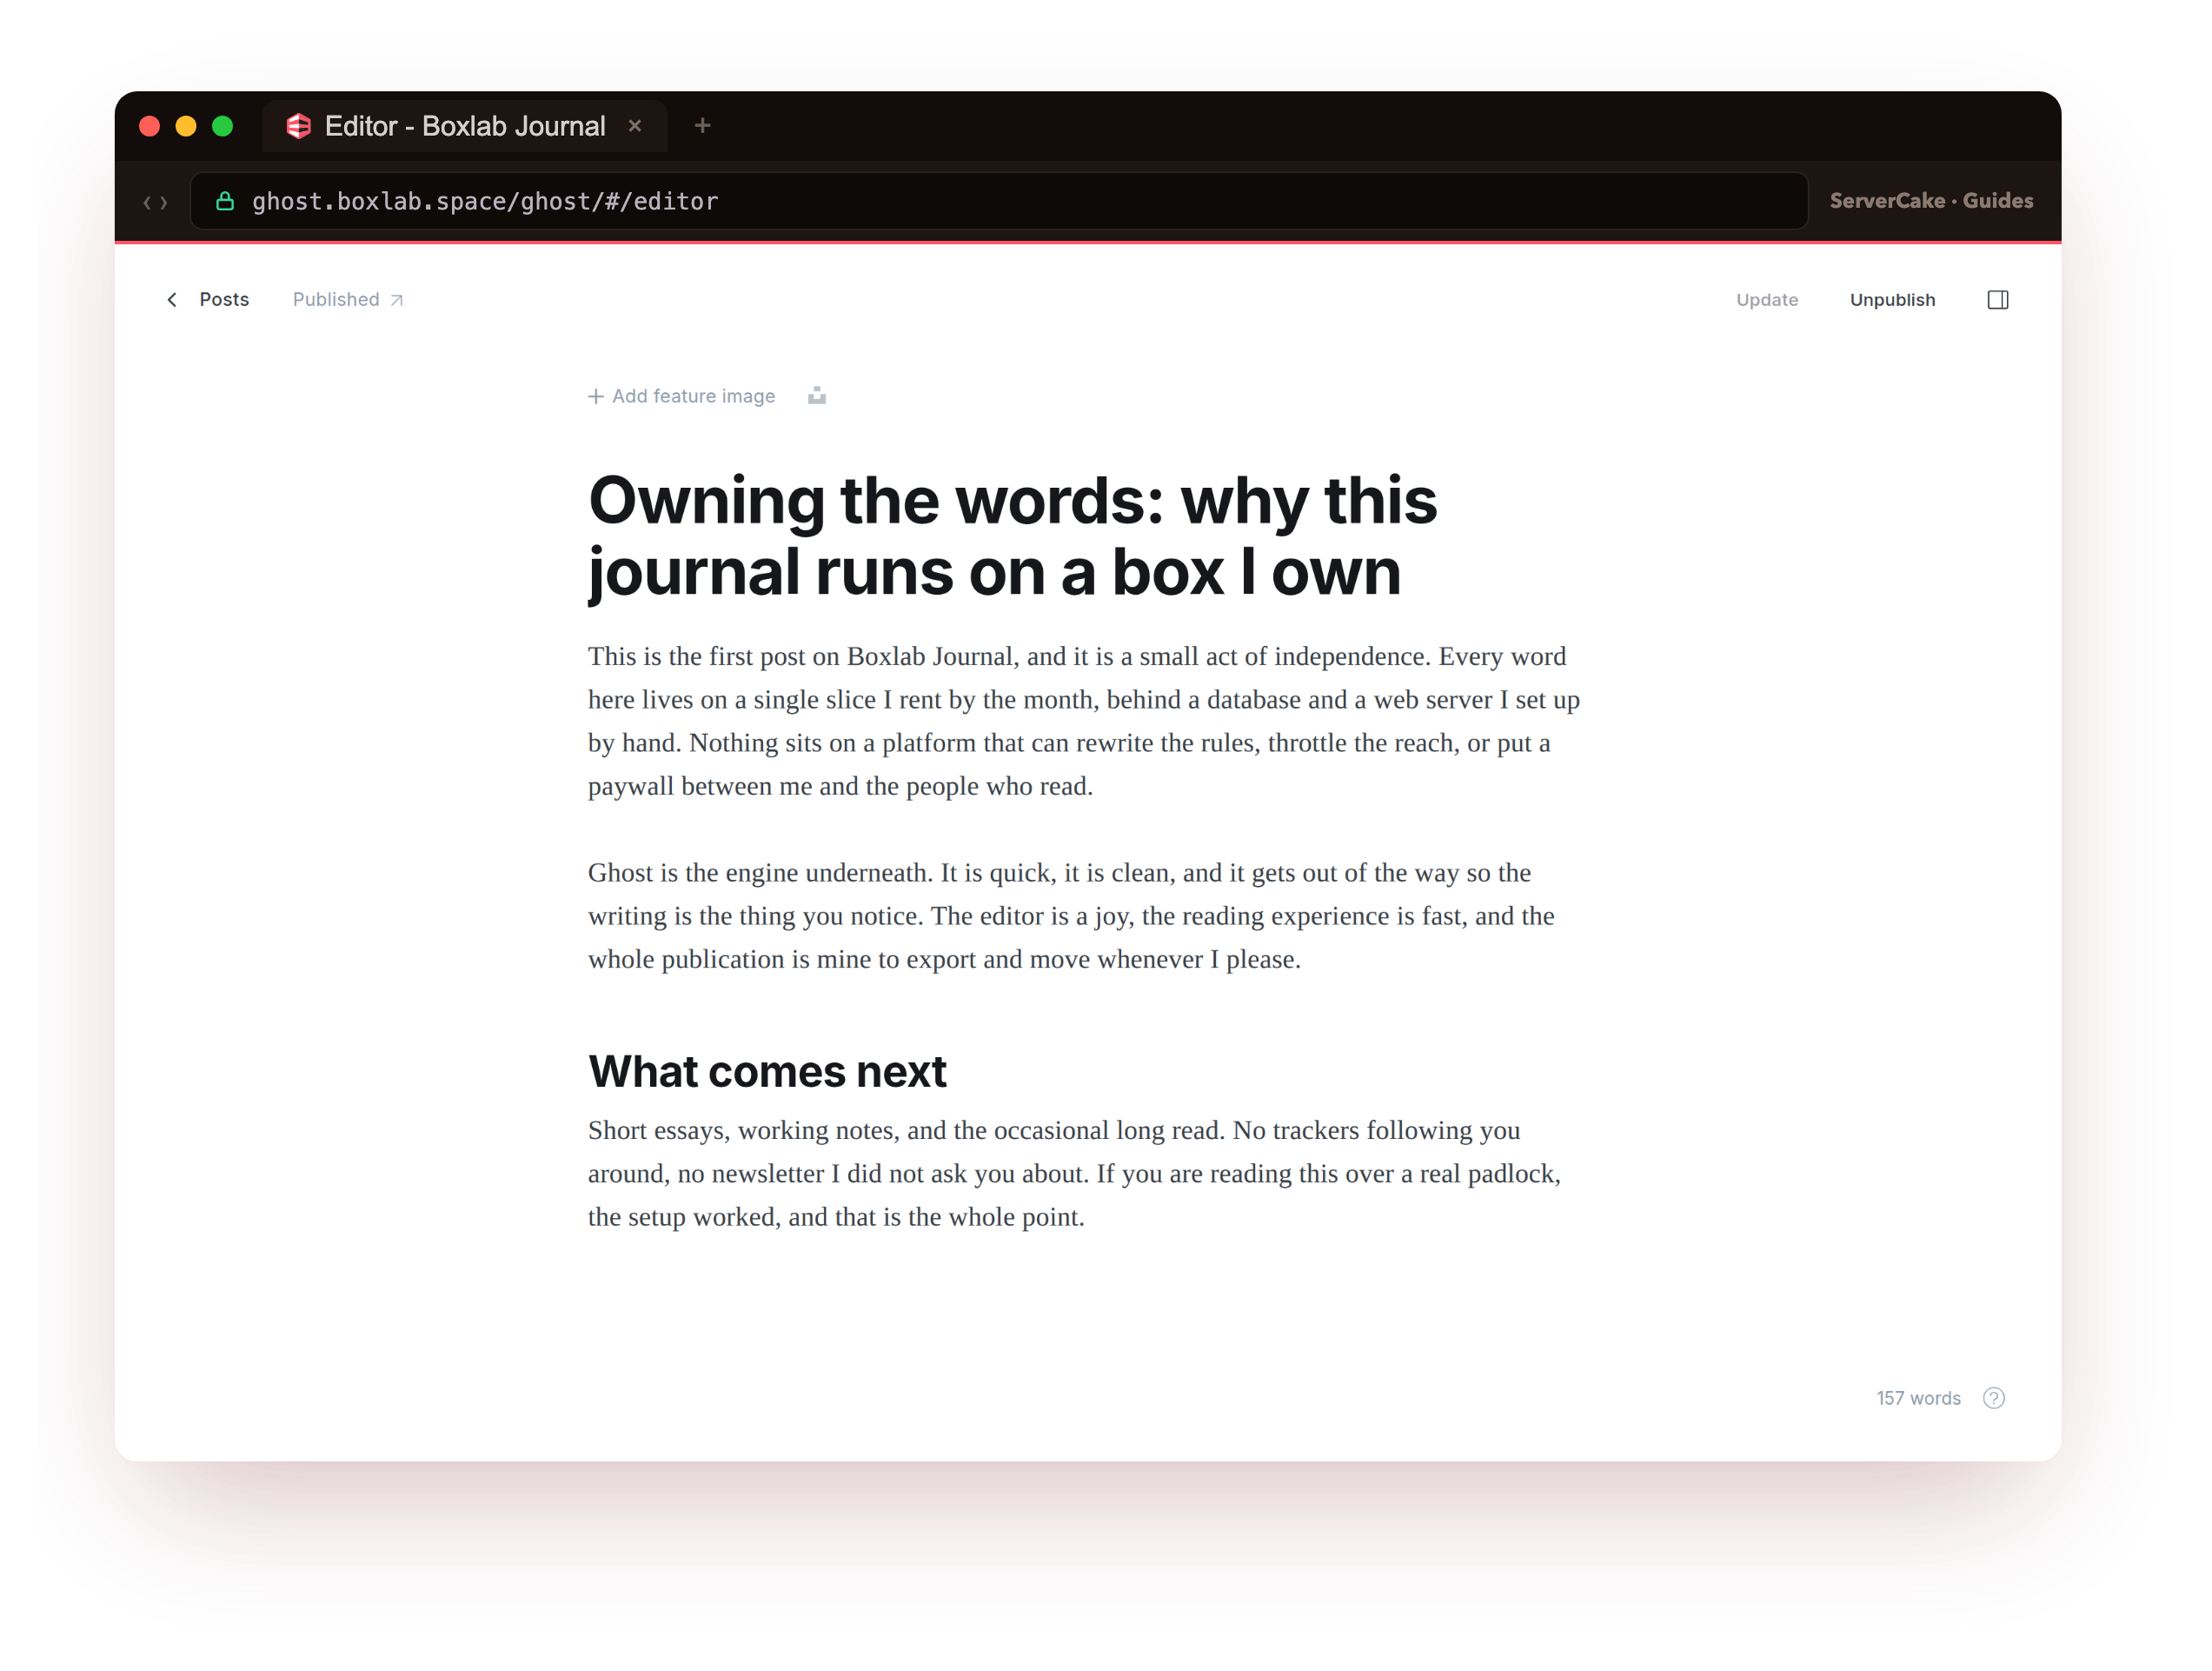
Now the part Ghost is known for: the editor. Click New post, give it a title, and start writing. The editor is deliberately quiet, with formatting appearing as you need it and cards for images, bookmarks, embeds and code. When you are ready, hit Publish, choose to publish now, and the post goes live. Open your bare domain in a browser and there it is on the front-end, running the default Source theme over your own certificate, exactly the post shown at the top of this tutorial.
Two more things are worth doing before you write much more. Set your publication title, description and icon under Settings, so the site and its social cards read as yours. And pick a theme: Ghost ships with Source, the clean default in these screenshots, and you can swap it under Settings for another official theme or one of your own, without touching the posts you have already written.
Secure and harden your Ghost install
A ghost-cli install is sensibly set up out of the box, but a few checks confirm the locks are on rather than assumed. The most important property is that Ghost is not exposed directly to the internet at all: the node process listens only on loopback, and nginx is the single public front door that terminates TLS.
sudo ss -tlnp | grep -E ':2368|:443'
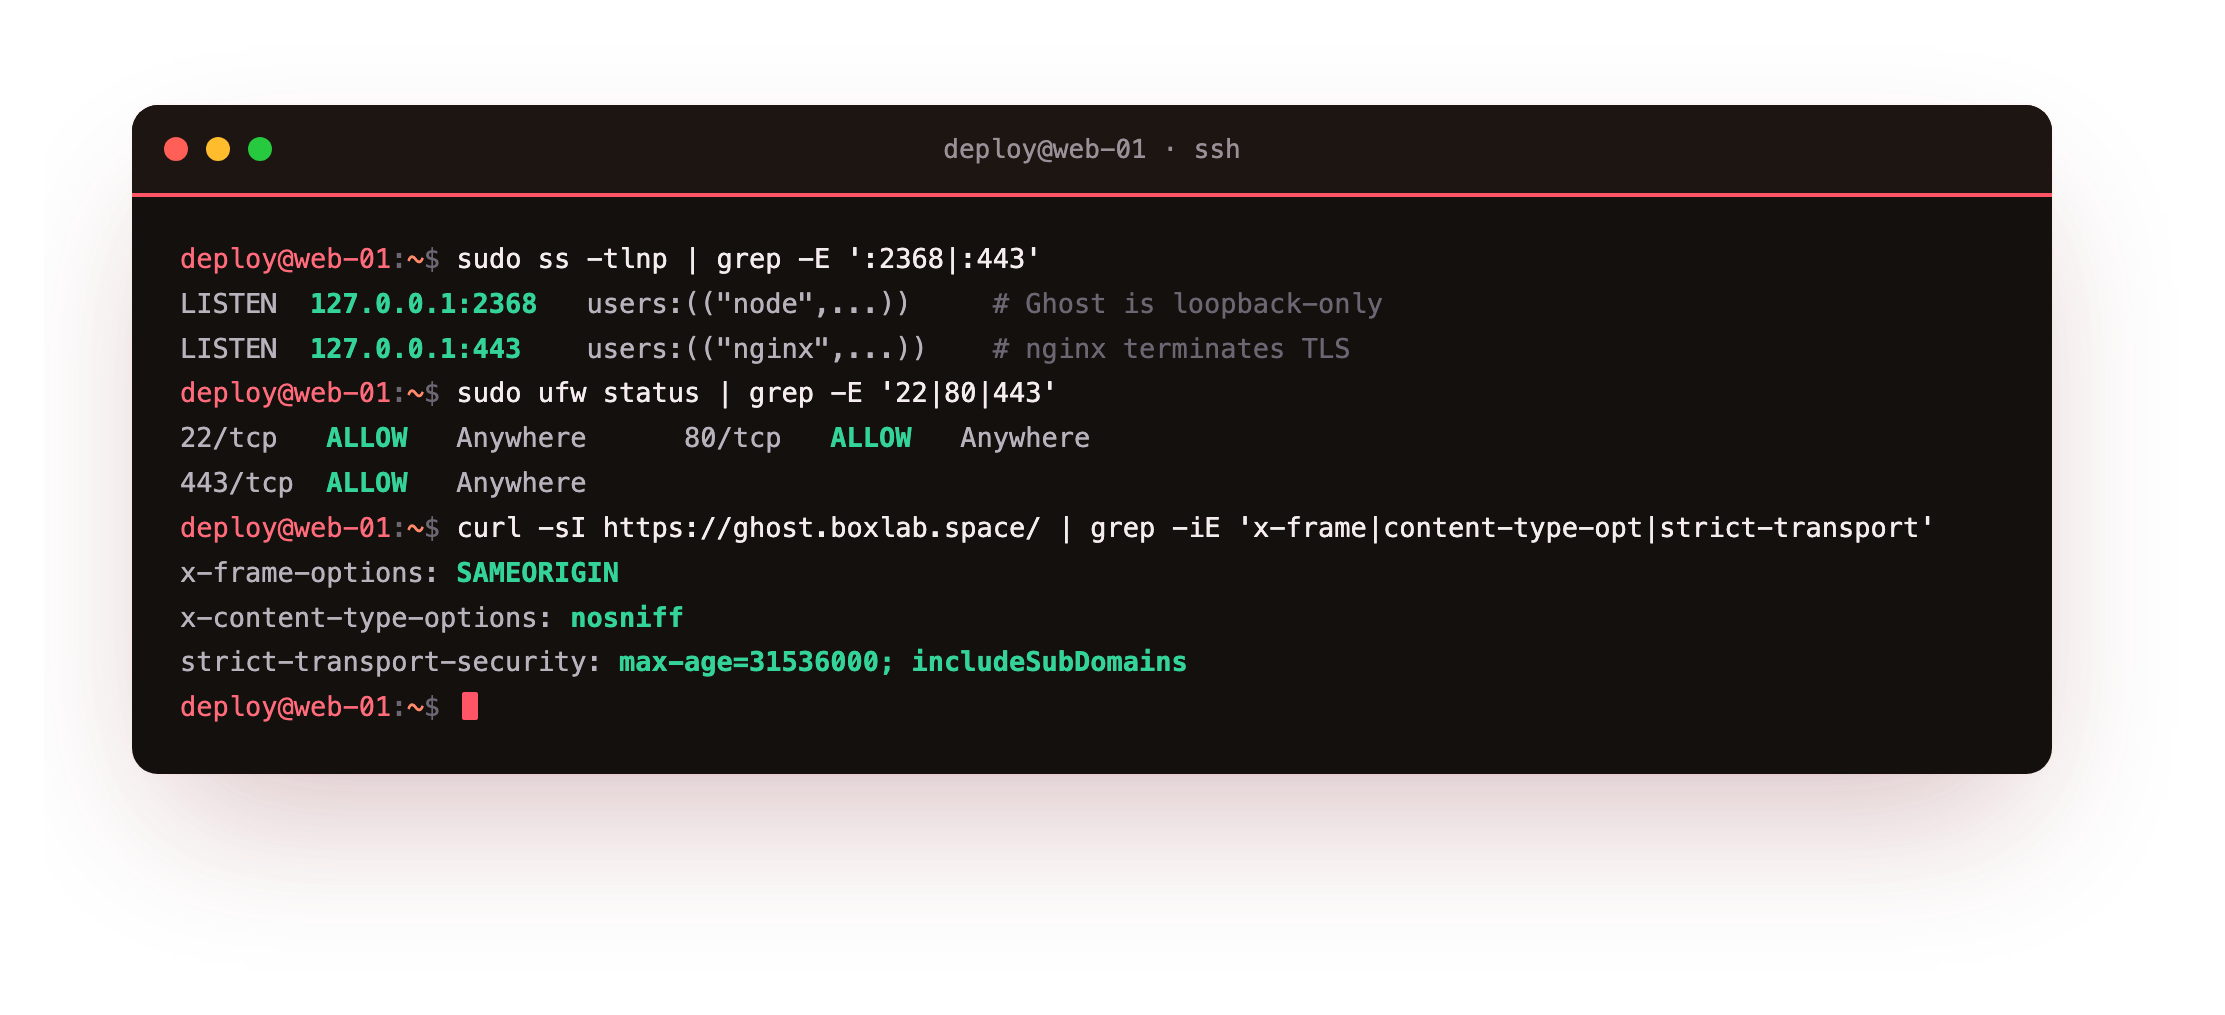
Ghost should show on 127.0.0.1:2368 and nginx on 443, never 0.0.0.0:2368. Pair that with a firewall that permits only what the site needs, and the security headers nginx is sending on every response.
The firewall should allow SSH, HTTP and HTTPS and nothing else; on Ubuntu that is ufw allow for 22, 80 and 443, then ufw enable. HTTP stays open only so the certificate can renew and so plain requests get redirected up to HTTPS.
Beyond that, three habits keep the install tidy: leave MySQL bound to 127.0.0.1 so the database is never reachable from outside, let the ghost system user own only its own content directory rather than running as root, and keep the admin at /ghost behind that strong owner password. Ghost applies its own security headers through nginx, and you can confirm them with a quick request.
curl -sI https://your-domain/ | grep -iE 'x-frame|content-type-opt|strict-transport'
Seeing X-Frame-Options, X-Content-Type-Options: nosniff and a Strict-Transport-Security line means the browser is being told to refuse framing, to stop guessing content types, and to insist on HTTPS for future visits.
Keep it running and updated
Because ghost-cli manages the whole install, keeping Ghost healthy for the long term is a handful of commands. Updates are the main one: Ghost ships releases often, and an unpatched publication is the one that gets caught. Updating is a single command that fetches the new version, runs any database migrations, and restarts in place.
ghost update
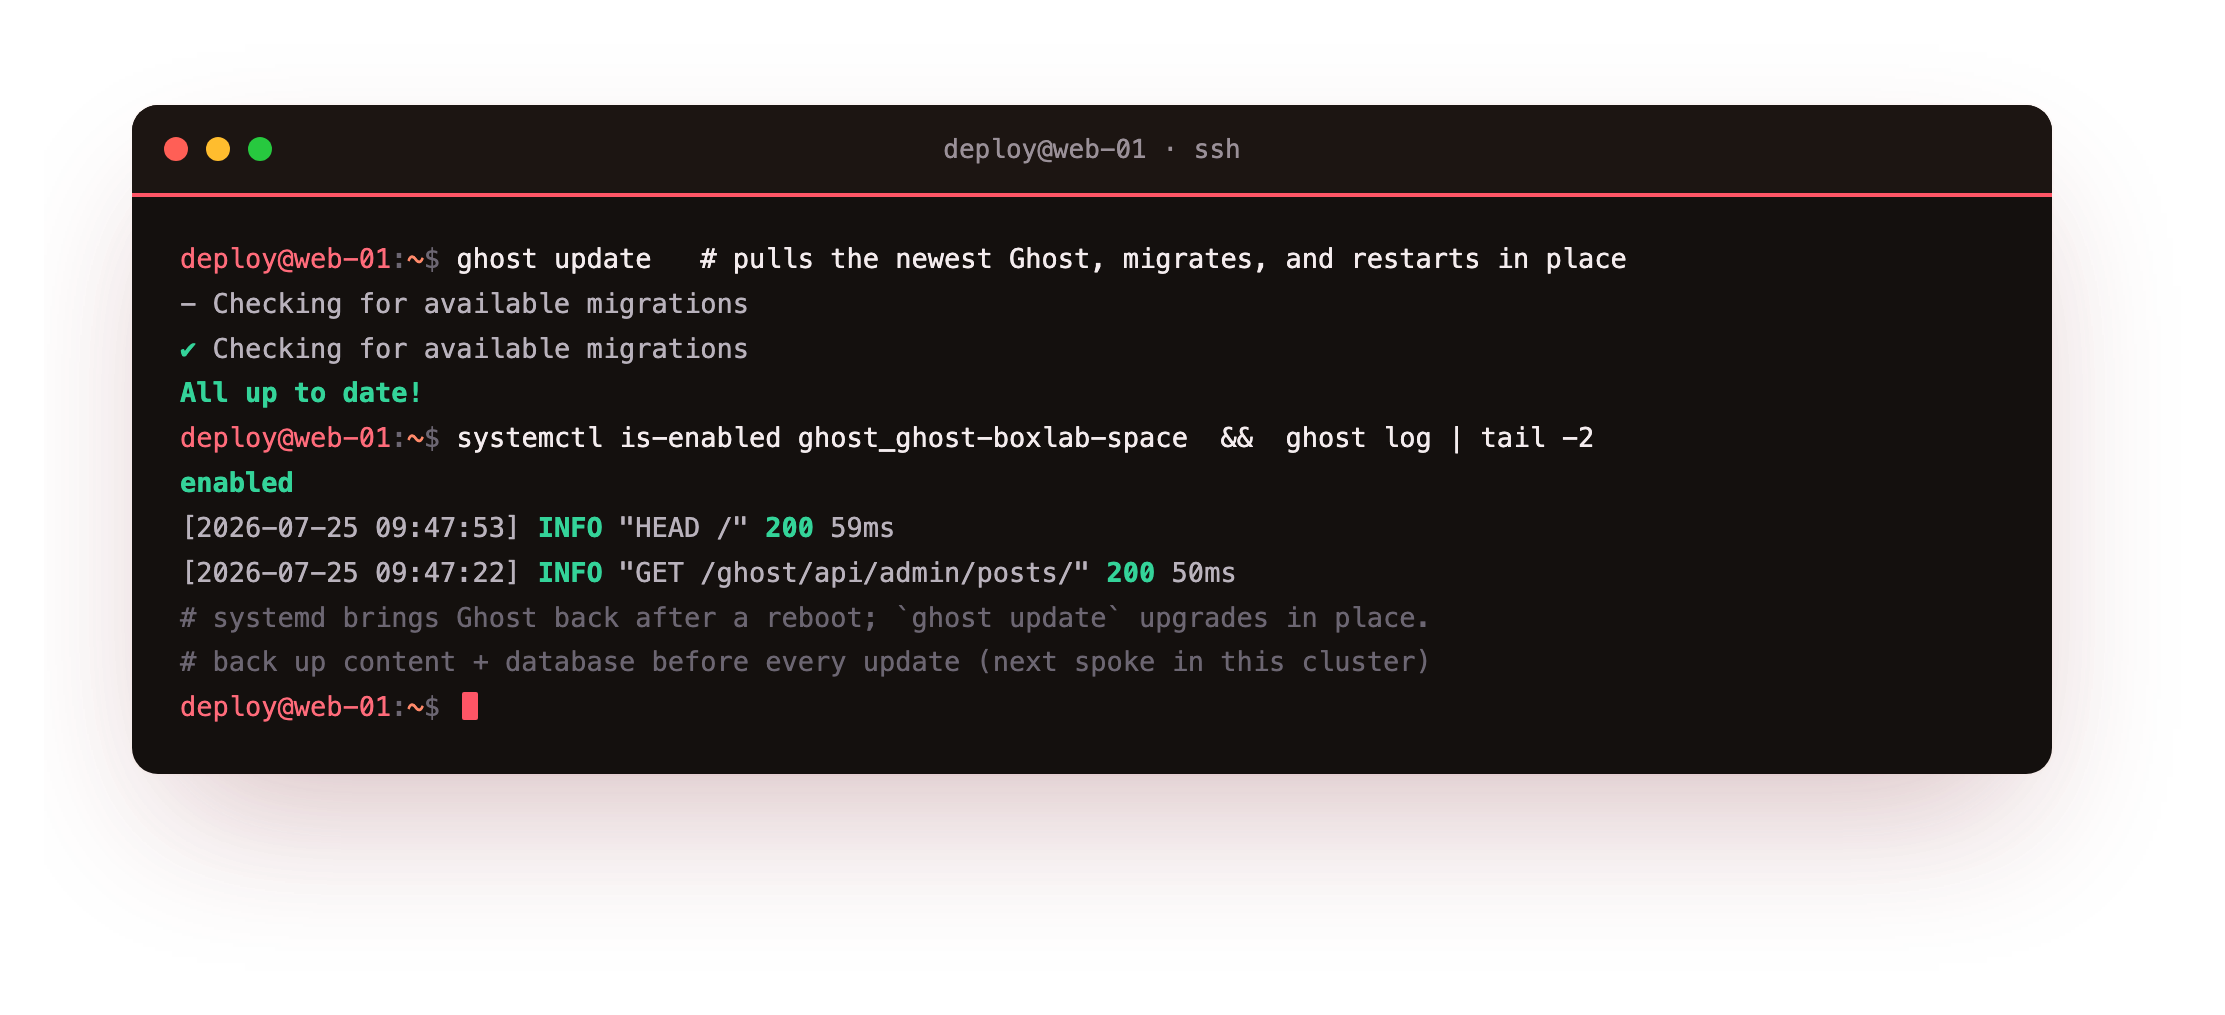
Run it from the install directory. It reports All up to date! when there is nothing to do, and steps through the migration and restart when there is. The systemd unit ghost-cli registered means the site comes back on its own after a reboot or a crash, and ghost ls confirms it is enabled. When something looks off, ghost log shows the request and error stream, and ghost restart bounces the process cleanly.
One habit finishes the picture: back up before every update. Ghost holds your posts, pages, members and settings in MySQL, and your images and theme in the content directory, so a real backup captures both together. Exporting content, members and the database, storing that copy off the slice, and rehearsing a restore is its own job, and it is the next tutorial in this Ghost cluster.
For now, know that ghost ls, ghost update, ghost log and ghost restart are the four commands you will lean on, and that every one of them is a plain call away because you built the install by hand.
That is a complete, hand-built Ghost publication: the Node LTS, MySQL 8 and nginx on a bare slice, Ghost installed and served over a real certificate, an admin account, a first post live from the editor, the whole thing hardened and set to update itself. You own every layer, so you can fix every layer.
Frequently asked questions
How much RAM does a Ghost VPS need?
Ghost itself is light, and the node process on a quiet publication sits in a few hundred megabytes. The part that wants room is MySQL, so a slice with 1 GB of RAM runs a small Ghost site, and 2 GB gives MySQL and nginx comfortable headroom for a busier one. Start on a modest slice, watch memory as traffic grows, and resize up only when the numbers ask for it, which on a VPS is a single command rather than a migration.Can I use MariaDB instead of MySQL 8 for Ghost?
Ghost officially supports MySQL 8, and that is what it is built and tested against, so this tutorial uses it. MariaDB often appears compatible, but Ghost does not test against it and its own tooling checks for MySQL, so you can hit subtle issues on upgrades or migrations that are hard to trace. On a fresh install there is no reason to take that risk: install MySQL 8, point Ghost at it, and you are on the supported path.Do I have to use ghost-cli, or can I run Ghost another way?
You can run Ghost from source or in Docker, and both are valid. The ghost CLI is the officially supported way to install and manage a production instance on a Linux VPS, and it is worth using because it handles the pieces that are easy to get wrong: the nginx config, the Let's Encrypt certificate, the systemd service, and the database user. It also makes updates a one-line, migration-aware step, which is the part you will be glad of a year from now.Ghost is not sending email. What is happening?
Out of the box Ghost uses direct mail, which most slices cannot deliver reliably, so transactional email such as staff invites and member sign-in codes may fail. That is expected on a fresh install and does not affect writing or publishing. The fix is to configure a mail provider over SMTP, which also unlocks newsletters to members. Wiring up email and memberships is a topic of its own and the next step in this Ghost cluster, so leave it until you are ready to send.Running Ghost on your own slice means the publication answers to you: your posts, your members, your rules on where the data sits, with no per-member fee and nothing between you and your readers. When you are ready to put it live, a ServerCake slice gives you a clean Ubuntu 24.04 box in India, billed in rupees with GST, ready for exactly the steps above.