What you will have
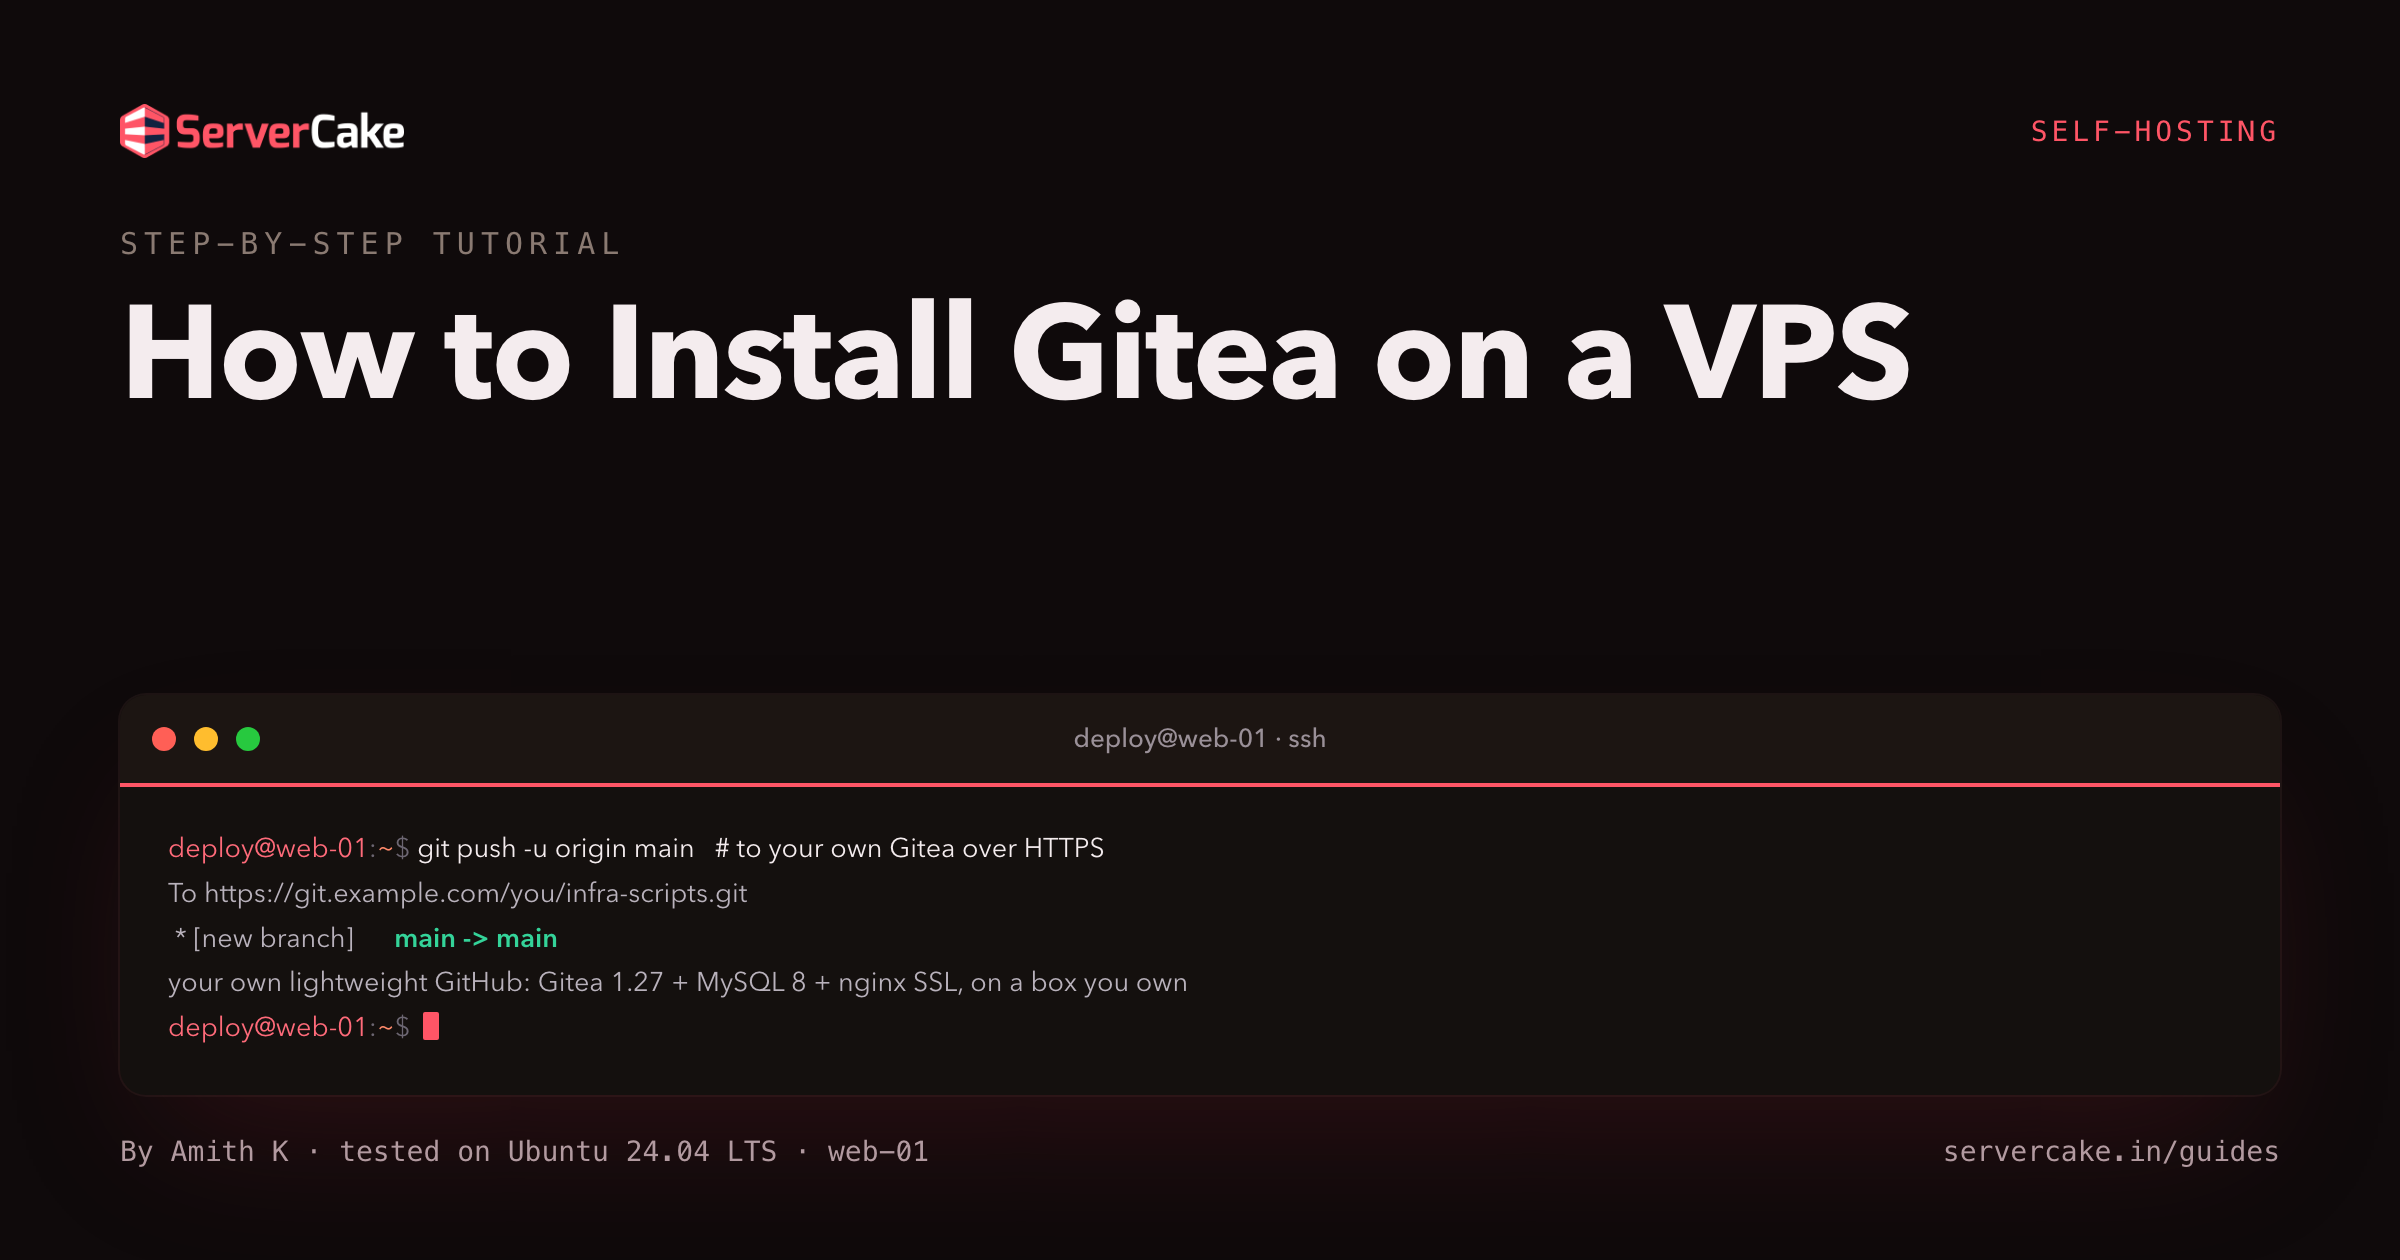
By the end of this guide you will install Gitea on a VPS from nothing: a bare Ubuntu 24.04 slice becomes your own Git service, run by a single Go binary, backed by a MySQL 8 database, and served through nginx over real HTTPS at your own domain. You create the admin account in the install wizard, then create a repository and push real code to it, and watch the files and the commit appear in the web interface.
This is for a developer or a small team who want their own lightweight GitHub without a per-seat bill and without their code leaving a box they control. Gitea is a good fit for exactly that. It is a single self-contained binary, it is light enough to run happily on a small slice, and it is actively maintained, so you get pull requests, issues, releases and a web UI without running a heavy platform.
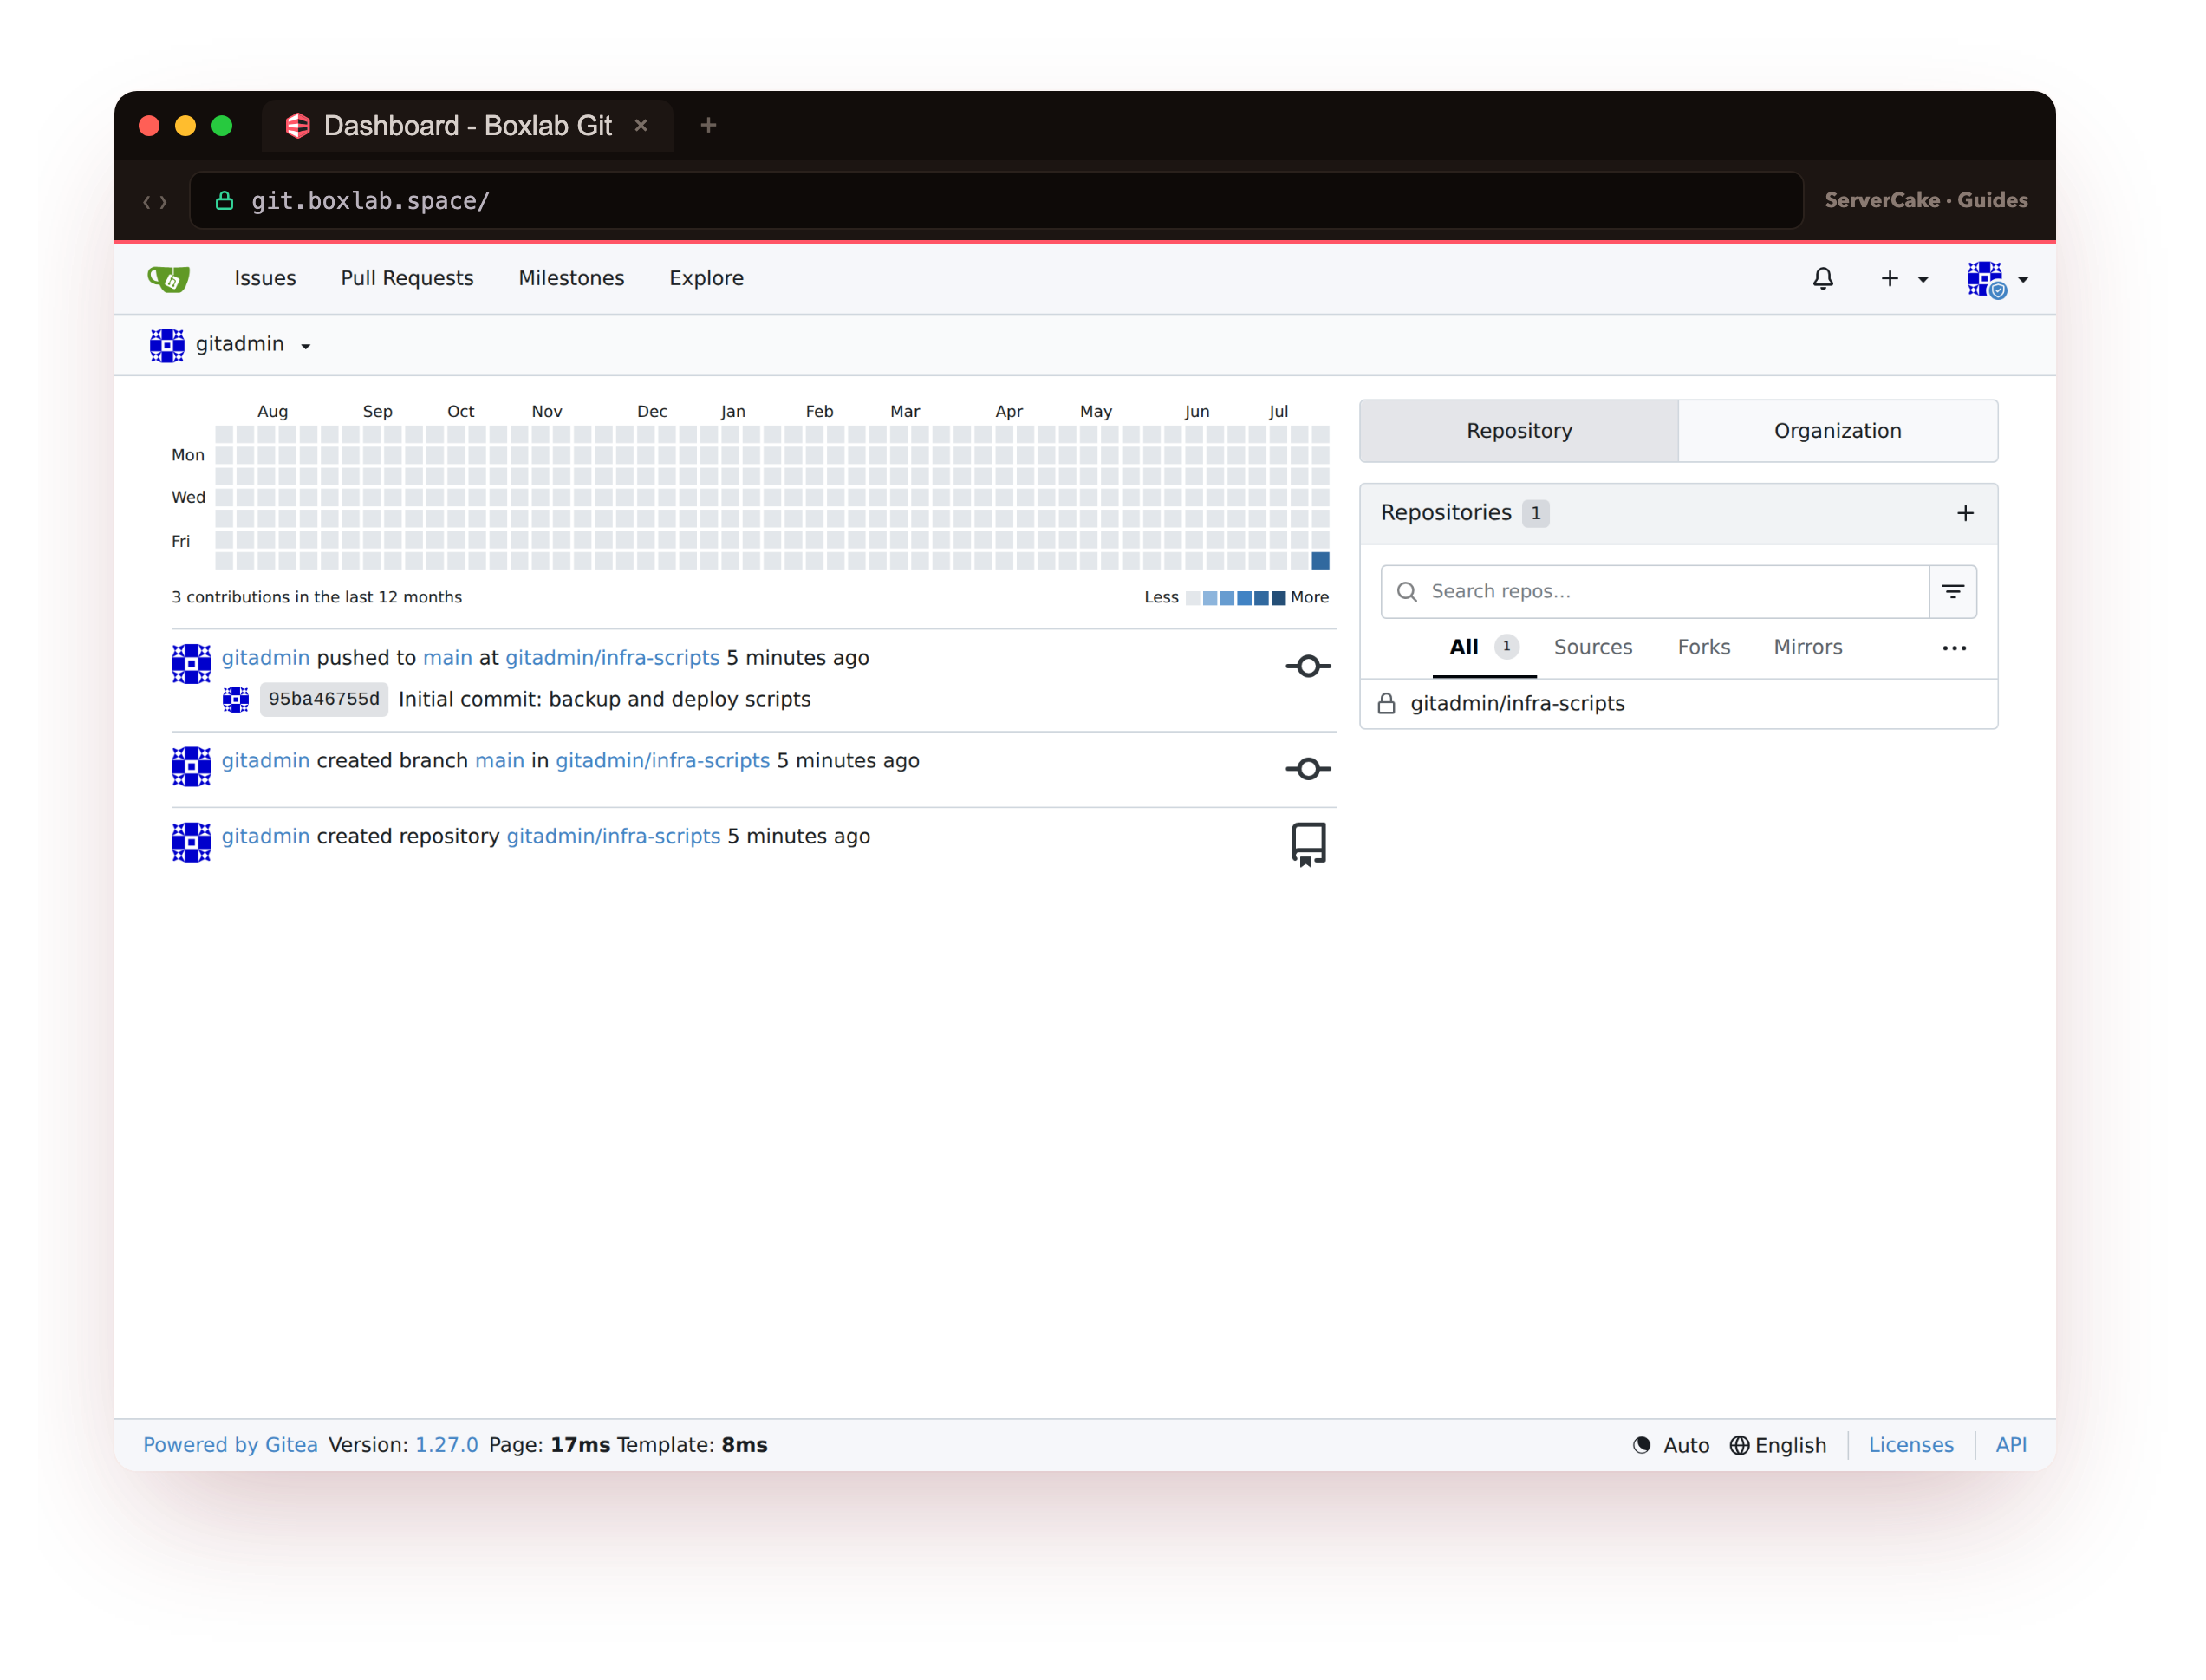
The destination is worth seeing up front, so the finished result is clear before you start. The screenshots are not mockups. Each one was captured from a real Gitea instance we stood up at git.boxlab.space while writing this guide, so the version numbers and the layout are the ones you will meet.
sudo -u git gitea --version
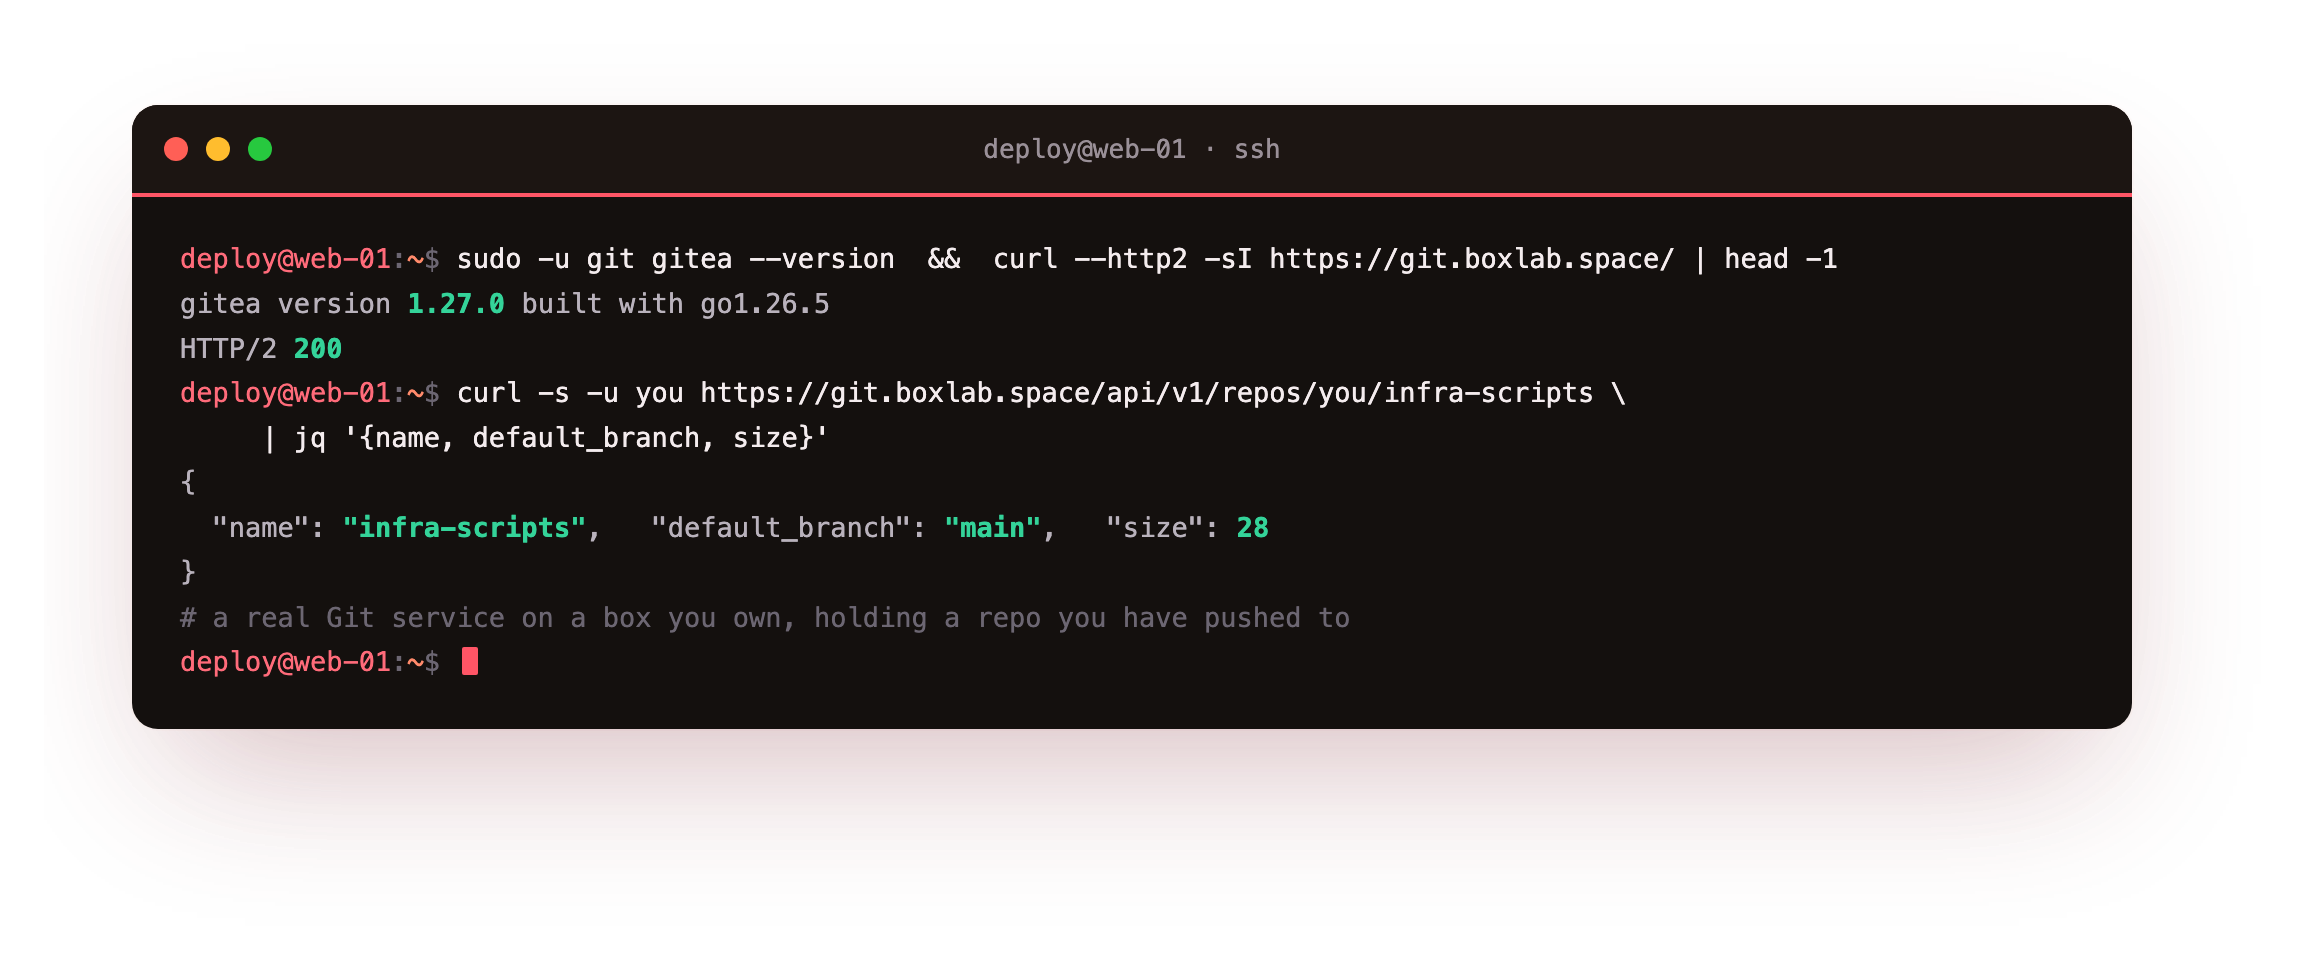
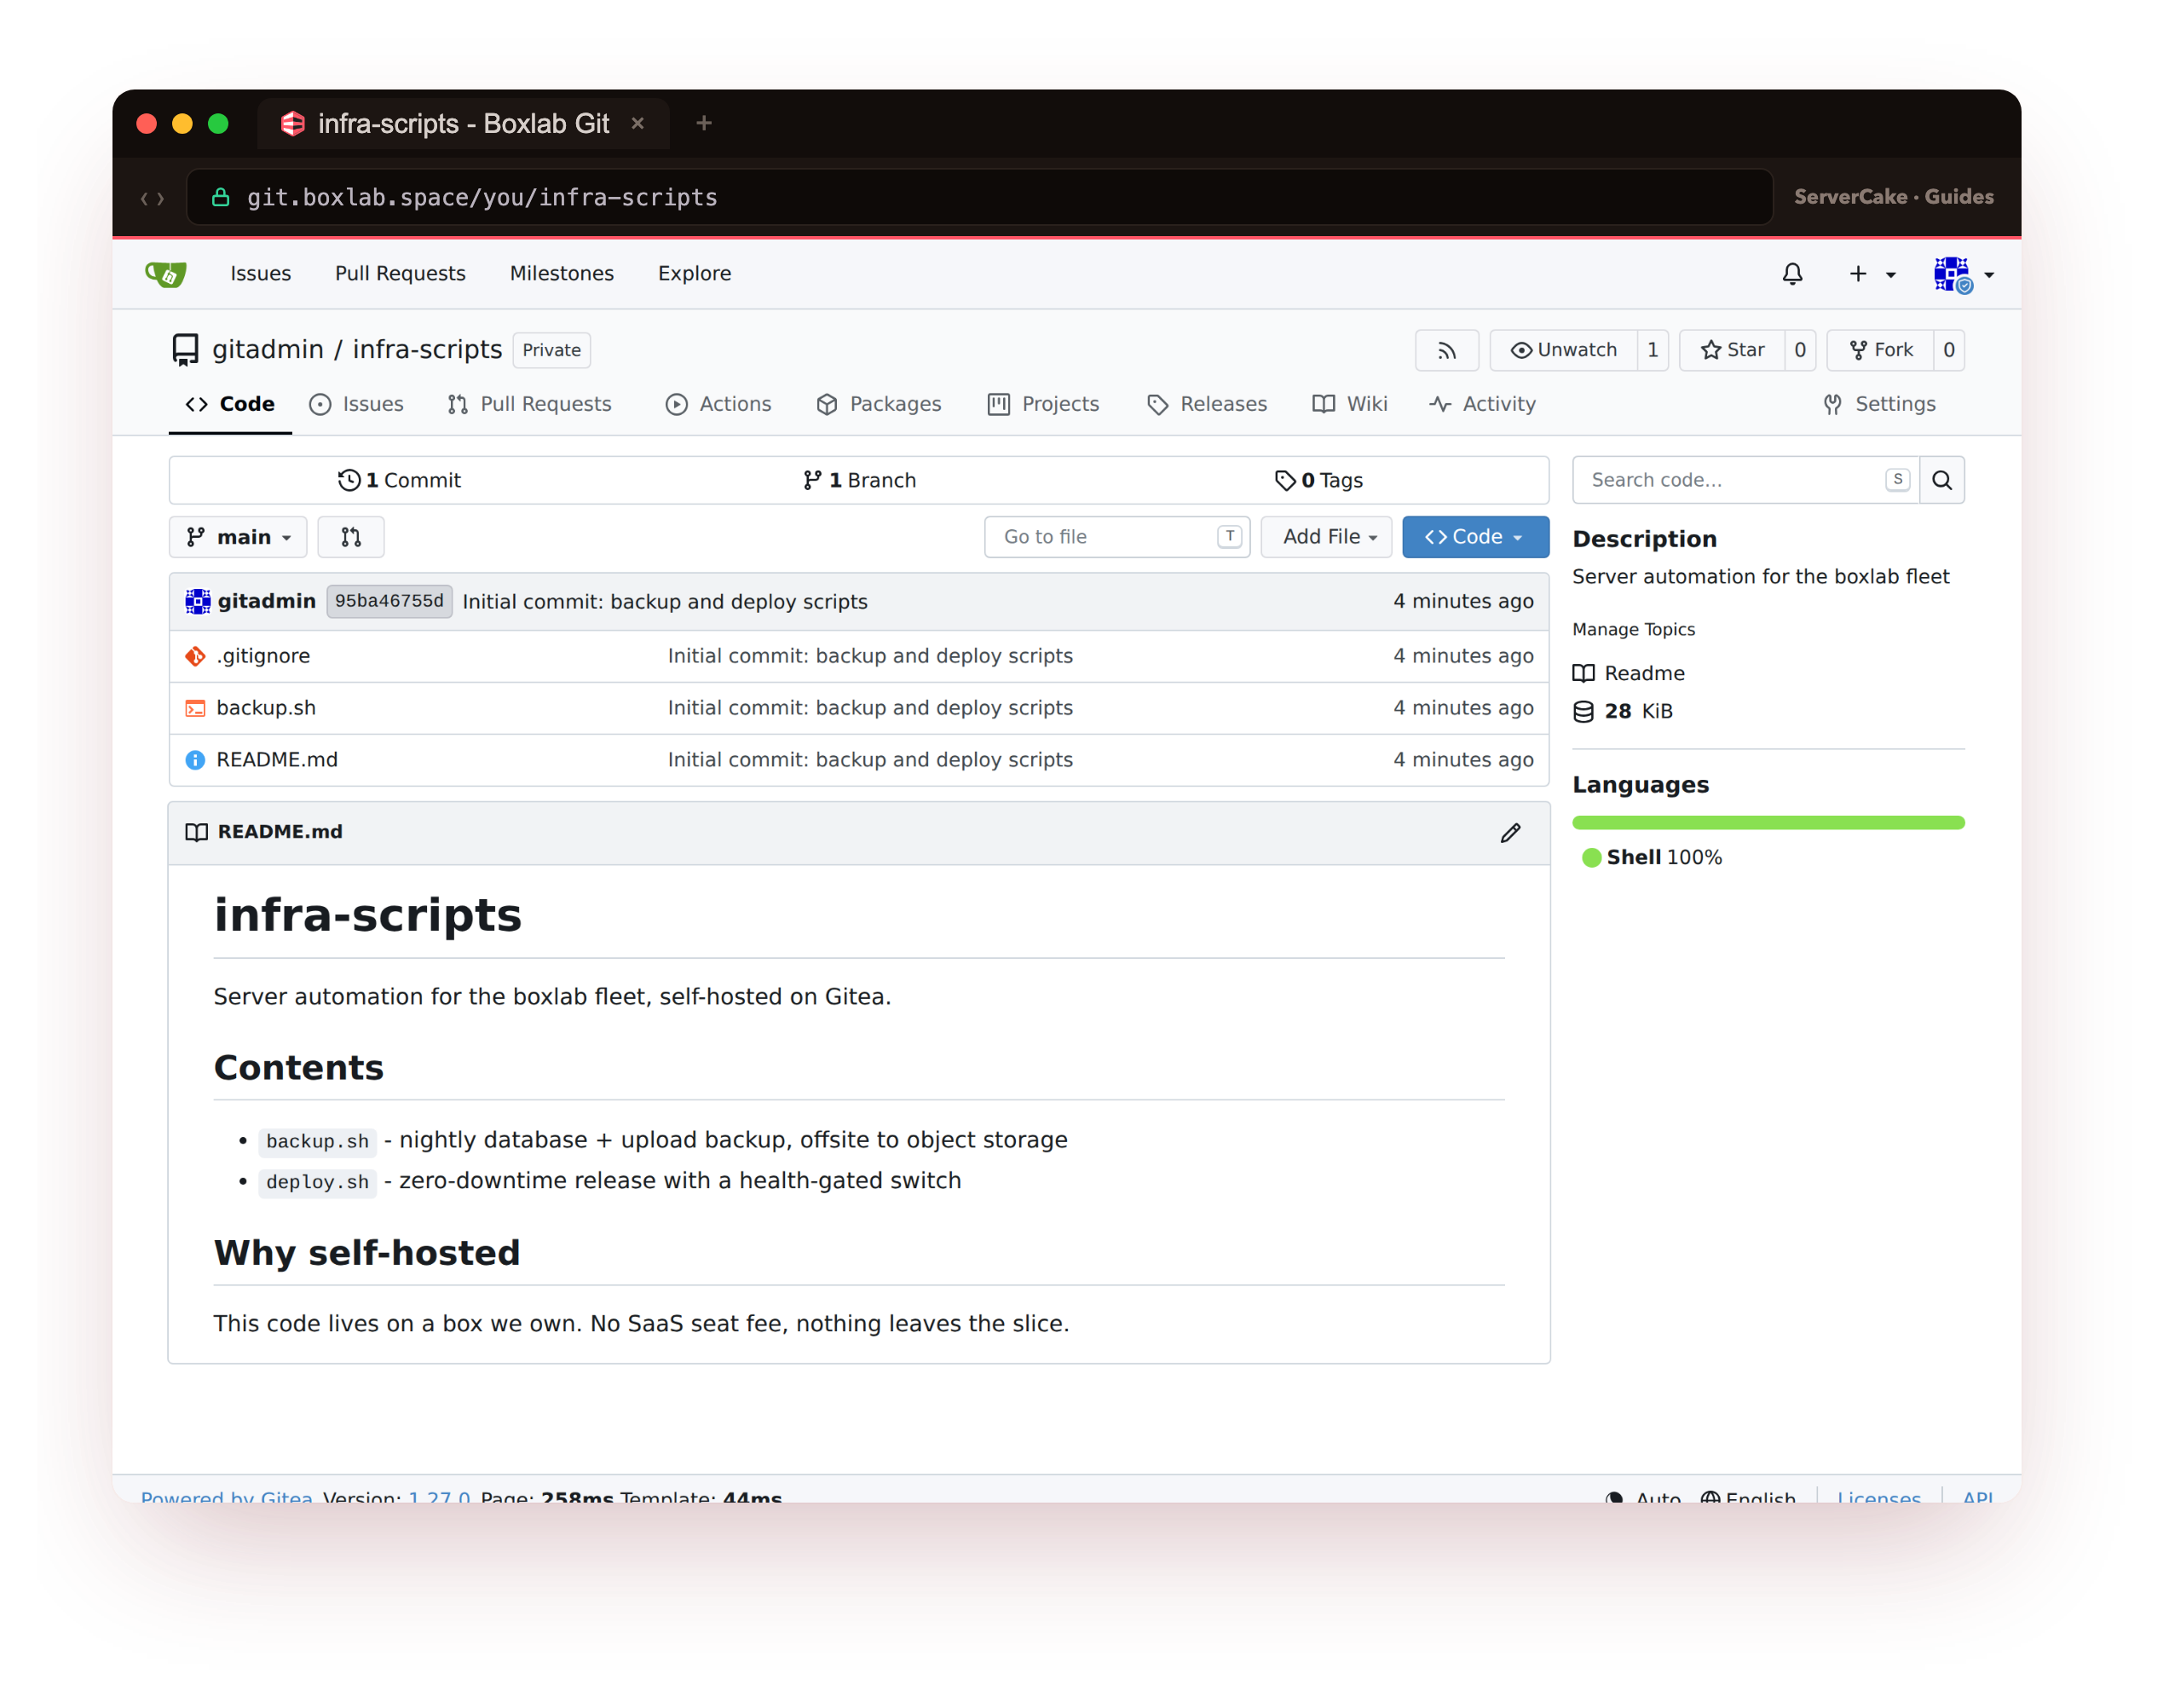
That command reports the exact release you are running, and below it is the repository we pushed to that same install, its files and its README rendered in the Gitea web UI over a real padlock.
- Creating a dedicated
gitsystem user, a data directory and a MySQL 8 database for Gitea. - Downloading the Gitea binary and verifying its checksum and GPG signature before it ever runs.
- Running Gitea under systemd behind nginx, with a real Let's Encrypt certificate.
- Completing the install wizard, creating a repository, and pushing your first commit over HTTPS.
- Hardening the install for a private instance and keeping it backed up and updated.
Before you begin
Gitea asks very little of a server, but a few things need to be in place before you start. None of them are heavy.
- A slice running Ubuntu 24.04 LTS that you reach over SSH as an ordinary user with
sudo. Gitea itself is tiny, so a slice with 1 GB of RAM comfortably runs a small team's instance, with MySQL taking most of that budget. - A domain or subdomain you control, with access to its DNS. A dedicated subdomain such as
git.example.comis the usual choice. - The slice's public IPv4 address, so a single DNS record can be aimed straight at the box.
- A non-root user with
sudo. Every command below runs as that user, and reaches forsudoonly where a step needs root, so you never log in as root directly.
Before you go further, point your domain at the slice. In your DNS, add an A record for the hostname you want, for example git, aimed at the slice's public IPv4 address, and give it a few minutes. nginx will request a certificate for that name later, and that only works once the name resolves to your box.
Install Gitea on a VPS: the stack from a bare box
Gitea is a Go program that stores its data in a database and sits behind a reverse proxy. So the plan is four pieces around it: a dedicated user for it to run as, a MySQL 8 database, the Gitea binary itself, and nginx to terminate TLS. Start with the user.
Gitea should not run as root and should not run as you. Create an unprivileged git system account for it, a data directory it owns, and a config directory that only root and the git group can read.
sudo adduser --system --shell /bin/bash --gecos 'Git Version Control' \
  --group --disabled-password --home /home/git git
sudo mkdir -p /var/lib/gitea/{custom,data,log}
sudo chown -R git:git /var/lib/gitea
sudo mkdir -p /etc/gitea && sudo chown root:git /etc/gitea && sudo chmod 770 /etc/gitea
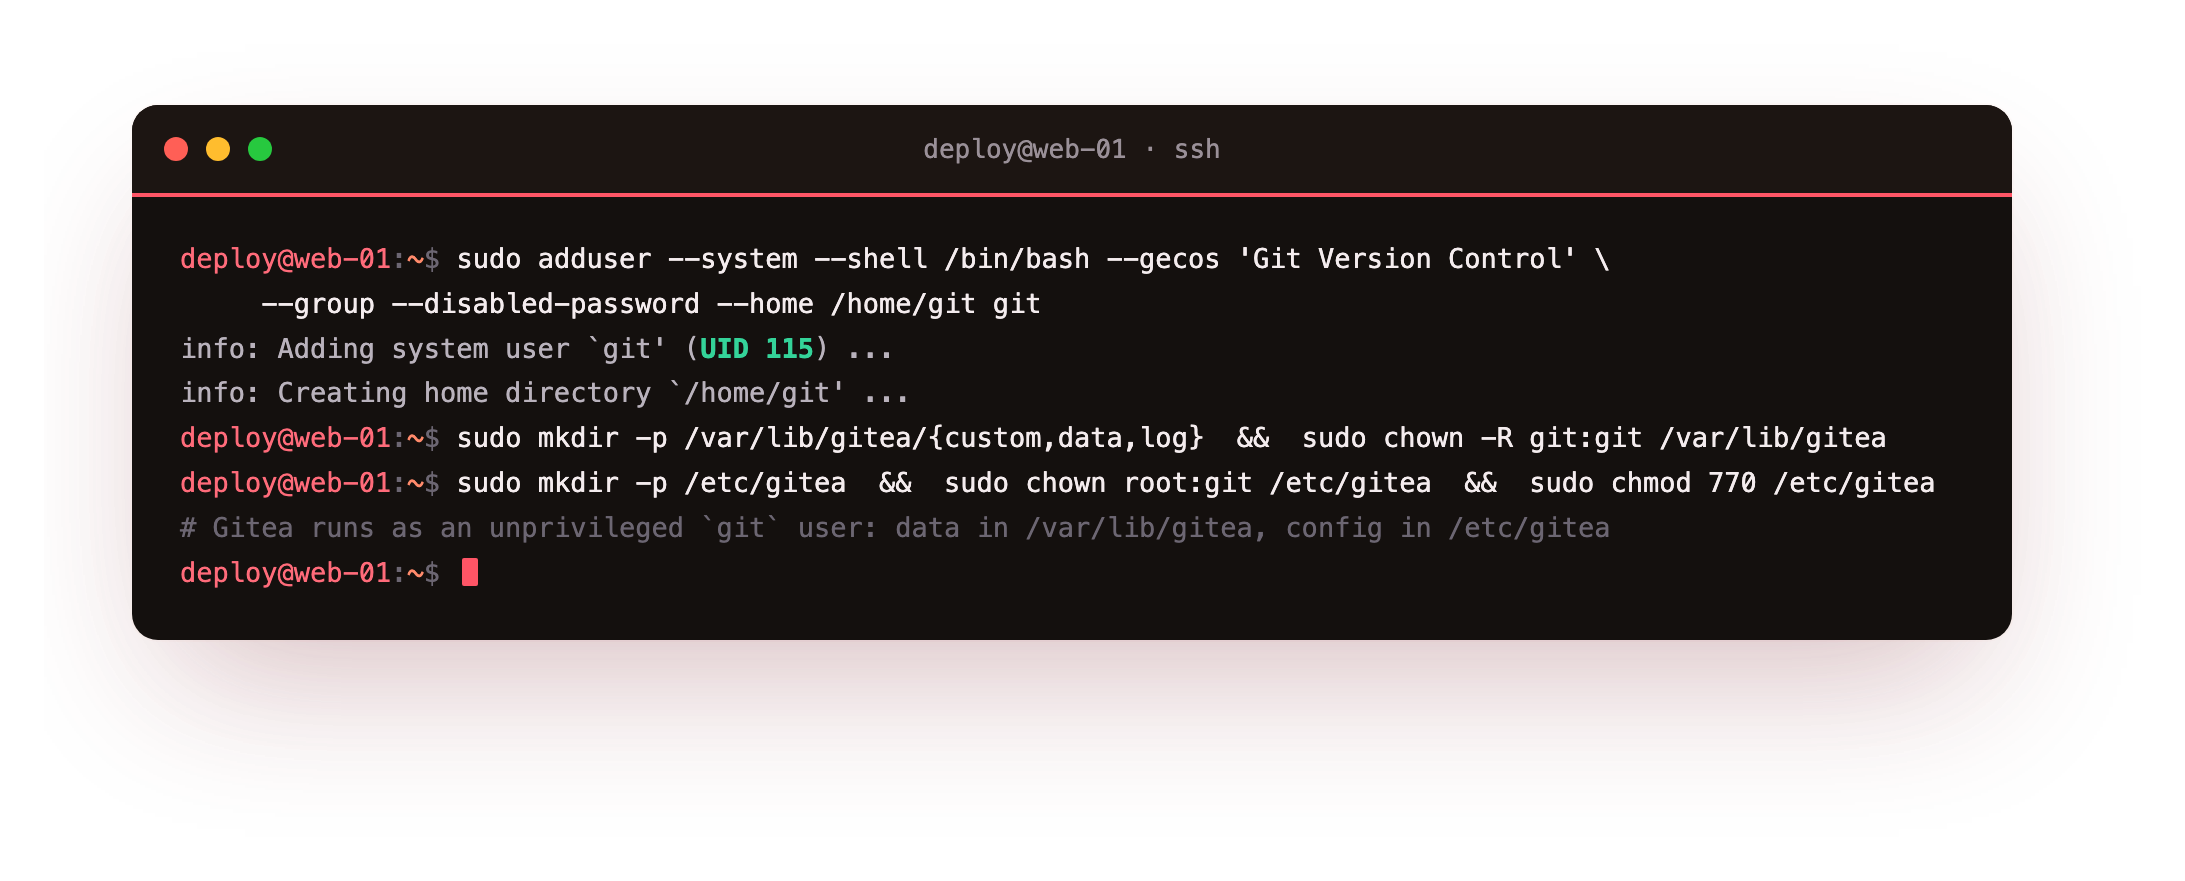
The git account has no password and no login of its own; the Gitea process runs as it, and everything Gitea writes lands under /var/lib/gitea. The config directory /etc/gitea is left group-writable for now only so the wizard can write the config into it, and we lock it down again straight after.
Next the database. Gitea supports SQLite, MySQL and PostgreSQL; MySQL 8 is a solid choice for a team instance, so install the server, run the bundled hardening script, and create one database with a user scoped to just that database.
sudo apt update && sudo apt install -y mysql-server
sudo mysql_secure_installation
sudo mysql
CREATE DATABASE gitea CHARACTER SET utf8mb4 COLLATE utf8mb4_general_ci;
CREATE USER 'gitea'@'%' IDENTIFIED BY 'a-strong-random-password';
GRANT ALL PRIVILEGES ON gitea.* TO 'gitea'@'%';
FLUSH PRIVILEGES;
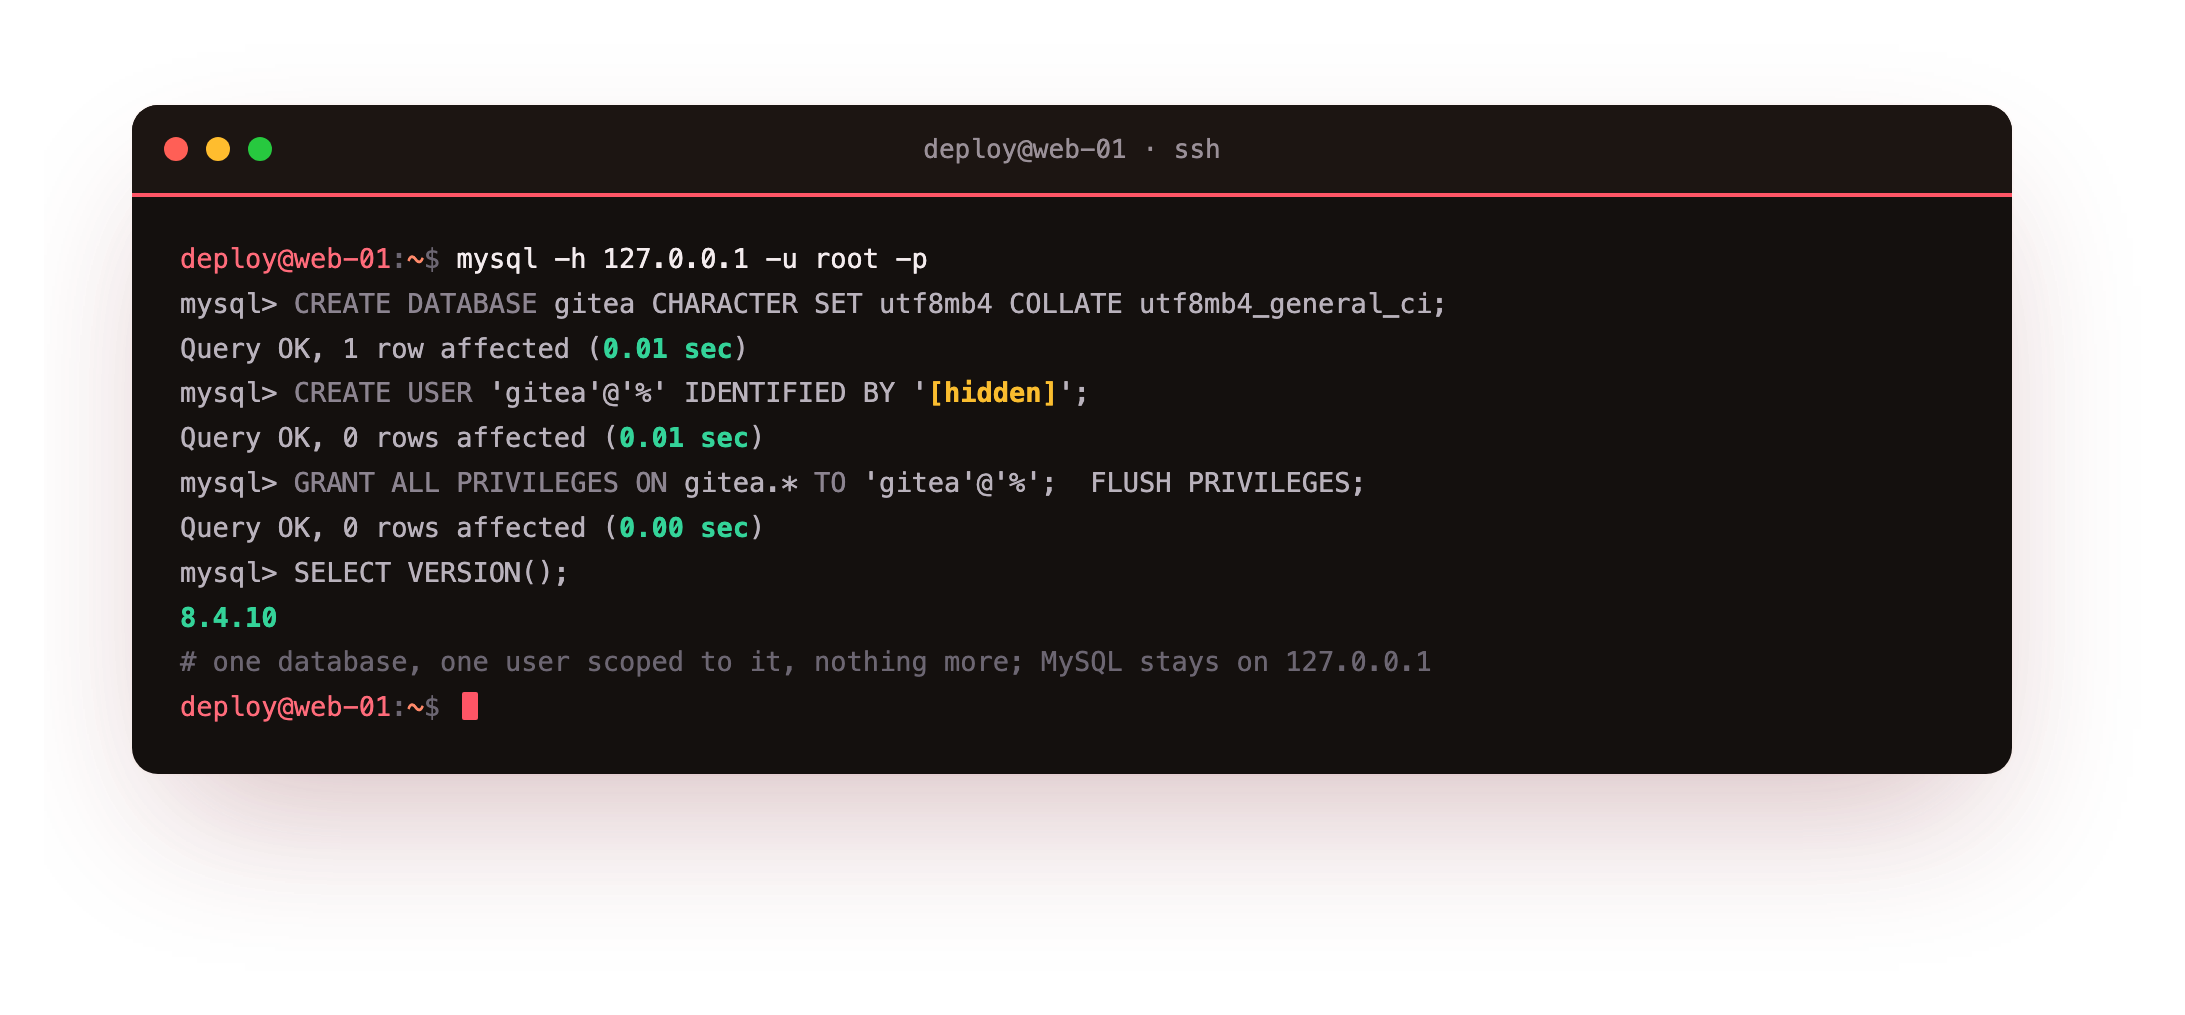
Use a long random password in place of the placeholder, and keep it somewhere safe; the wizard asks for it in a moment. The utf8mb4 charset matters, because it lets Gitea store the full range of characters people put in commit messages and issues.
sudo mysql -e 'SELECT VERSION()' should report an 8.x release, and SHOW DATABASES should list gitea. If MySQL will not start on a 1 GB slice, add a small swap file first; MySQL is the hungriest part of this stack.Now the binary. This is where Gitea shows its character: there is nothing to compile and no runtime to install, just one file. Download the current release for your architecture, then verify it two ways before you trust it. Check the SHA256 so you know the download is intact, and check the GPG signature so you know it is the file the Gitea team actually published.
VER=1.27.0
cd /tmp
curl -fsSLO https://dl.gitea.com/gitea/$VER/gitea-$VER-linux-amd64{,.sha256,.asc}
sha256sum -c gitea-$VER-linux-amd64.sha256
gpg --keyserver keys.openpgp.org --recv 7C9E68152594688862D62AF62D9AE806EC1592E2
gpg --verify gitea-$VER-linux-amd64.asc gitea-$VER-linux-amd64
sudo cp gitea-$VER-linux-amd64 /usr/local/bin/gitea && sudo chmod 755 /usr/local/bin/gitea
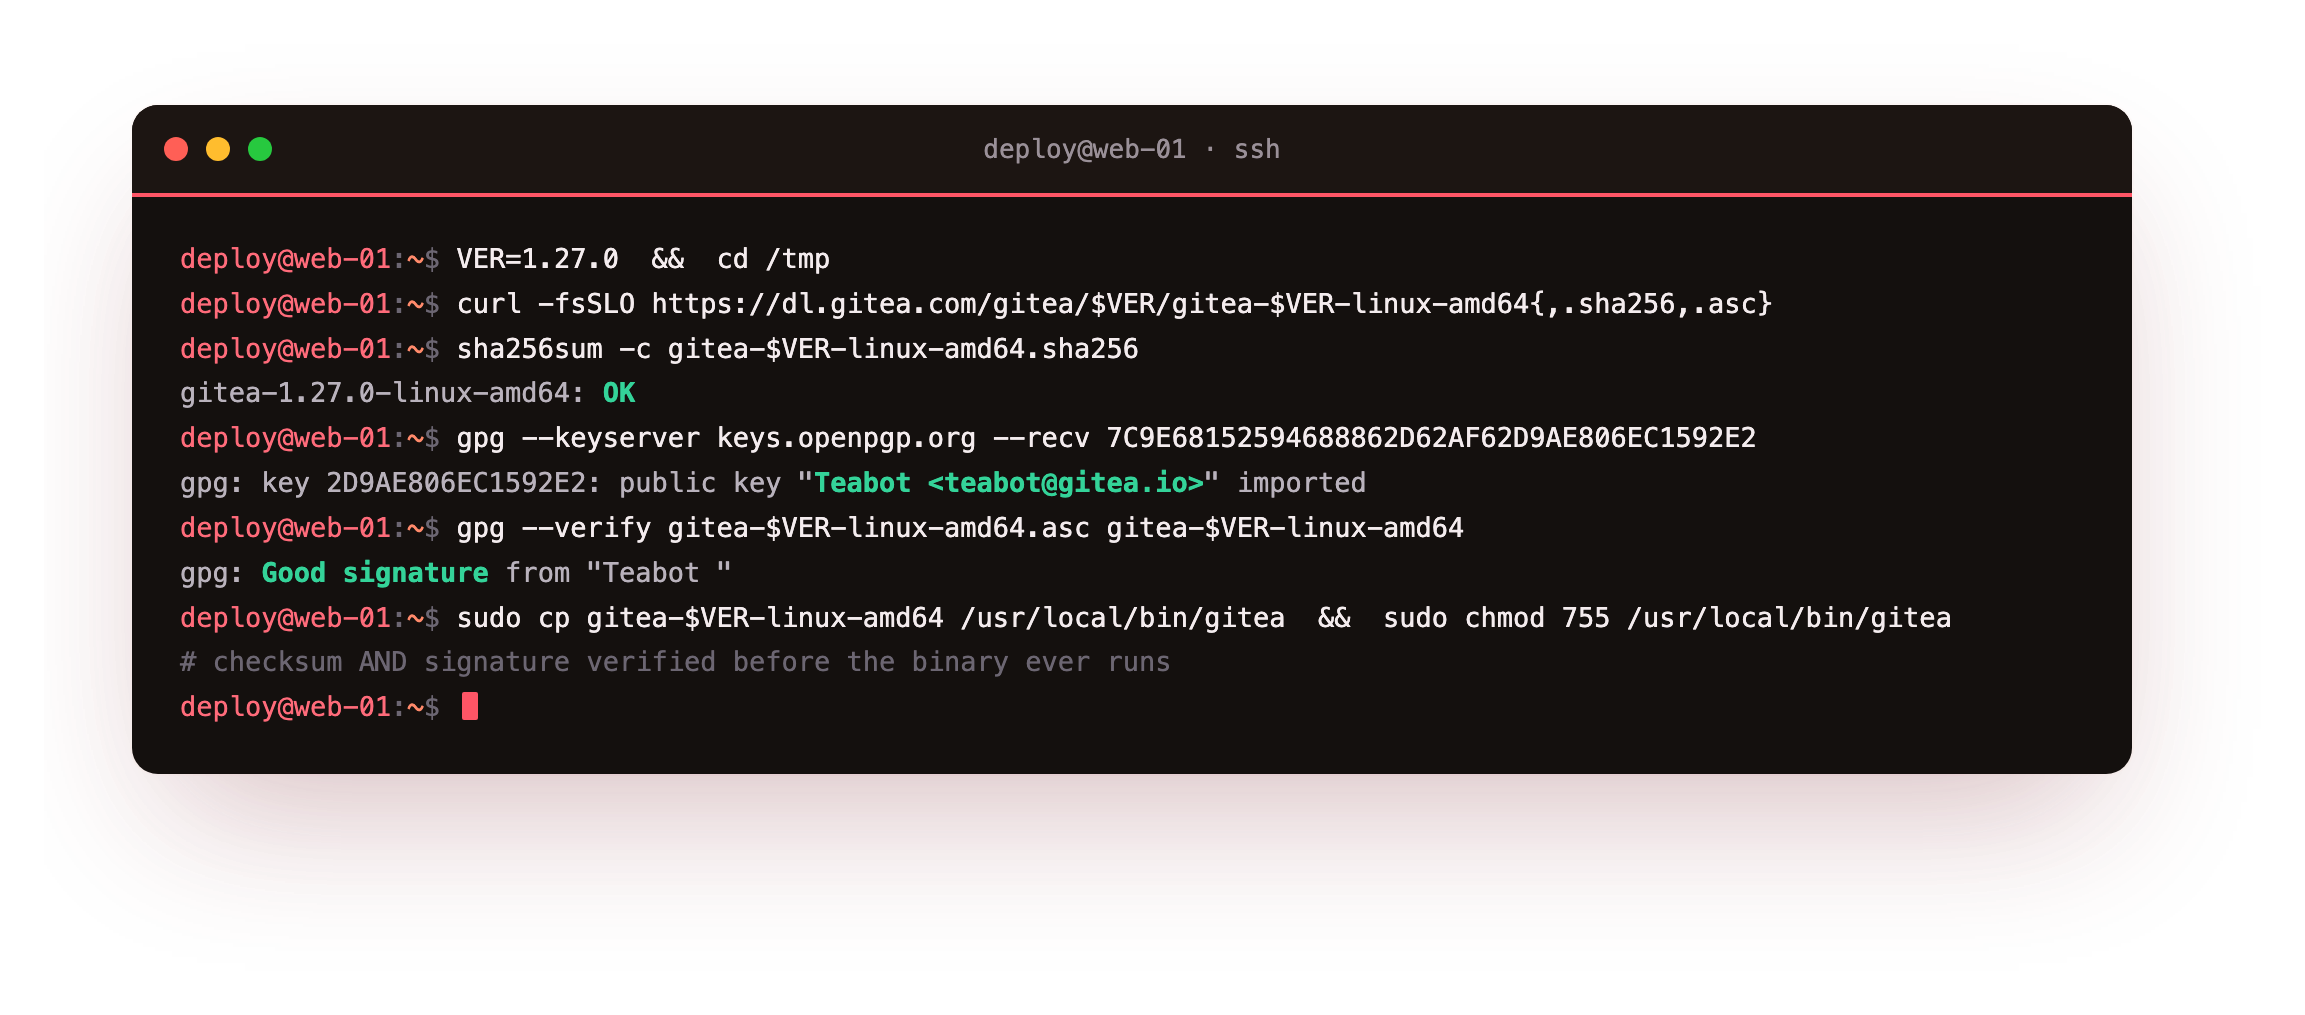
The checksum line prints OK, and the signature check reports a good signature from Teabot <[email protected]>, the Gitea release key. That two-step verification is a habit worth keeping for any binary you install by hand: a checksum alone only proves the file matches a hash you also downloaded, while the signature proves who made it.
sudo -u git gitea --version should print the release you just installed. If gpg --verify did not report a good signature, do not install the binary; re-download it and check that the key fingerprint matches the one above.With the binary in place, make Gitea a service so it starts on boot and comes back after a crash. Write a systemd unit that runs Gitea as the git user, then reload systemd and start it.
[Unit]
Description=Gitea
After=network.target

[Service]
User=git
Group=git
WorkingDirectory=/var/lib/gitea/
ExecStart=/usr/local/bin/gitea web --config /etc/gitea/app.ini
Restart=always
Environment=GITEA_WORK_DIR=/var/lib/gitea

[Install]
WantedBy=multi-user.target
sudo systemctl daemon-reload
sudo systemctl enable --now gitea
systemctl is-active gitea
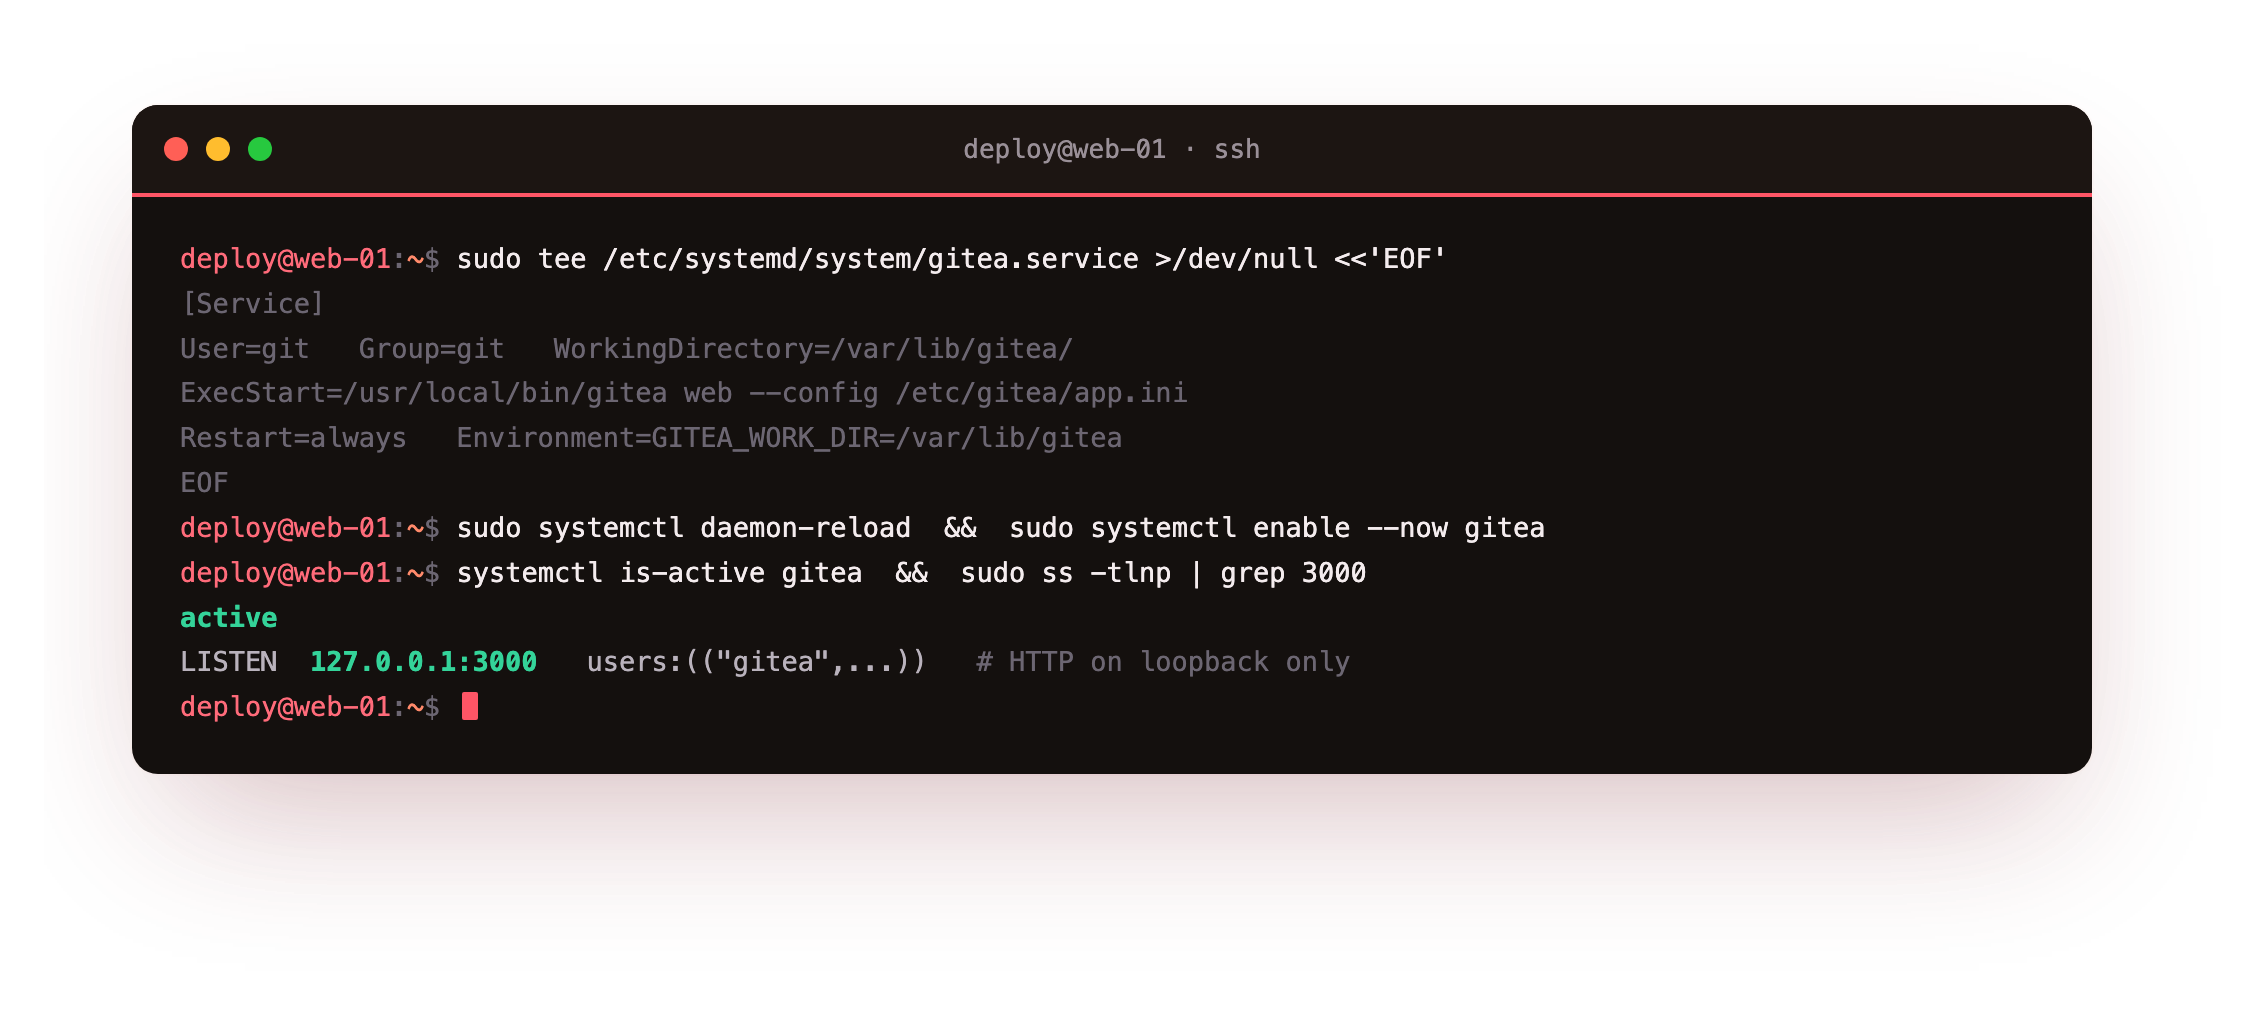
Gitea comes up listening on 127.0.0.1:3000, on loopback only, which is exactly what you want. It is never spoken to directly from the internet; nginx is the single public front door. That is the last piece.
Write an nginx server block for your domain that terminates TLS and passes everything through to Gitea on port 3000. The certificate here is a real one; if you use certbot, sudo certbot --nginx -d git.example.com issues and wires up a free Let's Encrypt certificate for the name once DNS points at the box.
server {
    listen 443 ssl;
    server_name git.example.com;

    ssl_certificate     /etc/letsencrypt/live/git.example.com/fullchain.pem;
    ssl_certificate_key /etc/letsencrypt/live/git.example.com/privkey.pem;

    client_max_body_size 512M;
    add_header Strict-Transport-Security "max-age=31536000; includeSubDomains" always;

    location / {
        proxy_pass http://127.0.0.1:3000;
        proxy_set_header Host $host;
        proxy_set_header X-Forwarded-For $proxy_add_x_forwarded_for;
        proxy_set_header X-Forwarded-Proto $scheme;
    }
}
sudo ln -s /etc/nginx/sites-available/git.example.com /etc/nginx/sites-enabled/
sudo nginx -t
sudo systemctl reload nginx
curl --http2 -sI https://git.example.com/
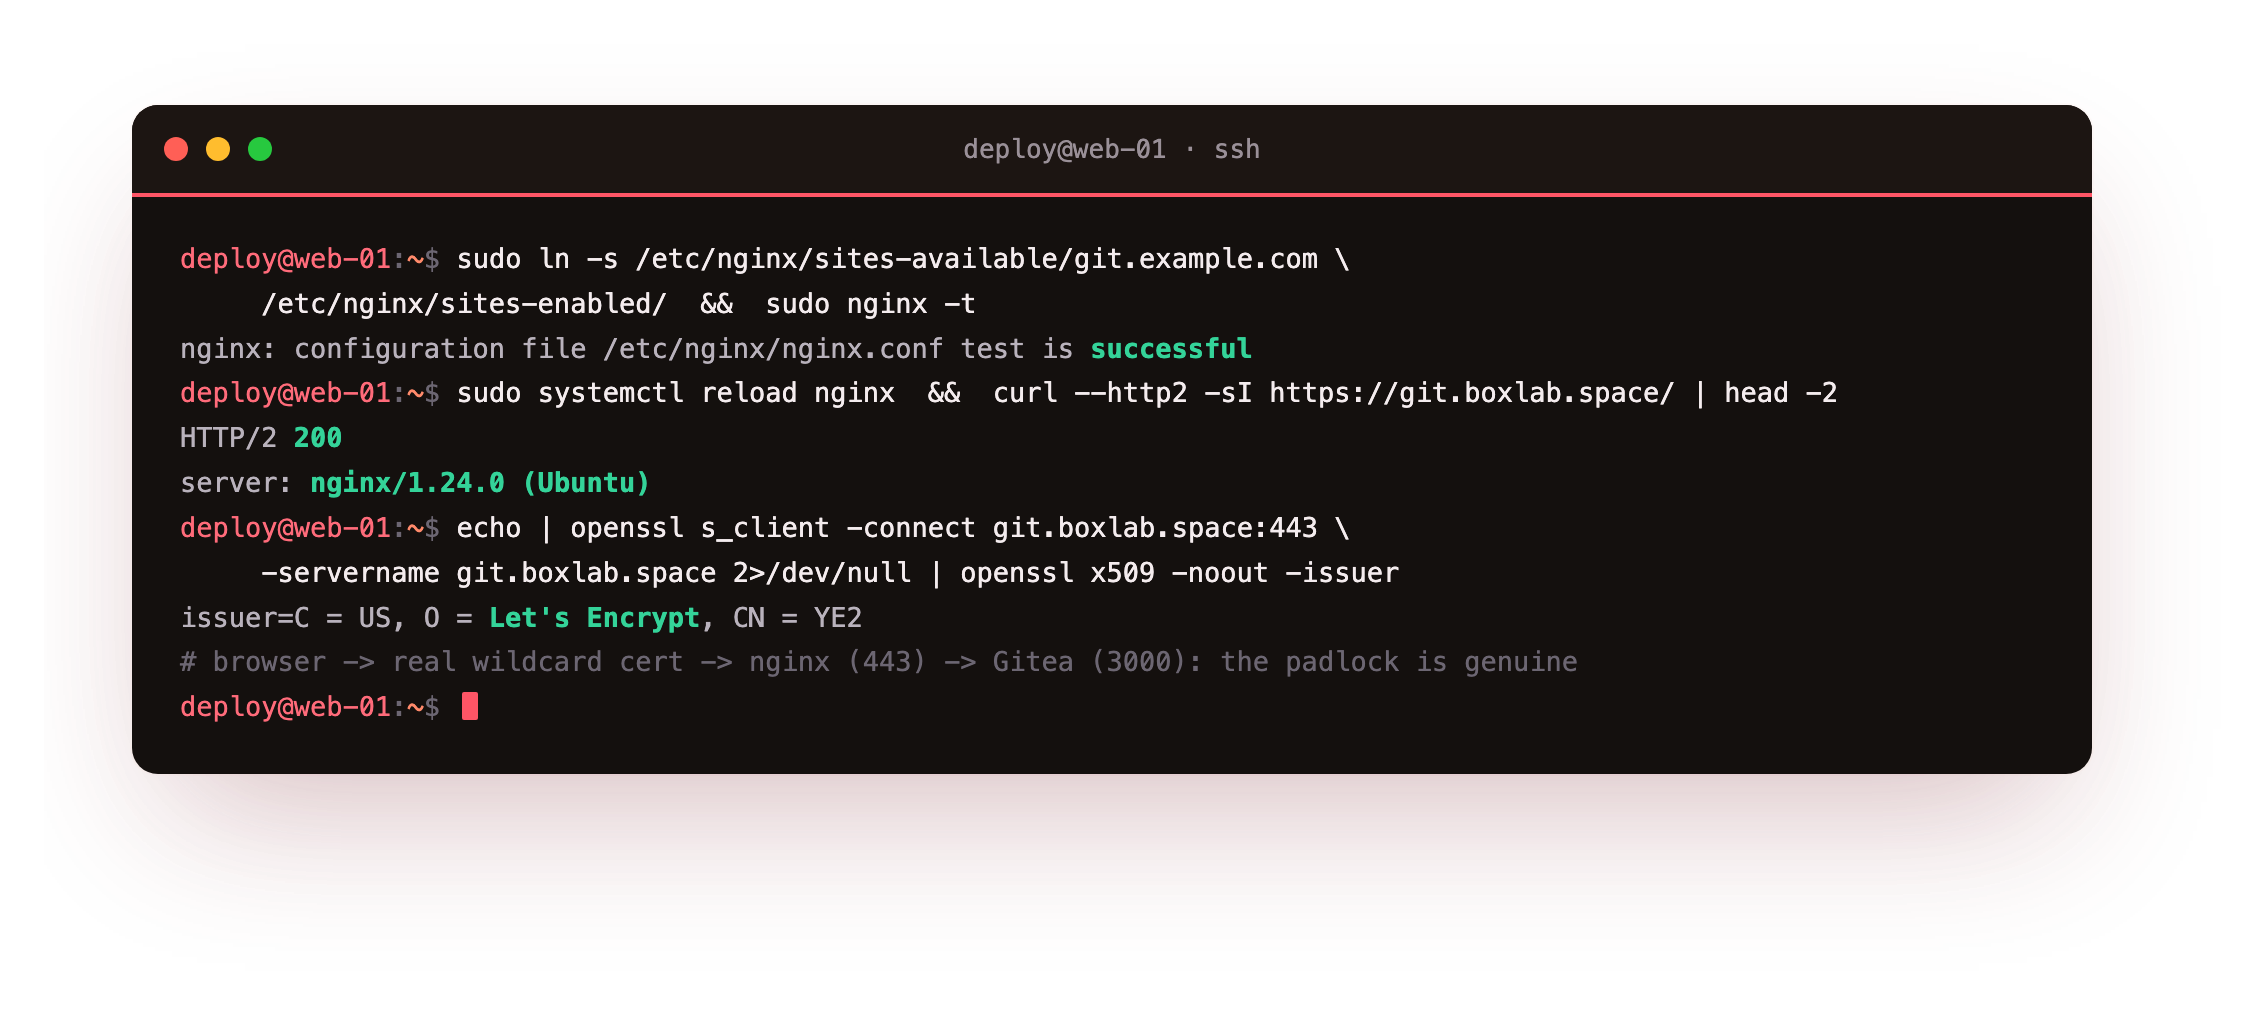
A 200 over HTTP/2 with server: nginx means the whole path works: browser, to the real wildcard or per-host certificate, to nginx on 443, to the Gitea process on 3000. The client_max_body_size is set generously so large pushes over HTTPS are not cut off by the proxy.
https://git.example.com/ in a browser should now show Gitea's install page over a valid padlock. If you get a 502, Gitea is not answering on 3000; check systemctl status gitea and journalctl -u gitea.Run the install wizard
Open your domain in a browser and Gitea shows its one-time install page. Every field here writes a line into /etc/gitea/app.ini, so it is worth understanding rather than clicking through. Walk it with intent.
For the database, choose MySQL, set the host to 127.0.0.1:3306, and enter the gitea user, the password you set, and the database name gitea. Leave the repository and data paths at their defaults under /var/lib/gitea. Set the run-as user to git, matching the account you created. The important field is the application URL: set it to https://git.example.com/, because Gitea bakes this into clone links, emails and redirects, and a wrong value here causes confusing breakage later.
Then open the administrator account section and create your admin now, in the wizard, rather than leaving it for an anonymous visitor to claim. And for a private instance, tick the option to disable open registration, so the internet cannot sign itself up. When you submit, Gitea writes the config, runs its database migrations, creates the admin, and locks the installer. You can confirm all of that from the shell.
sudo grep -E 'ROOT_URL|INSTALL_LOCK|DISABLE_REGISTRATION' /etc/gitea/app.ini
sudo -u git gitea admin user list --config /etc/gitea/app.ini
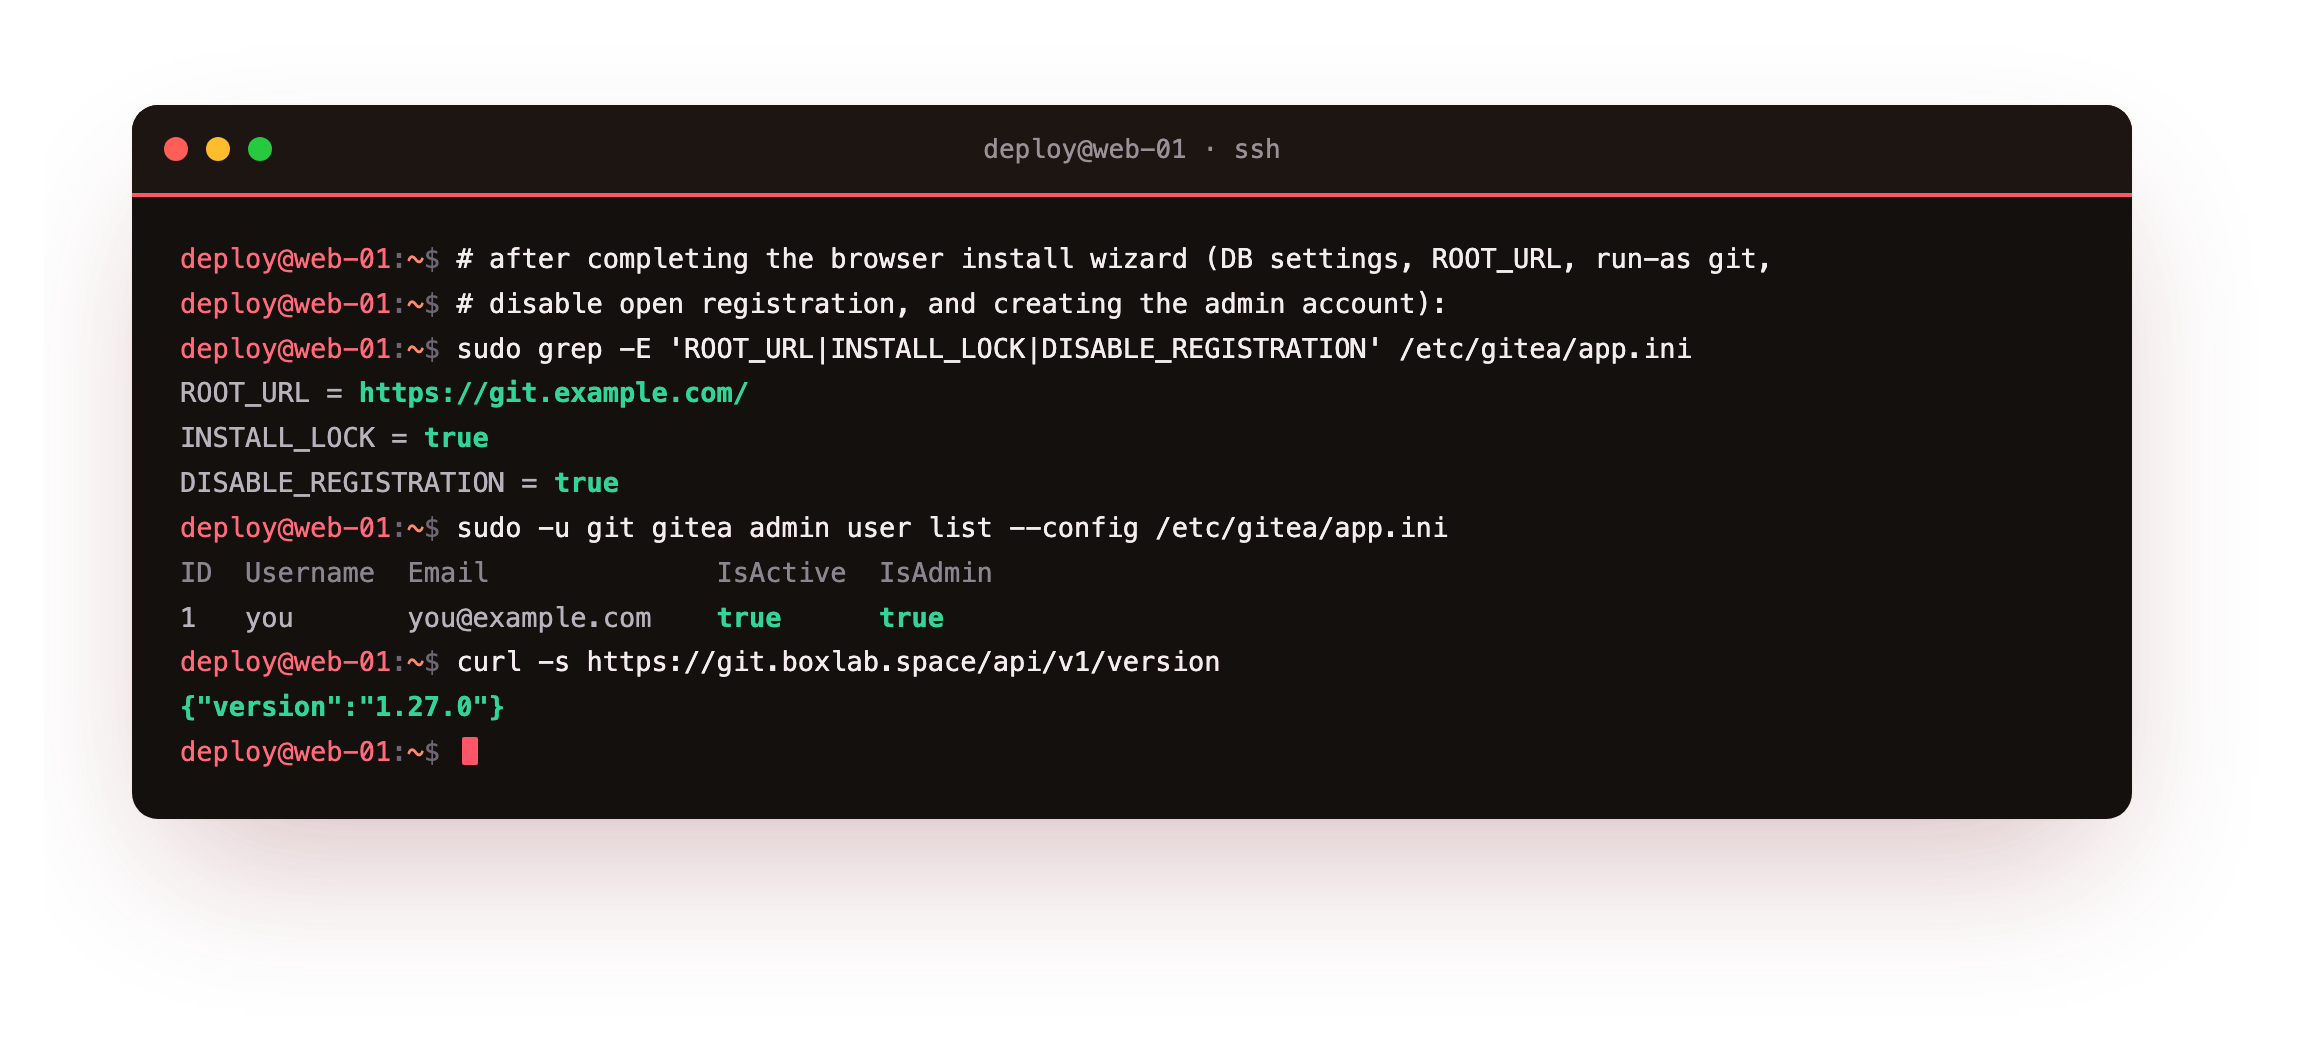
INSTALL_LOCK = true means the wizard is closed and cannot be replayed, DISABLE_REGISTRATION = true confirms the private posture, and the user list shows your admin as active with the admin flag set. Now lock the config back down so only root and the git group can read it, since it holds the database password and the instance secret keys.
sudo chown root:git /etc/gitea/app.ini && sudo chmod 640 /etc/gitea/app.ini
sudo systemctl restart gitea
app.ini file holds your database password and the SECRET_KEY and INTERNAL_TOKEN that protect sessions and tokens. Keep it mode 640 owned by root:git, and include it in your backups, because a restore without it cannot decrypt existing sessions.Push your first repository
This is the part you set the whole thing up for. Sign in to the web UI with the admin account, click the plus in the top bar, and create a new repository, for example infra-scripts. Leave it private and give it a description. Gitea shows you the clone URL and the exact commands to push an existing project into it.
On your machine, or on the server, make a real repository and push it. The remote is your own domain over HTTPS, and Gitea authenticates the push with your account username and password, or a personal access token if you prefer.
git init -b main
git add -A
git commit -m "Initial commit: backup and deploy scripts"
git remote add origin https://git.example.com/you/infra-scripts.git
git push -u origin main
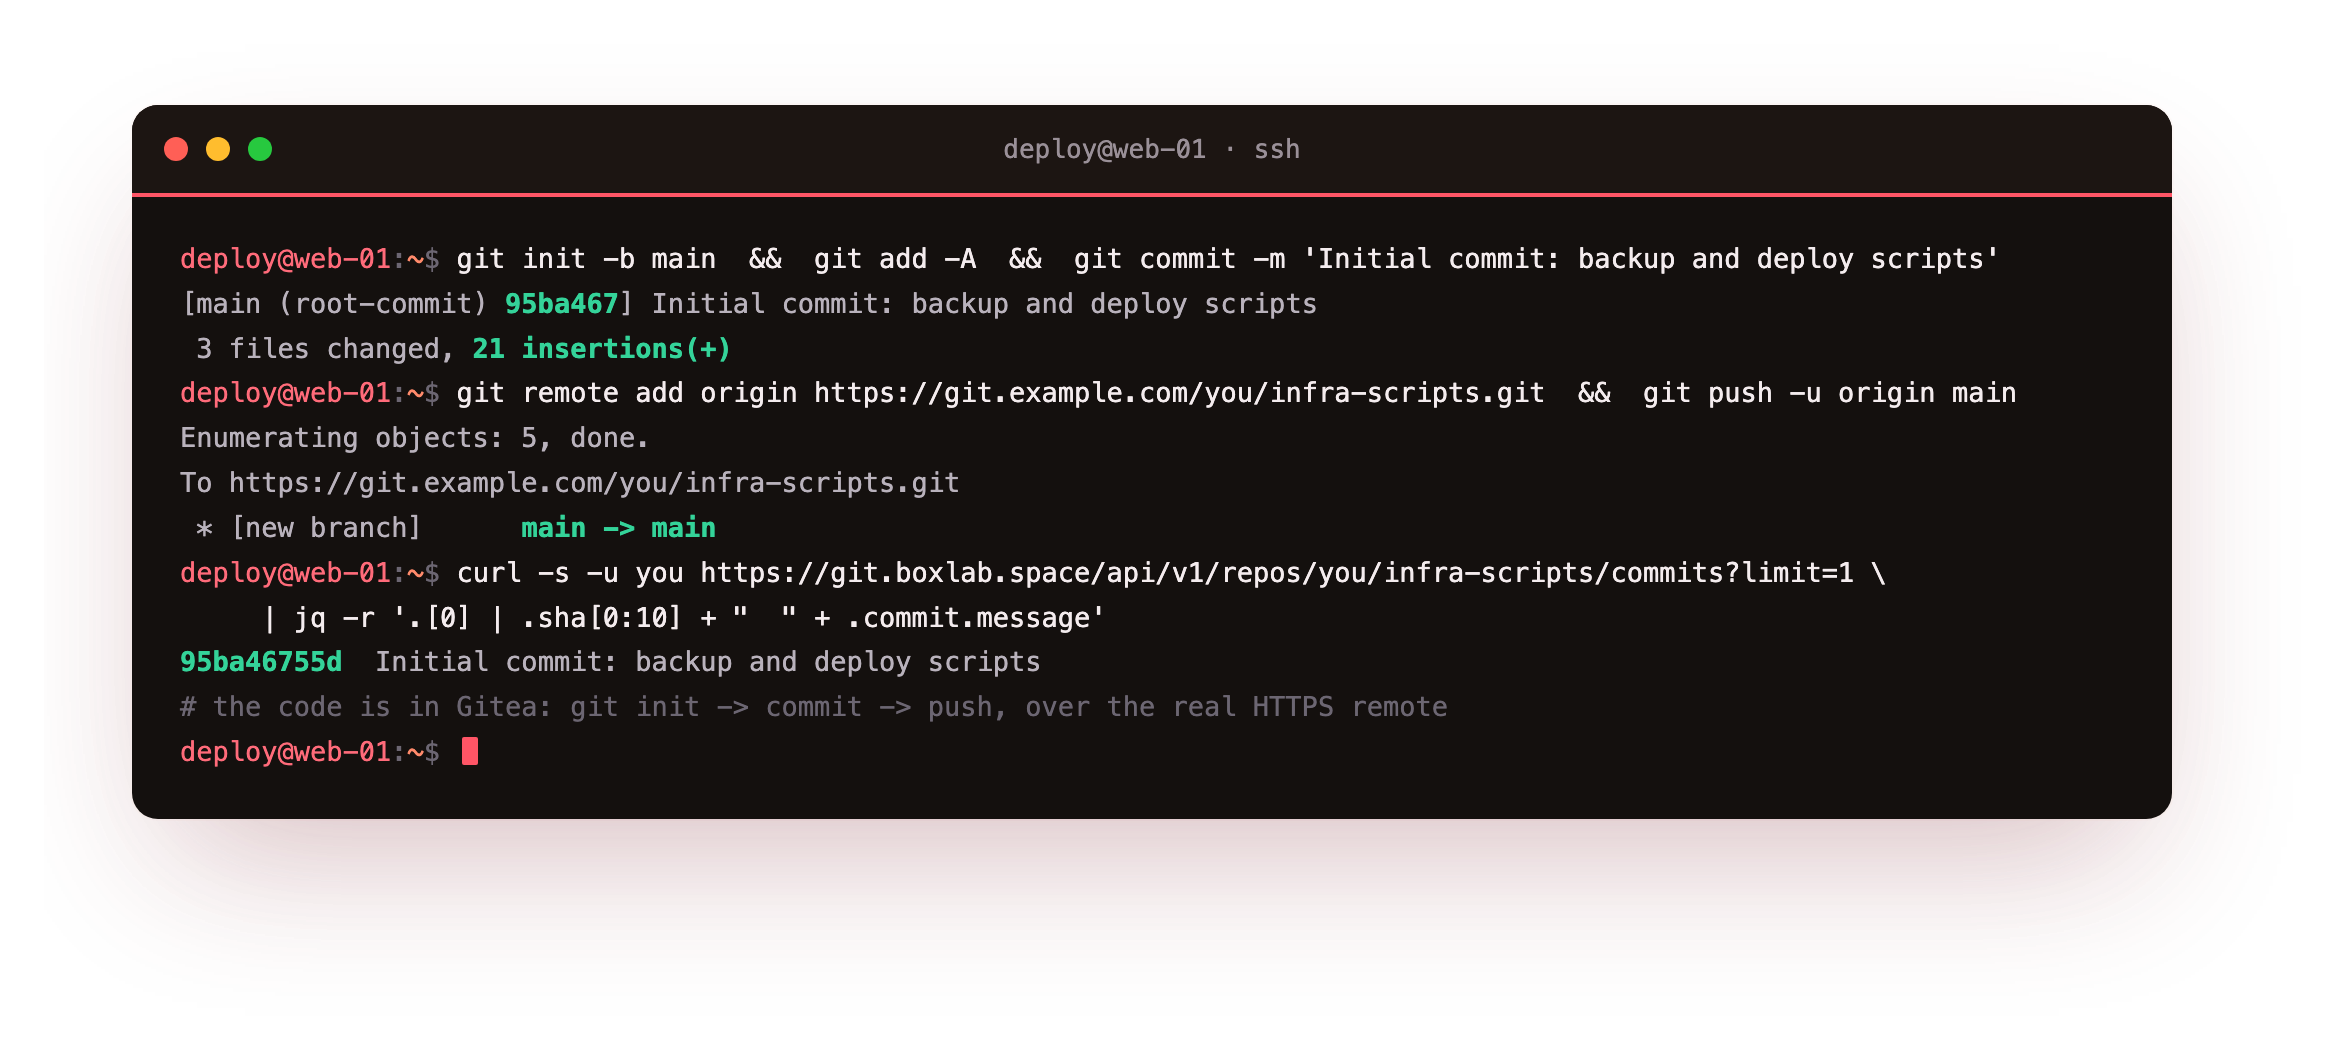
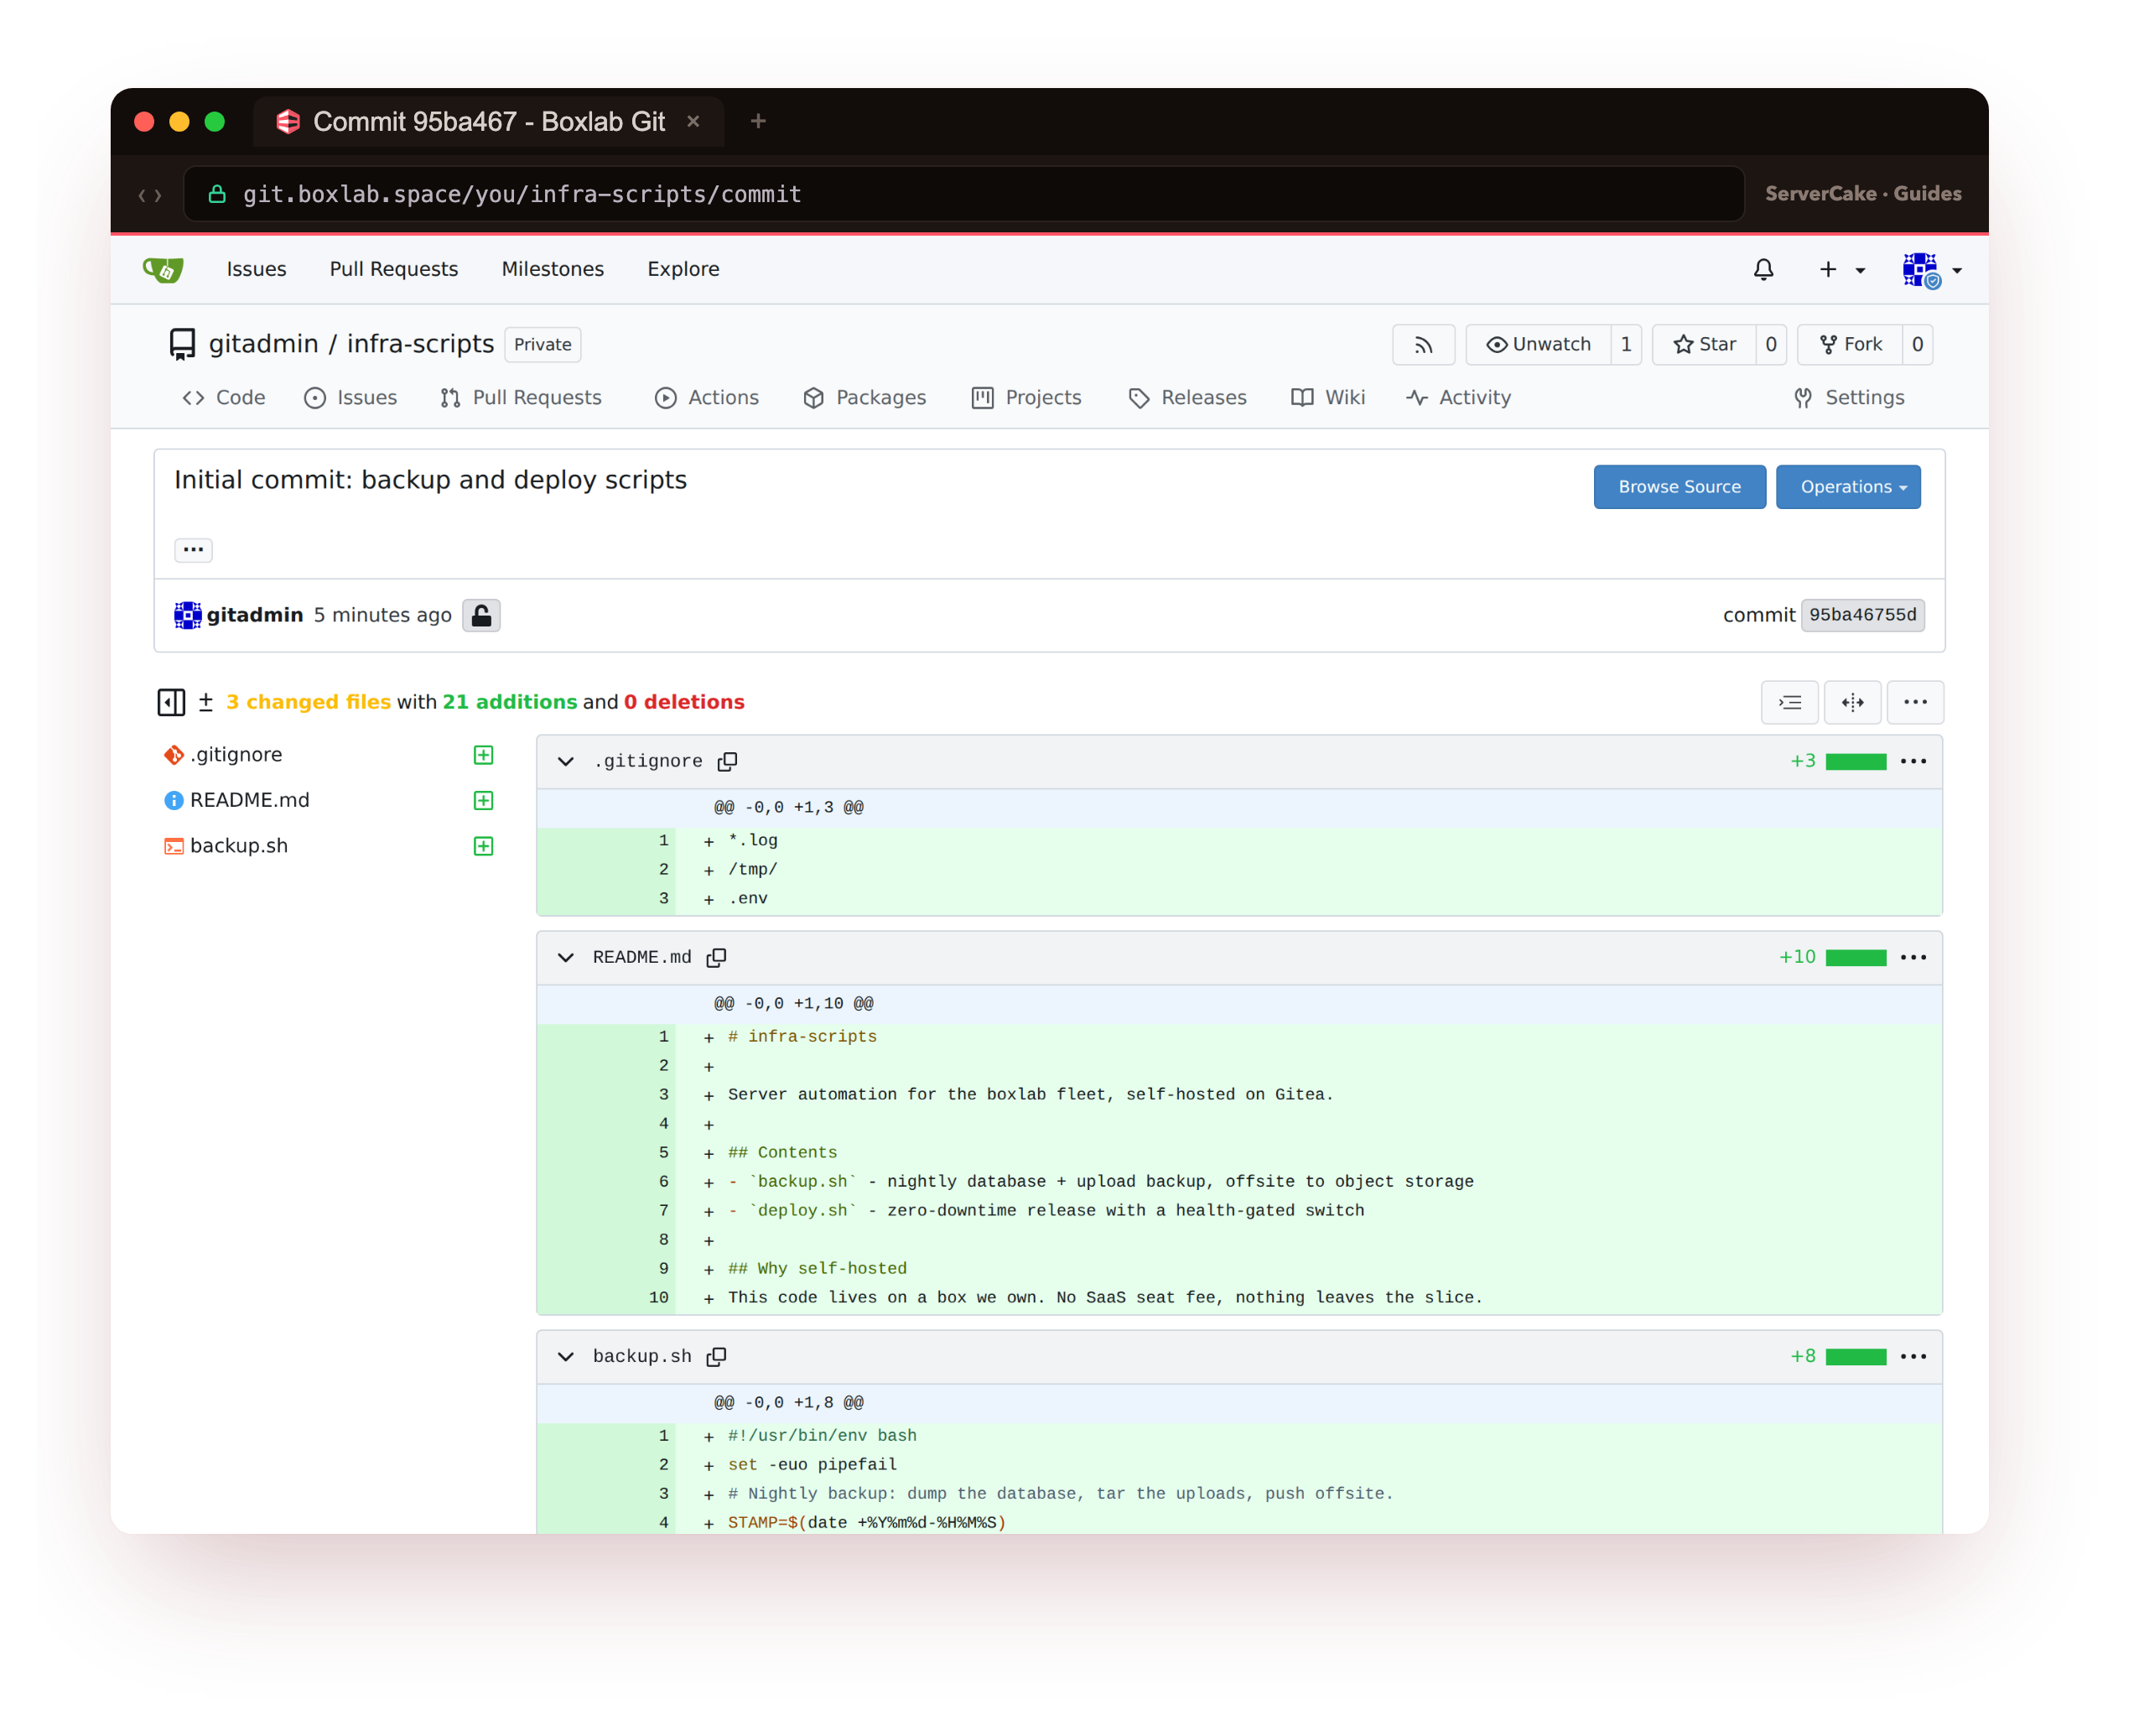
The push reports [new branch] main -> main, and that is the moment your code lives on a Git server you own. Refresh the repository page and the files are there, the README is rendered below them, and the commit you just made is at the top of the history with its short hash. Click the commit and Gitea shows the full diff, every added line of every file, exactly as it landed.
For everyday work you will want SSH rather than typing a password on every push. Add your public key under your user settings, and clone with the SSH remote Gitea shows on the repository page. Git operations then run over the SSH port with key authentication, which is both faster and safer than HTTPS with a password.
Secure and harden your Gitea install
The install is sensibly set up, but a few checks confirm the locks are on rather than assumed. The most important property is that Gitea is never exposed directly: the process listens on loopback, and nginx is the only thing facing the world.
sudo ss -tlnp | grep -E ':3000|:443'
sudo ufw allow 22 && sudo ufw allow 80 && sudo ufw allow 443 && sudo ufw enable
sudo ufw status
sudo stat -c '%A %U:%G %n' /etc/gitea/app.ini
curl -sI https://git.example.com/ | grep -iE 'x-frame|content-type-opt|strict-transport'
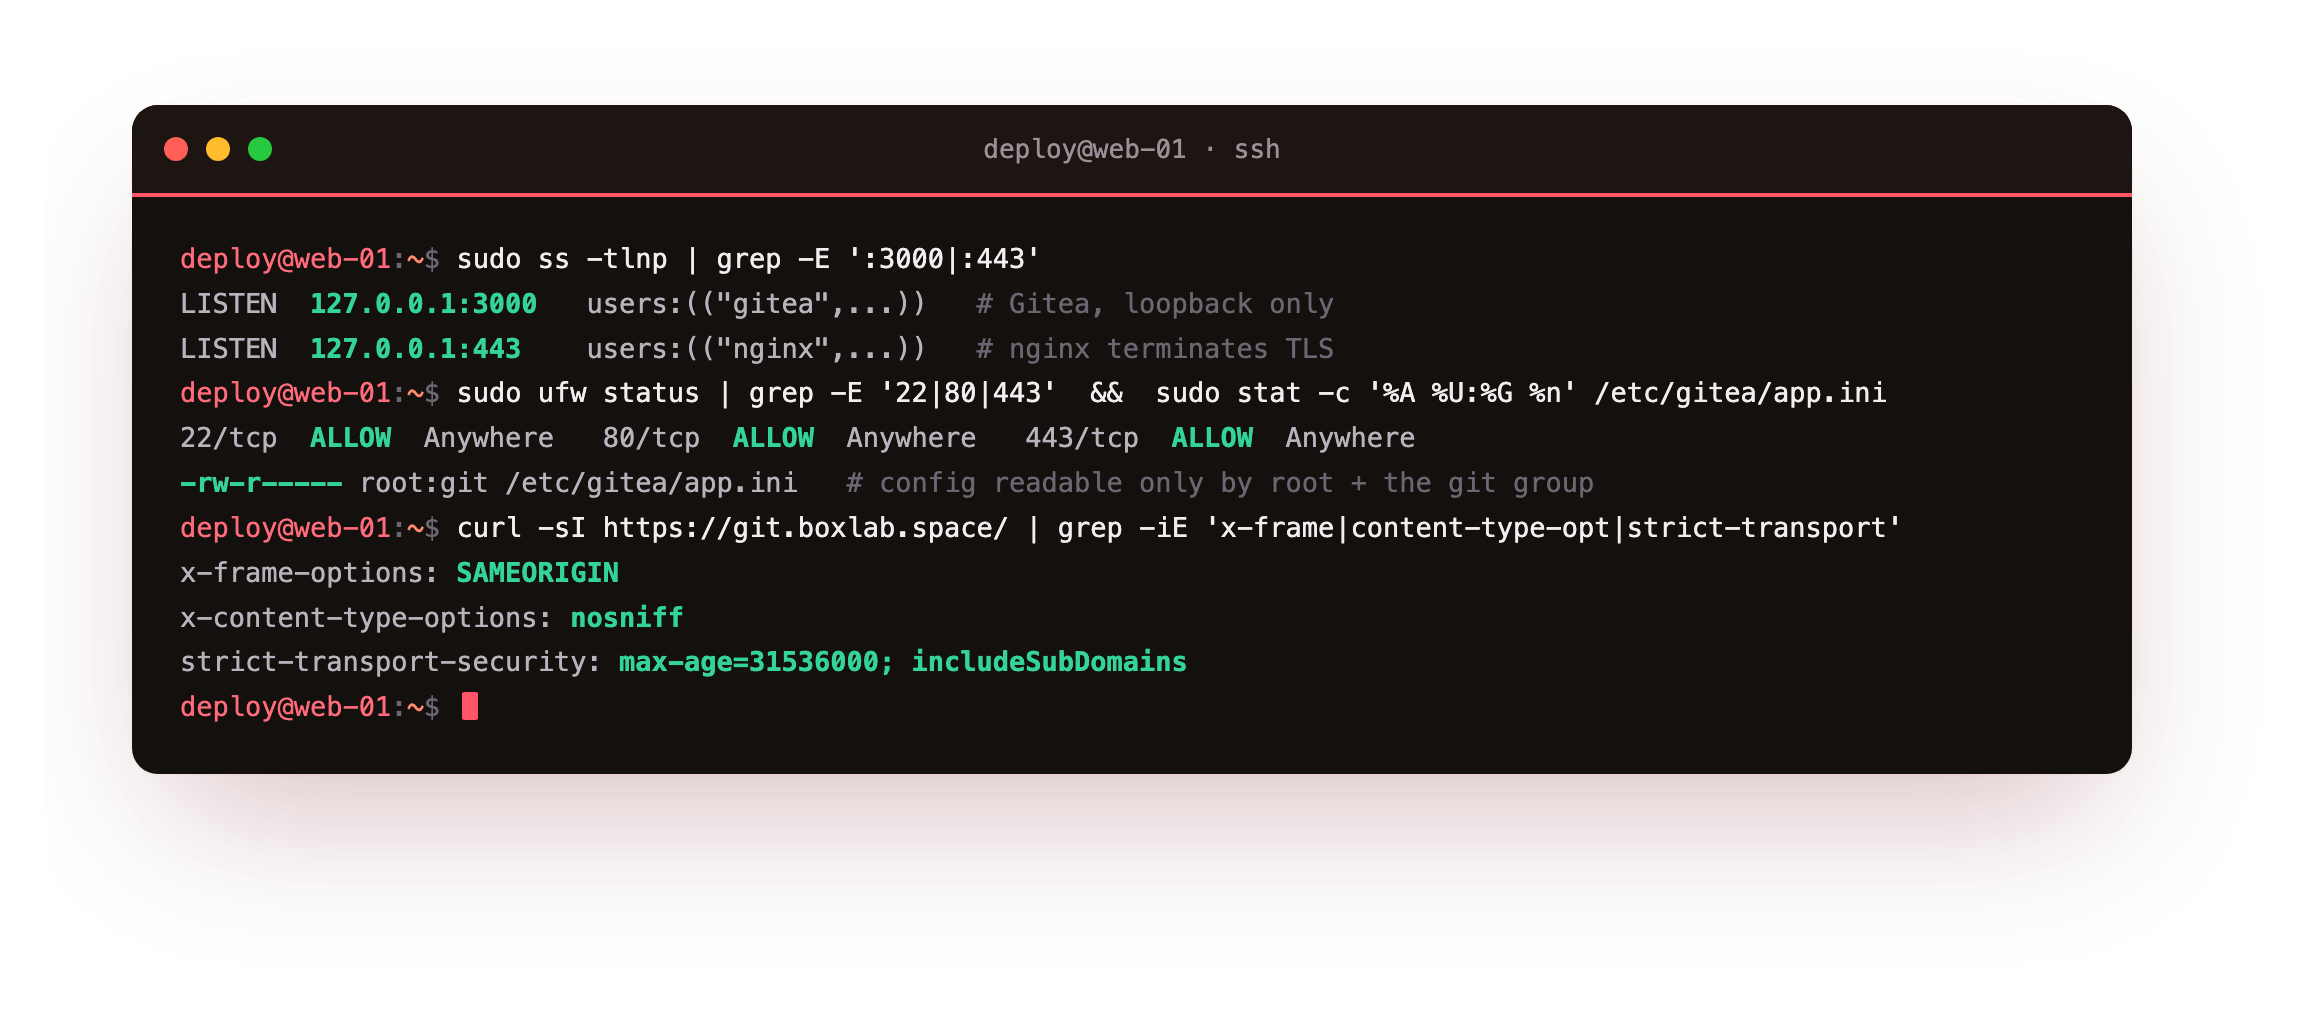
Gitea should show on 127.0.0.1:3000 and nginx on 127.0.0.1:443, never 0.0.0.0:3000. The firewall should allow SSH, HTTP and HTTPS and nothing else; HTTP stays open only so certificates renew and plain requests redirect up to HTTPS. The config file should read -rw-r----- owned by root:git. And the response should carry the X-Frame-Options, X-Content-Type-Options and Strict-Transport-Security headers, so browsers refuse to frame the site, stop guessing content types, and insist on HTTPS next time.
Two Gitea settings finish the private posture. DISABLE_REGISTRATION = true, which you set in the wizard, keeps the internet from signing up. If your instance should not even be readable without a login, set REQUIRE_SIGNIN_VIEW = true in the [service] section of app.ini and restart. Between the loopback binding, the firewall, a least-privilege database user and a private, sign-in-gated instance, there is no public path to anything you did not intend to publish.
Keep Gitea running and updated
Because Gitea is one binary under systemd, keeping it healthy is a short list. Back up first, always, because both the update and any restore depend on it. Gitea's own dump command captures the database, the repositories and the config into a single archive.
sudo -u git gitea dump --config /etc/gitea/app.ini -t /tmp
ls -lh gitea-dump-*.zip
sudo systemctl restart gitea
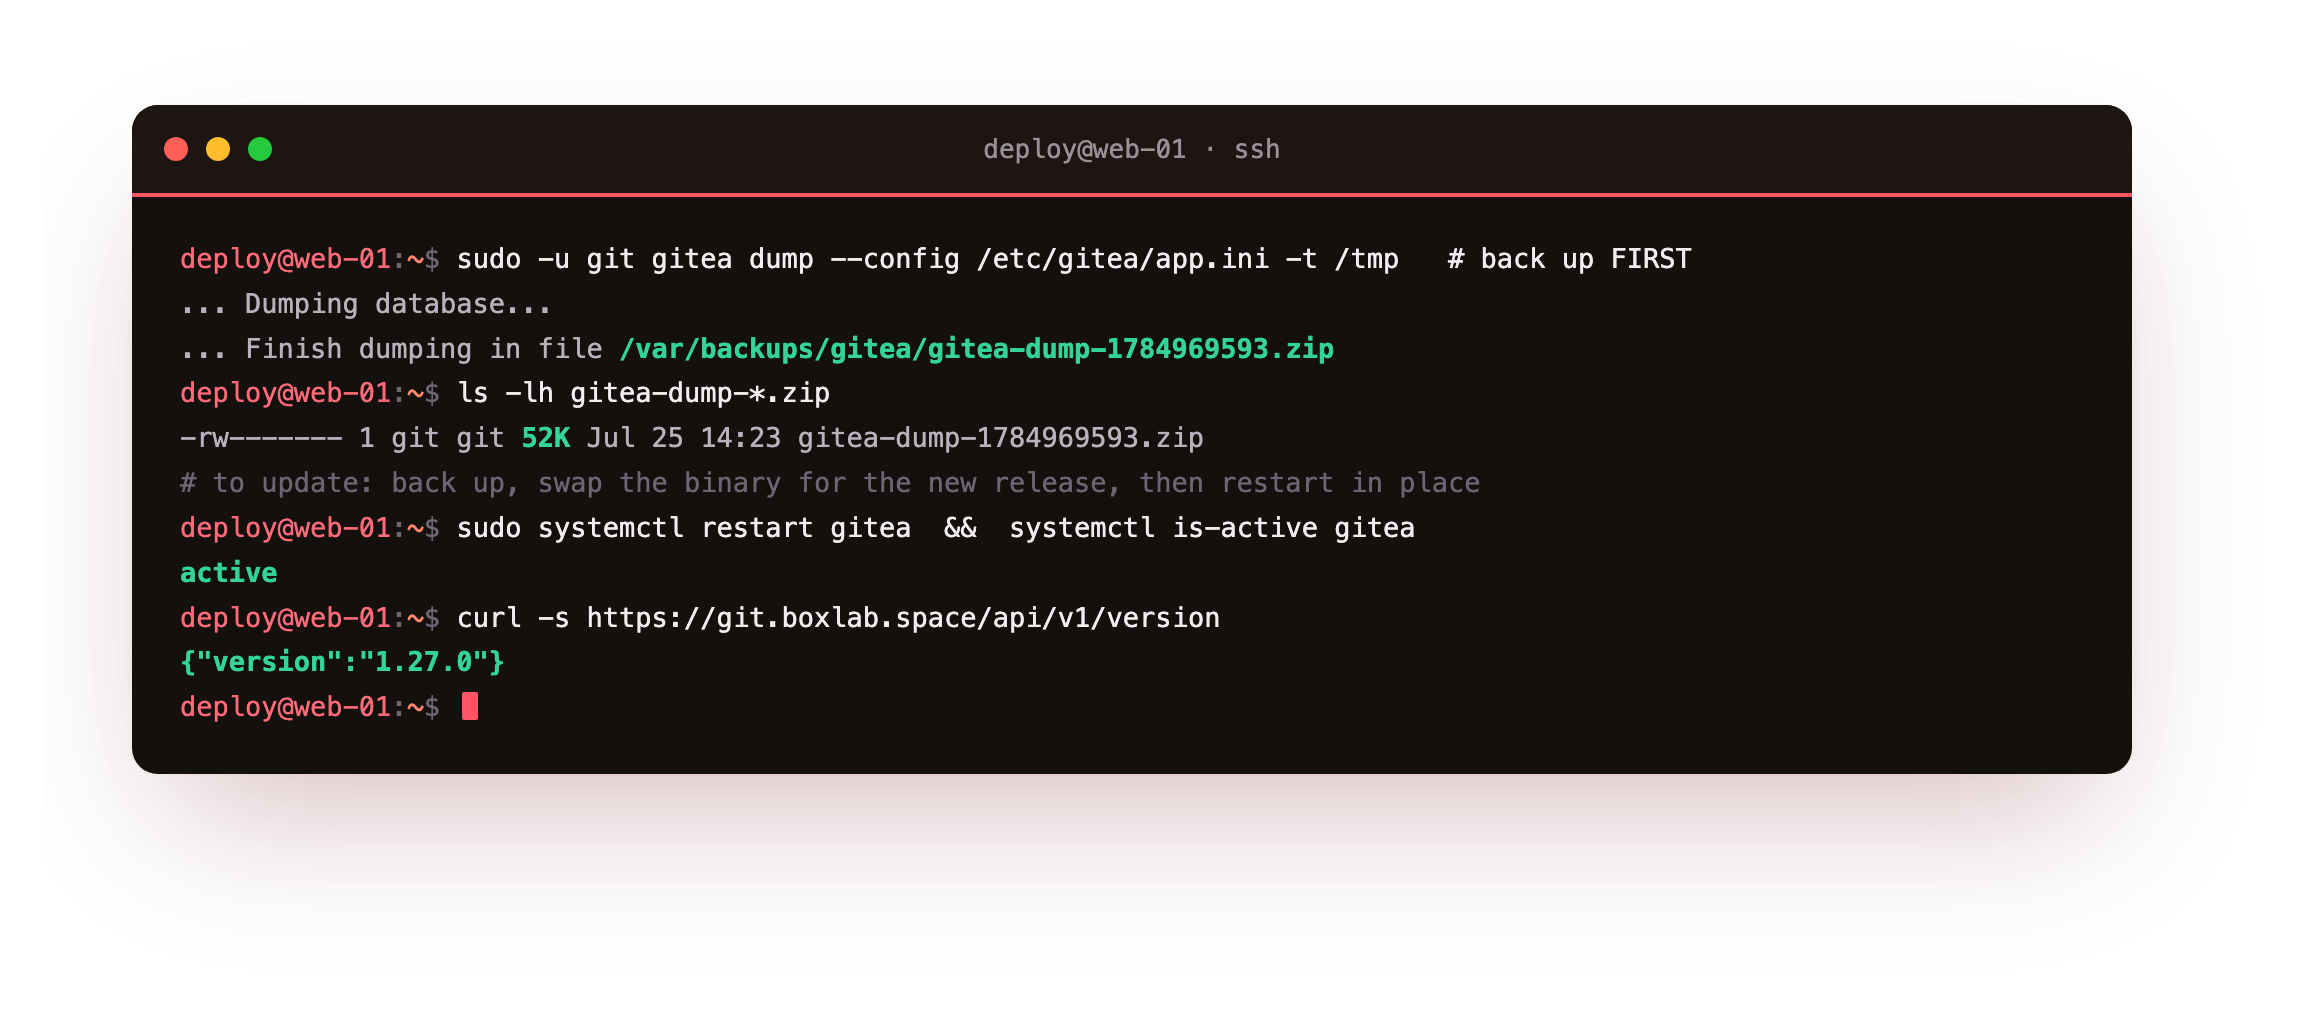
The dump writes a timestamped .zip holding everything the instance needs to come back. Updating Gitea is then genuinely simple: take a dump, download and verify the new binary exactly as you did the first, replace /usr/local/bin/gitea with it, and restart the service. Gitea runs any database migrations on start, so a version bump is a binary swap plus a restart, not a migration project. systemctl restart gitea brings it back, and systemctl status gitea and journalctl -u gitea are where you look when something is off.
The systemd unit means Gitea returns on its own after a reboot or a crash, and gitea dump is the backbone of a real backup routine. Sending those dumps off the slice to object storage on a nightly timer, and rehearsing a restore, is its own job and the natural next step for this instance, coming next in this Gitea cluster.
That is a complete, hand-built Git service: a dedicated user, MySQL 8, a verified Gitea binary under systemd, nginx over a real certificate, an admin account, a first repository pushed and visible in the web UI, the whole thing hardened for a private instance and set to back itself up. You own every layer, so you can fix every layer.
Frequently asked questions
How much RAM does a Gitea VPS need?
Gitea itself is remarkably light: the Go binary on a small team's instance sits in a couple of hundred megabytes, because there is no separate runtime or interpreter behind it. The part that wants room is the database. With MySQL 8, a 1 GB slice runs a small instance and 2 GB gives it comfortable headroom, while choosing SQLite instead drops the memory need further and suits a personal instance on a very small box. Start modest, watch memory as your team and repositories grow, and resize up when the numbers ask for it.Should I use MySQL, PostgreSQL or SQLite for Gitea?
All three are supported and all three work. SQLite needs no database server at all and is a fine choice for a personal instance or a small team, since Gitea keeps everything in one file. MySQL 8 and PostgreSQL are the better fit once several people are pushing at once or the instance grows, because a real database server handles concurrency more gracefully. This tutorial uses MySQL 8, but the only difference at install time is which database type you pick in the wizard; everything else is identical.Can I use Gitea over SSH instead of HTTPS for git?
Yes, and for daily work you should. HTTPS pushes ask for your username and password or a token each time, which is fine for the first push but tedious after that. Add your SSH public key under your Gitea user settings, then clone with the SSH remote shown on the repository page. Git operations then run over the SSH port with key authentication, so there is no password to type and nothing to leak, while HTTPS stays available for anyone who prefers it or for automation using a scoped token.How do I update Gitea safely without losing data?
Take a dump first withgitea dump, so you can roll back if anything surprises you. Then download the new release, verify its checksum and GPG signature the same way you did on the first install, replace the binary at /usr/local/bin/gitea, and run systemctl restart gitea. Gitea applies any pending database migrations automatically on start, so there is no separate migration step. Your data lives in MySQL and in /var/lib/gitea, neither of which the binary swap touches, so a normal update keeps every repository, issue and user intact.
Running Gitea on your own slice means your code answers to you: your repositories, your users, your rules on where the data sits, with no per-developer fee and nothing between you and your history. When it is time to put your instance online, a ServerCake slice hands you a clean Ubuntu 24.04 box in India, priced in rupees with GST, set up for the exact workflow above.