What you will have
By the end of this tutorial you will install WordPress on a VPS from nothing: a bare Ubuntu 24.04 slice becomes a real website, served by nginx, run by PHP-FPM, backed by a MariaDB database, reachable at your own domain over real HTTPS, and closed to the handful of attacks that catch most fresh WordPress installs. No control panel, no one-click installer, no magic. Just the same stack the big managed hosts run, put together by hand so you understand every part of it.
Here is the destination, shown first so you know exactly what you are building toward. The screenshots in this tutorial are not mockups. They are captured from a genuine install we ran on our lab box at wp.boxlab.space while writing this, so what you see is what you get.
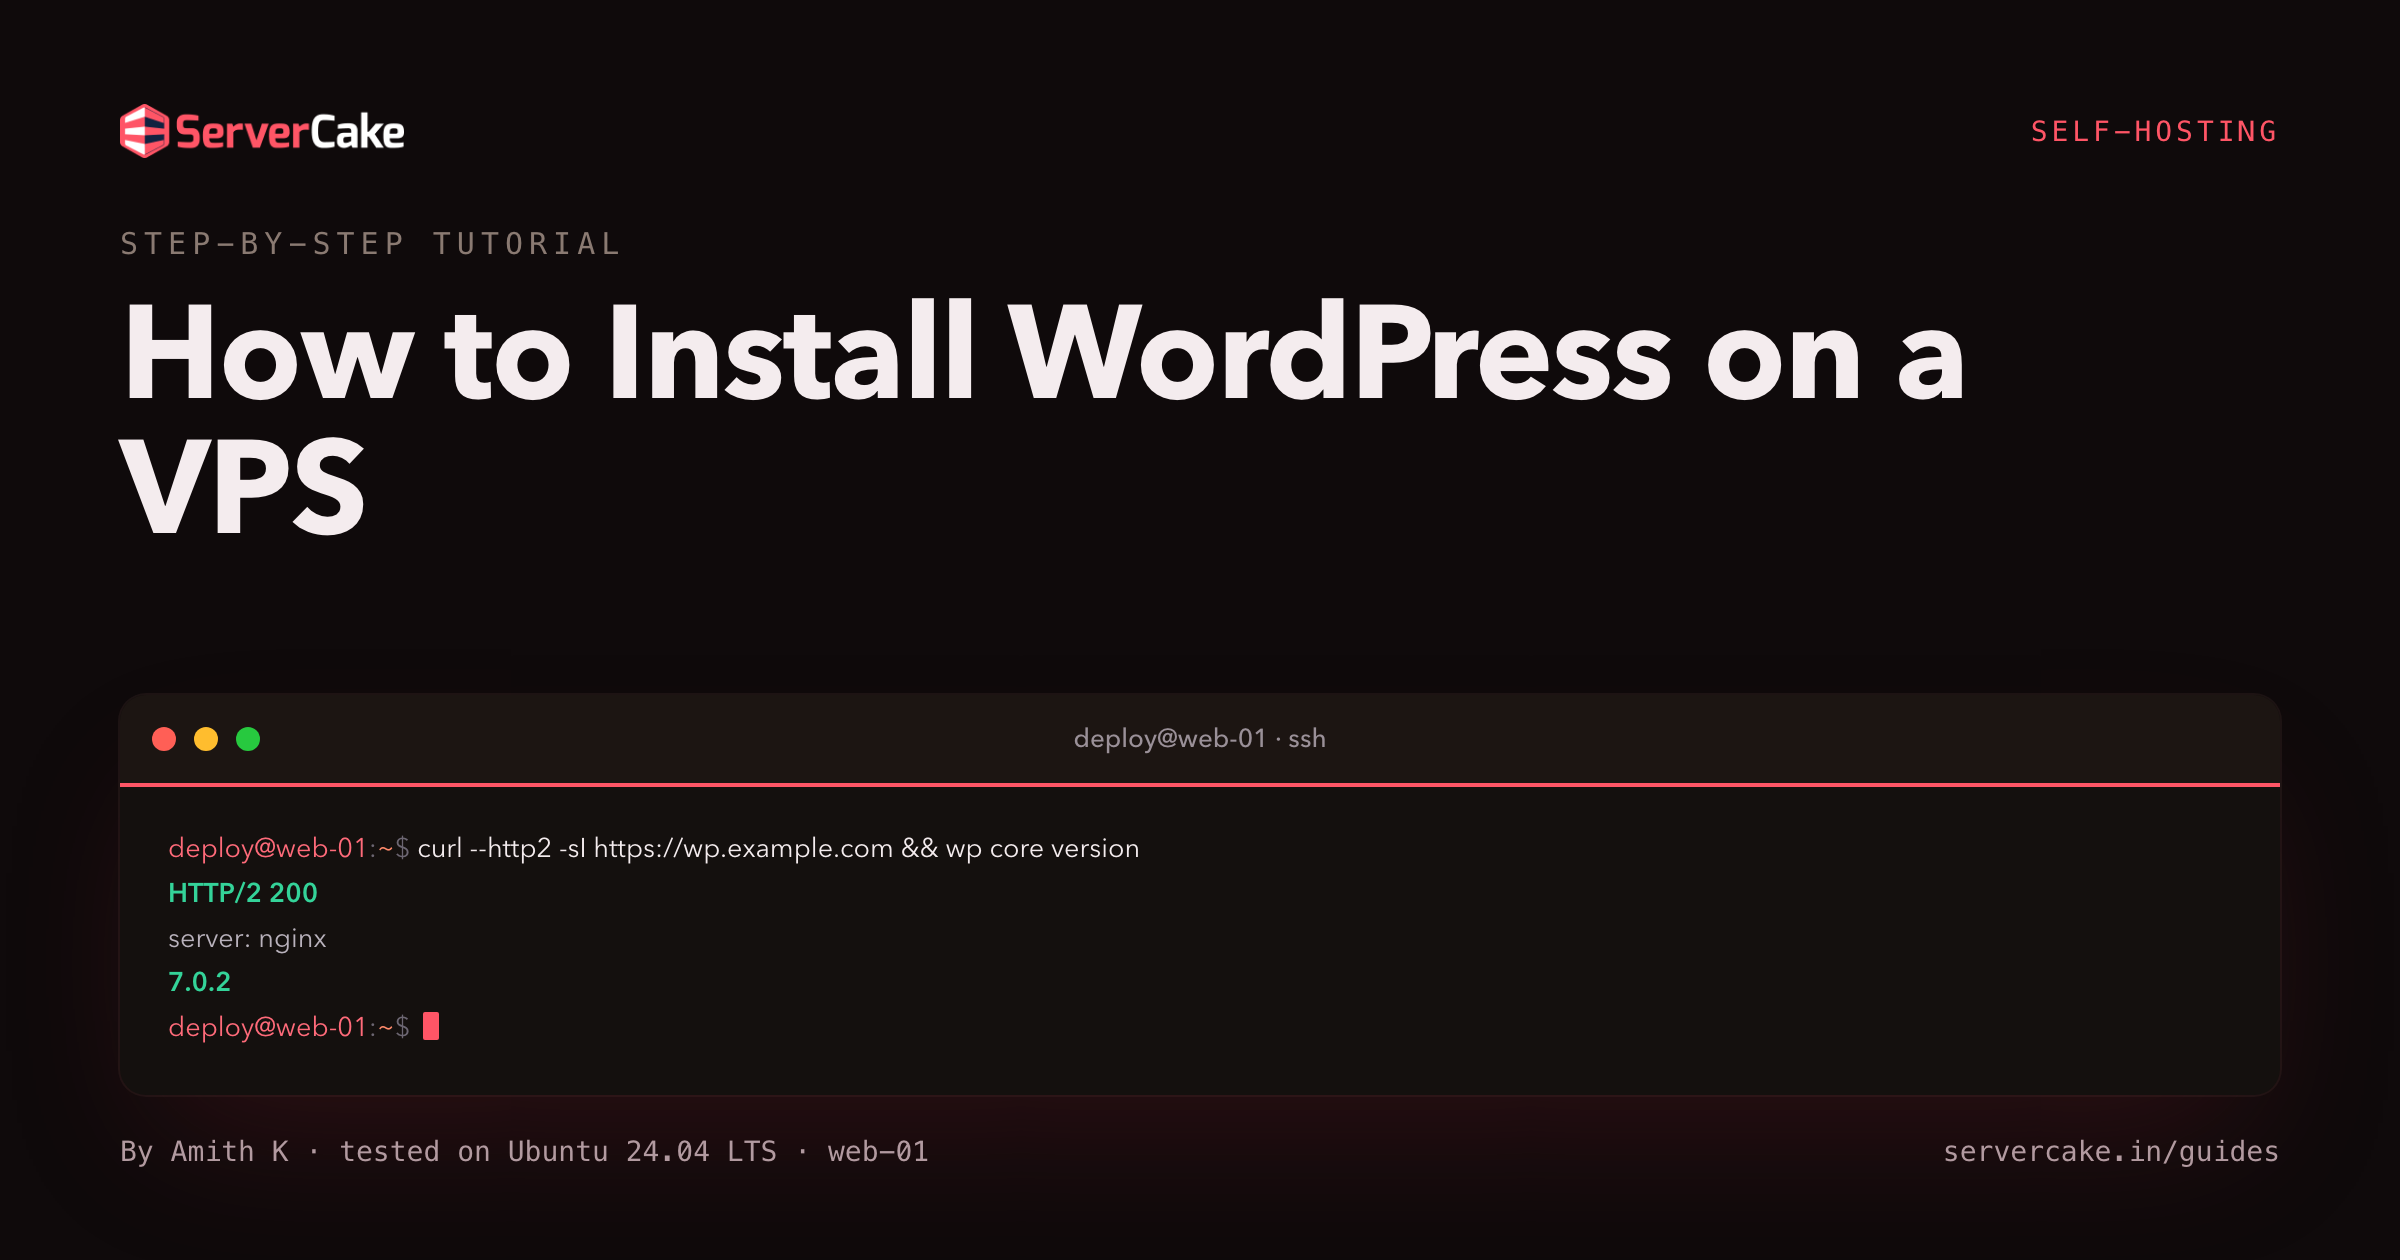
curl --http2 -sI https://your-domain/
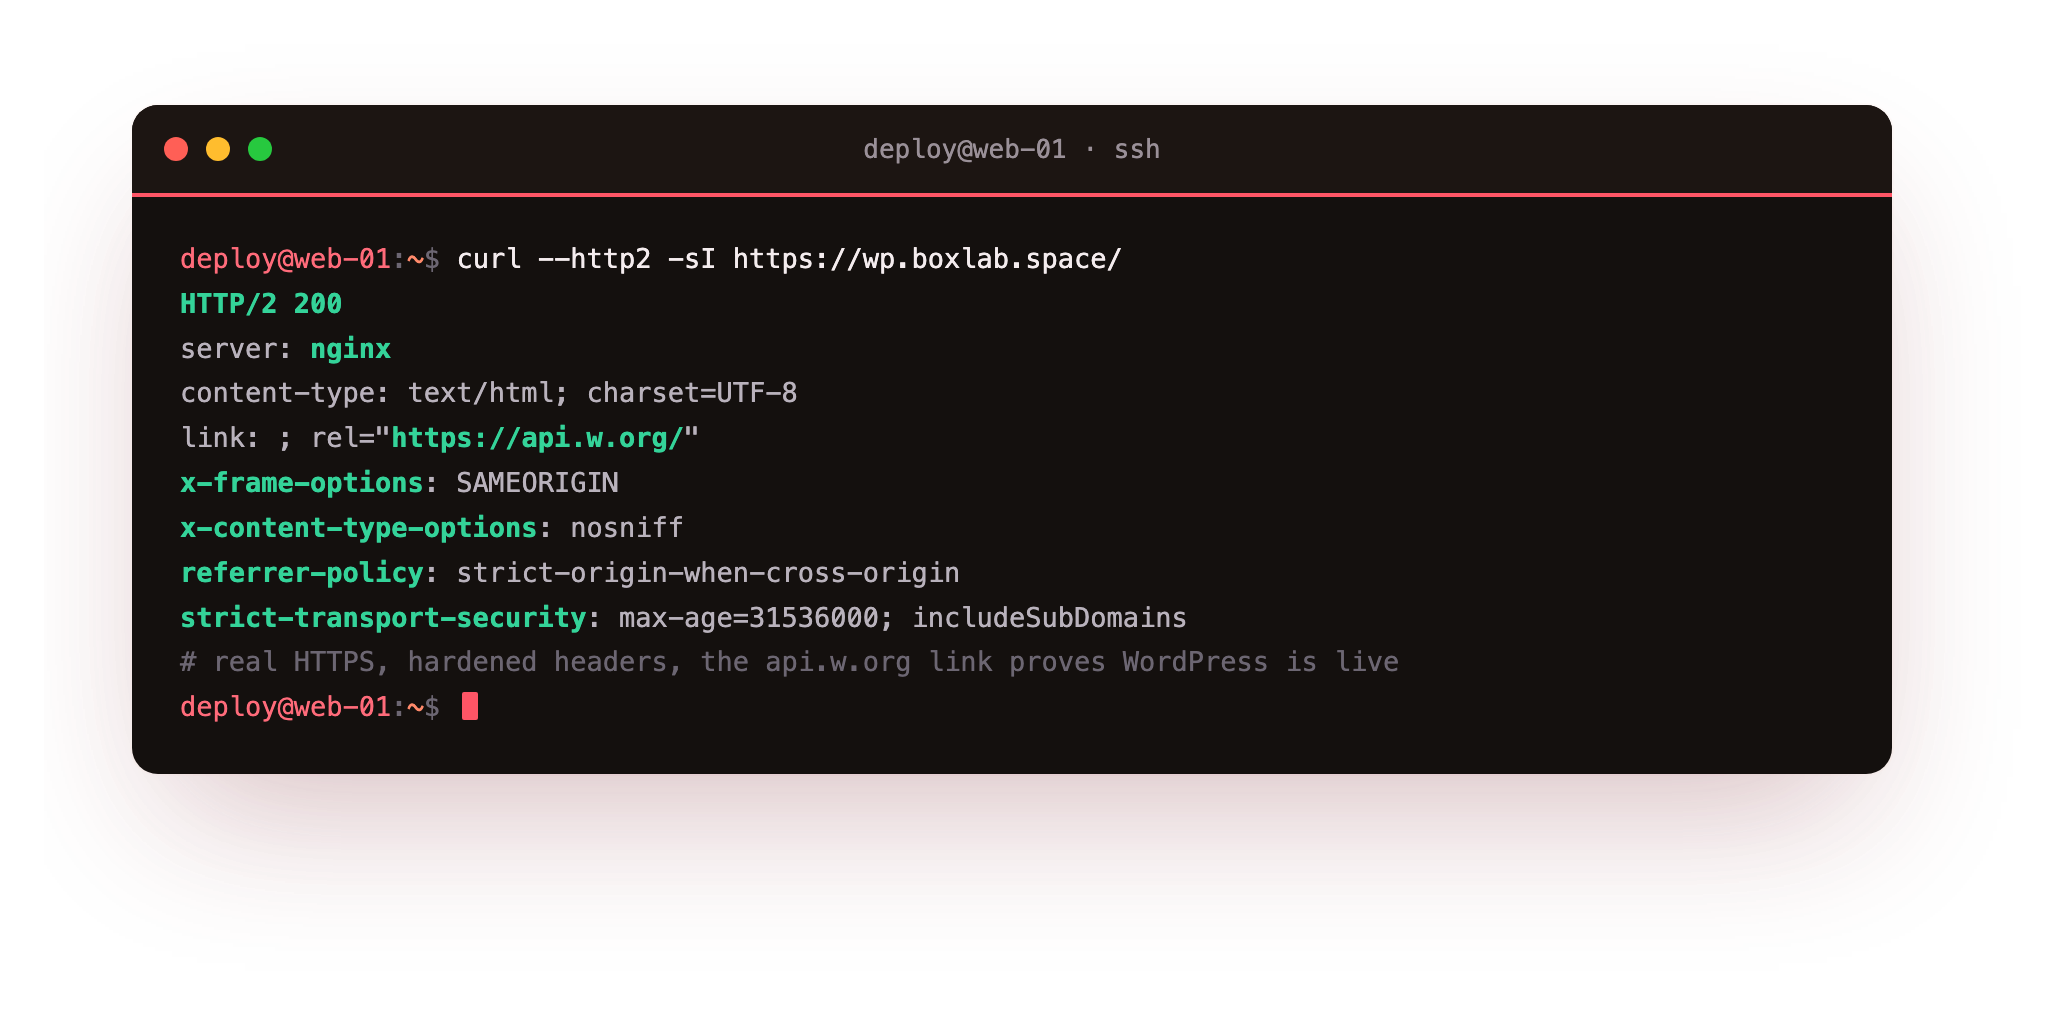
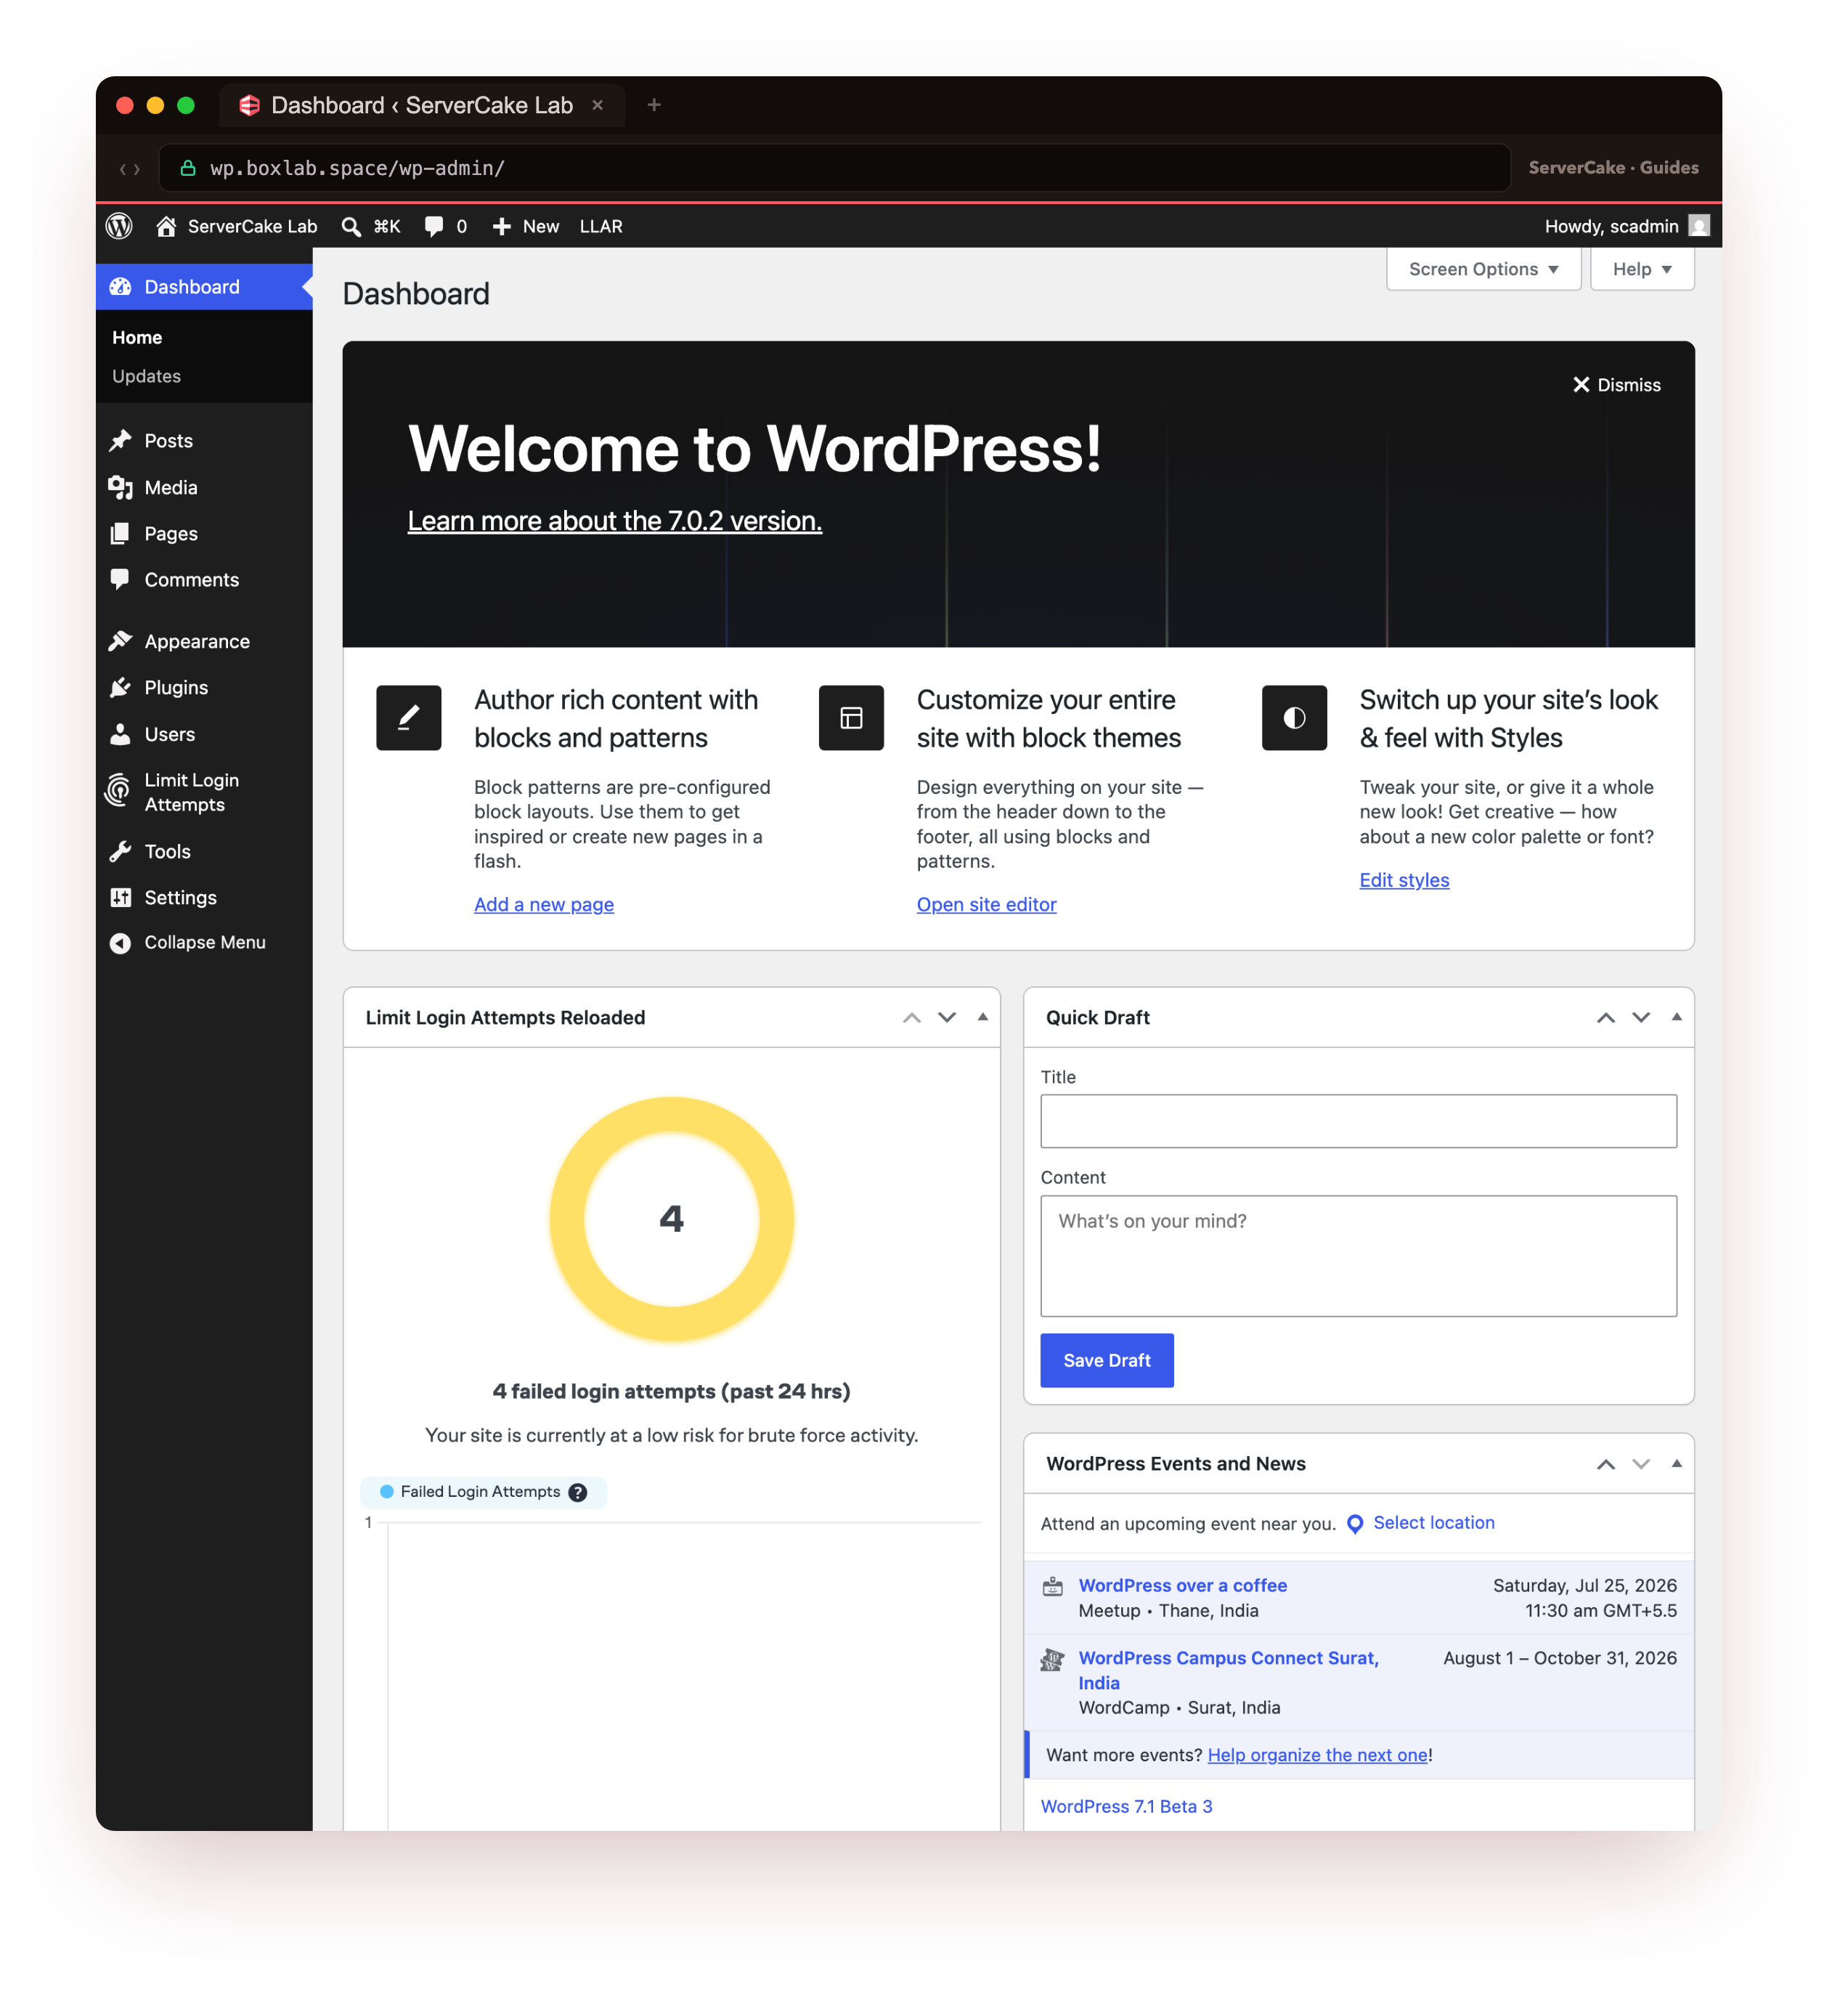
That one response tells you everything is wired correctly: WordPress answering over HTTP/2, the security headers in place, and the api.w.org link header that only a live WordPress emits. And here is the admin dashboard that same install lands you on, real WordPress, real domain, real padlock.
- Installing the LEMP stack (nginx, PHP-FPM, MariaDB) on a fresh Ubuntu 24.04 slice.
- Creating a database and a least-privilege user scoped to WordPress alone.
- Downloading WordPress and wiring
wp-config.phpwith unique security salts. - Pointing your domain at the slice and serving it over a real, valid HTTPS certificate.
- Running the five-minute install, then hardening the site so it stays yours.
Before you begin
This is a do-it-yourself tutorial, so it assumes a little groundwork. None of it is heavy.
- A freshly provisioned Ubuntu 24.04 LTS slice you reach over SSH, with an account cleared for
sudo. A single small slice is plenty for one WordPress site. - A domain name you control, with access to its DNS records. We will point it at the slice.
- The slice's public IP address, which you will use for one DNS record.
- About half an hour, and a willingness to read what each command prints back.
Everything below is run as a normal sudo user over SSH. Where a step needs root, it uses sudo in front, so you never log in as root directly.
Install the LEMP stack
WordPress is PHP, and PHP needs three things in front of and behind it: a web server to accept requests, a PHP runtime to execute the code, and a database to hold the content. On Linux that combination is the LEMP stack, nginx plus PHP-FPM plus MariaDB (the drop-in, fully compatible successor to MySQL). One apt install brings all three.
sudo apt update && sudo apt install -y nginx \
     php-fpm php-mysql mariadb-server
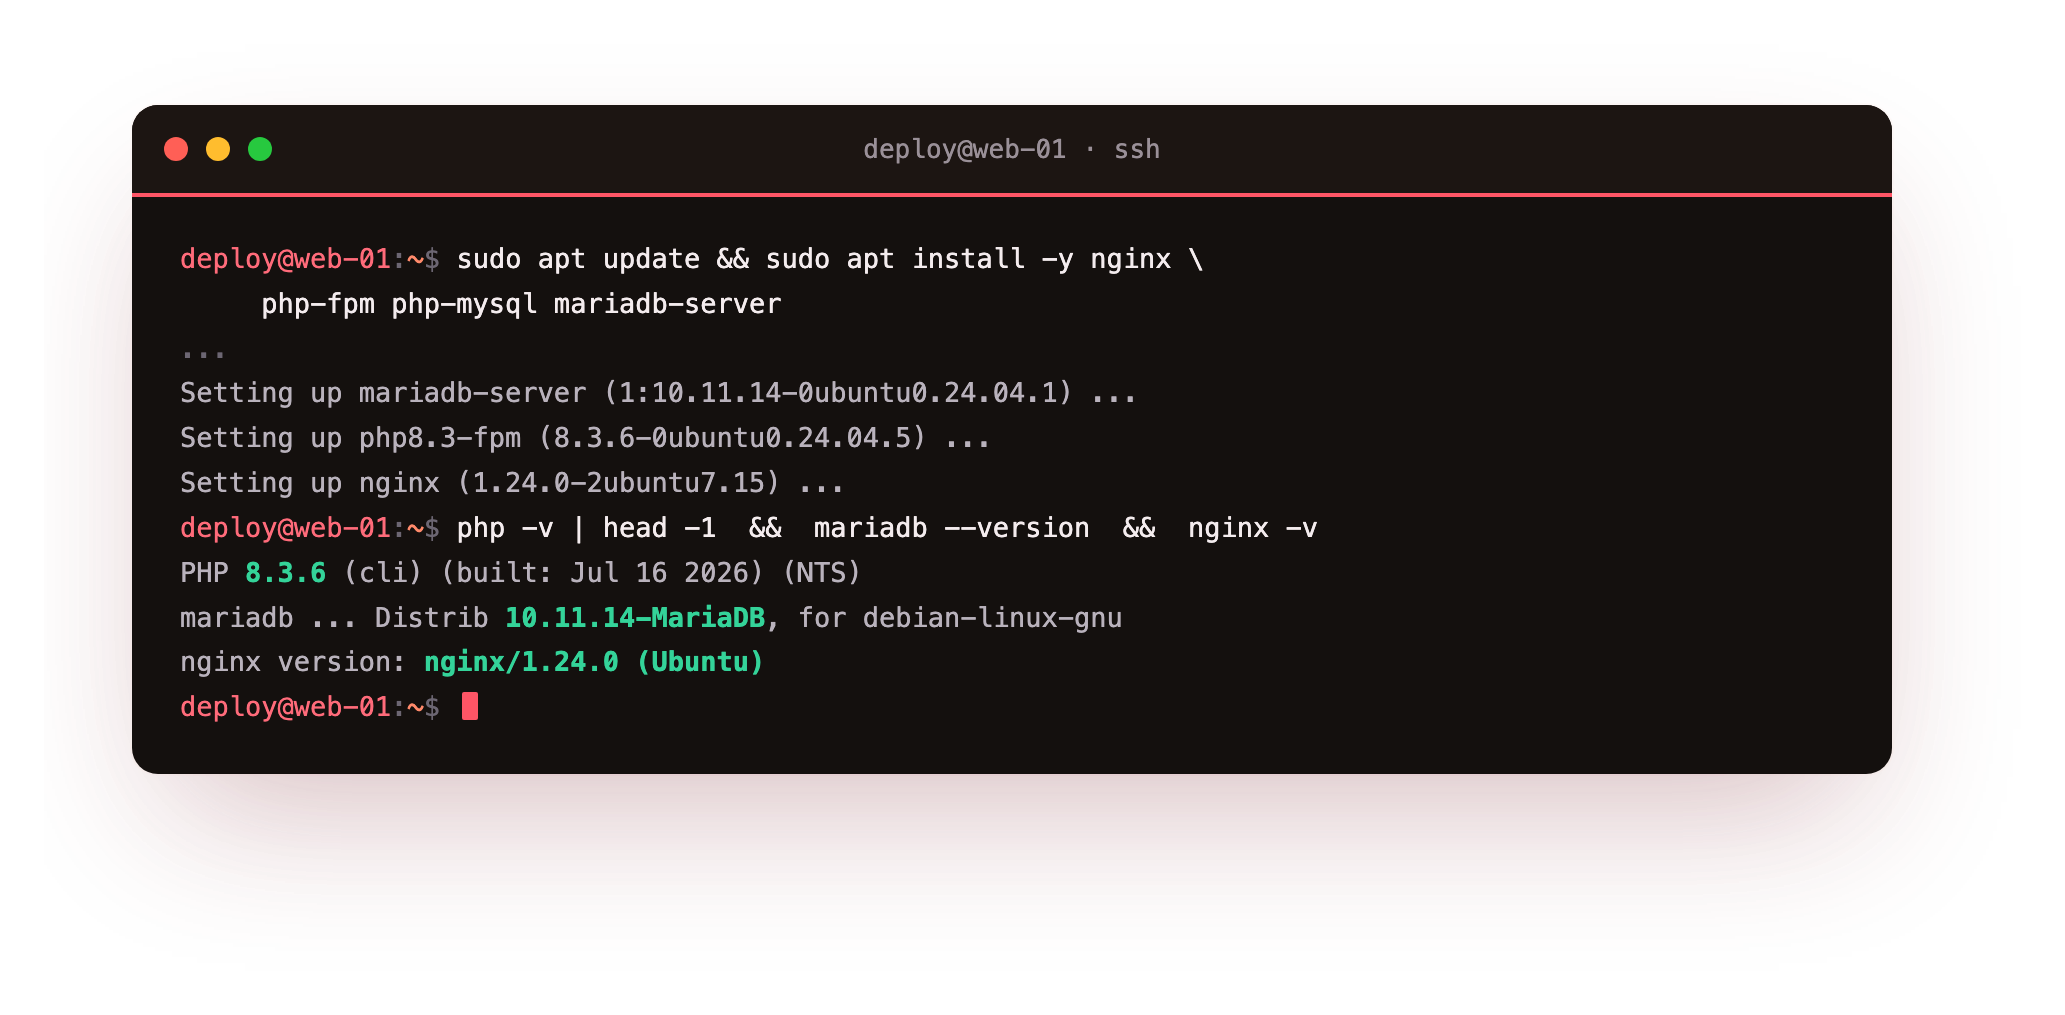
The php-mysql package is the bridge that lets PHP talk to the database. Read the versions back so you know what you are running, rather than trusting the package name alone.
Confirm all three services came up and are set to start on boot.
systemctl is-active nginx php8.3-fpm mariadb
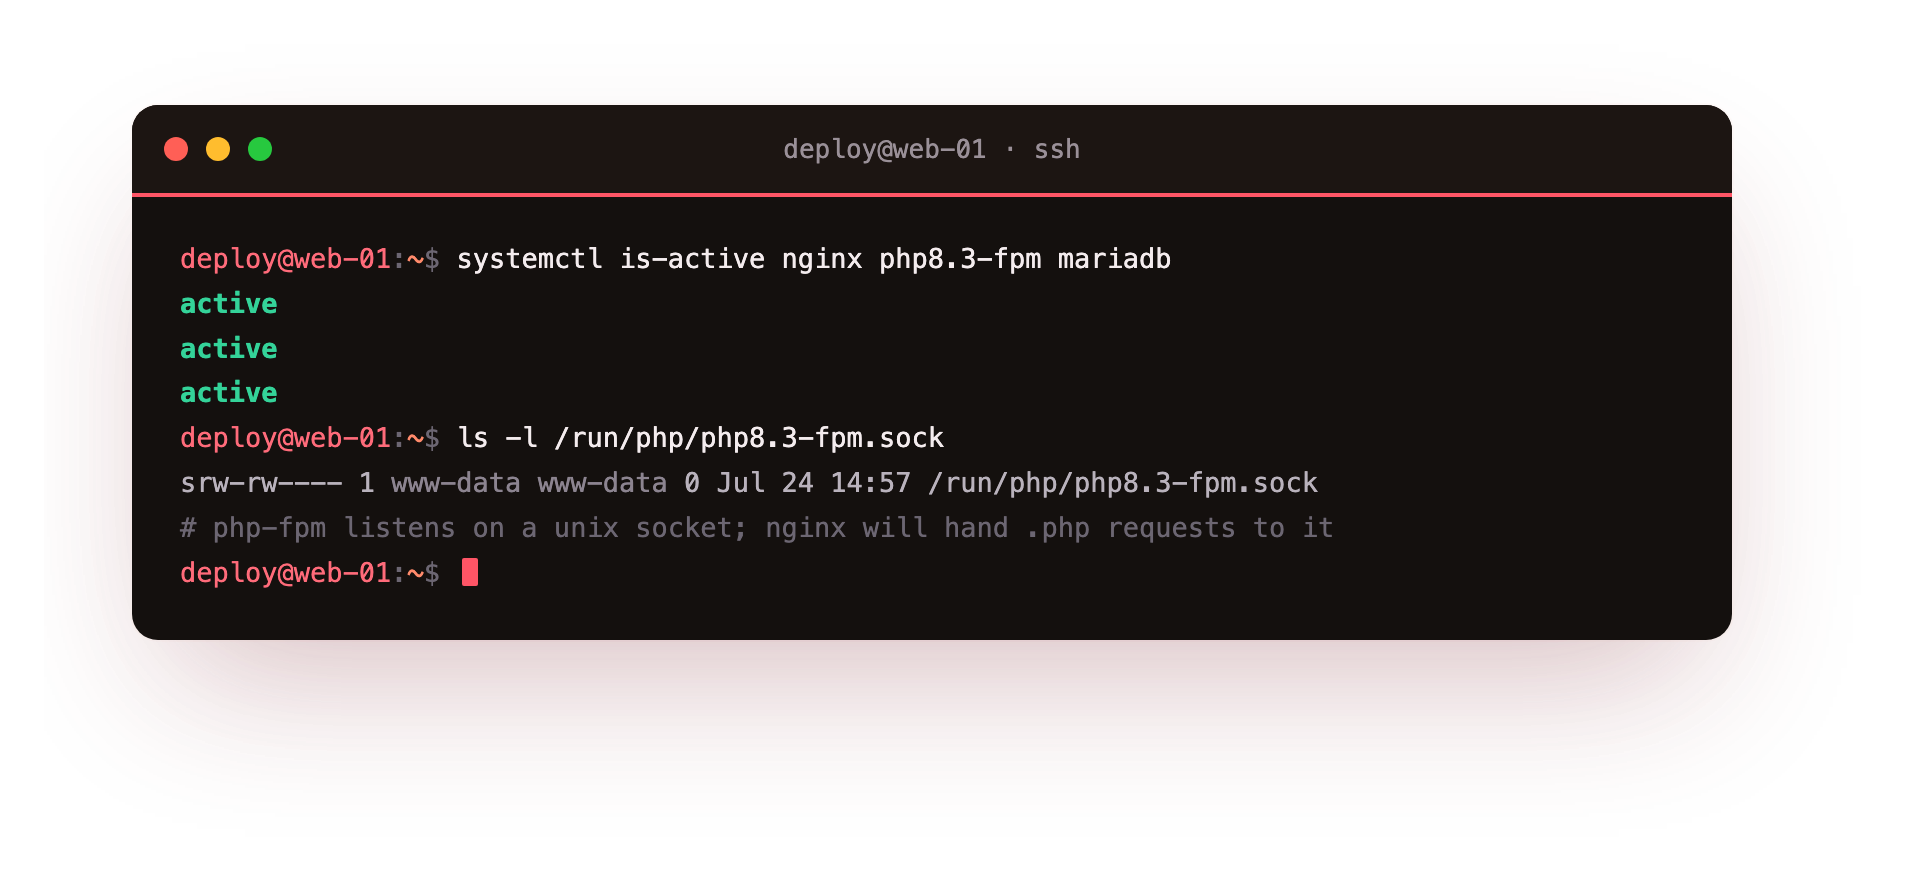
Three lines of active mean the stack is running. The last piece is the socket: PHP-FPM listens on a unix socket under /run/php, and in a moment you will tell nginx to hand every .php request to it there.
WordPress also expects a handful of PHP extensions for image handling, translations, and its dashboard feeds. Install them and restart PHP-FPM so it loads them.
sudo apt install -y php-curl php-gd php-mbstring \
     php-xml php-zip php-intl php-imagick
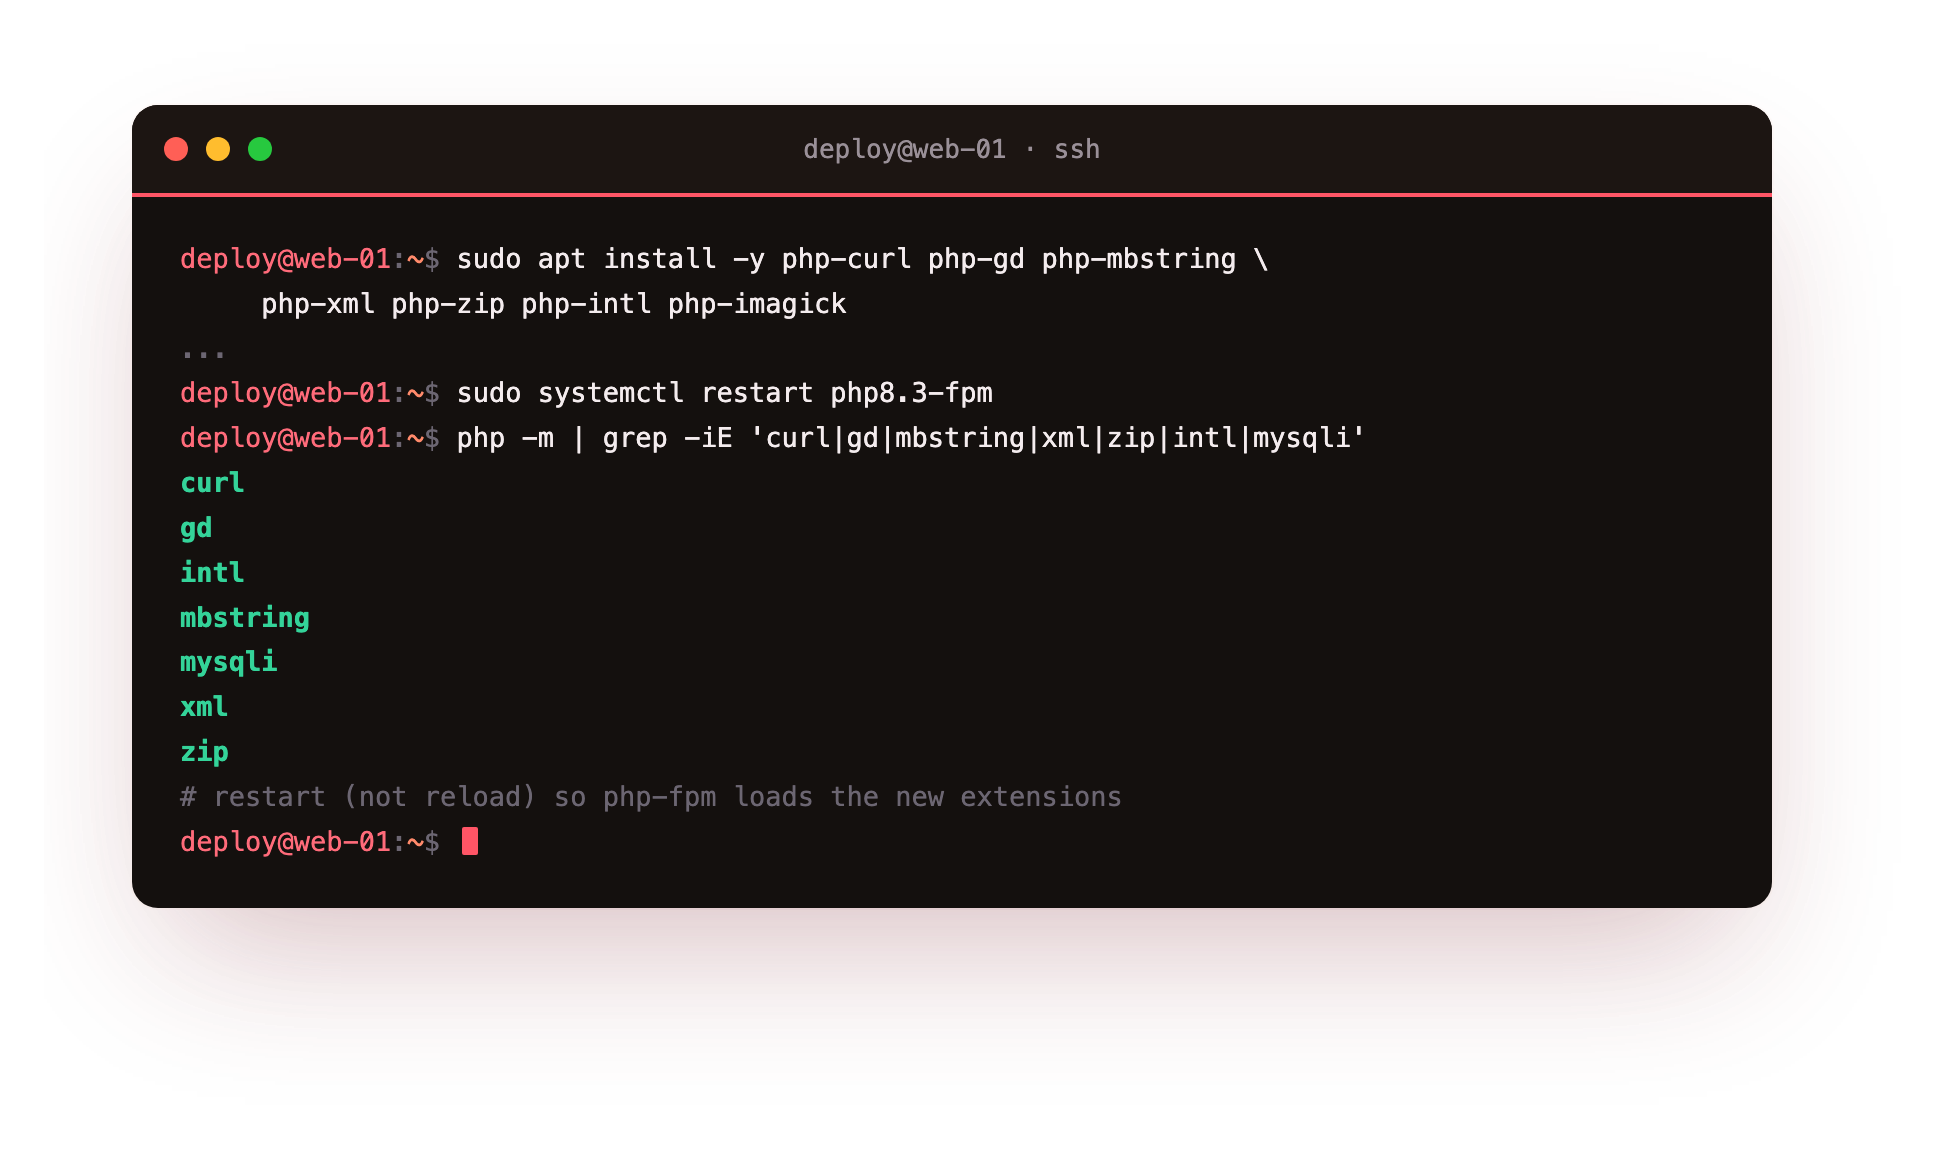
systemctl is-active printed active three times, you are ready to build the database.Secure MariaDB and create the database
A fresh MariaDB install ships with a couple of loose ends: an anonymous account, a throwaway test database, and no policy on the root login. The bundled mysql_secure_installation script closes all of them in one pass. Answer yes to every prompt.
sudo mysql_secure_installation
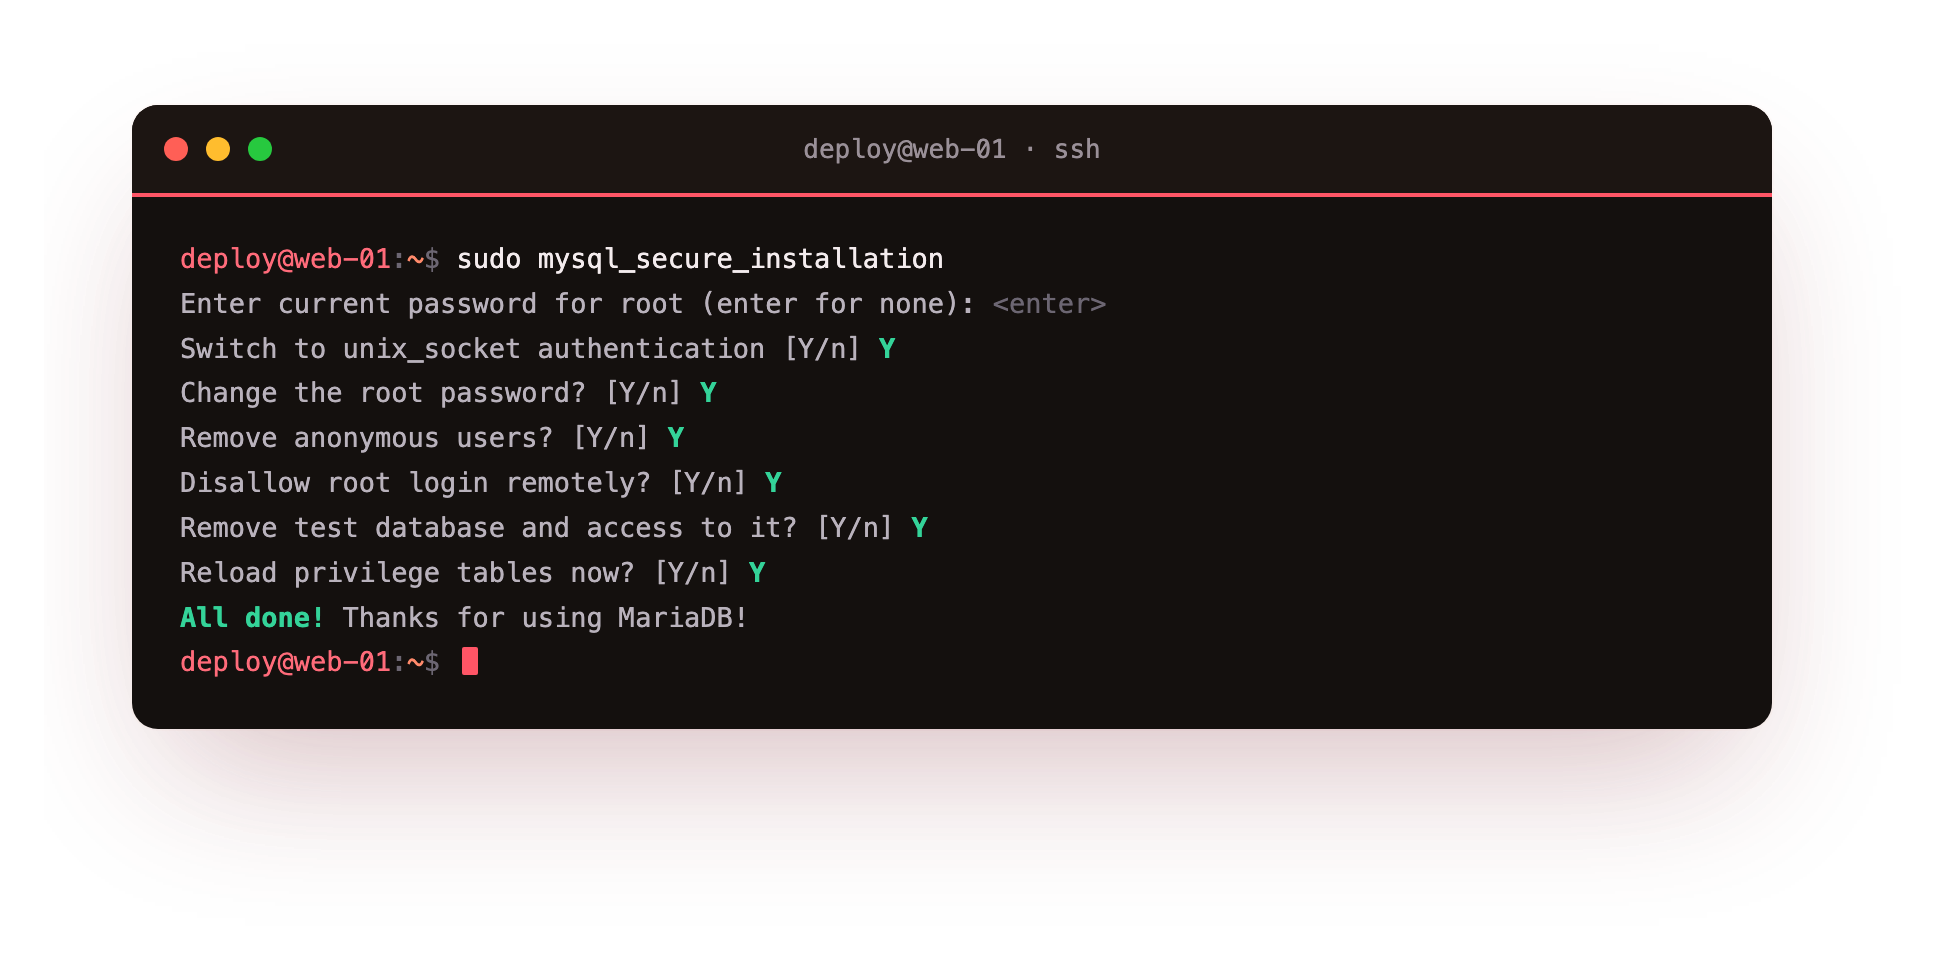
Now create the database WordPress will live in, and a dedicated user that can touch that database and nothing else. This is the single most important database habit: WordPress never needs access to any schema but its own, so its user is granted rights on wordpress.* only, never on *.*. If the site is ever compromised, the blast radius stops at this one database.
sudo mariadb
CREATE DATABASE wordpress
  CHARACTER SET utf8mb4 COLLATE utf8mb4_unicode_ci;
CREATE USER 'wpuser'@'localhost'
  IDENTIFIED BY '<your-strong-db-password>';
GRANT ALL PRIVILEGES ON wordpress.*
  TO 'wpuser'@'localhost';
FLUSH PRIVILEGES;
EXIT;
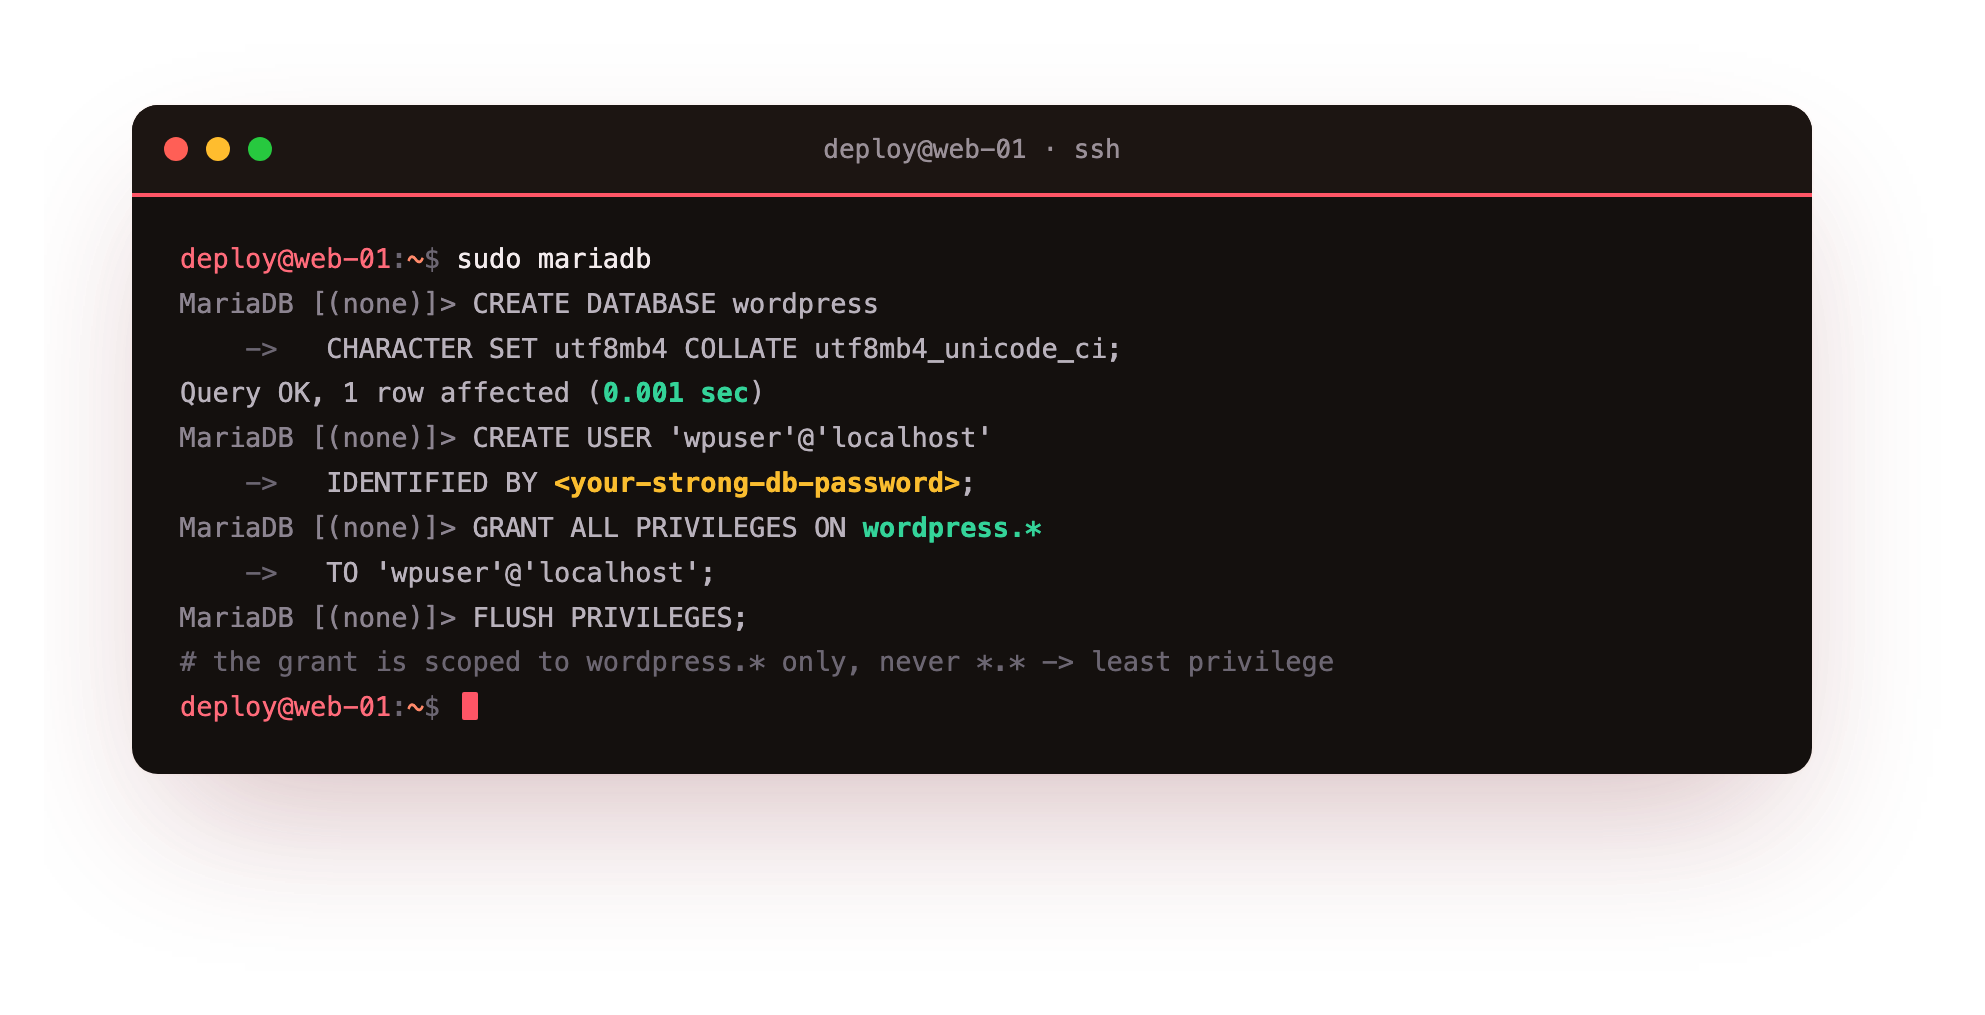
Pick a long, random password for wpuser and keep it somewhere safe. You will paste it into wp-config.php in the next step and never type it again. utf8mb4 is not optional in 2026: it is the character set that lets your posts hold emoji and every language correctly.
wordpress database and a wpuser account whose reach is limited to it. Nothing has been served yet; that is next.Install WordPress on a VPS
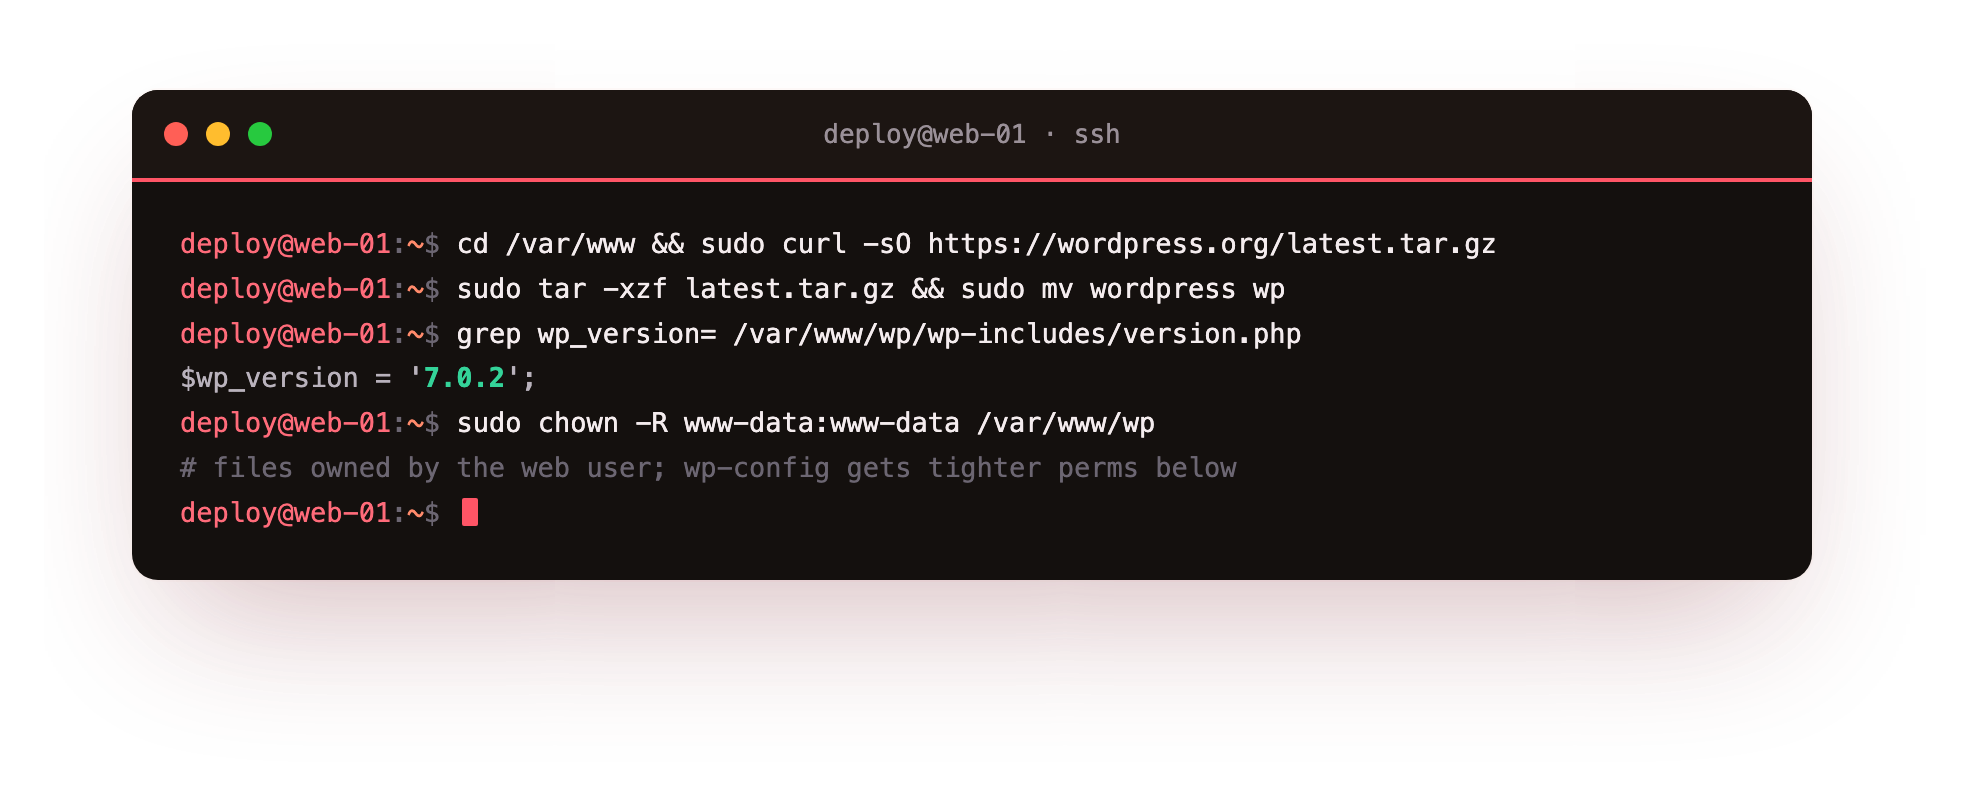
Download the current WordPress release straight from source, unpack it into the web root, and give the files to the web server user so PHP-FPM can read and write them.
cd /var/www
sudo curl -sO https://wordpress.org/latest.tar.gz
sudo tar -xzf latest.tar.gz && sudo mv wordpress wp
sudo chown -R www-data:www-data /var/www/wp
WordPress ships an example config. Copy it, then edit the four database lines to match the database and user you just created.
cd /var/www/wp
sudo -u www-data cp wp-config-sample.php wp-config.php
sudo -u www-data nano wp-config.php
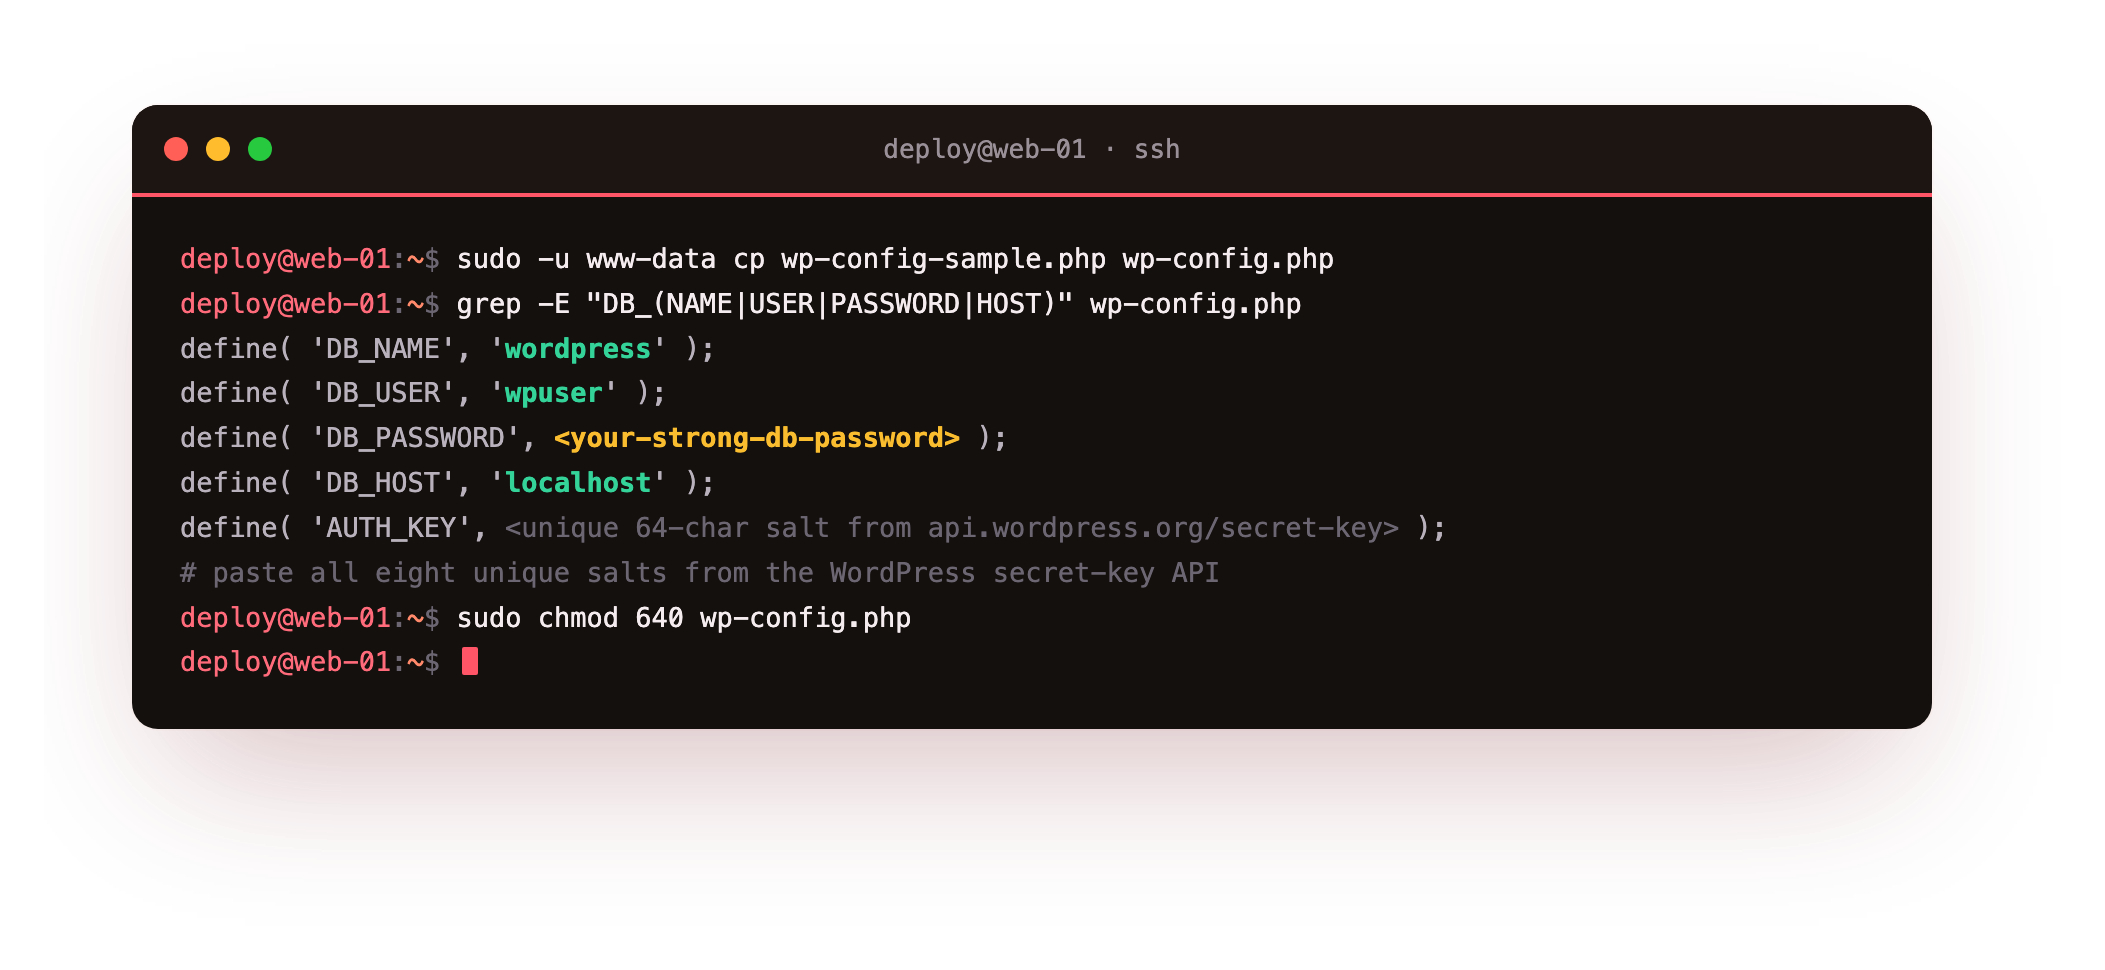
Set DB_NAME to wordpress, DB_USER to wpuser, DB_PASSWORD to the password you chose, and leave DB_HOST as localhost. Then replace the block of eight authentication keys and salts. Do not invent them by hand: WordPress runs a generator that prints a fresh, unique set every time you load it, at https://api.wordpress.org/secret-key/1.1/salt/. Copy its output over the placeholder lines. These salts are what keep your login cookies from being forged, so unique values matter.
Finally, tighten the permissions on the config file itself. It holds your database password, so only the web server user should be able to read it.
sudo chmod 640 wp-config.php
Point your domain and turn on real HTTPS
WordPress is on the slice, but nothing answers your domain yet. Two things fix that: a DNS record that sends the domain to your slice, and an nginx server block that serves WordPress over HTTPS.
First, in your domain's DNS, add an A record for the hostname you want (the bare domain, or a subdomain like www) pointing at your slice's public IP. Give it a few minutes to propagate.
Next, create the nginx server block. This is the whole configuration for the site: it listens on 443 for HTTPS, redirects plain HTTP up to HTTPS, points at the WordPress files, hands .php requests to PHP-FPM over its socket, and refuses to serve the files an attacker would go looking for.
# /etc/nginx/sites-available/your-domain
server {
    listen 80;
    server_name your-domain;
    return 301 https://$host$request_uri;
}

server {
    listen 443 ssl http2;
    server_name your-domain;
    root /var/www/wp;
    index index.php;

    ssl_certificate     /etc/letsencrypt/live/your-domain/fullchain.pem;
    ssl_certificate_key /etc/letsencrypt/live/your-domain/privkey.pem;

    add_header X-Frame-Options "SAMEORIGIN" always;
    add_header X-Content-Type-Options "nosniff" always;
    add_header Referrer-Policy "strict-origin-when-cross-origin" always;
    add_header Strict-Transport-Security "max-age=31536000; includeSubDomains" always;
    client_max_body_size 64m;

    # Never serve the config, dotfiles, or PHP smuggled into uploads
    location = /wp-config.php { deny all; }
    location ~ /\.(?!well-known) { deny all; }
    location ~* ^/wp-content/uploads/.*\.php$ { deny all; }

    location / { try_files $uri $uri/ /index.php?$args; }

    location ~ \.php$ {
        include snippets/fastcgi-php.conf;
        fastcgi_pass unix:/run/php/php8.3-fpm.sock;
    }
}
The certificate paths above assume you already have a certificate. If you do not, the standard way to get one free is Let's Encrypt via Certbot: sudo apt install -y certbot python3-certbot-nginx, then sudo certbot --nginx -d your-domain. Certbot obtains the certificate, writes those two ssl_certificate lines for you, and sets up automatic renewal. Enable the site, test the config, and reload.
sudo ln -s /etc/nginx/sites-available/your-domain \
     /etc/nginx/sites-enabled/
sudo nginx -t
sudo systemctl reload nginx
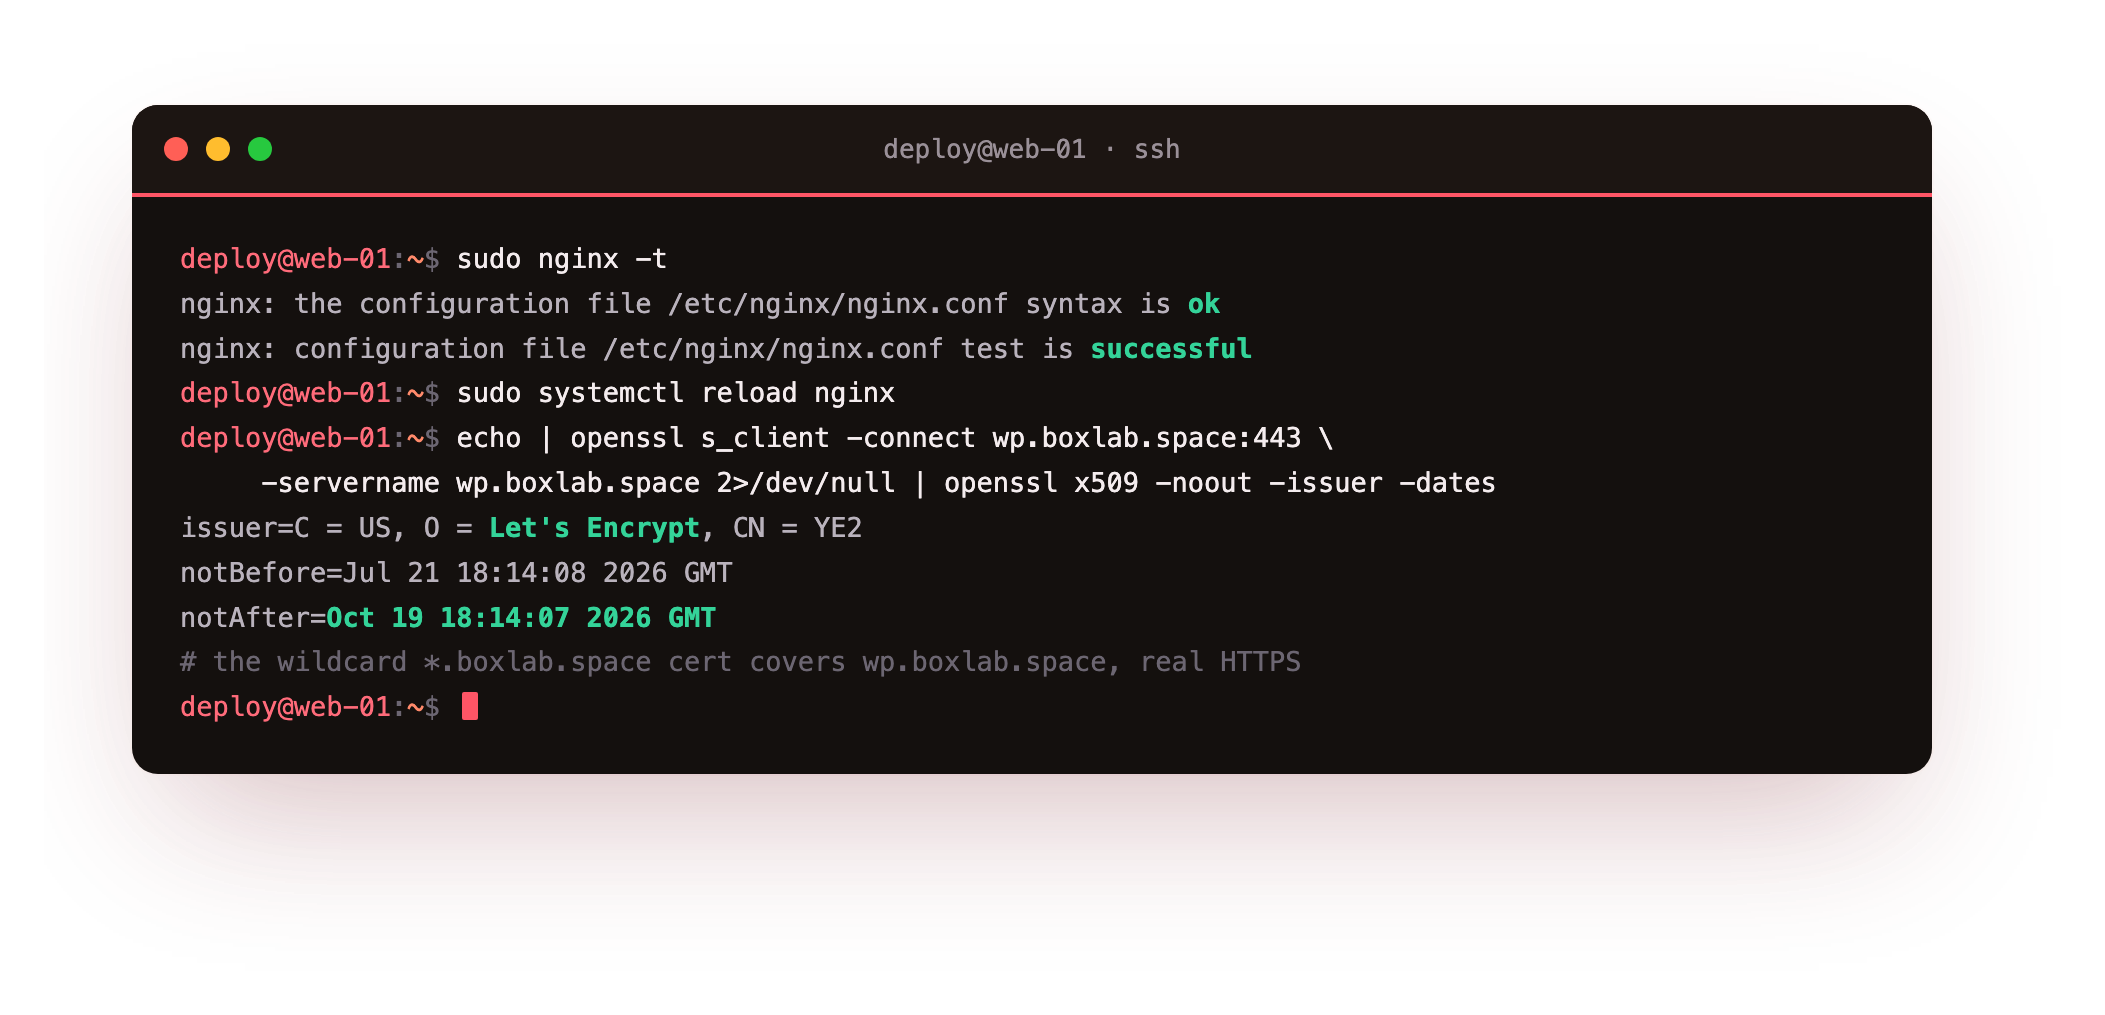
A test is successful from nginx -t is the gate: nginx will not reload a broken config, so never skip it. With the certificate in place, the padlock is real, issued by a public authority and trusted by every browser.
Confirm the domain now answers, and that plain HTTP is pushed up to HTTPS.
curl -sI http://your-domain/
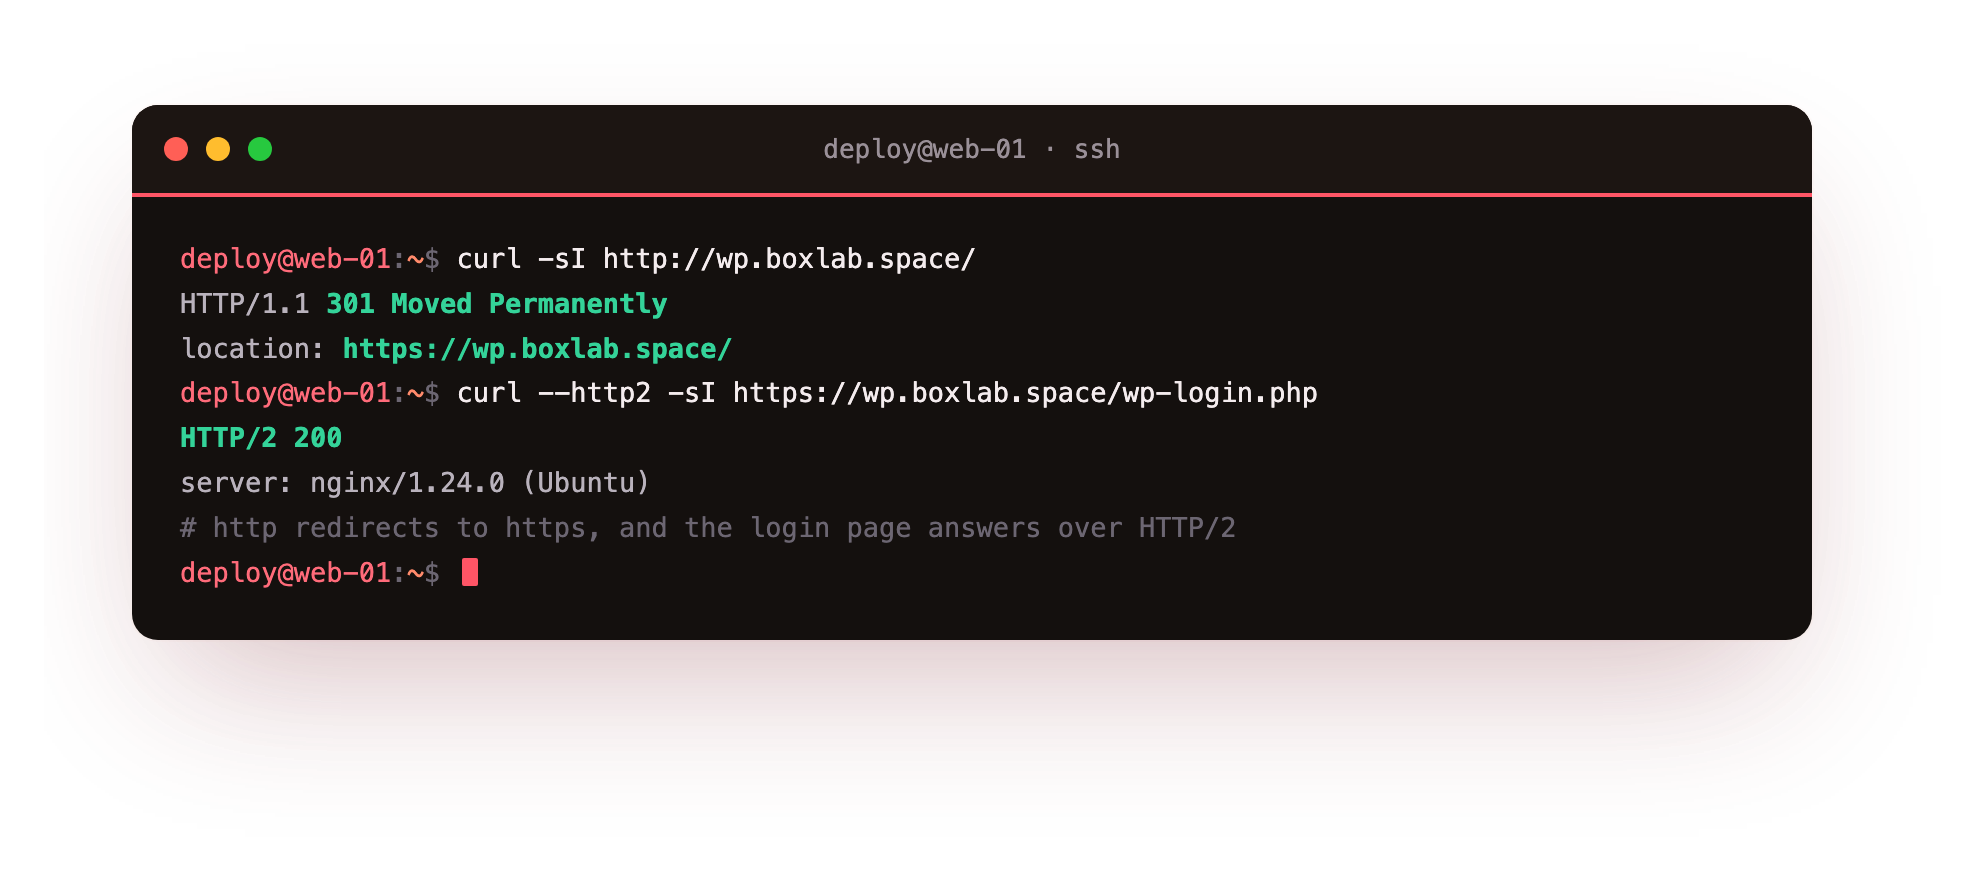
You should see a 301 to the https:// address, and the login page answering with 200 over HTTP/2. That is your live site, served over a real certificate.
First load: the install wizard and your dashboard
Now the fun part. Open your site's admin URL in a browser.
curl -sI https://your-domain/wp-admin/install.php
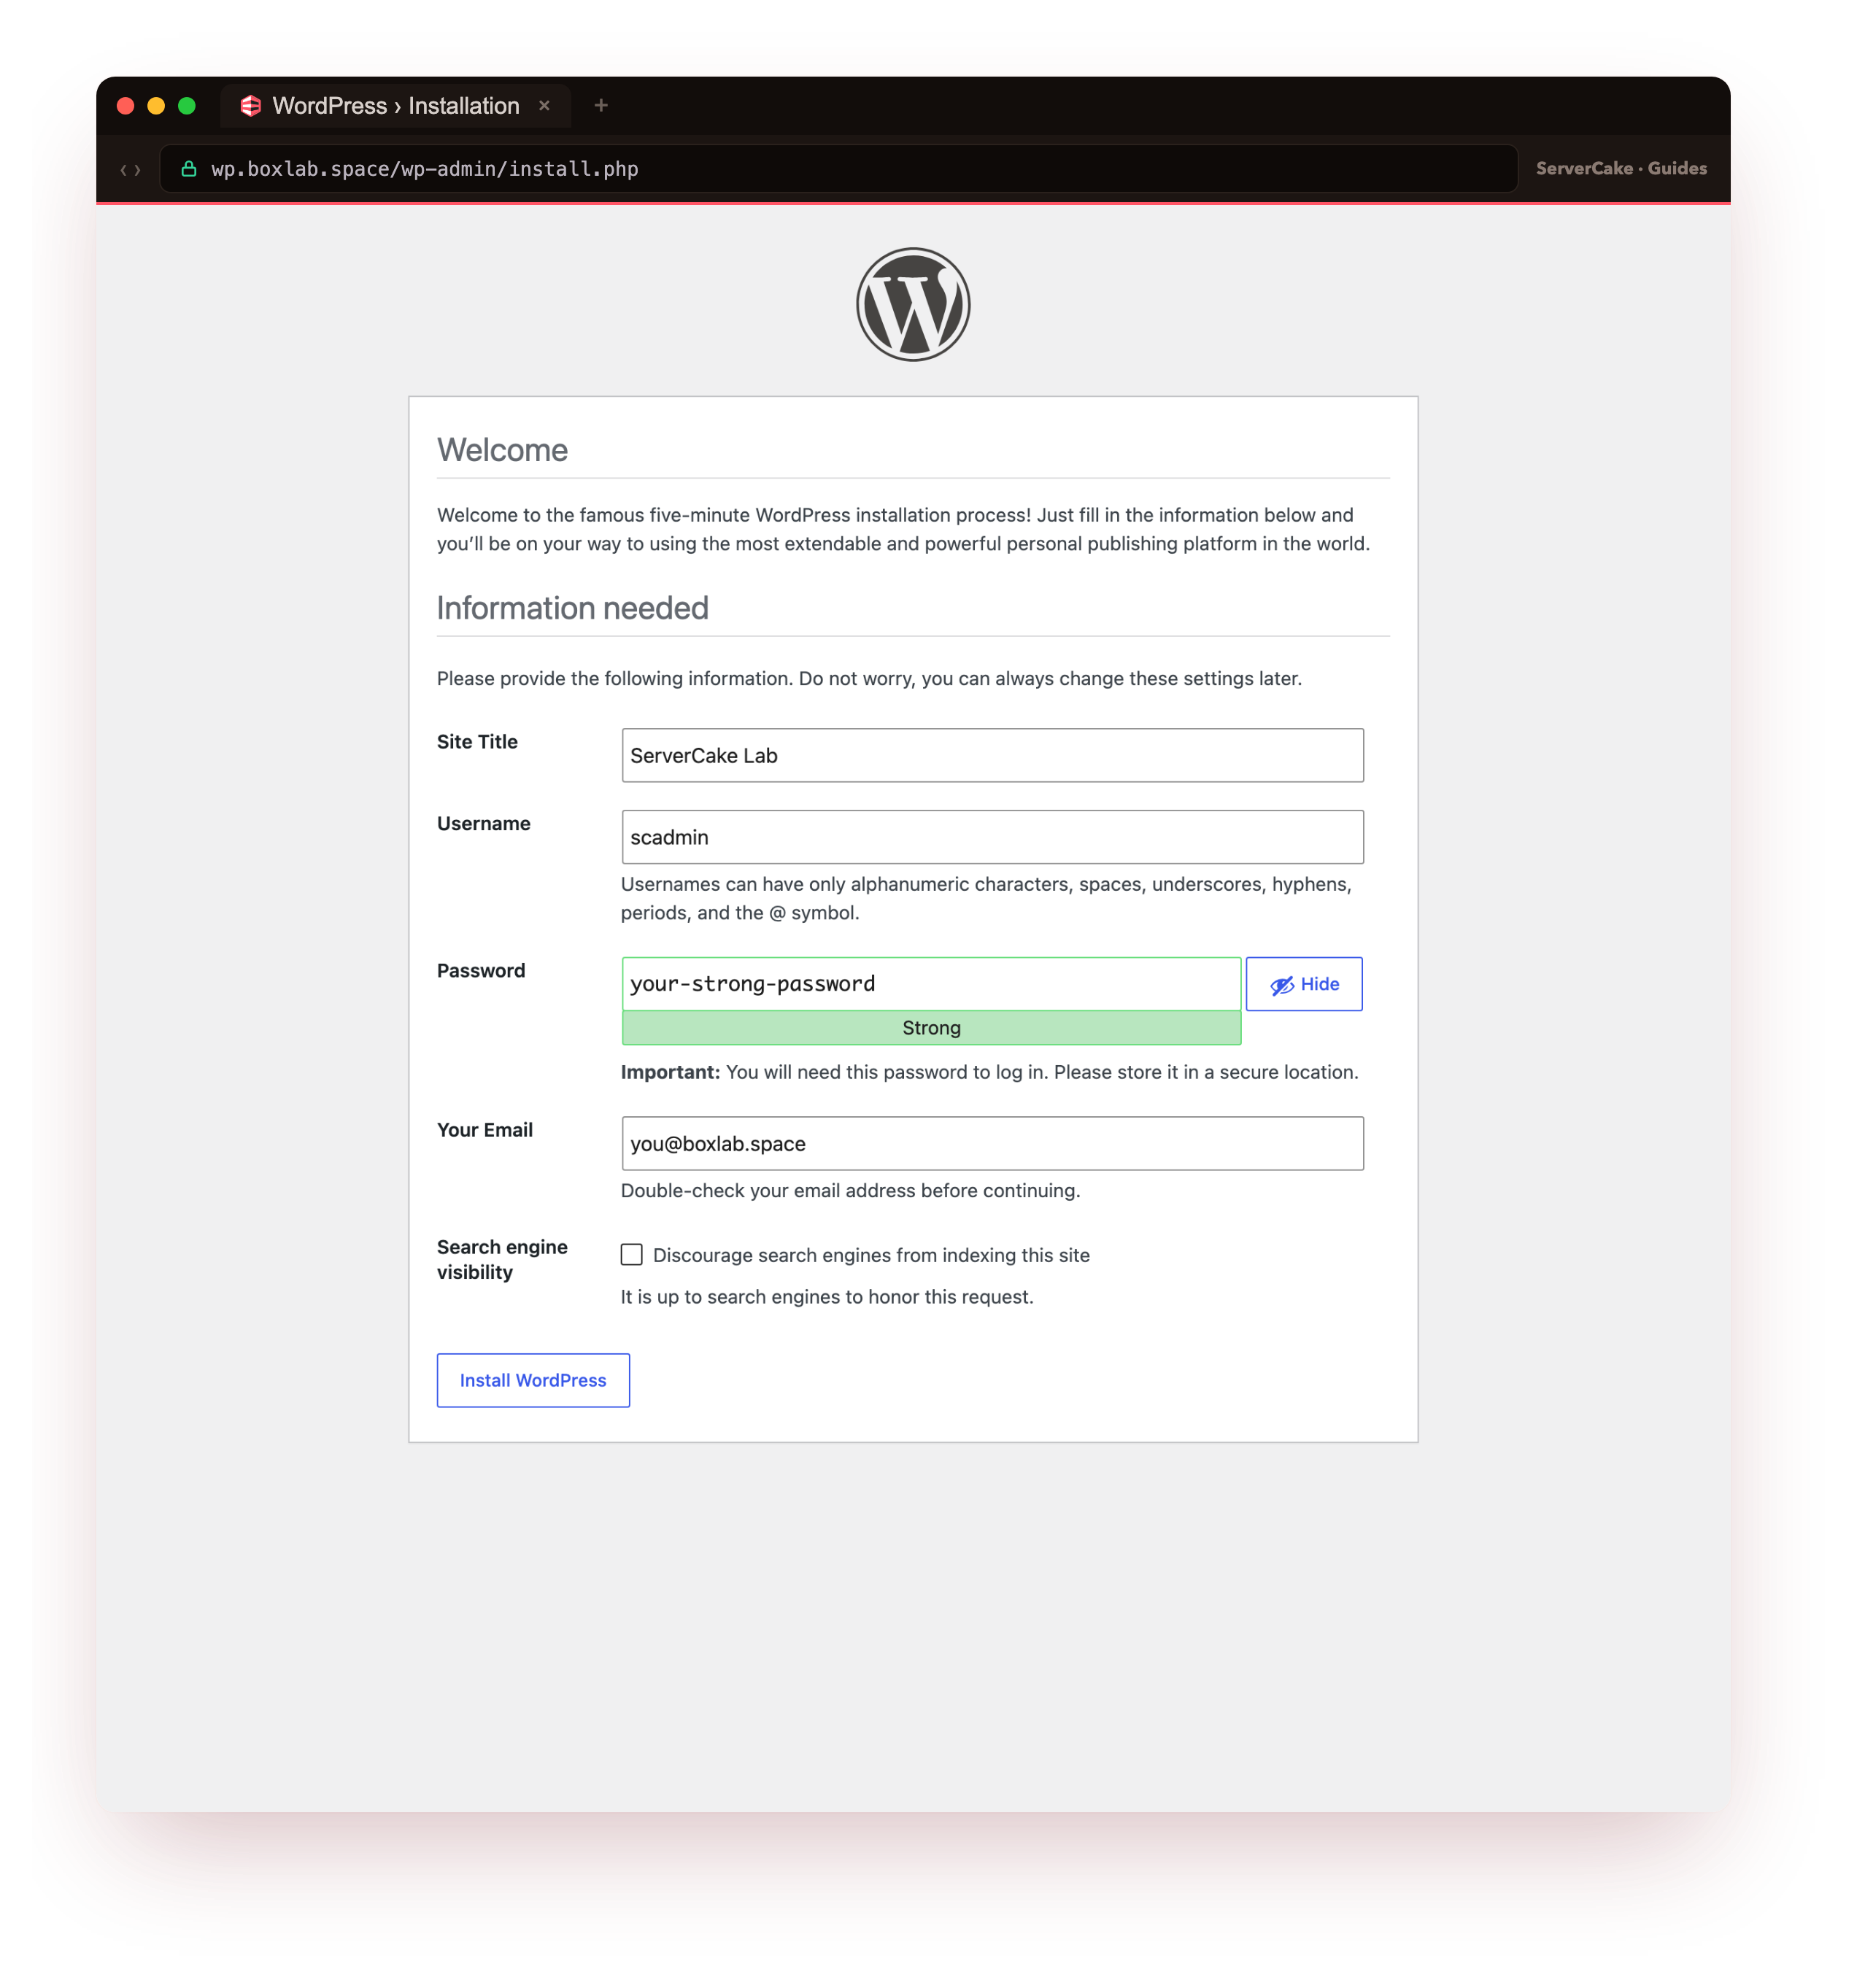
WordPress detects that the database is empty and shows the famous five-minute install wizard. Fill in a site title, choose an admin username that is not admin, let WordPress generate a strong password (and save it), add your email, and submit.
The moment you finish, WordPress writes its tables into the database and drops you at the dashboard, the same one shown at the top of this tutorial. Now load the bare domain to see the site a visitor sees, running the default Twenty Twenty-Five theme over your own certificate.
# the public front page a visitor sees
curl -sI https://your-domain/
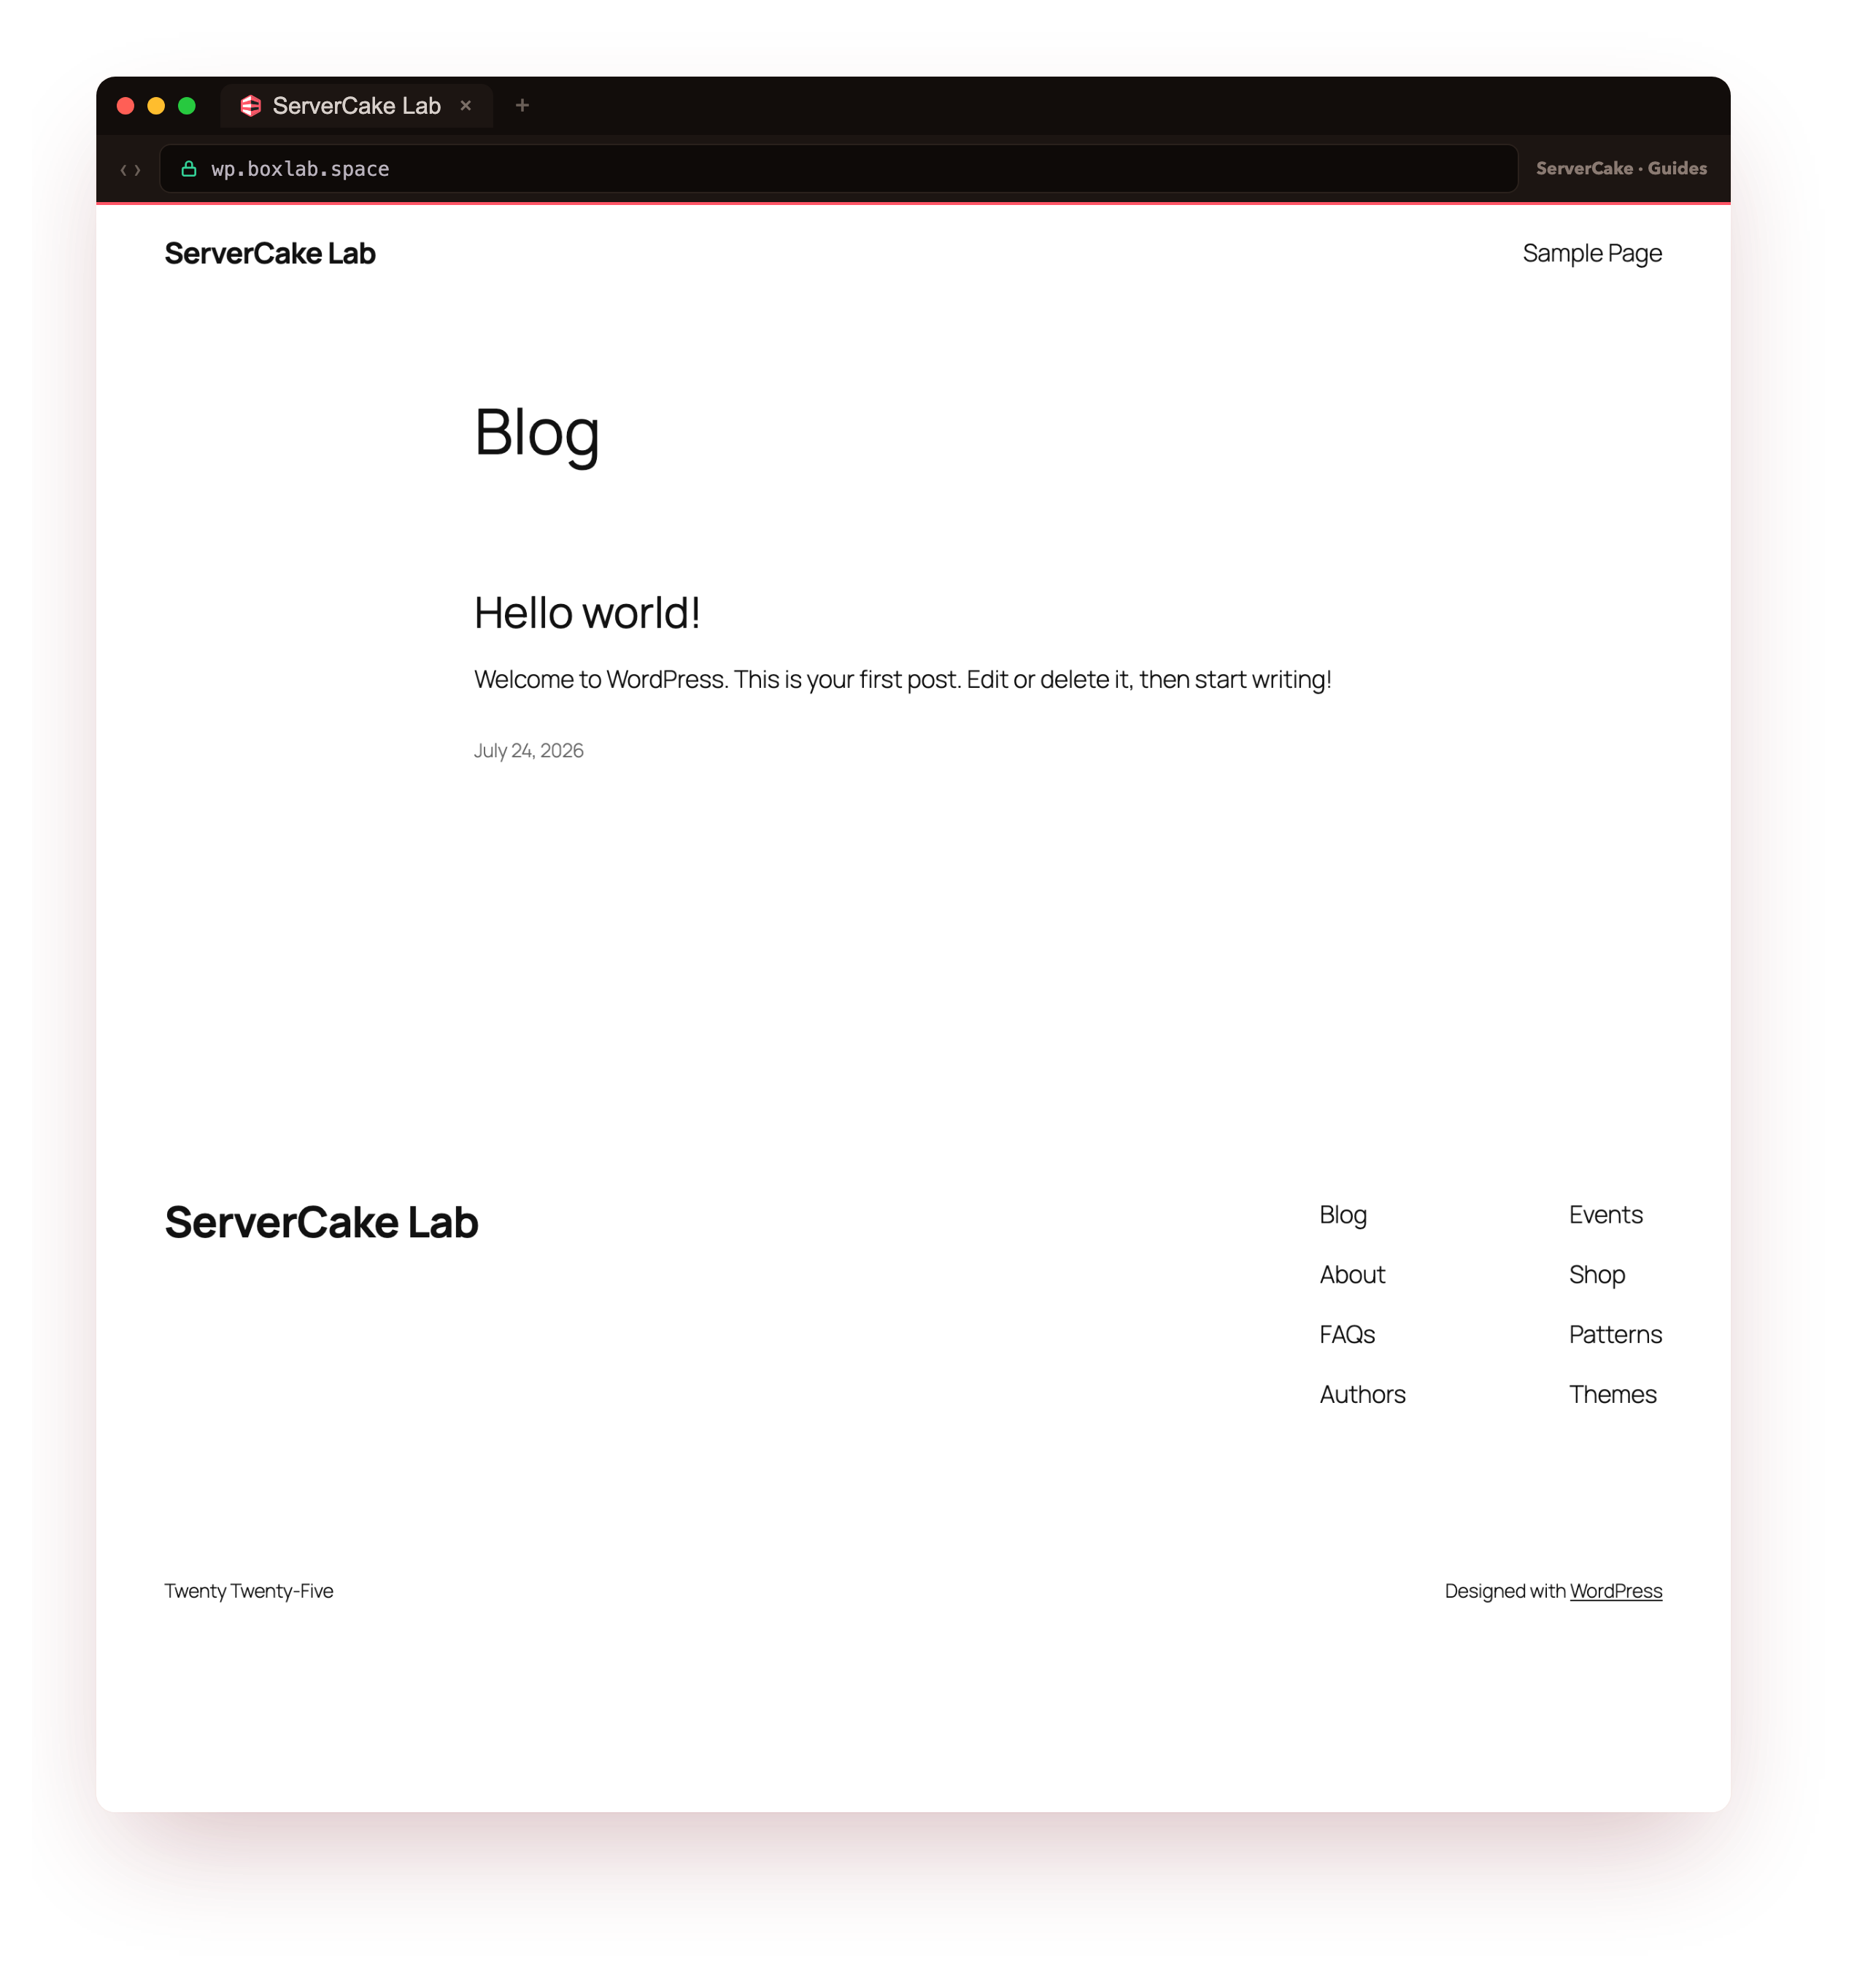
A 200 over HTTP/2, the WordPress link header, and the themed front page in a browser mean the install is complete. You now have a real WordPress site, front end and admin, both over HTTPS.
/wp-admin/ and your public site at the domain, both over HTTPS with a valid padlock. If the wizard cannot connect to the database, re-check the four DB_ lines in wp-config.php against the user you created.Harden your WordPress install
A default WordPress install is not insecure, but a few minutes of hardening removes the easy wins an attacker looks for. The nginx server block above already did most of the work: it refuses to serve wp-config.php, blocks any PHP file smuggled into the uploads folder, and sends security headers on every response. Two more habits finish the job.
Turn off the built-in theme and plugin file editor, so a stolen admin session cannot rewrite your site's PHP from the browser. Add one line to wp-config.php:
define( 'DISALLOW_FILE_EDIT', true );
Then install a login limiter so brute-force attempts against wp-login.php get throttled instead of running forever. From the dashboard, Plugins then Add New, search for Limit Login Attempts Reloaded, install and activate. That is it. Now verify the hardening actually holds, rather than assuming it does.
sudo -u www-data wp config get DISALLOW_FILE_EDIT
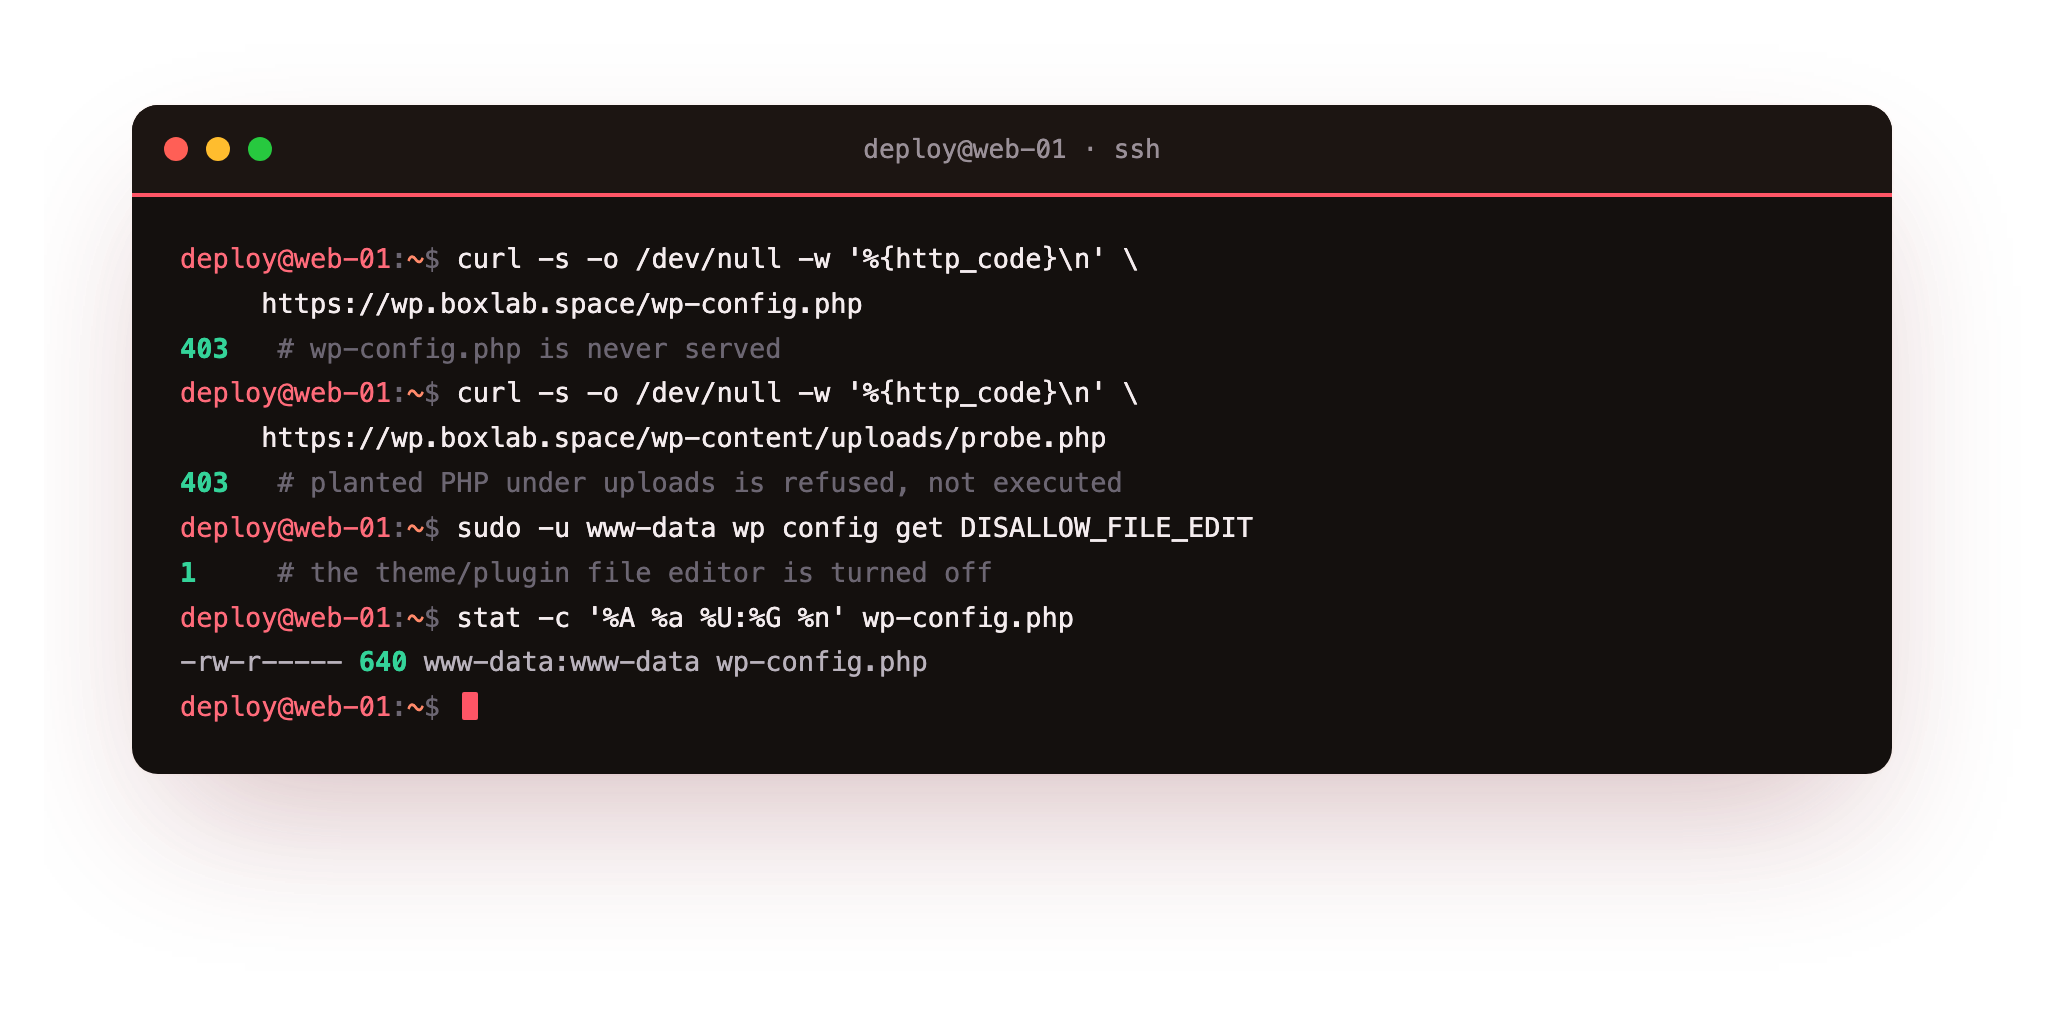
A 403 on wp-config.php, a 403 on a planted PHP file under uploads, and a 1 back from DISALLOW_FILE_EDIT mean the locks are on. The permissions readout confirms the config file is readable only by the web user. Keep files at 644, directories at 755, and wp-config.php at 640, and never loosen them to 777 to "fix" an upload problem, because that is how sites get taken over.
Keep it running and updated
WordPress ships security fixes often, and an unpatched site is the one that gets hit. WordPress already applies minor core updates automatically. Turn on automatic updates for plugins and themes too, so the whole site stays current without you watching it.
sudo -u www-data wp plugin auto-updates enable --all
sudo -u www-data wp theme auto-updates enable --all
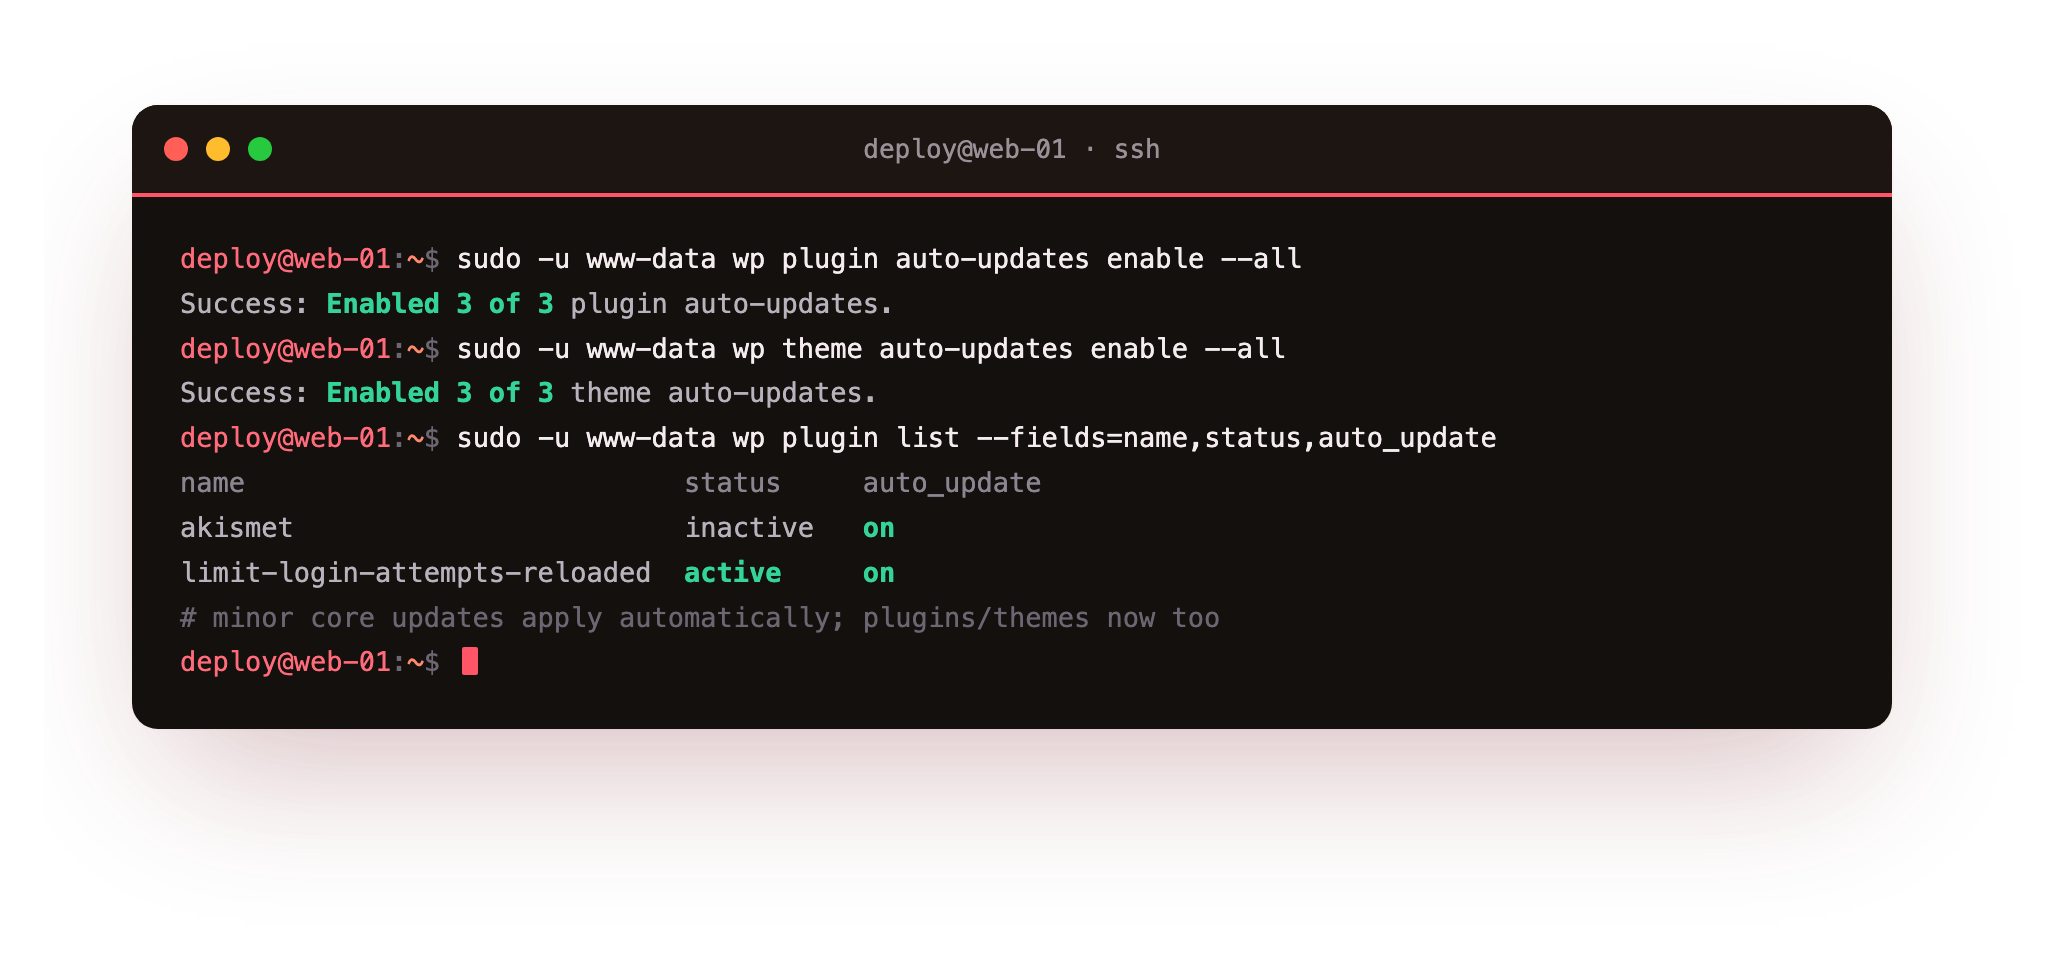
Two more habits keep a WordPress site healthy for years. Take regular backups of both the files and the database, and store them somewhere off the slice, because a backup that lives on the same machine is not a backup. And review your plugins now and then: every plugin is code running on your server, so keep only the ones you use, and prefer ones that are actively maintained.
That is a complete, hand-built WordPress install: the LEMP stack, a least-privilege database, your domain over real HTTPS, and the site hardened and set to keep itself updated. You built every layer, so you can fix every layer.
Frequently asked questions
How big a VPS do I need to run WordPress?
A single small slice with 1 GB of RAM comfortably runs one WordPress site with light to moderate traffic, which is why this tutorial targets exactly that. WordPress itself is not heavy; what grows are plugins, media, and traffic. Start small, watch memory and response times, and resize the slice up only when the numbers say so. Vertical headroom is one command away on a VPS, so there is no reason to over-provision on day one.Should I use nginx or Apache for WordPress?
Either serves WordPress well, and this tutorial uses nginx with PHP-FPM (the LEMP stack) because it holds memory better under concurrency and gives you explicit control over which paths are served. Apache with mod_php is friendlier to.htaccess-based plugins but carries more per-request overhead. On a small slice where memory is the constraint, nginx plus PHP-FPM is the choice that scales further before you have to think about it.
Why create a dedicated database user instead of using root?
Least privilege. Thewpuser account is granted rights on the wordpress database only, so if WordPress or a plugin is ever exploited, the attacker cannot reach any other database, cannot create users, and cannot touch the server's MariaDB internals. The root account can do all of that, which is exactly why WordPress should never hold its credentials. Scoping the user to one database is a two-line habit that limits the damage of a bad day.
Do I have to install WordPress manually, or can I use a one-click installer?
You can absolutely use a one-click installer, and many hosts offer one. Installing WordPress on a VPS by hand, as this tutorial does, is worth doing at least once because it teaches you where every piece lives: the web server config, the PHP socket, the database user, the file permissions. When something breaks later, and on a long-lived site something eventually does, that knowledge is the difference between a five-minute fix and a support ticket.Running WordPress on your own slice means you own the whole stack: the performance, the security posture, and the bill, with no per-site markup and no black box. When you are ready to put this live, a ServerCake slice gives you a clean Ubuntu 24.04 box in India, billed in rupees with GST, ready for exactly the steps above.