The backups nobody has ever restored
A restic restore test is what turns a backup into a recovery you can rely on: you restore a snapshot to a clean location and confirm the data comes back exactly as it went in. It is the one check most backup setups never do.
- A restore test is the only check that proves a backup can recover; running nightly and reporting success proves nothing on its own.
- Restore to a clean, separate target, never over your live data, then verify the files and their sizes match what went in.
- Single-file restore with --include is the common case; restic dump and restic mount pull back one path without a full restore.
- Because the repository lives off-server, you can restore onto a brand-new machine with the same four environment variables.
There is a grim little truth in operations: most backup systems have never successfully restored anything. They run every night, they report success, the storage fills with snapshots, and everyone feels safe, right up until the day they actually need it and discover the restore fails.
The password was lost. The repository was corrupt. The backup had been silently excluding the one directory that mattered. The tooling changed and nobody re-tested. A backup you have not restored is not a backup, it is a belief, and beliefs are a poor foundation for the worst day of your operational year.
So this chapter does the one thing that converts a belief into a fact, on the same Ubuntu 24.04 LTS server as the rest of the series: it restores a snapshot to a clean location and confirms the data comes back exactly as it went in. This is not an advanced topic to get to later. It is the point of the whole exercise, and it should be something you do on a schedule, not once.
Let's build.
Prerequisites
- The S3 restic repository from the earlier parts, with at least one snapshot in it.
- The four environment variables exported so restic can reach and decrypt the repository.
- An empty target directory to restore into, kept separate from your live data.
- An Ubuntu 24.04 LTS server. A fresh one is fine, which is exactly the point of an off-server repository.
Test the restic restore and verify recovery
Restoring is the mirror of backing up. Point restic at a target directory, one that is empty and separate from your live data, never over the top of what you are trying to protect, and tell it which snapshot:
restic restore latest --target /tmp/restore-test
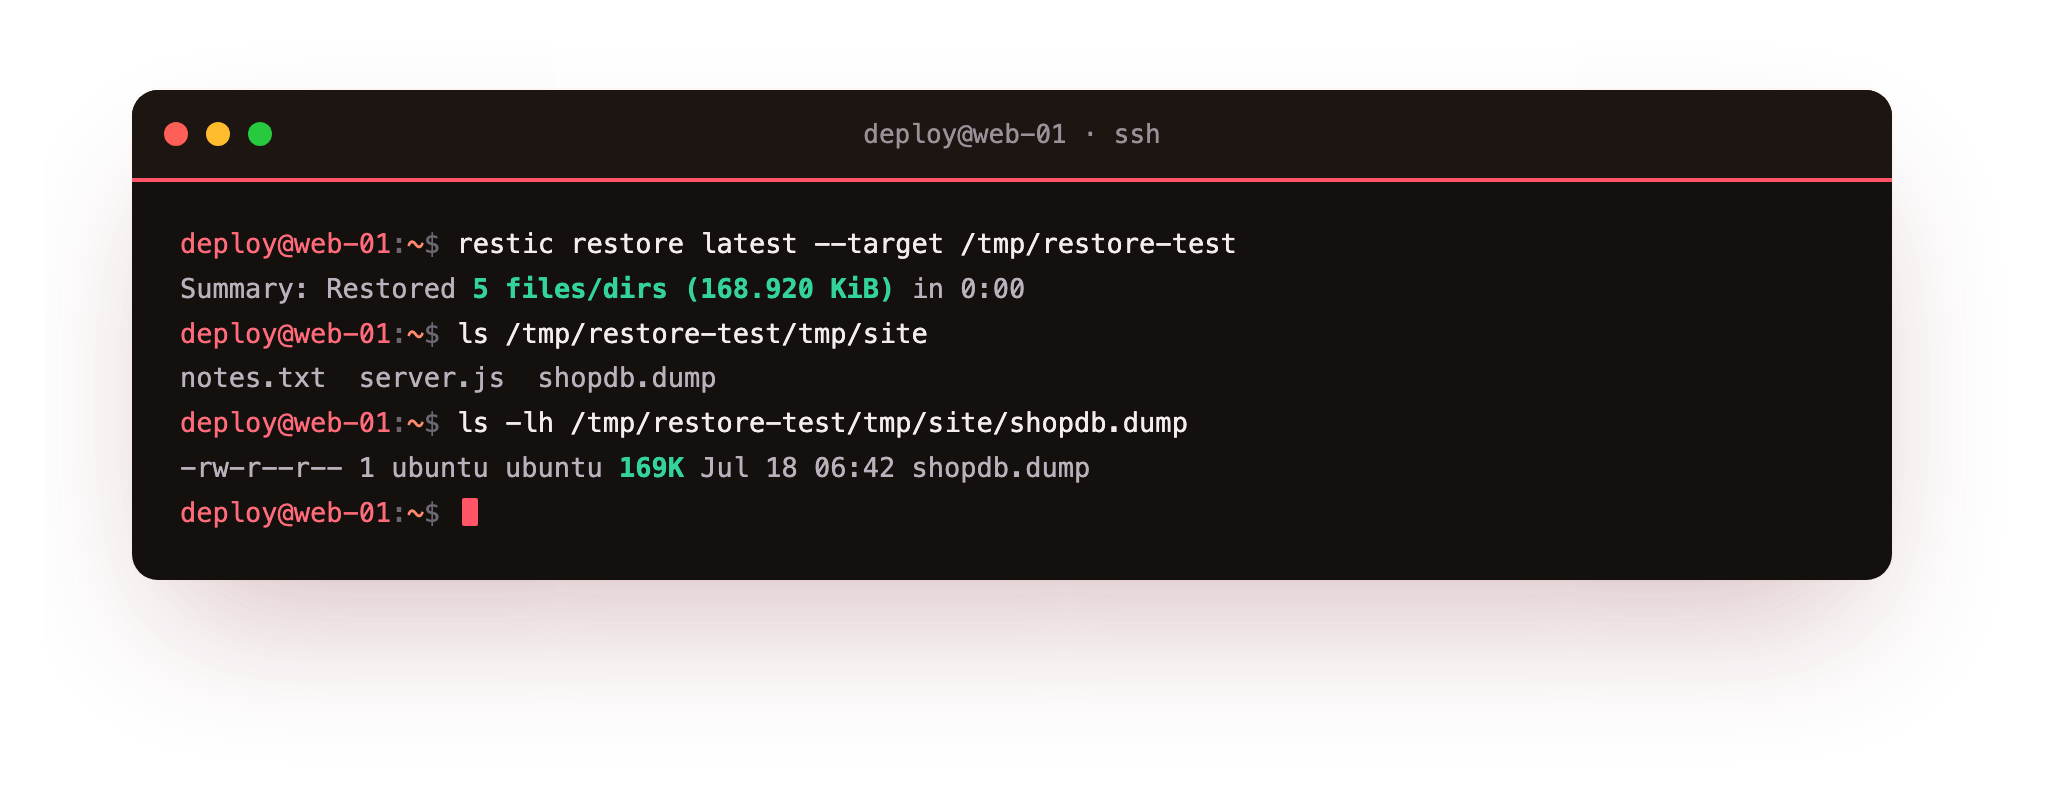
restic reports what it did: restored 5 files and directories, about 169 KiB, from the latest snapshot. Now verify, because the restore running is not the same as the restore being correct. List what came back and check the files are all there, then confirm the important one, the database dump, is intact and the right size:
ls /tmp/restore-test/tmp/site
ls -lh /tmp/restore-test/tmp/site/shopdb.dump
All the files are present, server.js, notes.txt, and shopdb.dump, and the database dump is 169 KiB, exactly the size it was when it went in. That is a verified restore. Not "the backup ran," but "the data came back, complete and correct." To go one step further, you would restore that shopdb.dump into a scratch database and check the row counts, exactly as the PostgreSQL guide did, closing the loop from backup all the way to usable data.
Notice restic restored the files under their original path (/tmp/site becomes /tmp/restore-test/tmp/site), preserving the full structure so you always know where everything came from. When you are recovering for real, you restore either to the original location or to a staging area you can inspect before promoting.
Restore a single file, because that is the common case
The dramatic disaster, the whole server gone, is rare. The everyday reality is smaller and more frequent: someone deleted one file, or you need last week's version of a specific config, or a single upload got corrupted. You do not want to restore an entire snapshot for that, and restic lets you pull back exactly one path:
restic restore latest --target /tmp/one --include /tmp/site/shopdb.dump
Only that file comes back. Even better for a quick look, you can restic dump latest /tmp/site/notes.txt to stream a single file's contents straight to your terminal or pipe it somewhere, without restoring anything to disk at all. And restic mount will present the entire backup history as a browsable filesystem, so you can wander through snapshots in a file manager and copy out exactly what you need. The single-file restore is the one you will actually use most, so it is worth knowing it is this easy.
Practise the disaster before it happens
Here is the discipline that separates teams who recover from teams who panic: rehearse the restore when nothing is wrong. Once a quarter, or after any significant change to what you back up, restore your latest snapshot to a scratch location and verify it. It takes minutes, it confirms the whole chain works, the credentials, the repository, the password, the contents, and it means that when a real incident hits, you are running a procedure you have done before rather than reading documentation with your hands shaking.
The failure modes this catches are exactly the ones that ruin real recoveries: a repository password that was never actually written down anywhere safe, a backup that has been quietly excluding a directory since someone edited the script, a corrupt repository, a restore command nobody on the team has ever run. Every one of those is invisible until you restore, and every one is survivable if you find it during a drill instead of during an outage.
Restoring somewhere new
One more scenario worth naming, because it is the real disaster: the server itself is gone. Because your repository lives in object storage, off the dead machine, recovery does not depend on that machine at all. On a fresh server you install restic, set the same four environment variables pointing at the same bucket with the same password, and every snapshot is right there to restore from.
This is the whole reason the first chapter insisted the repository live off-server and the password live off the server too. A backup that dies with the machine it was protecting protects nothing; one sitting in object storage with the key kept safely elsewhere is what lets you rebuild from nothing.
Troubleshooting a restore
"wrong password" or restic refuses to open the repository. RESTIC_PASSWORD does not match the one the repository was created with. A truly lost passphrase cannot be recovered, so use the copy you stored off the server.
The restore wrote nothing, or "snapshot not found." The snapshot ID or latest matched nothing, often because the environment points at a different repository. Run restic snapshots first to confirm the ID you are restoring.
Files come back but ownership or permissions look wrong. restic preserves the original ownership, so restoring as a different user can leave files owned by an ID that does not exist on this box. Restore as root, or chown afterwards.
--include returns nothing. The include path must match the path as it was stored, since restic keeps the original absolute path. Check restic ls latest to see the exact stored paths.
Frequently asked questions
How often should I test a restore?
At least once a quarter, and after any change to what you back up. A rehearsed restore is a procedure you have run before, not documentation you read for the first time during an outage.
Can I restore just one file?
Yes. restic restore latest with an include path pulls back a single path, and restic dump streams one file's contents straight to standard output without writing anything to disk.
What if the original server is gone entirely?
Install restic on a new machine, set the same four environment variables pointing at the same bucket and password, and every snapshot is there to restore from. The dead machine is not involved.
Is restoring over my live data safe?
No. Always restore to a separate, empty target and inspect it before promoting, so a bad or partial restore cannot destroy the data you still have.
What you have, and the last piece
You have now done the thing most backup setups never do: restored a snapshot and confirmed the data came back complete and correct, both a full restore and a single file, and you understand that recovery works even when the original server is gone. That is the difference between a backup and a recovery.
The final chapter makes all of this run without you: retention rules that keep a sensible window of snapshots and prune the rest so the repository does not grow forever, and a systemd timer that takes the backup every night, so the whole thing becomes a reliable, automatic property of your server rather than a chore you have to remember.