What you will have
This tutorial shows you how to back up Nextcloud on a VPS in a way you can trust, because it ends with a restore you have actually done rather than a folder of archives you hope would work. A Nextcloud is three moving parts held together at once, and a copy that catches them out of step, or misses one, will not bring your files back on the day you need it.
By the end you will have a single script that pauses Nextcloud, dumps its database, rolls its config, code and data into one timestamped archive, ships that offsite to object storage, runs itself every night, and prunes old copies. Then you will break the instance on purpose and bring it back from that archive.
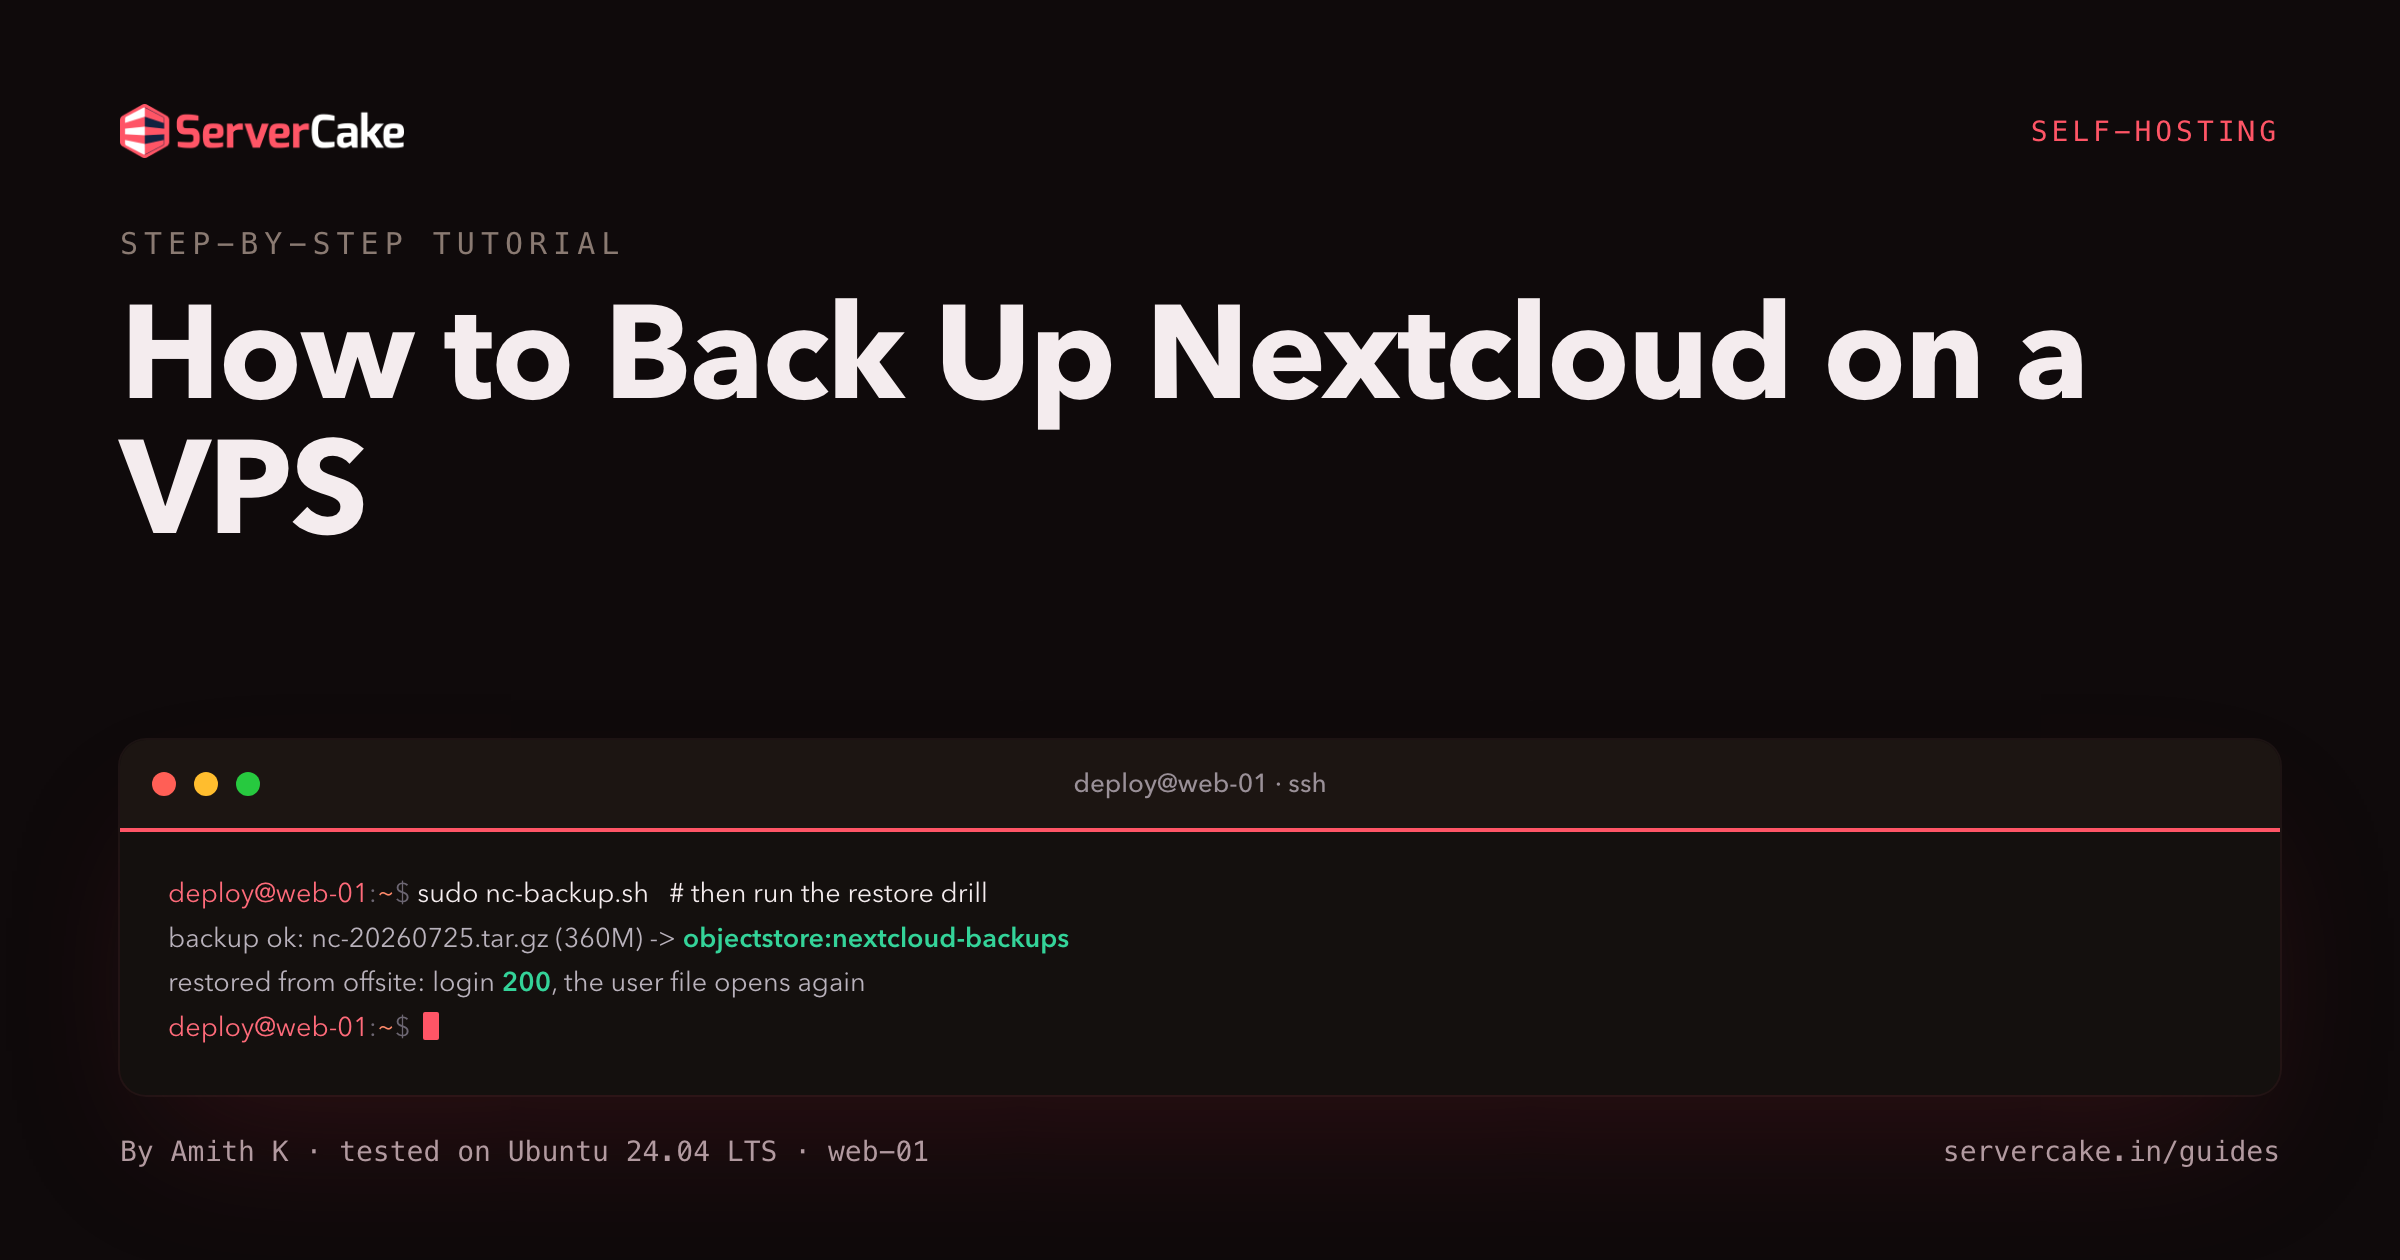
Here is the destination, shown first. This is the exact arc captured on the instance we protected while writing this, a small slice running Nextcloud behind nginx.
# the payoff: a backup runs, then a restore proves it   (prove a backup by restoring it)
sudo /usr/local/bin/nc-backup.sh
# ... then simulate a disaster and restore from the offsite copy
curl -sk -o /dev/null -w 'before   %{http_code}\n' https://your-domain/login    # 200
# drop the database, wipe the data dir, restore from offsite, then:
curl -sk -o /dev/null -w 'restored %{http_code}\n' https://your-domain/login    # 200
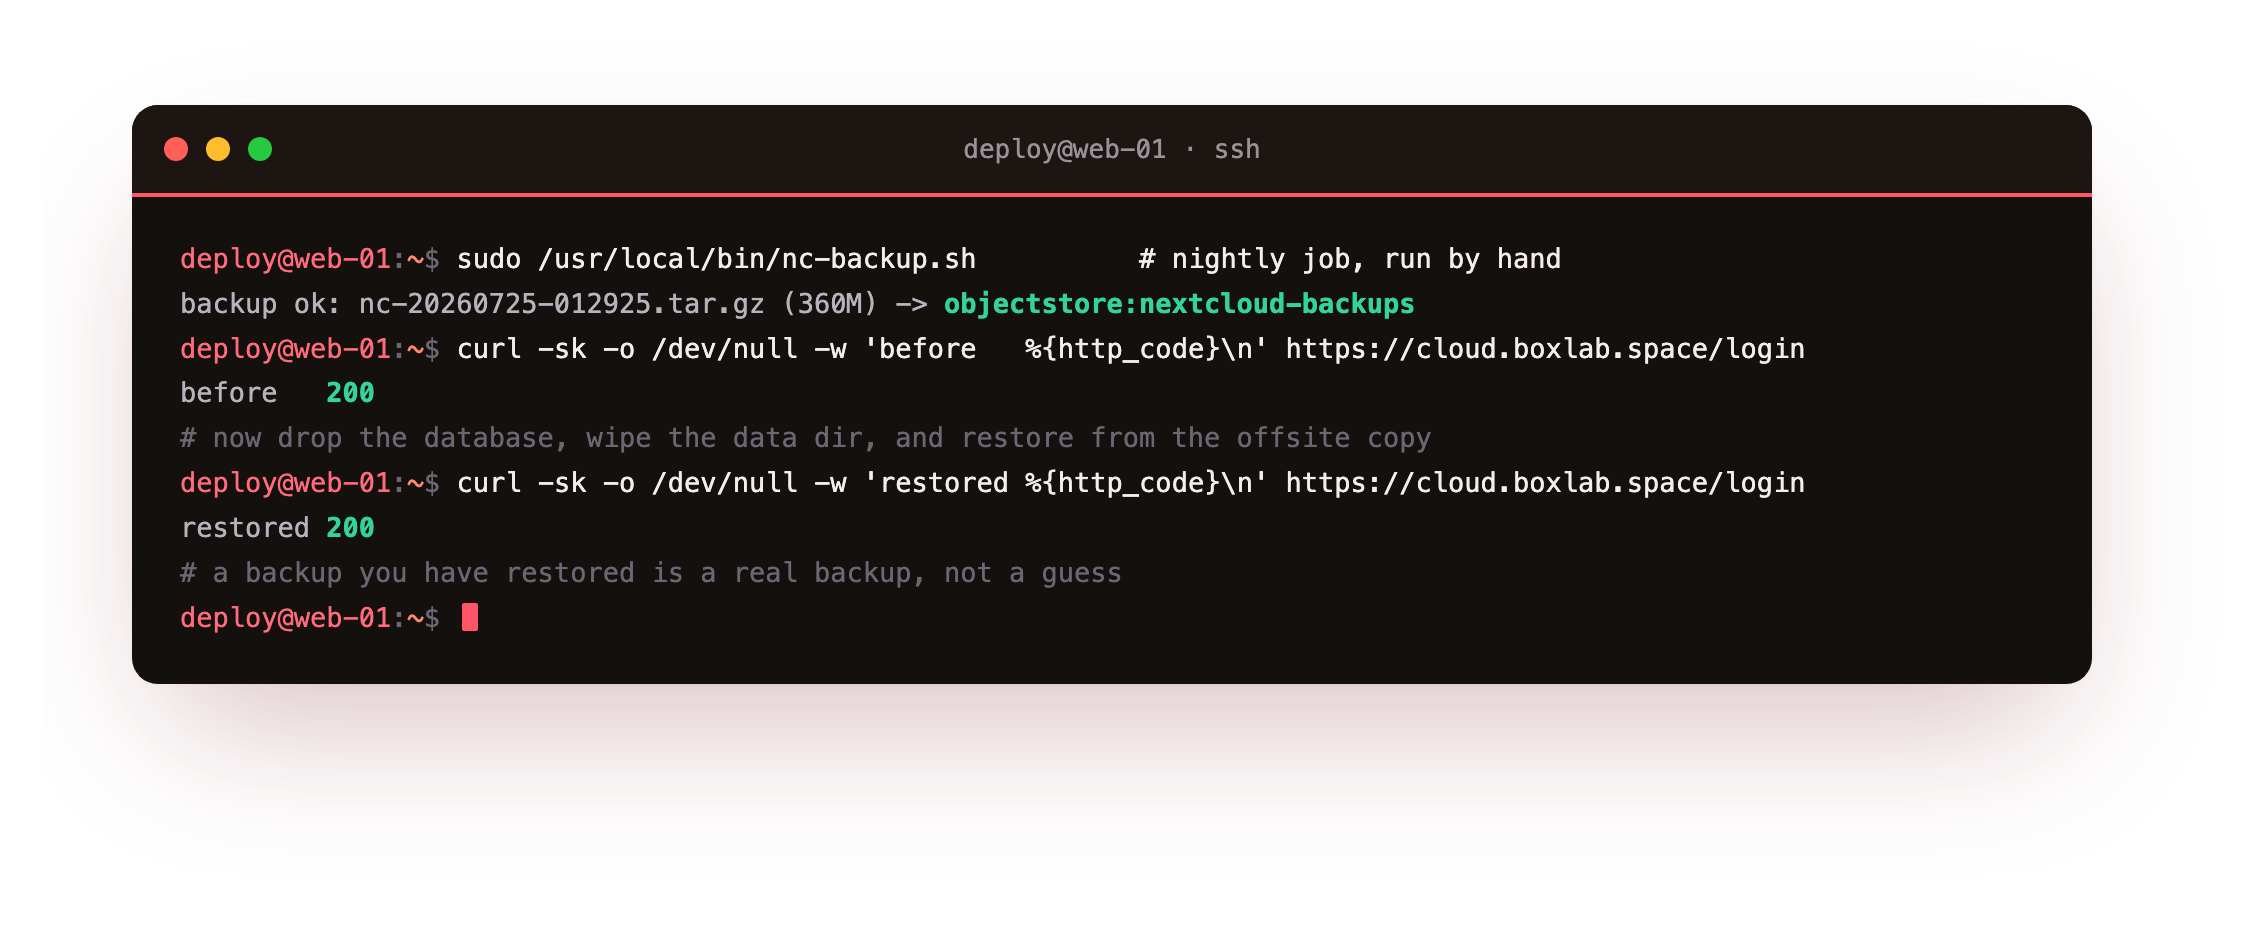
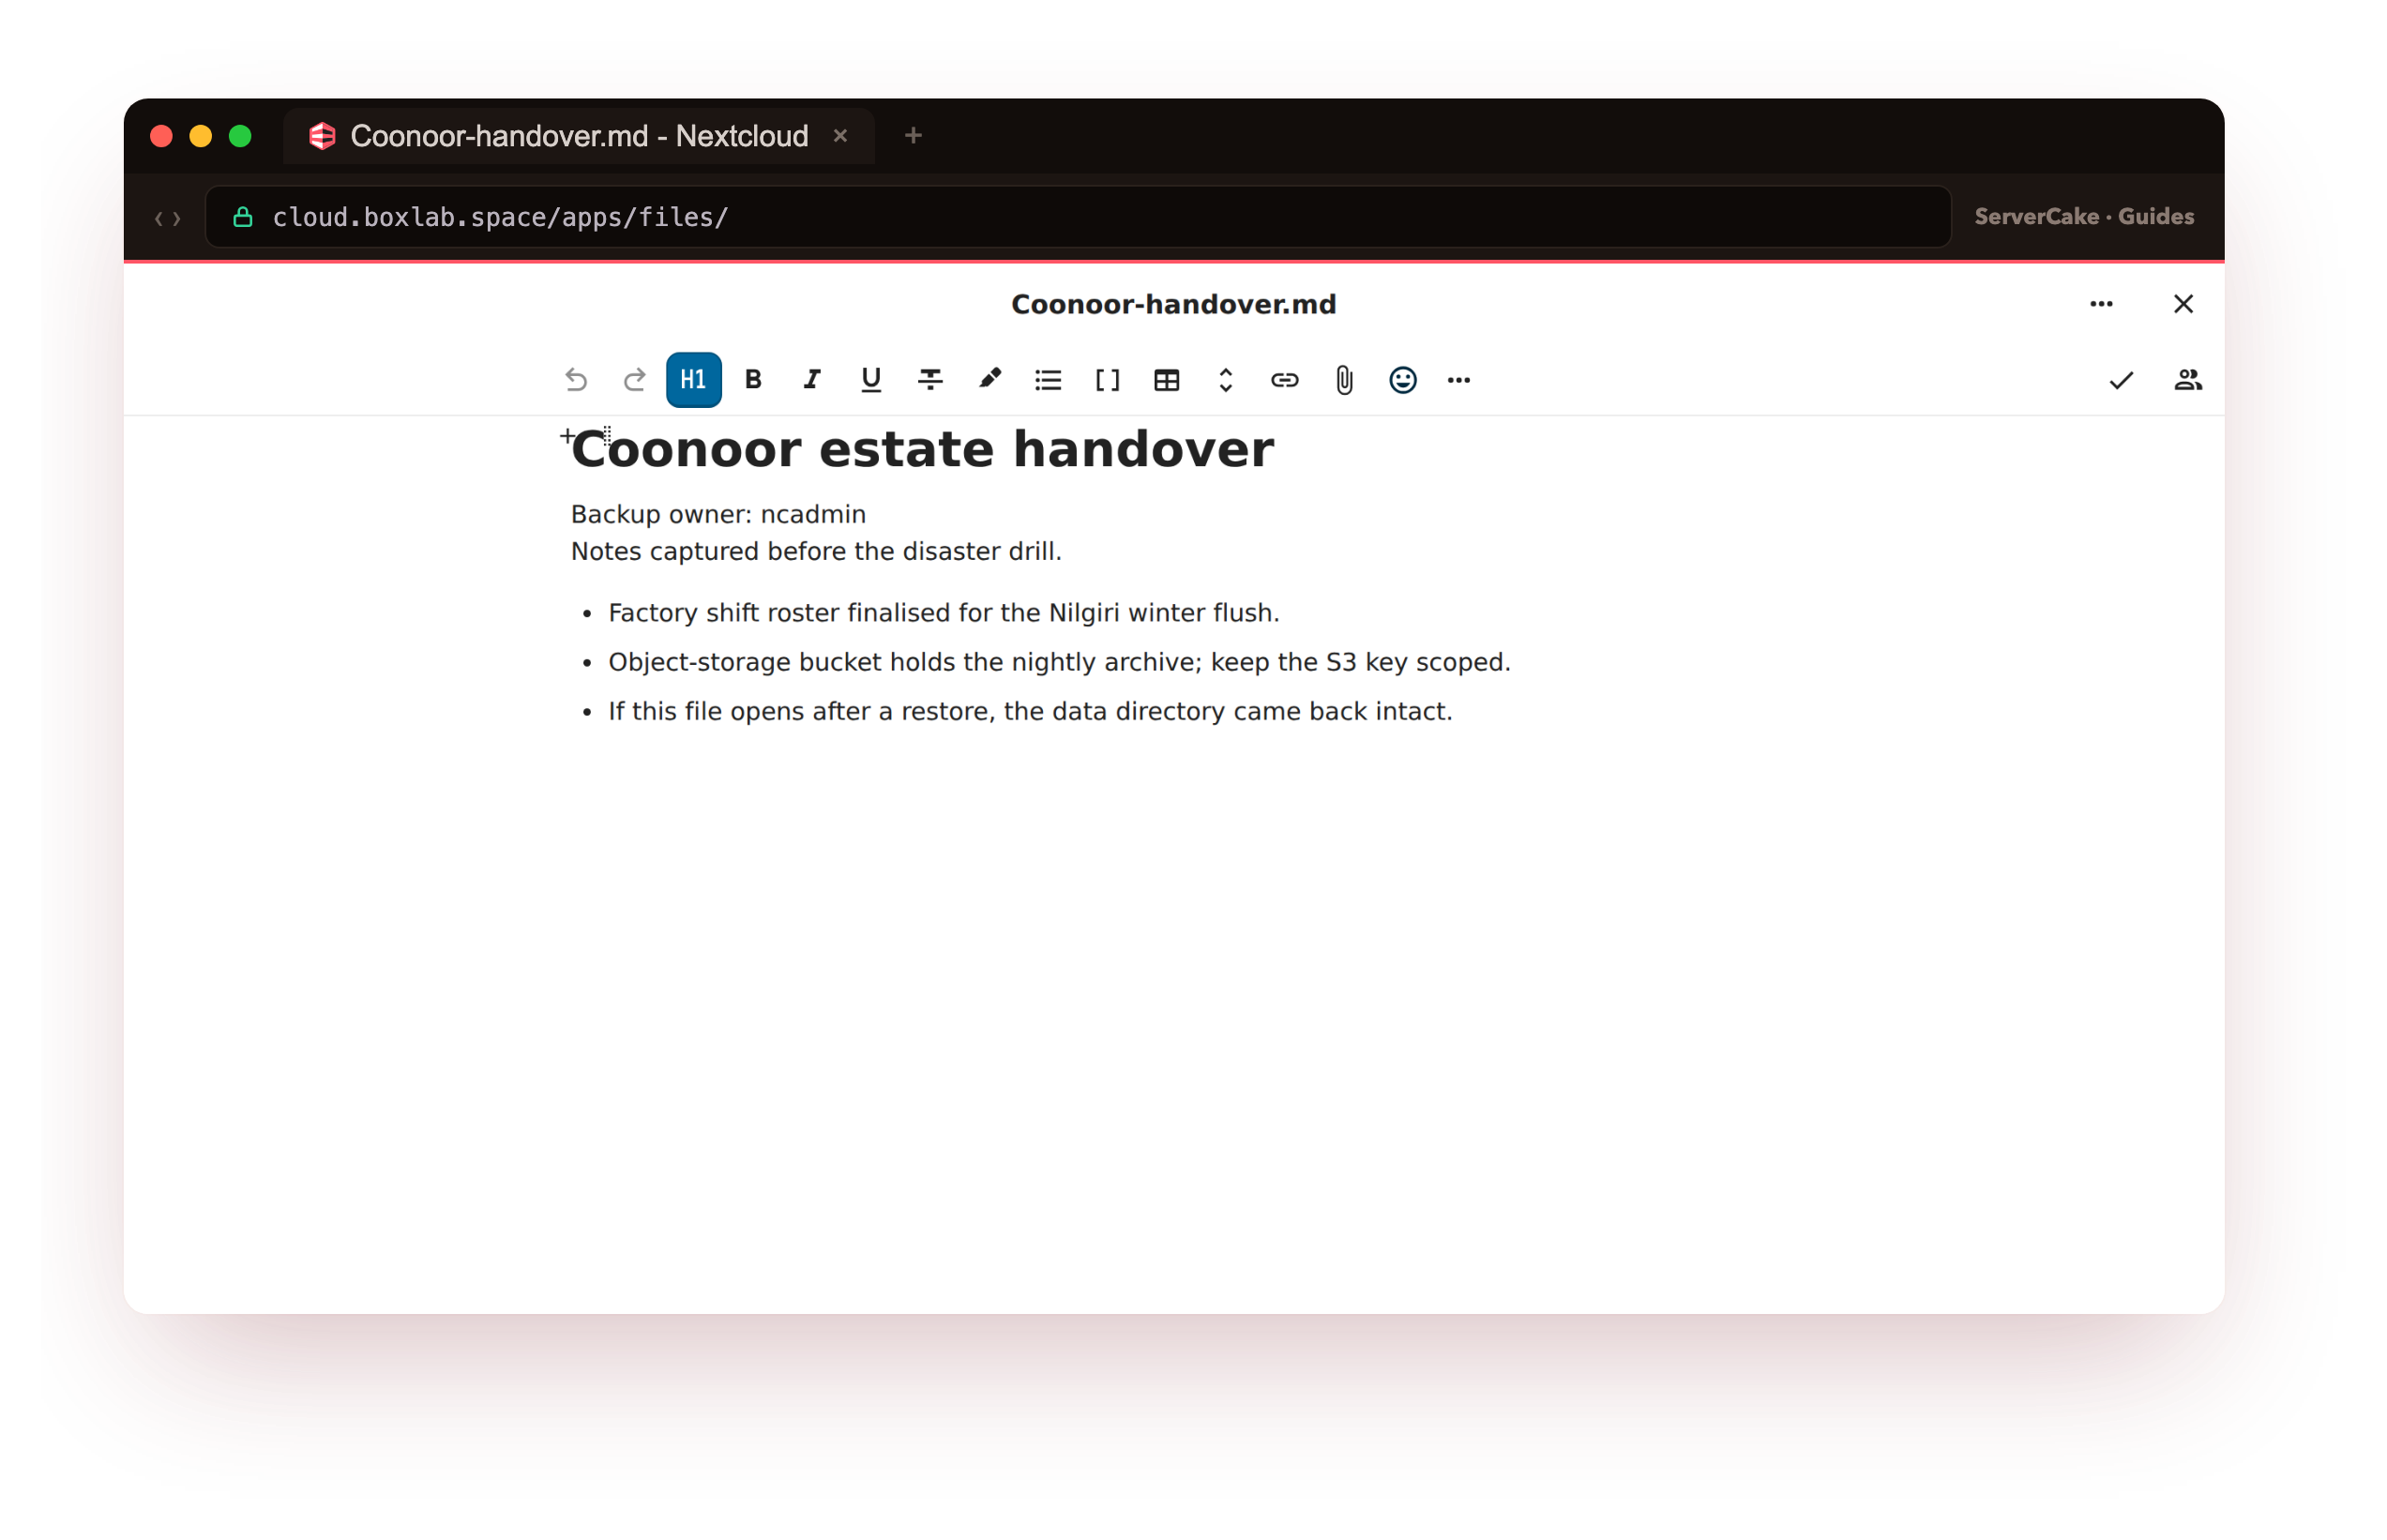
On our box that backup wrote a 360M archive and pushed it offsite, and after we dropped the database and deleted the data directory, the restore brought the instance back to a 200 with every user file in place. An archive you have watched recover an instance is worth ten you have only ever written.
- The three parts a Nextcloud backup must capture: the config and install directory, the database, and the data directory.
- Why the instance must be quiesced with maintenance mode so the three parts stay consistent.
- A clean backup script that pauses Nextcloud, dumps the database, and tars everything into one archive.
- Pushing each archive offsite to S3-compatible object storage with a scoped, least-privilege key.
- A real restore drill: break the instance, restore from the offsite archive, and open a user file again.
One idea sits under every step here: a Nextcloud backup earns the name only after it has put an instance back together. Scheduling a tar is the easy tenth of the job. The rest is catching the database and the files in the same instant, getting the archive off the box, and walking the recovery often enough that the real one feels like a rehearsal you have already done.
Before you begin
This tutorial protects an instance that already runs, so it assumes you have one to work on.
- A live Nextcloud on a slice, served over HTTPS by nginx and PHP-FPM, set up with how to install Nextcloud on a VPS. The steps here assume that same Ubuntu 24.04 stack of nginx, PHP 8.3-FPM and MariaDB, with the install directory at
/var/www/nextcloudand the data directory outside the web root. - An SSH login on the slice with
sudorights, and the habit of drivingoccas thewww-dataweb user that owns Nextcloud's files. - Somewhere offsite to keep the copies. Ours is a ServerCake Object Storage bucket, and because it talks the S3 API, every command here is identical against any S3-compatible endpoint.
You will work over SSH throughout as a sudo-capable user, and the handful of steps that read or write Nextcloud's own files run under www-data. Substitute your-domain, the install path and the database names for yours as they come up.
How to back up Nextcloud on a VPS
There is no single button that makes a Nextcloud safe, so the job is a short sequence of parts that each remove one excuse not to have a backup. You will back up Nextcloud on a VPS by working through them in order:
- Learn the three parts a Nextcloud is, and why they must be captured together.
- Write one script that quiesces the instance and turns those parts into a single archive.
- Ship every archive off the box, since a copy on the failed disk goes down with it.
- Automate the script nightly in a quiet window and set retention.
- Practise the recovery, so that a real one is muscle memory rather than a first attempt.
The steps stack, and the payoff is entirely in the last one, so treat a healthy-looking pile of archives as a reason to run the drill, not a reason to skip it.
The three parts of a Nextcloud
A running Nextcloud is not one thing, it is three, and a backup that misses any one of them cannot bring the instance back. The database, held in MariaDB, is the index: it maps every file to an owner, holds shares, users, app settings and the file cache.
The data directory, on disk and deliberately outside the web root, holds the actual user files, every upload and every version. And the config plus the install directory hold config/config.php, which carries the database password and the secret and password salt that decrypt everything, alongside the code and the apps that run it.
# the three parts a Nextcloud backup must capture   (three parts of a nextcloud)
du -sh /var/www/nextcloud-data                       # 1. data: every user's files
sudo mysql -N -e 'SELECT COUNT(*) FROM information_schema.tables WHERE table_schema="nextcloud"'  # 2. database
stat -c '%a %U:%G %n' /var/www/nextcloud/config/config.php   # 3. config: the secrets that tie 1 and 2 together
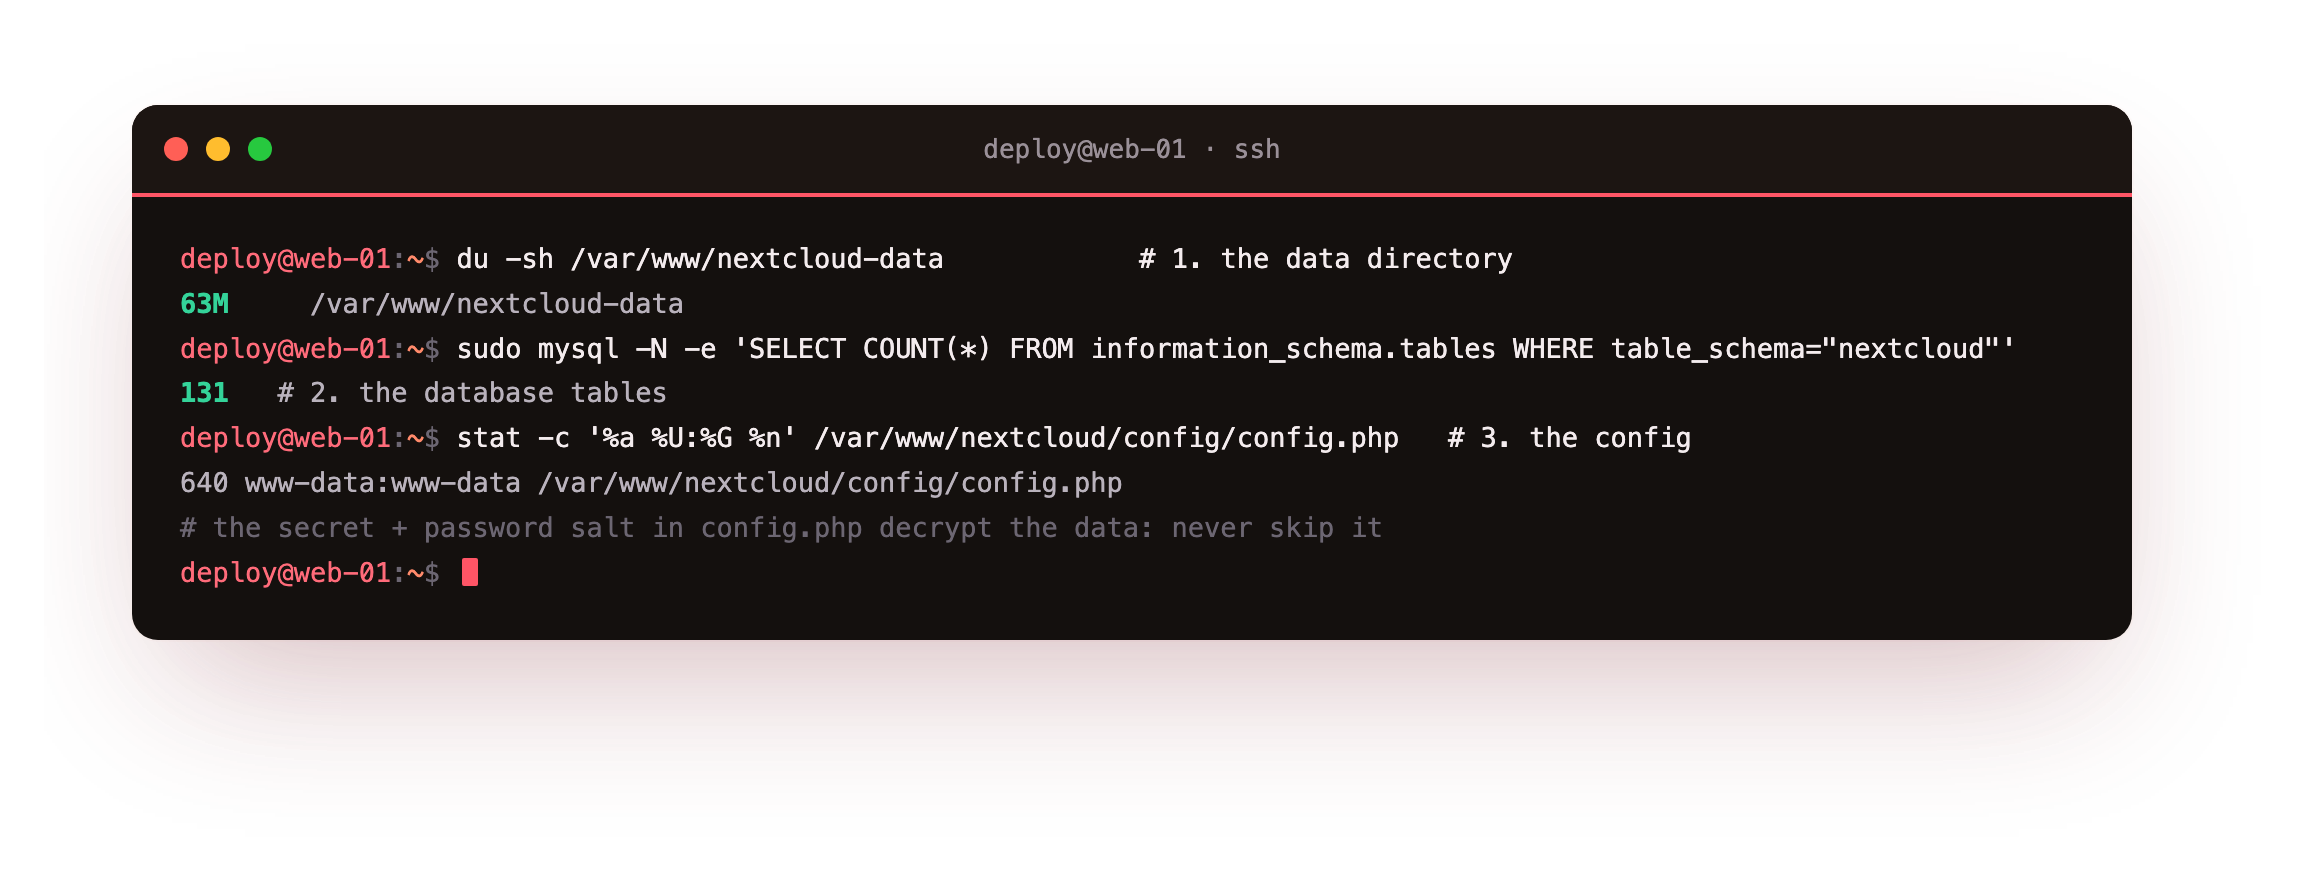
On our box the data directory held 63M of files, the database carried 131 tables, and config.php sat at mode 640 owned by www-data. That config file is the part people forget, and it is the one that hurts most to lose: without the original secret and passwordsalt a restored database and data directory will not decrypt or authenticate, so the config belongs in every backup next to the other two.
The catch that makes Nextcloud different from a plain website is that these three parts change together. If you dump the database while a sync is mid-write, the database can reference a file the archive has not captured yet, and the restore comes back subtly broken. The fix is to freeze the instance for the seconds it takes to capture all three, which is what maintenance mode is for.
nextcloud-data directory, and config.php inside the install directory. If a backup tool copies files but never dumps the database, or never freezes the instance, it is not a Nextcloud backup you can trust.Write the backup script
The backup itself is one script. It reads the database credentials straight out of config/config.php so nothing is duplicated, puts Nextcloud into maintenance mode so the three parts are captured as one consistent set, dumps the database with mysqldump, and rolls the install directory (config and code) together with the data directory and the dump into a single archive named by the date and time. Save this as /usr/local/bin/nc-backup.sh.
#!/usr/bin/env bash
# Back up Nextcloud: quiesce, then config + install dir + database + data dir into one archive.
set -euo pipefail
NCROOT=/var/www/nextcloud
WORK=/var/backups/nextcloud
STAMP=$(date +%Y%m%d-%H%M%S)
OCC="sudo -u www-data php ${NCROOT}/occ"
mkdir -p "$WORK"

# read the database credentials straight out of config/config.php (no second copy to drift)
cfg() { php -r "include '${NCROOT}/config/config.php'; echo \$CONFIG['$1'] ?? '';"; }
DB_NAME=$(cfg dbname); DB_USER=$(cfg dbuser); DB_PASS=$(cfg dbpassword); DB_HOST=$(cfg dbhost)

# 1. quiesce: freeze the instance so the DB and files are captured as one consistent set
$OCC maintenance:mode --on

# 2. database -> a consistent SQL dump
mysqldump --single-transaction --quick --default-character-set=utf8mb4 \
  -h"$DB_HOST" -u"$DB_USER" -p"$DB_PASS" "$DB_NAME" > "$WORK/db-$STAMP.sql"

# 3. the install dir (holds config/config.php) + the data directory + the dump -> one archive
tar -czf "$WORK/nc-$STAMP.tar.gz" \
  -C /var/www nextcloud nextcloud-data \
  -C "$WORK" "db-$STAMP.sql"
rm -f "$WORK/db-$STAMP.sql"

# 4. release: let Nextcloud serve again
$OCC maintenance:mode --off
echo "backup ok: nc-$STAMP.tar.gz -> local"
One flag on mysqldump earns its place. --single-transaction takes the dump inside one transaction so the data stays consistent, and because we already hold maintenance mode, nothing is writing anyway. Make the script executable and run it once.
sudo chmod +x /usr/local/bin/nc-backup.sh
sudo /usr/local/bin/nc-backup.sh
ls -lh /var/backups/nextcloud/
tar -tzf /var/backups/nextcloud/nc-*.tar.gz | grep -E 'config/config.php|nextcloud-data/|db-.*sql' | head
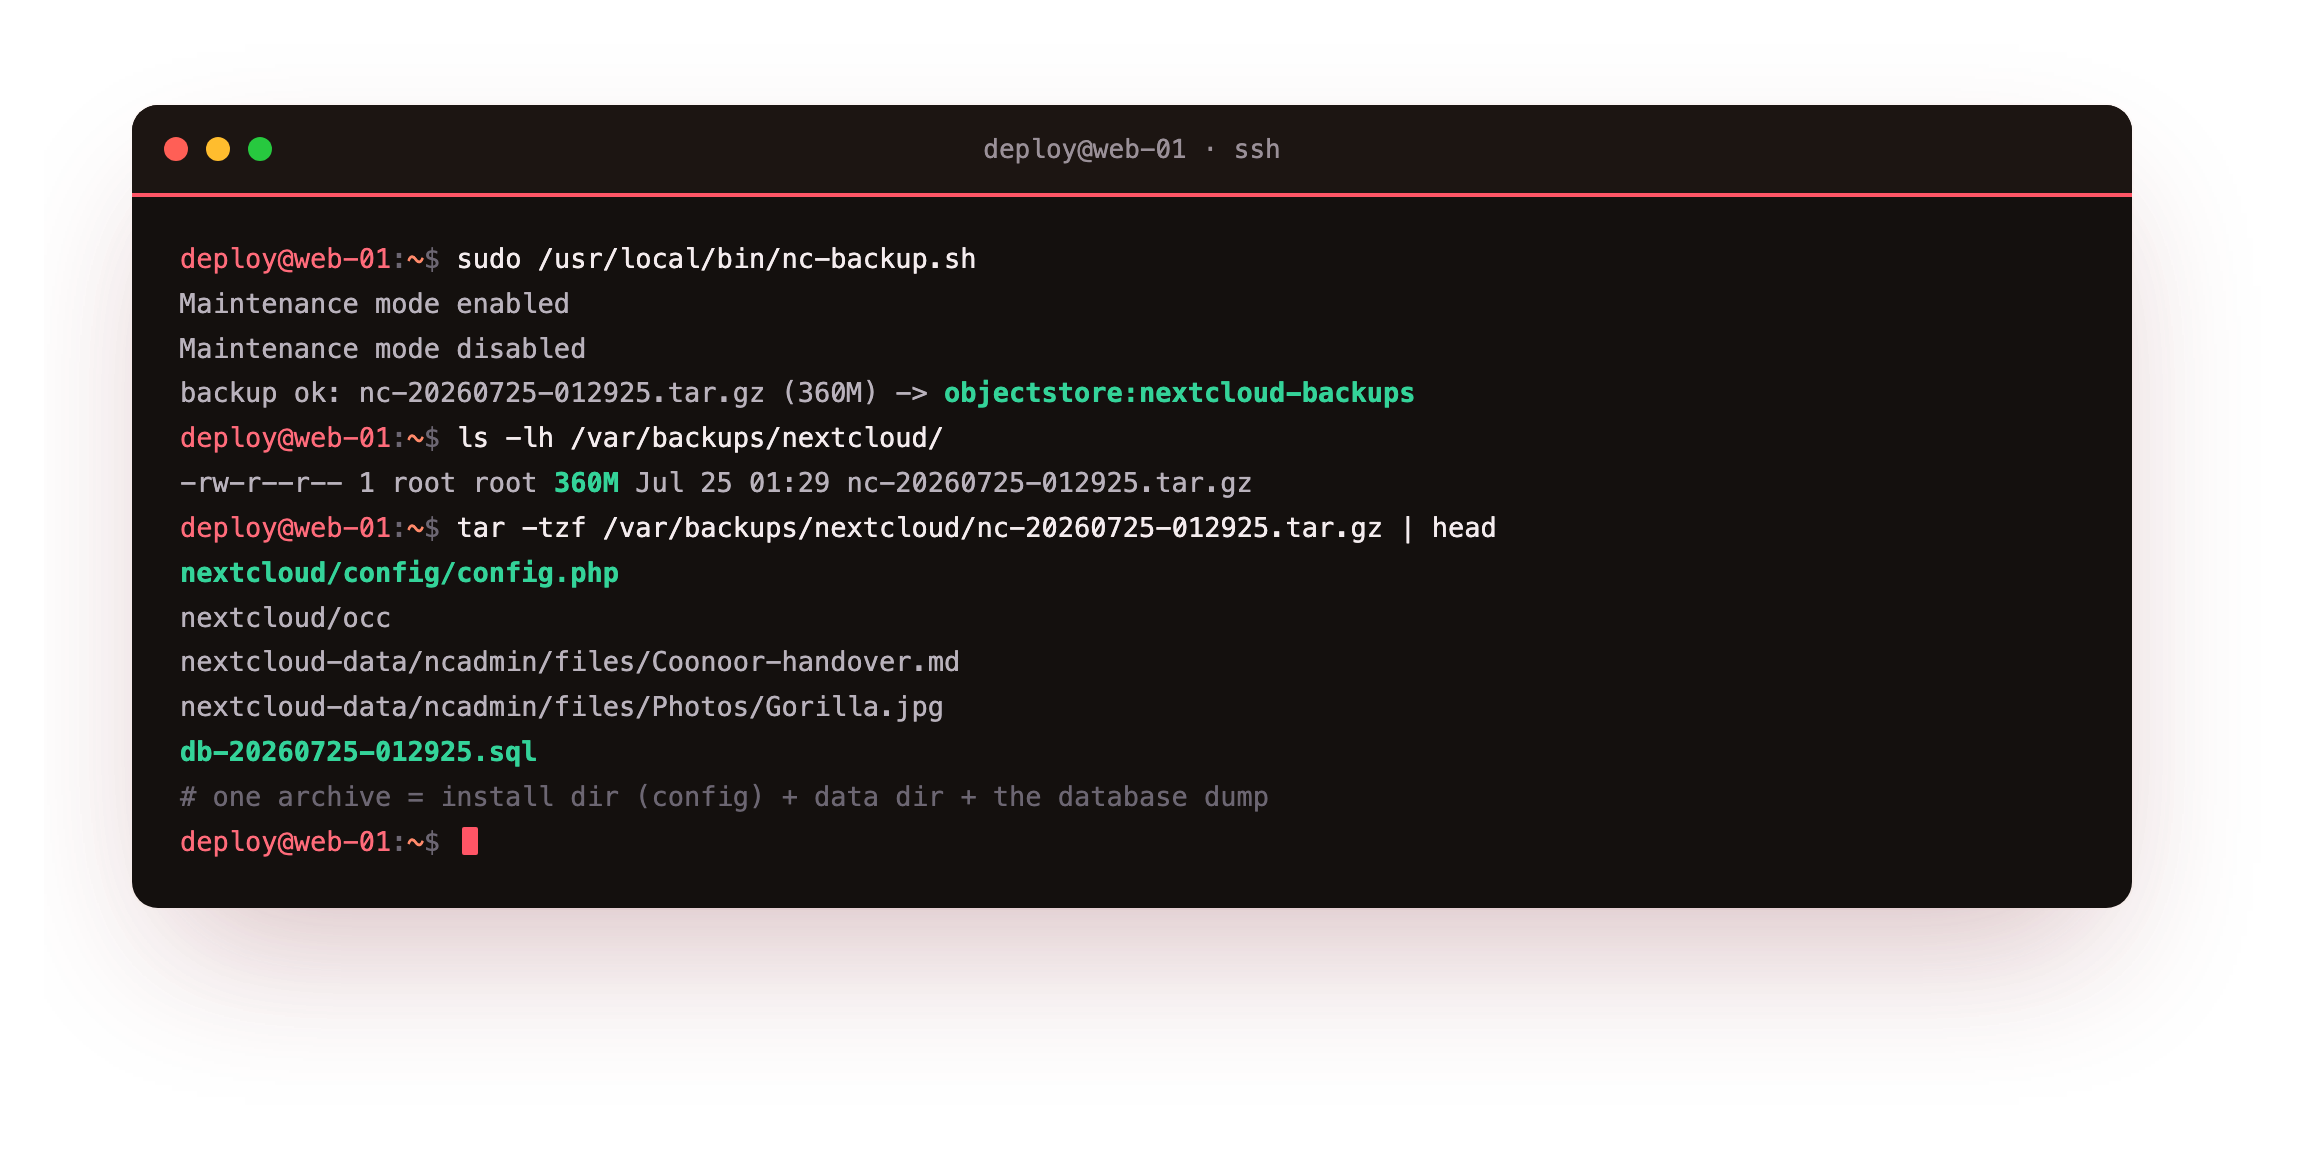
On our box that produced a single nc-20260725-012925.tar.gz of about 360M, and listing the archive showed exactly what a restore will need: nextcloud/config/config.php, the whole nextcloud-data tree of user files, and the db-*.sql dump at the end. One file now holds a complete, self-contained copy of all three parts, and Nextcloud spent only a couple of seconds in maintenance mode to make it.
nextcloud/config/config.php, the nextcloud-data/ subtree, and a db-*.sql at the end. A zero-byte or absent dump means the credential read failed, so confirm cfg dbpassword prints the password from config before you trust the archive.Send the backup offsite
An archive sitting beside the instance is barely a backup, because whatever kills the slice (a failed disk, a mistyped rm, an intruder) tends to take that archive down with it. The copy has to leave the box. For that we use rclone, one static binary fluent in the S3 API, pointed at ServerCake Object Storage or any S3-compatible bucket. Install it, then register the remote a single time against your bucket credentials.
sudo -v ; curl https://rclone.org/install.sh | sudo bash    # one static binary
# define the S3 remote once (endpoint + access key + secret from your bucket)
rclone config create objectstore s3 provider Other \
  endpoint https://blr.objects.servercake.io \
  access_key_id NCBK**************** secret_access_key **************** \
  region blr acl private
Once the remote exists, one command pushes an archive up and a second lists the bucket to confirm it arrived. Wire both the upload and a local prune into the tail of the backup script so each run leaves an offsite copy without you thinking about it.
# add to /usr/local/bin/nc-backup.sh, after the archive is built:
rclone copy "$WORK/nc-$STAMP.tar.gz" objectstore:nextcloud-backups/ --s3-no-check-bucket
find "$WORK" -name 'nc-*.tar.gz' -mtime +14 -delete   # keep 14 days on local disk
# confirm the object is really in the bucket   (object landed offsite)
rclone ls objectstore:nextcloud-backups
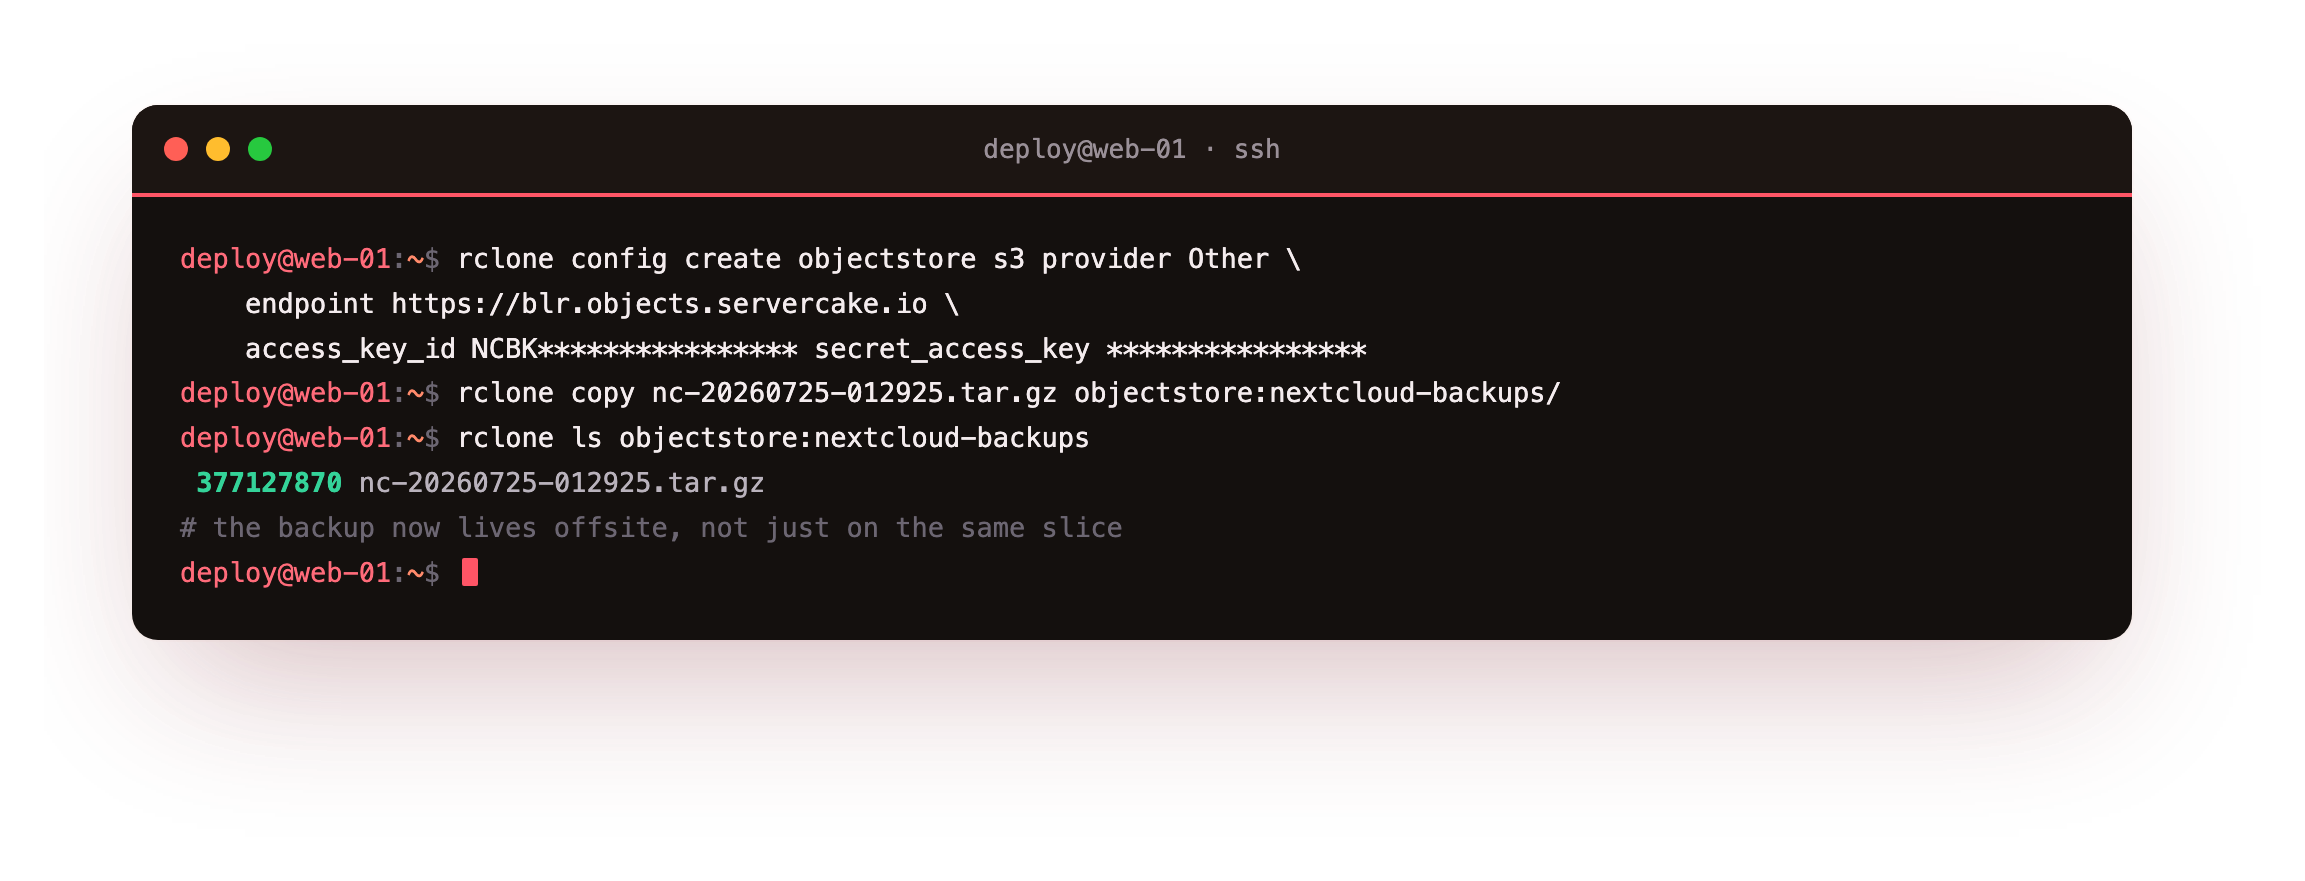
On our box the transfer completed and rclone ls objectstore:nextcloud-backups printed the archive with its size, 377127870 nc-20260725-012925.tar.gz. There are now two copies living in different places: the local one for a quick restore, and the offsite one for the day the slice itself is gone.
PutObject, GetObject, DeleteObject and ListBucket on nextcloud-backups and nothing more, and the script is unchanged because that is plain S3.Automate it and set retention
Any backup that depends on you remembering it will eventually be the backup you forgot, so give the job to the machine. On a modern slice a systemd timer does this cleanly, and since the run pauses Nextcloud for a moment, it belongs in a quiet window rather than the working day. Create the two units.
# /etc/systemd/system/nc-backup.service
[Unit]
Description=Nextcloud backup (config + database + data, offsite)
After=network-online.target mariadb.service
[Service]
Type=oneshot
ExecStart=/usr/local/bin/nc-backup.sh
# /etc/systemd/system/nc-backup.timer
[Timer]
OnCalendar=*-*-* 02:30:00
Persistent=true
[Install]
WantedBy=timers.target
Scheduling for 02:30 drops the brief maintenance pause into the quietest hours, and Persistent=true catches up a run the moment the slice wakes if it happened to be off at half past two, so a night is never silently missed. For offsite retention, hand the ageing-out to the bucket with a lifecycle rule, which survives a broken client far better than a client-side delete. Enable the timer, add the rule, and check the schedule.
sudo systemctl enable --now nc-backup.timer
# offsite retention: expire archives older than 14 days at the bucket
mc ilm rule add --expire-days 14 objectstore/nextcloud-backups
systemctl list-timers nc-backup.timer
On our box systemctl list-timers put the next run at 02:30:00 the next morning, and the bucket reported its 14-day expiry rule as Enabled. A schedule on paper is not proof, though, so fire the unit yourself and read what it logged.
sudo systemctl start nc-backup.service
journalctl -u nc-backup.service -n 4 -o cat
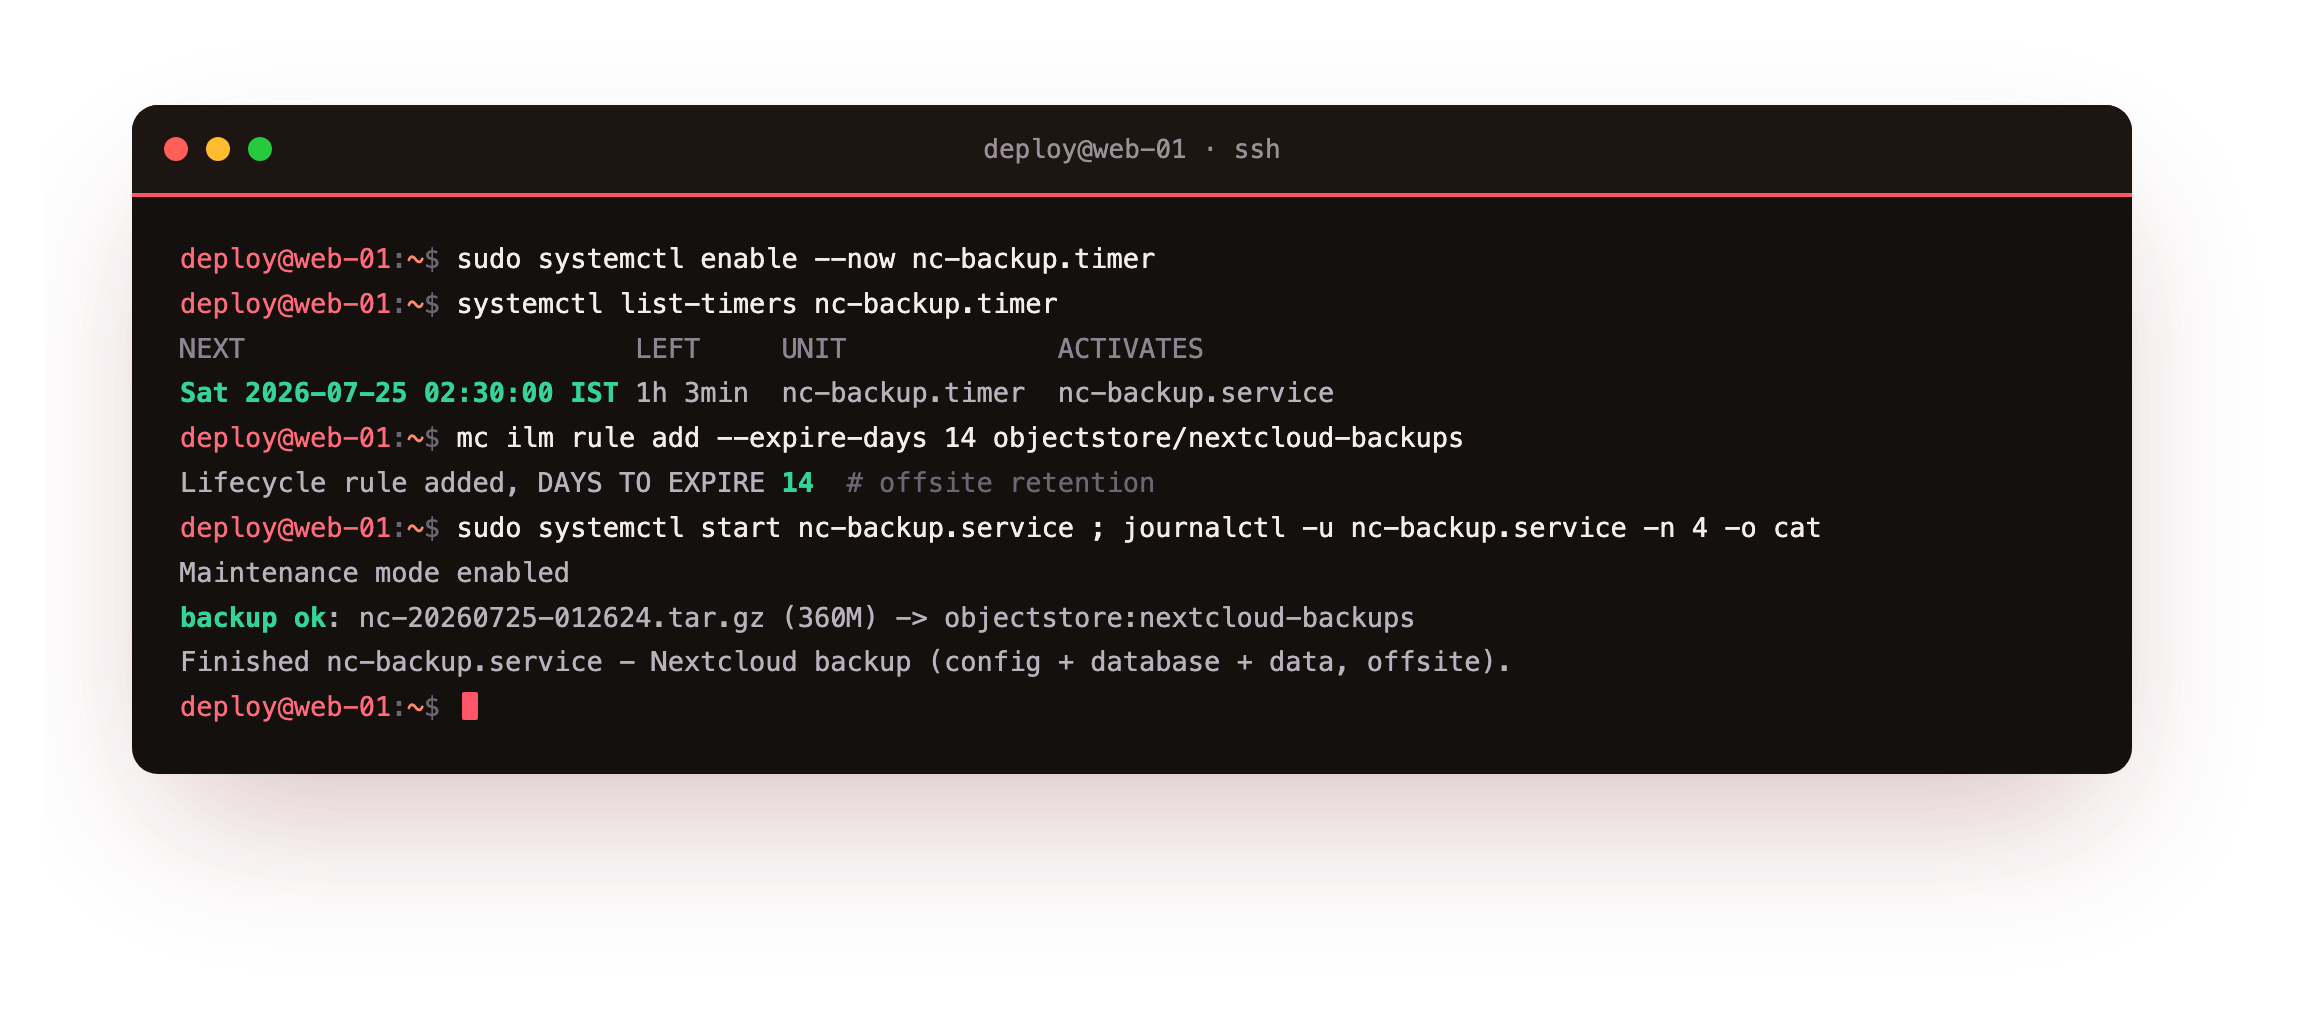
On our box the journal caught the service switching on maintenance mode, the script printing backup ok, and the unit exiting cleanly, with a new archive turning up in the bucket. Once it runs on its own and leaves a trail you can read back, the backup stops being something you have to hold in your head.
systemctl list-timers with a genuine NEXT time, and a manual systemctl start should leave backup ok in the journal. When the unit errors, call /usr/local/bin/nc-backup.sh directly to read the failure, because the script emits exactly what the journal records.The restore drill
Almost everyone leaves this step out, and it is the only one that shows the rest actually worked. You will wreck the instance the way a genuine failure would, then rebuild it from nothing but the offsite archive. If dropping a live database makes you uneasy, run the drill against a staging slice the first time, and trust that unease as a good sign. Start by recording the healthy state so there is something to check the recovery against.
# BEFORE: the instance is healthy and a known user file is present
curl -sk -o /dev/null -w 'front page -> %{http_code}\n' https://your-domain/login
sudo -u www-data php /var/www/nextcloud/occ status | grep -E 'installed|versionstring'
Now simulate the disaster. Drop the database, then wipe the data directory and the install directory, which together are as bad a day as a slice usually has. The front page should stop working immediately.
# DISASTER: drop the database, then wipe the data + install directories
sudo mysql -e 'DROP DATABASE nextcloud'
curl -sk -o /dev/null -w 'front page -> %{http_code}\n' https://your-domain/login   # now 500
sudo rm -rf /var/www/nextcloud-data /var/www/nextcloud
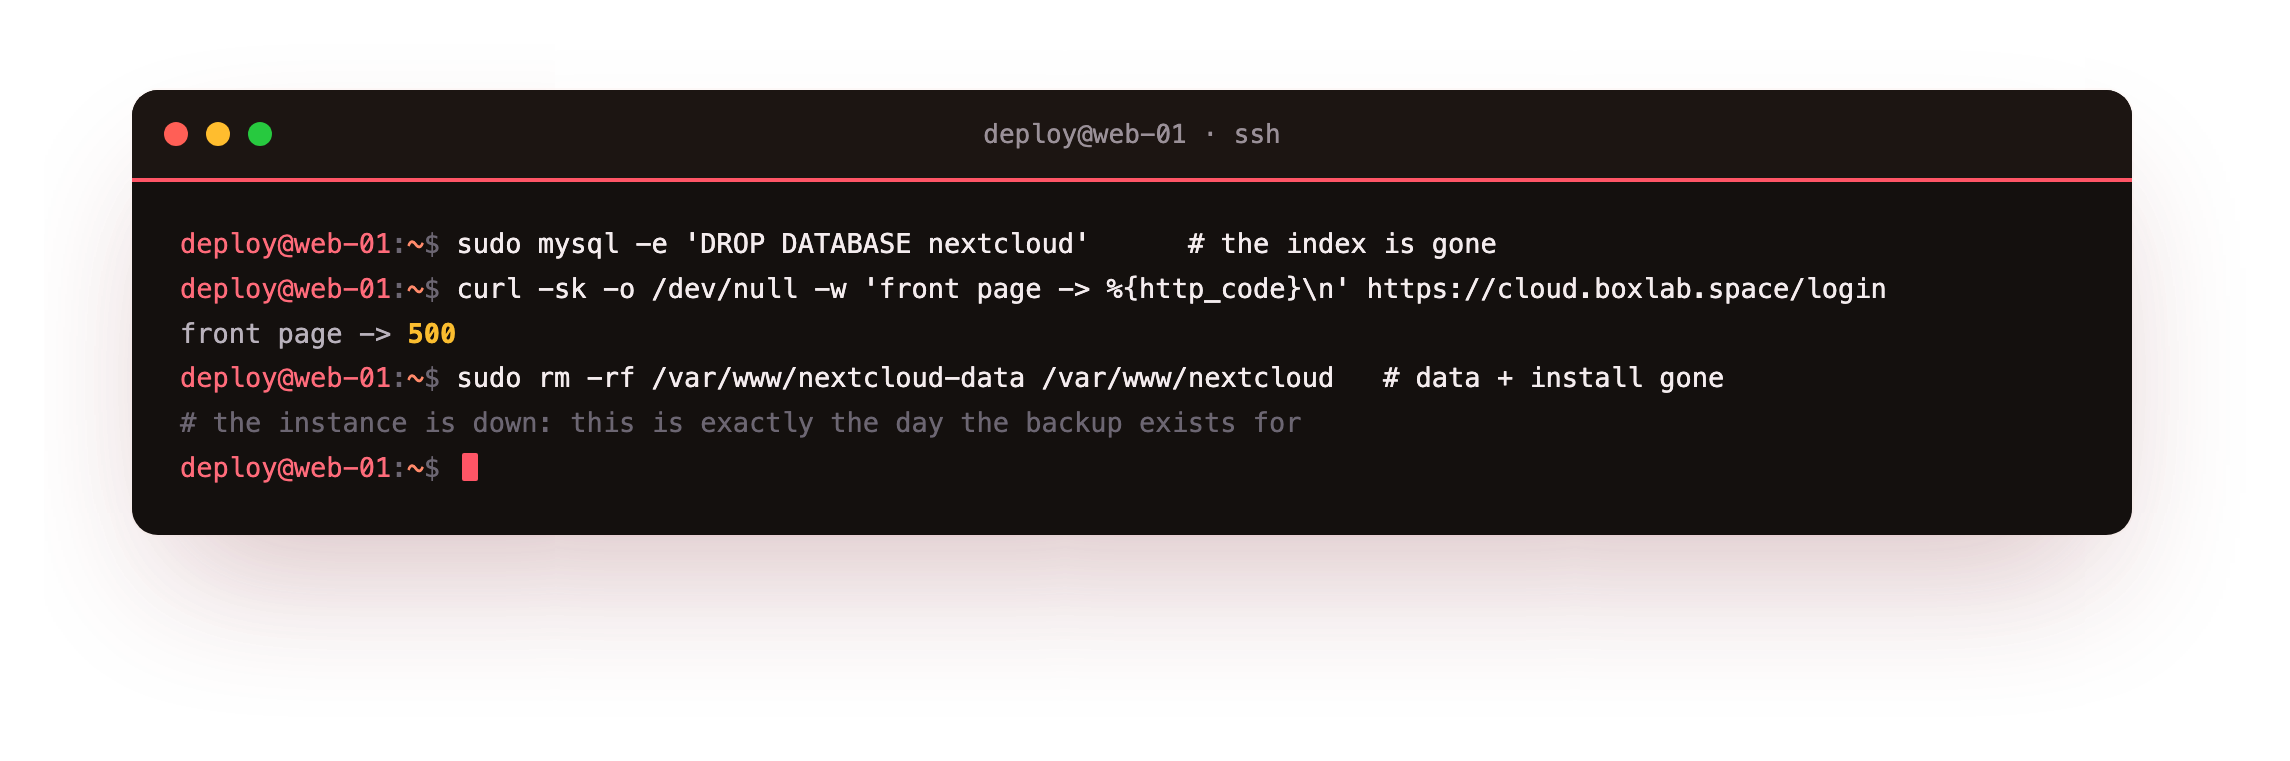
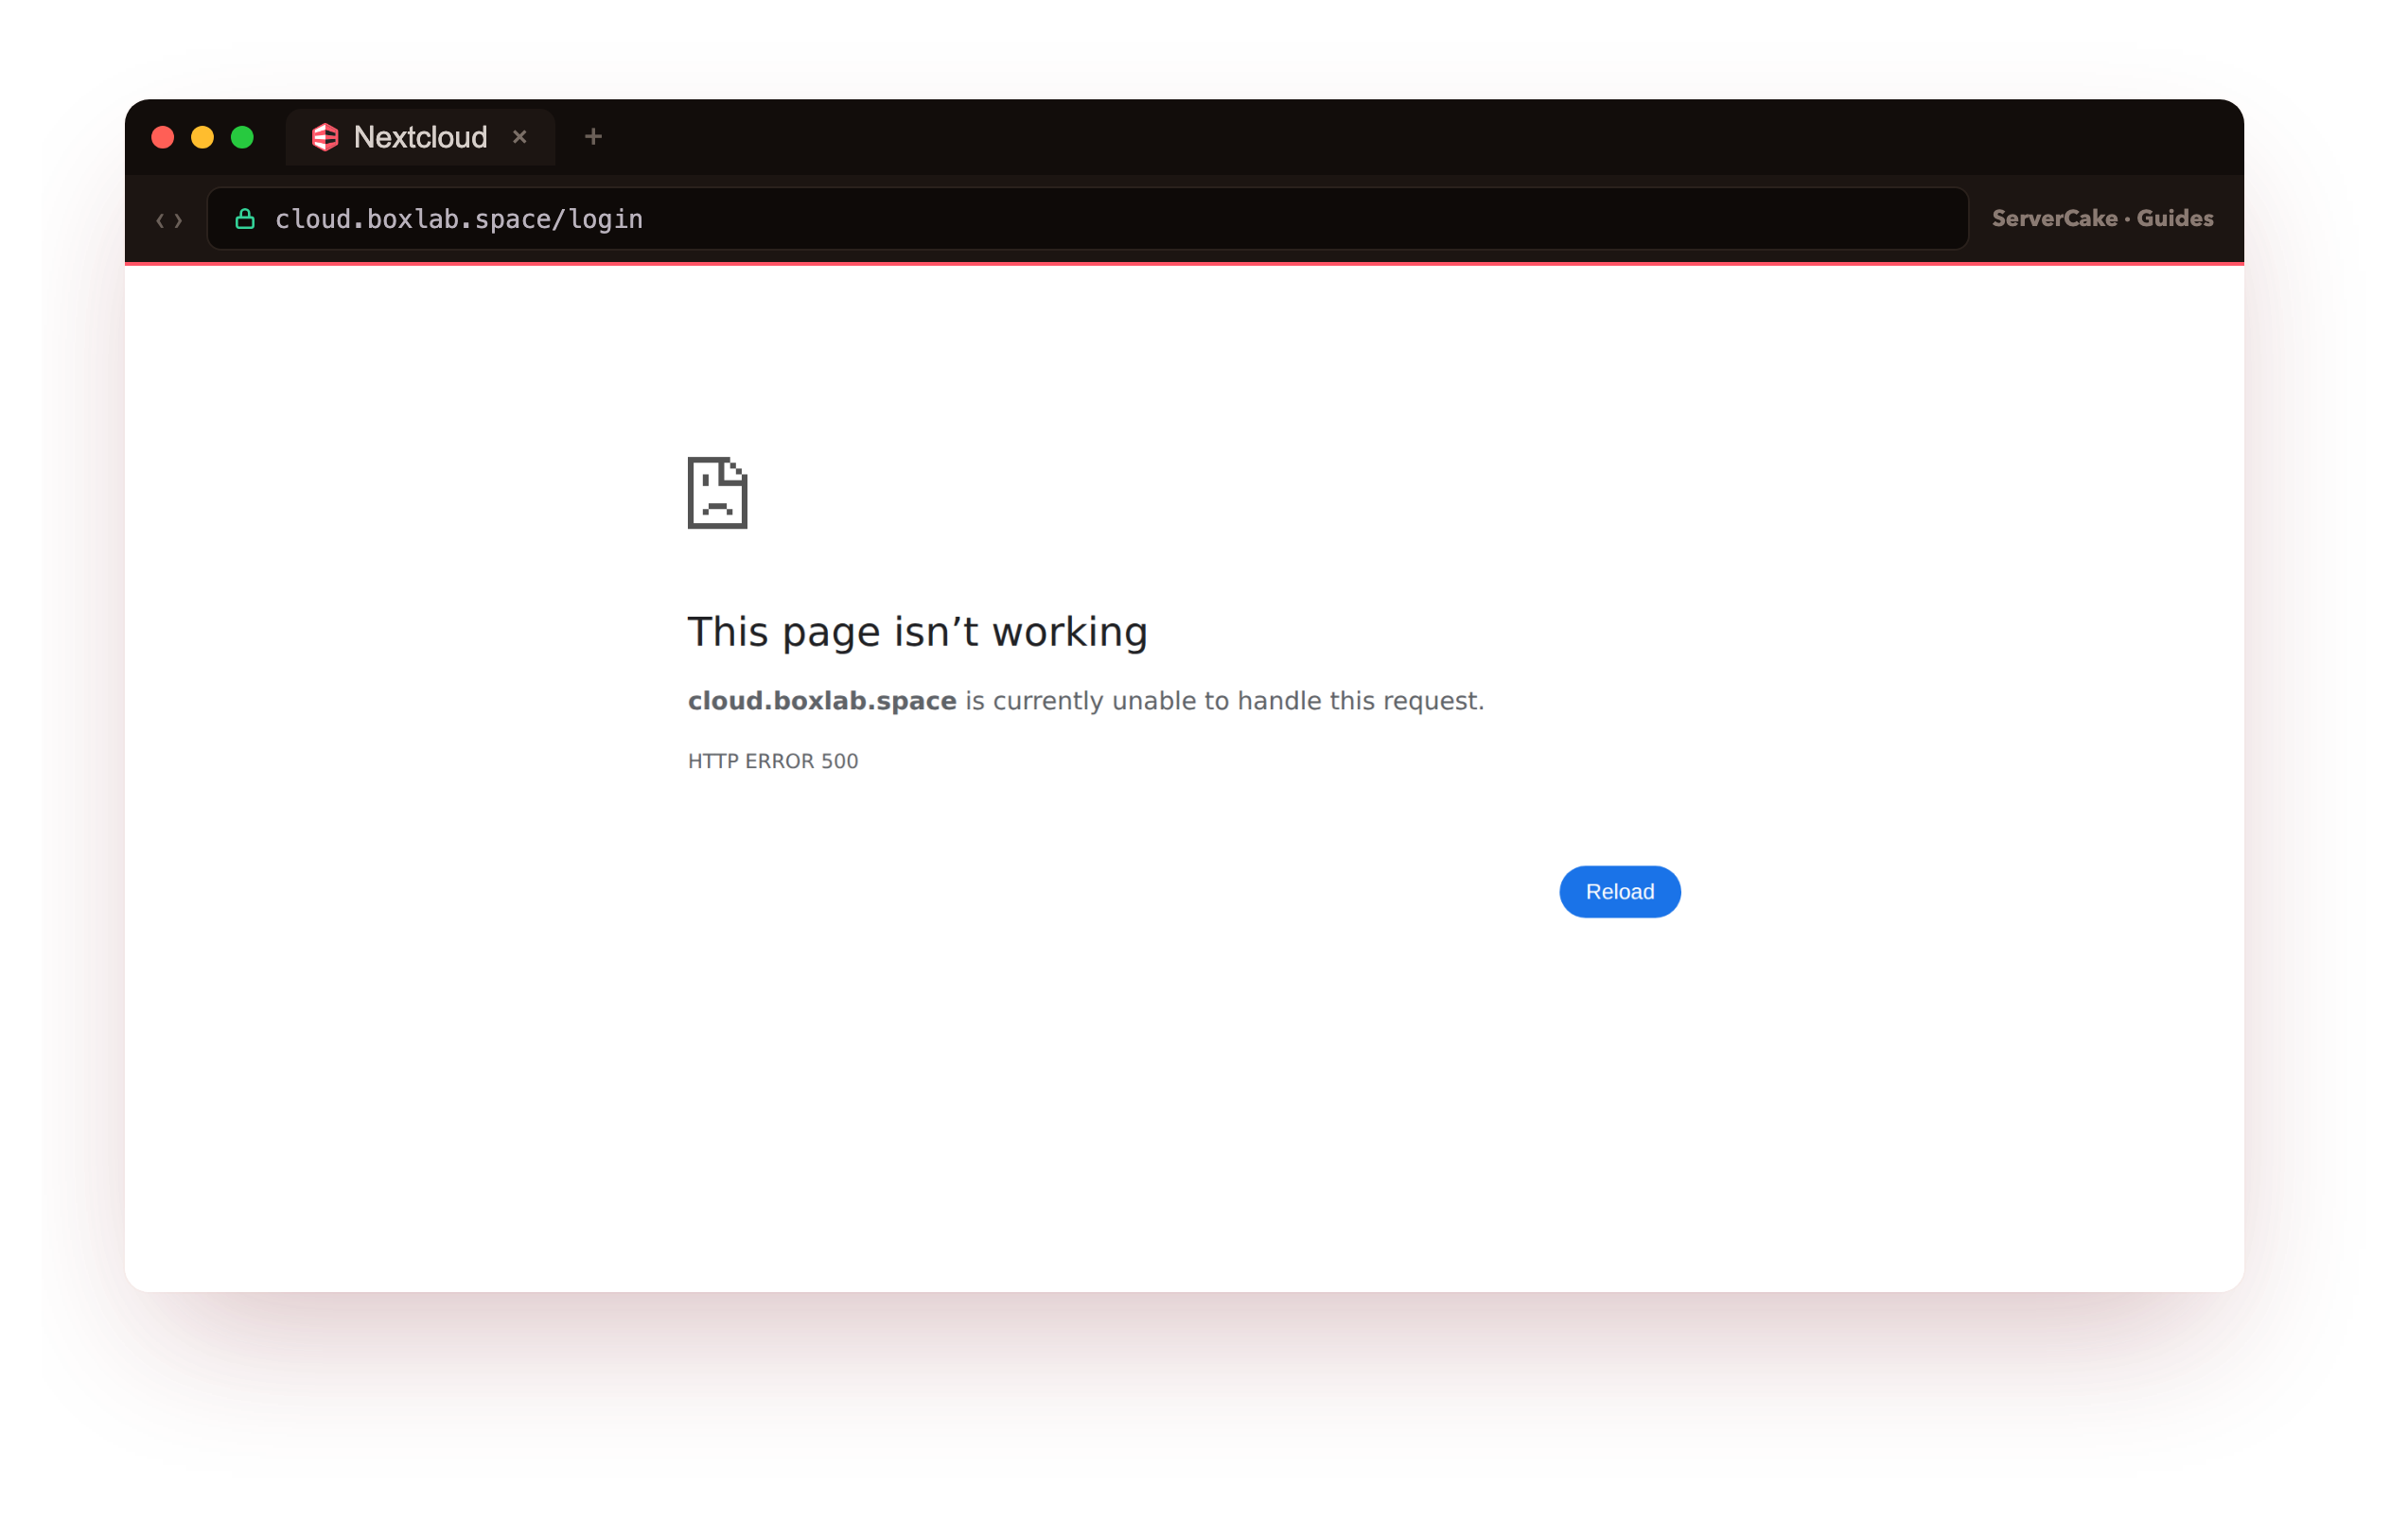
On our box the front page went straight to HTTP 500 the moment the database was gone, because Nextcloud cannot answer a single request without it, and wiping the two directories then removed the files and the config too. This is exactly the situation your backup exists for. Now recover from the offsite copy: pull the newest archive, unpack it, put the install and data directories back, and recreate and import the database.
# RESTORE: pull the latest archive from offsite and unpack it   (restore from the offsite copy)
cd /var/restore
LATEST=$(rclone lsf objectstore:nextcloud-backups | sort | tail -1)
rclone copy "objectstore:nextcloud-backups/$LATEST" .
tar -xzf "$LATEST"          # yields nextcloud/, nextcloud-data/, db-*.sql
# put the directories back, then recreate the database and import the dump
sudo cp -a nextcloud nextcloud-data /var/www/ && sudo chown -R www-data:www-data /var/www/nextcloud /var/www/nextcloud-data
DB_USER=$(sudo -u www-data php -r "include '/var/www/nextcloud/config/config.php'; echo \$CONFIG['dbuser'];")
DB_PASS=$(sudo -u www-data php -r "include '/var/www/nextcloud/config/config.php'; echo \$CONFIG['dbpassword'];")
sudo mysql -e "CREATE DATABASE nextcloud CHARACTER SET utf8mb4; GRANT ALL ON nextcloud.* TO '$DB_USER'@'localhost' IDENTIFIED BY '$DB_PASS'"
sudo mysql nextcloud < db-*.sql
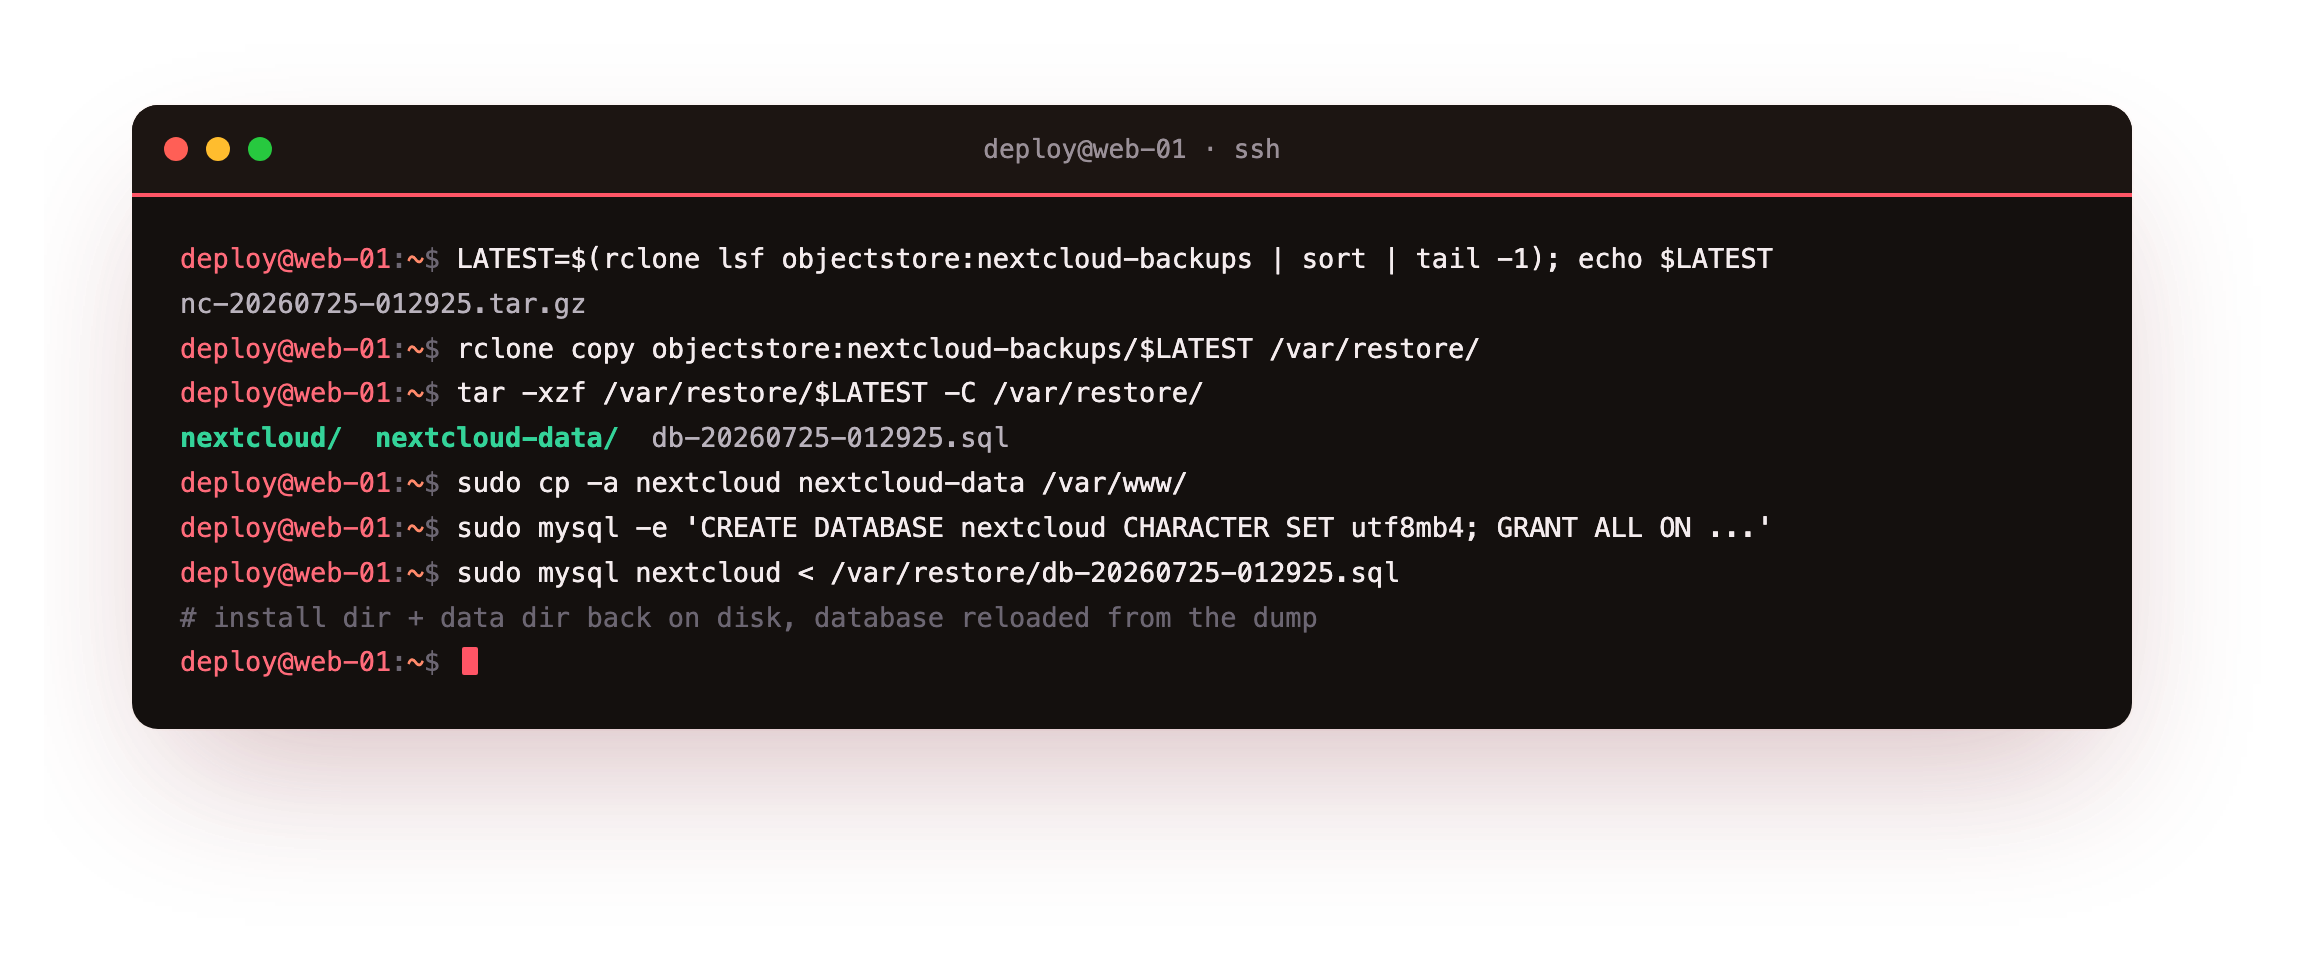
With the files back on disk and the database reloaded from the dump, tell Nextcloud it is live again, then let it re-check its data directory. The archive was taken in maintenance mode, so the restored config still has that flag set, which is why the first command turns it off.
# bring it back: release maintenance mode, then reconcile the data dir with the database
sudo -u www-data php /var/www/nextcloud/occ maintenance:mode --off
sudo -u www-data php /var/www/nextcloud/occ maintenance:data-fingerprint
sudo -u www-data php /var/www/nextcloud/occ files:scan --all
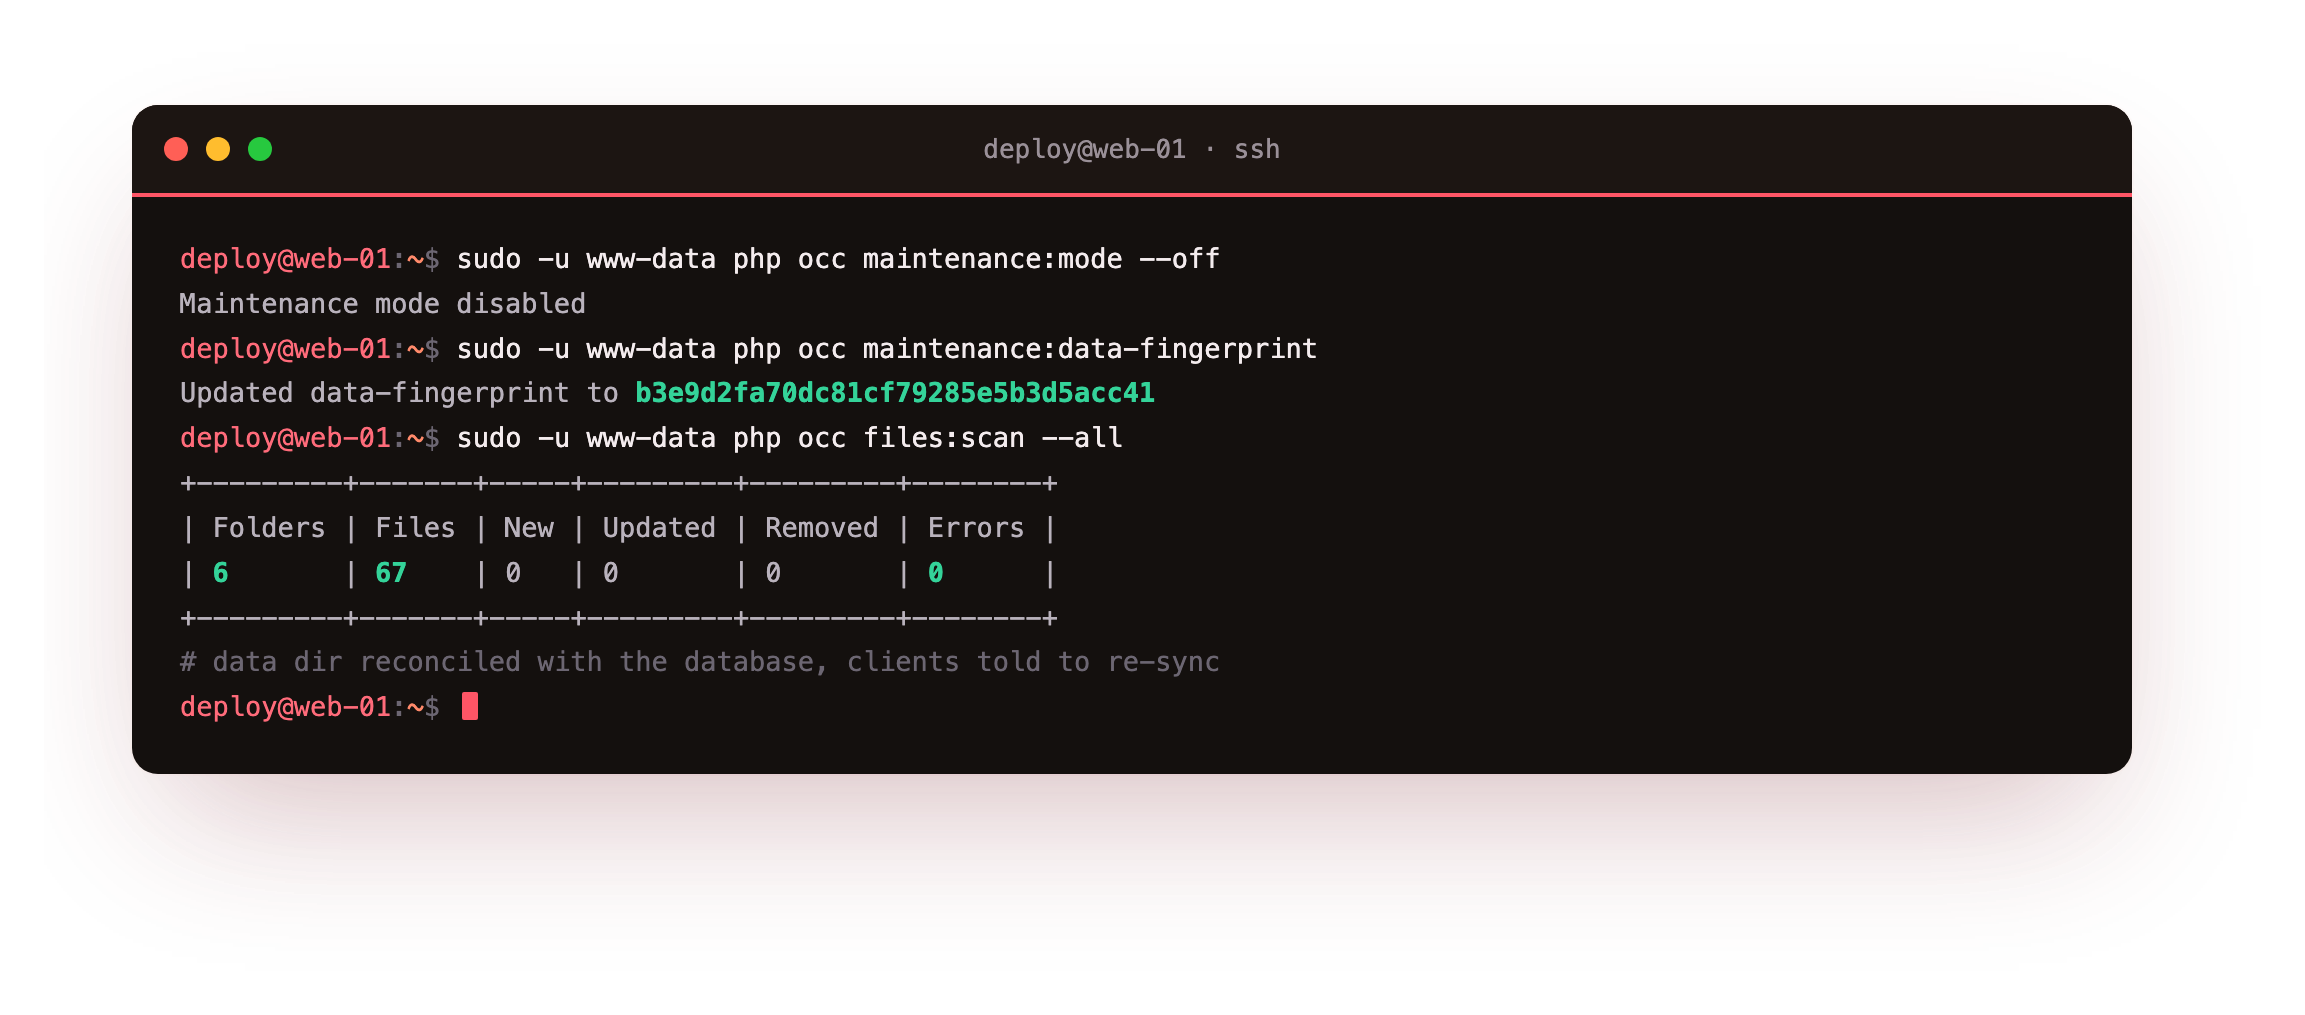
On our box files:scan --all walked the restored tree and reported 6 folders and 67 files with no errors, and maintenance:data-fingerprint reset the fingerprint so any connected desktop or mobile client knows the server was restored and re-syncs cleanly. The instance is now exactly as it was at the last backup. Verify it the same way you checked the good state, and confirm a specific user file is back.
# AFTER: the instance serves again and a known user file opens   (a specific user file is back)
curl -sk -o /dev/null -w 'front page -> %{http_code}\n' https://your-domain/login   # 200 again
curl -sk -u 'ncadmin:PASS' https://your-domain/remote.php/dav/files/ncadmin/Coonoor-handover.md | head -3
sudo -u www-data php /var/www/nextcloud/occ user:list
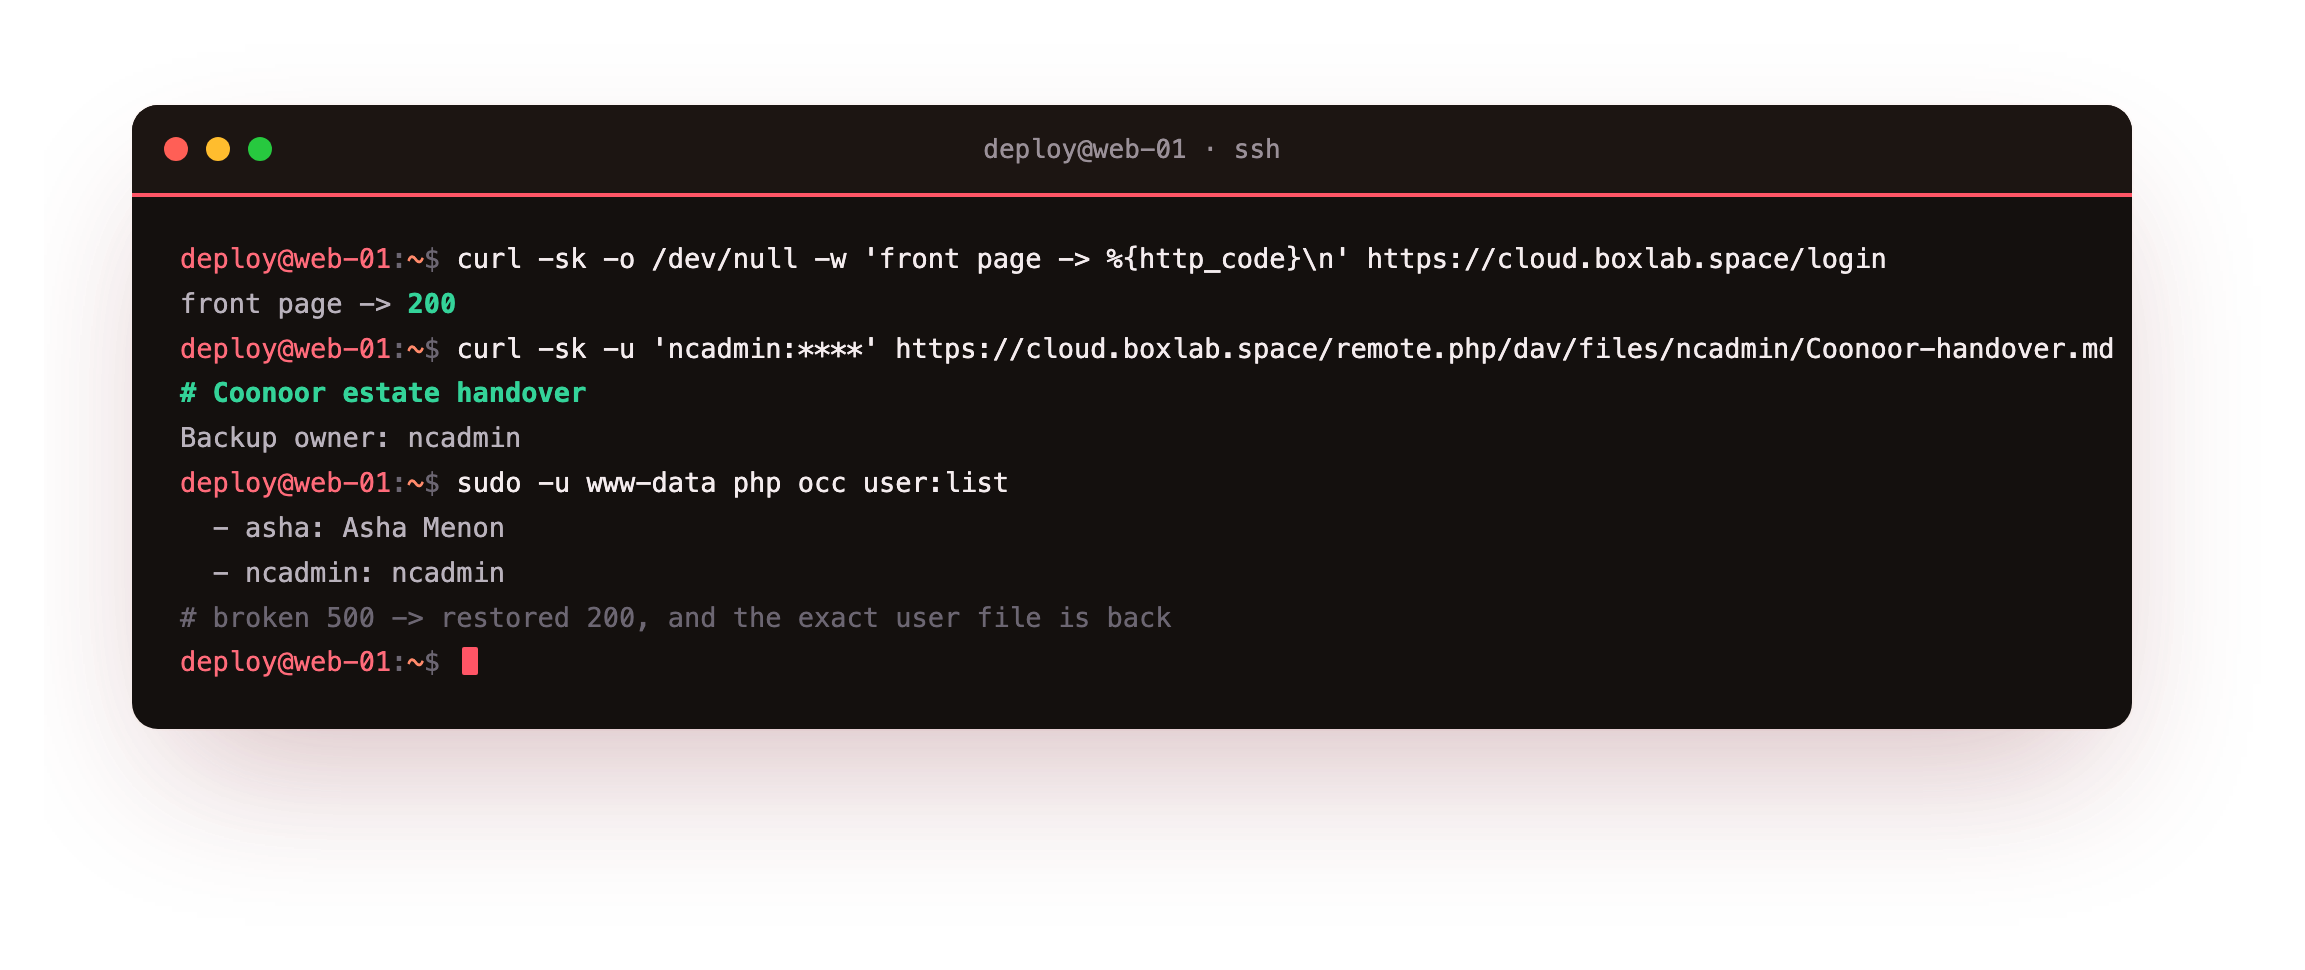
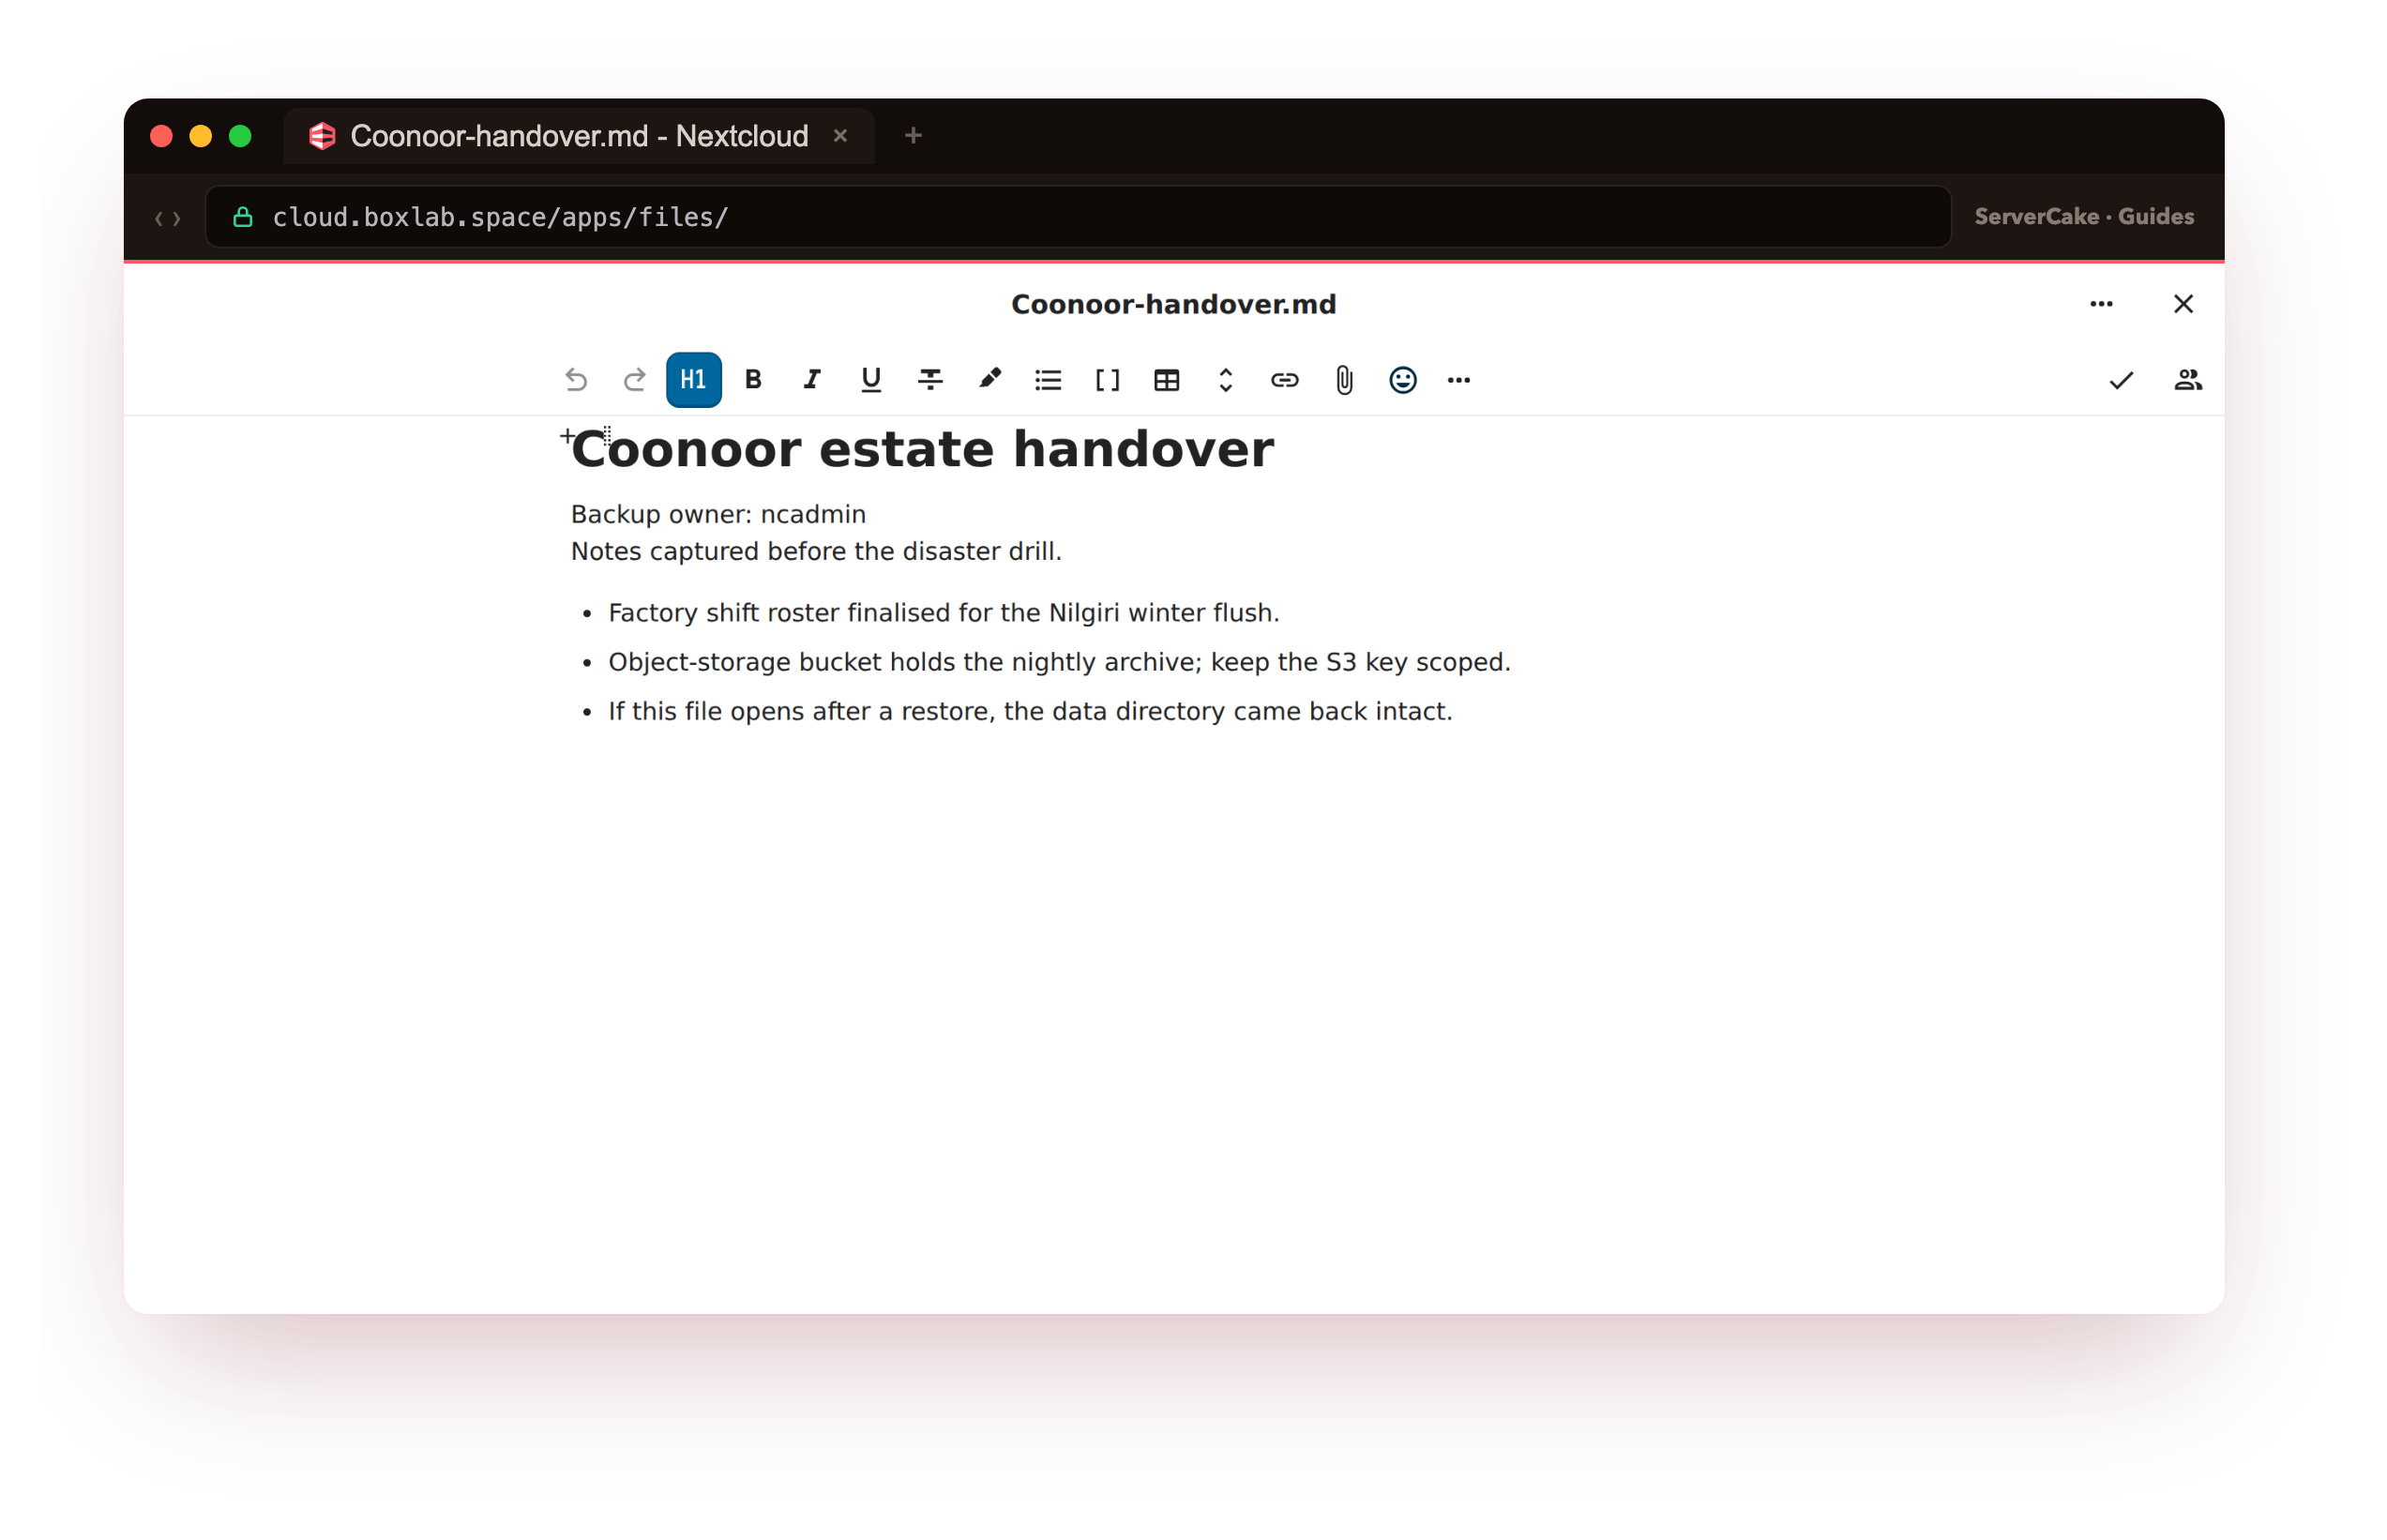
On our box the front page came back to 200, the WebDAV call streamed the real opening lines of Coonoor-handover.md, the very file present before the disaster, and user:list returned both ncadmin and asha. From a 500 and a dropped database to a whole instance again, sourced entirely from the offsite archive. This is the only backup worth keeping: one you have watched come back.
200 and a known file should open at its old path. If files list but thumbnails or previews are missing, that is normal right after a restore: they regenerate as the background cron runs, so give it a few minutes rather than re-restoring.Keep your backups reliable
Running the restore once proves the setup; running it on a rhythm is what keeps the backup honest as the instance fills up. Two habits carry most of the weight. The first is a standing reminder to repeat this drill, ideally by restoring the latest archive onto a staging slice each month, so you are the one who finds a broken backup rather than an outage.
The second is keeping an eye on whether the backup is even happening, because a timer that quietly stopped is more dangerous than no backup at all, since it still feels covered. Checking that the newest offsite archive is fresh is enough to catch it.
# monitor: alert if the newest offsite backup is older than a day
/usr/local/bin/nc-backup-check.sh
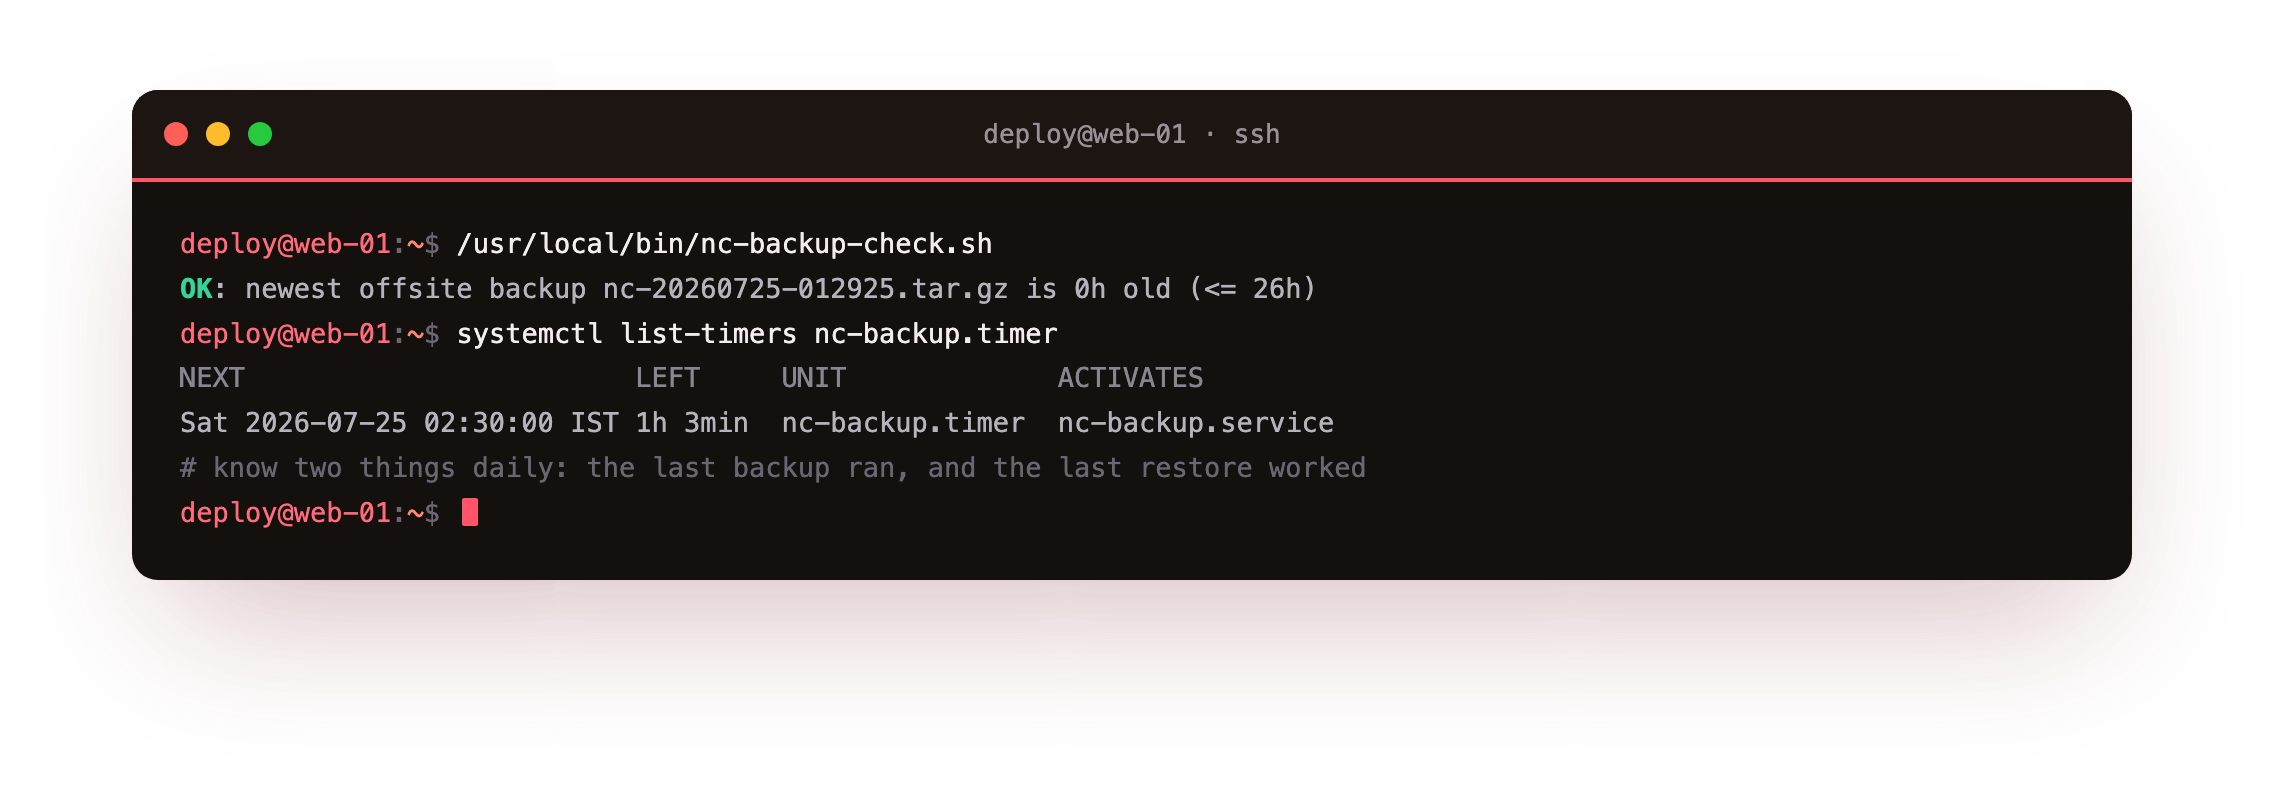
On our box the check printed OK: newest offsite backup ... is 0h old, and feeding its non-zero exit into whatever already alerts you, be it a cron mail, a webhook or an uptime probe, makes a stale backup page you instead of ambush you. With a monthly restore test on one side and a freshness check on the other, the backup graduates from a one-time chore into something you can point to and say works.
Frequently asked questions
Do I really need maintenance mode to back up Nextcloud?
For a backup you can trust, yes. Nextcloud's database and its data directory change together, so if you dump the database while a file is mid-upload, the database can point at a file the archive missed, and the restore comes back subtly inconsistent. Maintenance mode freezes writes for the few seconds it takes to dump the database and start the tar, which is why the script turns it on first and off last. On a busy instance this pause is short and belongs in a quiet window, which is exactly why the timer runs at 02:30.Can I skip the install directory and only back up config, database and data?
You can, and the archive gets much smaller, because the install directory is mostly code you can re-download for your Nextcloud version. The one file inside it you must never skip isconfig/config.php, since it holds the secret and passwordsalt that a restored database and data directory need to decrypt and authenticate. Backing up the whole install directory, as this tutorial does, is the safest default because it makes a restore a straight extract with no version-matching, but a config-plus-database-plus-data backup is a valid, leaner choice if you are disciplined about recording the exact version.
Where should the offsite backups actually live?
Somewhere that is not the same machine, and better still not the same provider account, so a single stolen login cannot wipe the instance and its backups in one move. Object storage suits the job well: it is inexpensive, every tool already speaks its S3 API, and a lifecycle rule can retire old archives on its own. Put the bucket in the slice's region, such as ServerCake Object Storage in India, and restores stay quick while data residency stays simple, and a key scoped to only that bucket keeps a leak contained.How often should I back up Nextcloud, and how long does a restore take?
Match the schedule to how much you are willing to lose. A personal instance that changes daily is well served by the nightly timer here, and a shared instance with active teams wants more, either several runs a day or file versioning so you can roll back individual files. A full restore is as fast as the archive is large: on our small slice the 360M archive pulled, extracted and imported in a couple of minutes. Thefiles:scan at the end is what takes longest on a big data directory, so budget for it, and remember that previews regenerate quietly afterwards.
Running Nextcloud on your own slice means the backups are yours, stored where you choose, and restored on your schedule rather than a host's. If you want a box to script this whole routine on and rehearse a real restore, a ServerCake slice hands you a clean Ubuntu 24.04 server in India, billed in rupees with GST, with object storage one bucket away for the offsite copy.