What you will have
By the end of this guide you will install Nextcloud on a VPS from nothing: a bare Ubuntu 24.04 slice becomes your own private cloud, a genuine replacement for Google Drive that stores your files on a box you own, in a location you choose. Nextcloud gives you the files, calendar, contacts and photo sync you expect from a big platform, except the data lives on your slice and answers only to you.
That ownership is the reason to bother. For anyone in India who would rather keep customer records, invoices and family photos on Indian hardware than in someone else's data centre, the data-residency control this gives you is the whole point, and it is a growing consideration under the DPDP rules.
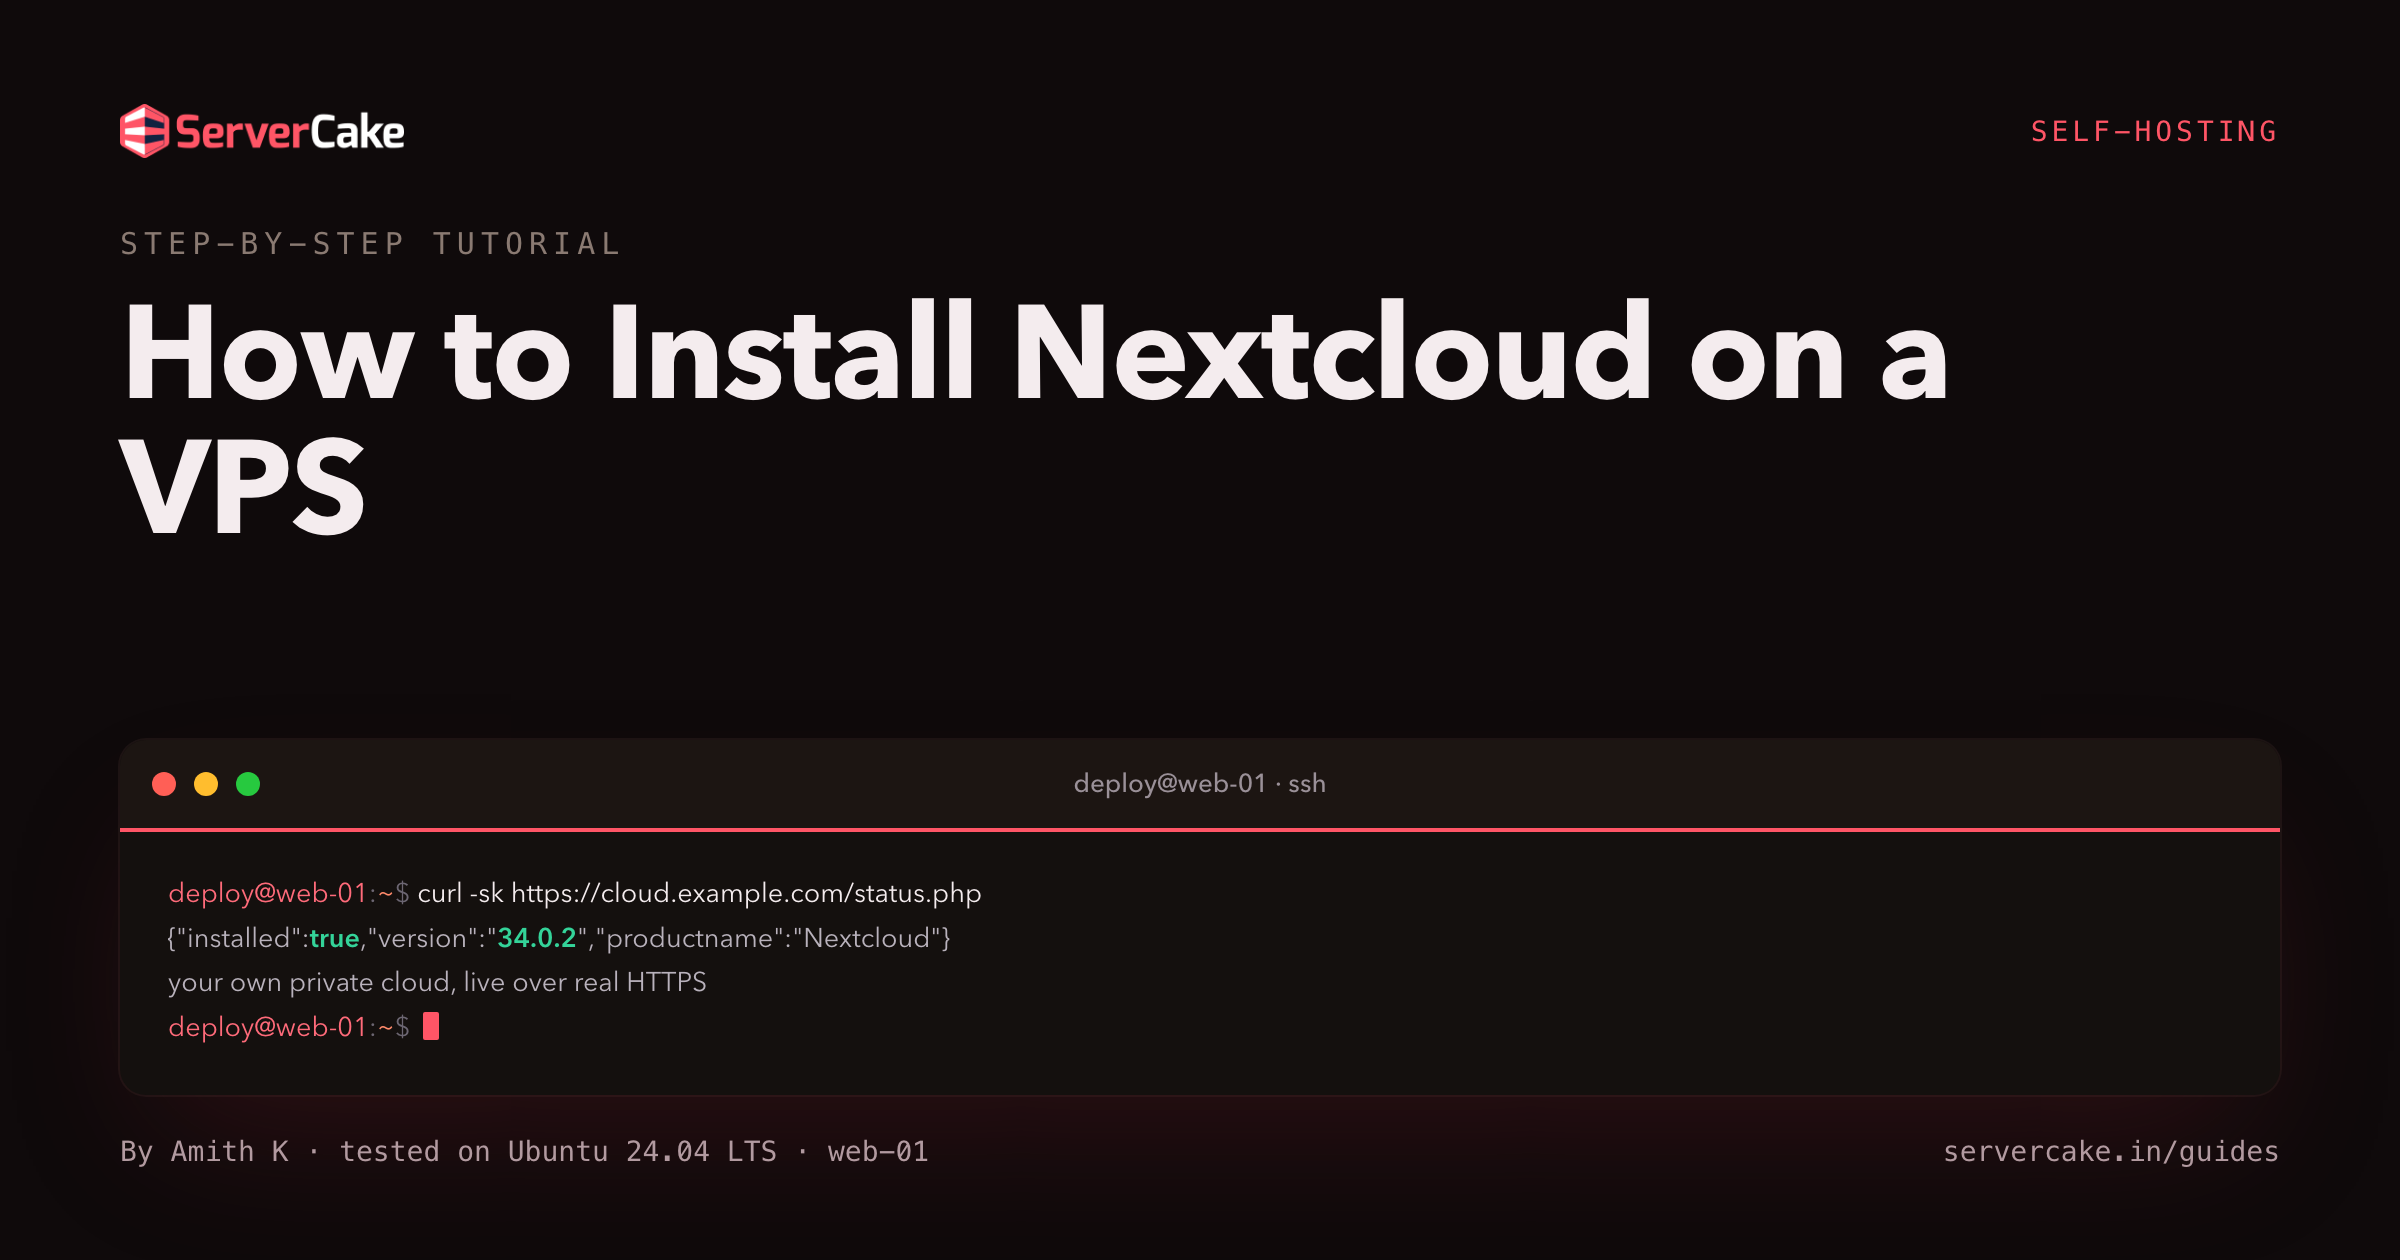
Let us start with the destination, so you know exactly what you are building toward. Every screenshot in this guide is real, captured while we stood up an actual instance on our lab box, so the version numbers and the interface you see below are the ones you will get, not a polished mock-up.
curl -sk https://your-domain/status.php
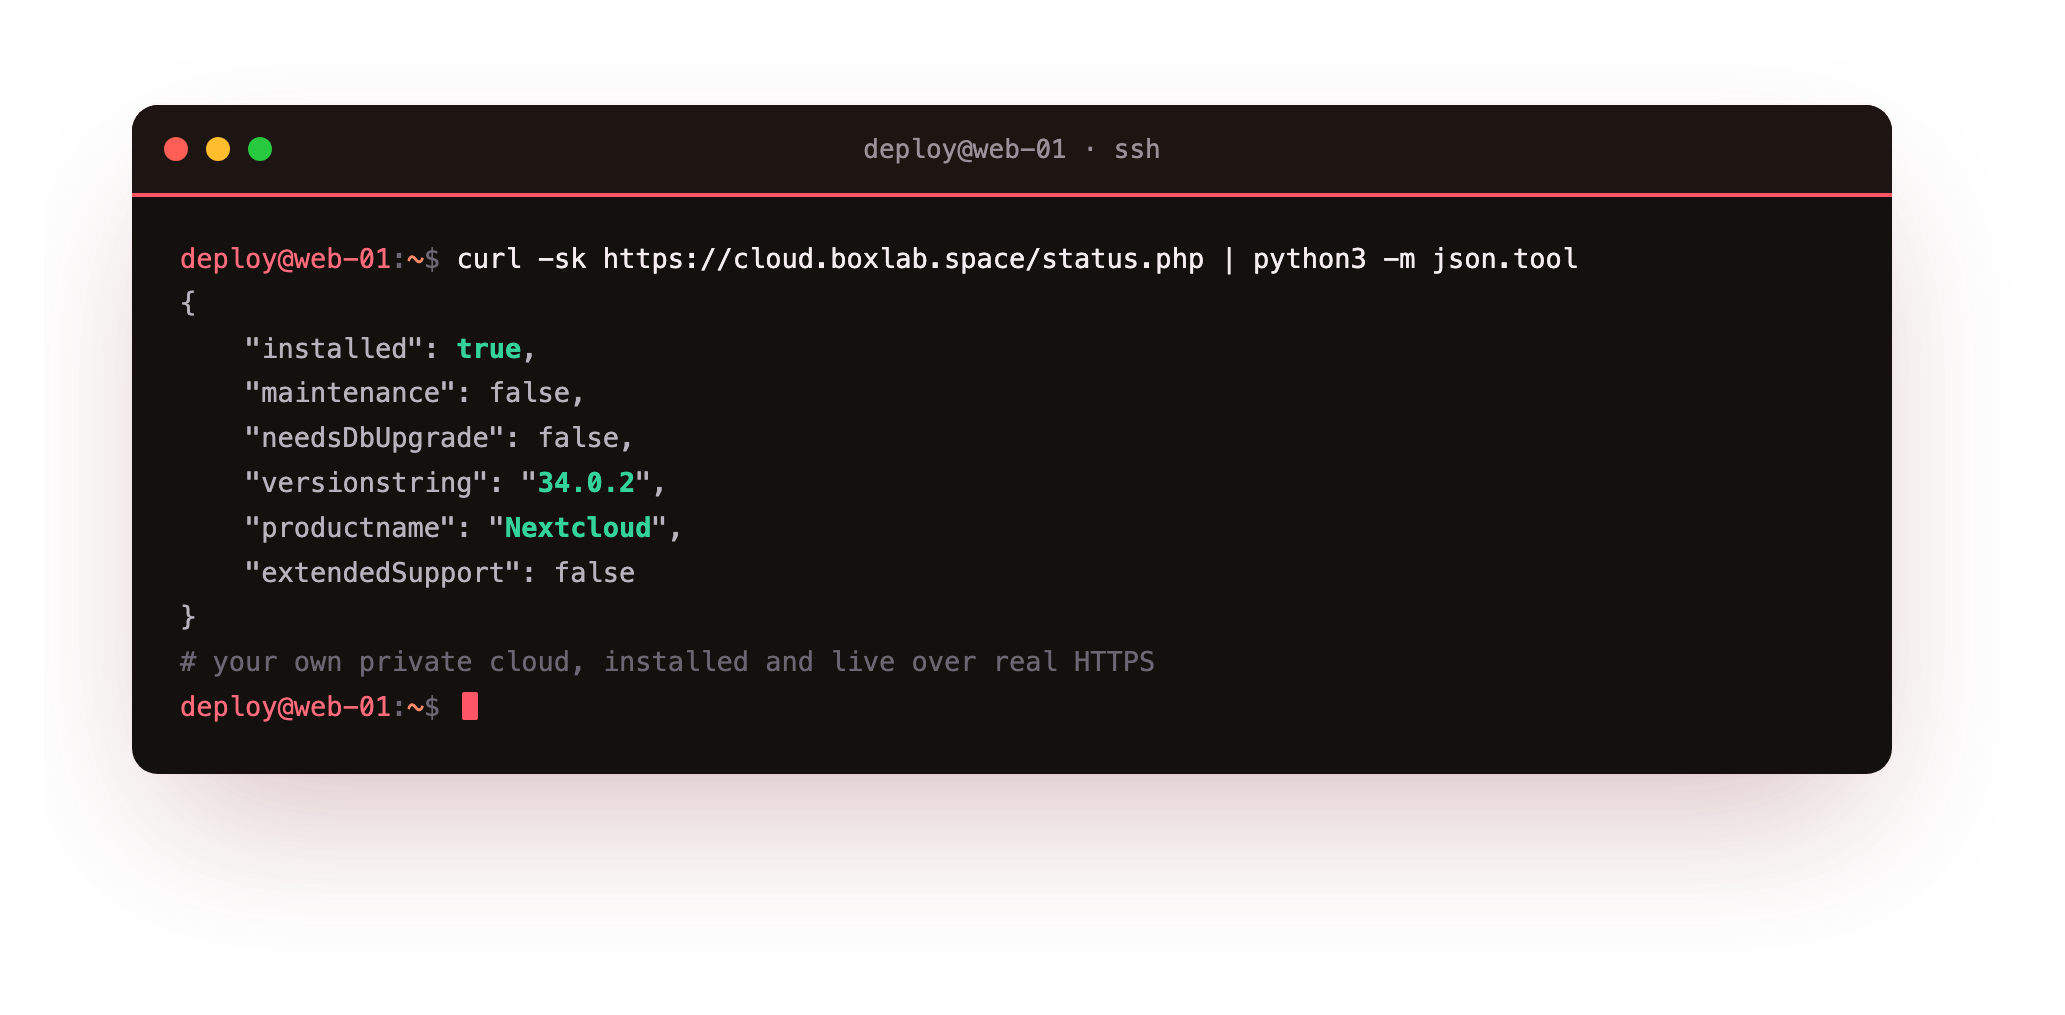
That one response is Nextcloud telling you it is installed and live: the product name, the exact version, and installed: true. From there it is your dashboard, your files, your rules.
- Installing the stack Nextcloud needs: nginx, PHP-FPM, MariaDB and the right PHP extensions.
- Creating a database and a least-privilege user scoped to Nextcloud alone.
- Downloading Nextcloud, verifying the checksum, and placing it with a data directory outside the web root.
- Serving it over a real HTTPS certificate and running the command-line installer.
- Fixing every recommended-settings warning Nextcloud flags, until the admin overview is green.
Before you begin
This is a do-it-yourself guide, so it assumes a little groundwork. None of it is heavy.
- An Ubuntu 24.04 LTS slice you can log into over SSH as a user with
sudo. Two vCPUs and 2 GB of RAM makes a comfortable personal cloud, and you can size up later. - A domain or subdomain you control, with access to edit its DNS records. Most people put Nextcloud on a subdomain like
cloud.example.com. - The public IP of your slice, which you will point that one DNS record at.
- Roughly forty minutes, and a habit of reading what each command reports back before running the next one.
Everything below is run as a normal sudo user over SSH. Where a step needs root it uses sudo, so you never log in as root directly, and where a step acts on the files Nextcloud owns it runs as the www-data web user.
Install the stack
Nextcloud is a PHP application, so it needs three things around it: a web server to accept requests, a PHP runtime to execute the code, and a database to hold the metadata. That is nginx plus PHP-FPM plus MariaDB, the same LEMP stack that runs most of the self-hosted web. One apt install brings all three, plus bzip2 for unpacking the release.
sudo apt update && sudo apt install -y nginx \
     php-fpm php-mysql mariadb-server bzip2
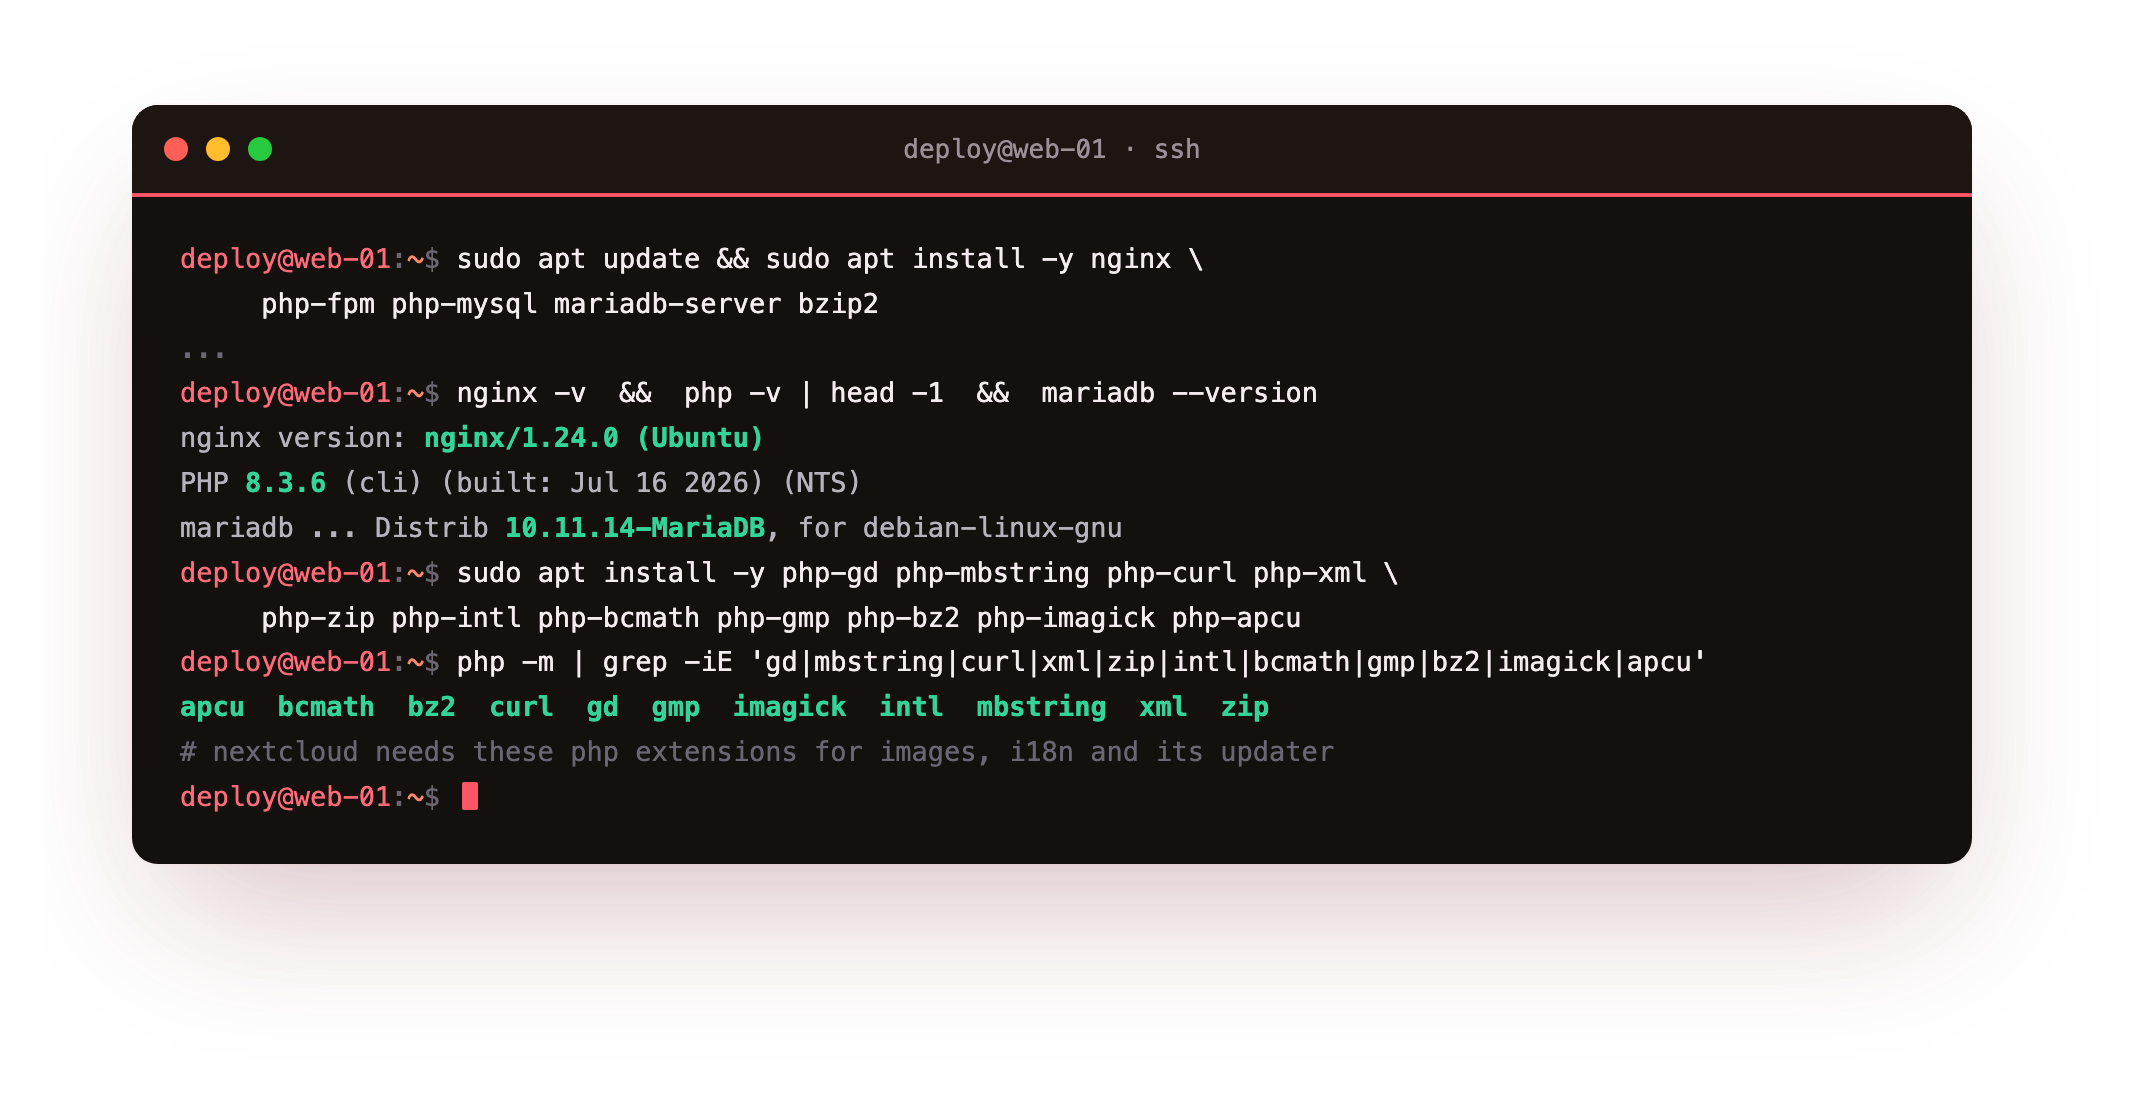
Read the versions back so you know what you are running rather than trusting the package name alone. On a current Ubuntu 24.04 slice this is nginx 1.24.0, PHP 8.3, and MariaDB 10.11. If you want to understand the PHP-FPM half of this stack in depth, our PHP-FPM and OPcache guide covers the runtime that Nextcloud leans on hardest.
Nextcloud also expects a specific set of PHP extensions: image handling, translations, the maths libraries its encryption uses, and the archive support its updater needs. Install them and PHP-FPM will pick them up.
sudo apt install -y php-gd php-mbstring php-curl php-xml \
     php-zip php-intl php-bcmath php-gmp php-bz2 php-imagick php-apcu
Confirm the extensions are loaded before moving on. A fresh install that skips one of these fails the setup checks later, so it is worth a look now.
php -m | grep -iE 'gd|mbstring|curl|xml|zip|intl|bcmath|gmp|bz2|imagick|apcu'
php -m. If one is missing, install it and restart php8.3-fpm before you continue.Create the database
A fresh MariaDB install ships with a few loose ends, so run sudo mysql_secure_installation first and answer yes to every prompt. Then create the database Nextcloud will live in, and a dedicated user that can touch that database and nothing else. This is the single most important database habit: Nextcloud never needs access to any schema but its own, so its user is granted rights on nextcloud.* only, never on *.*. If the app is ever compromised, the blast radius stops at this one database.
sudo mariadb
CREATE DATABASE nextcloud
  CHARACTER SET utf8mb4 COLLATE utf8mb4_general_ci;
CREATE USER 'ncuser'@'localhost'
  IDENTIFIED BY '<your-strong-db-password>';
GRANT ALL PRIVILEGES ON nextcloud.*
  TO 'ncuser'@'localhost';
FLUSH PRIVILEGES;
EXIT;
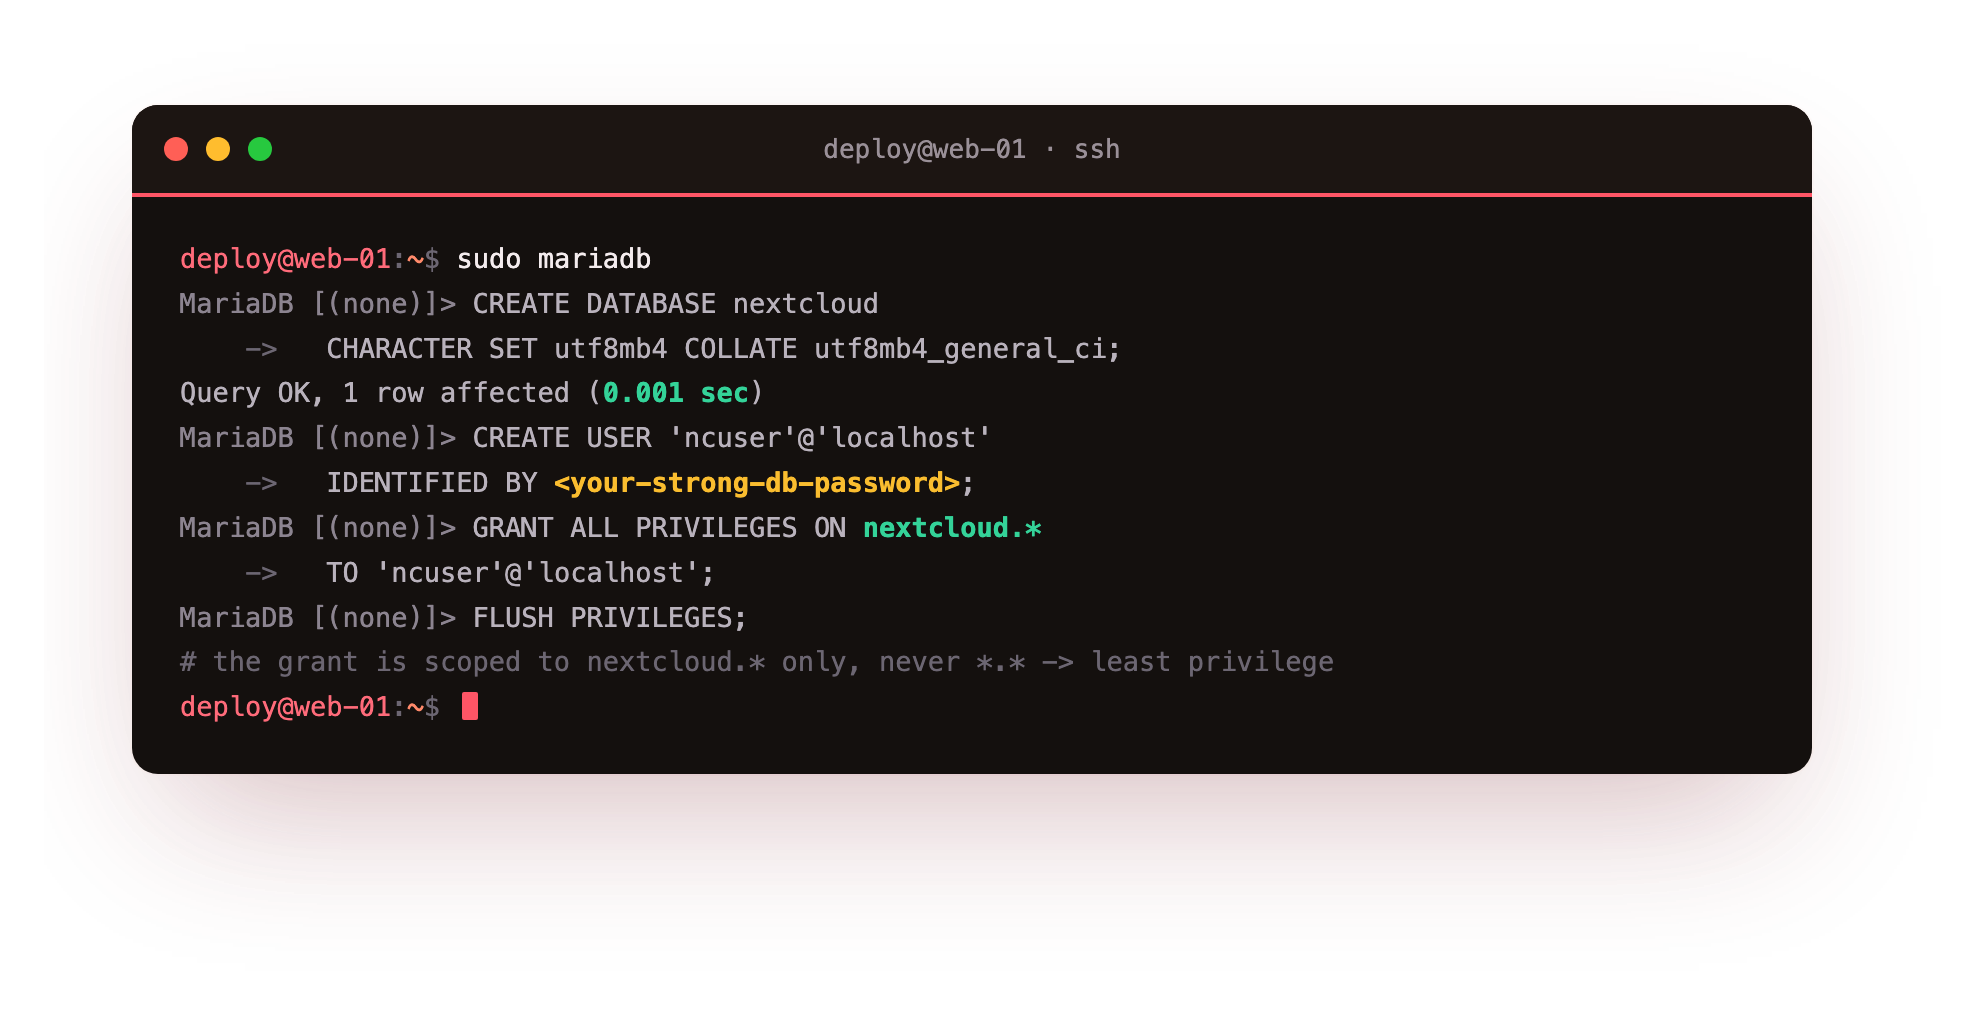
Pick a long, random password for ncuser and keep it somewhere safe. You will hand it to the installer in a moment and never type it again. The utf8mb4 character set is what lets Nextcloud store filenames and notes in every language, and emoji, without corruption.
Get Nextcloud
Download the current release straight from source, and do the one step most rushed installs skip: verify the checksum. The published .sha256 file lets you prove the archive arrived intact before you trust it.
cd /var/www
sudo curl -sSLO https://download.nextcloud.com/server/releases/latest.tar.bz2
sudo curl -sSLO https://download.nextcloud.com/server/releases/latest.tar.bz2.sha256
sha256sum -c --ignore-missing latest.tar.bz2.sha256
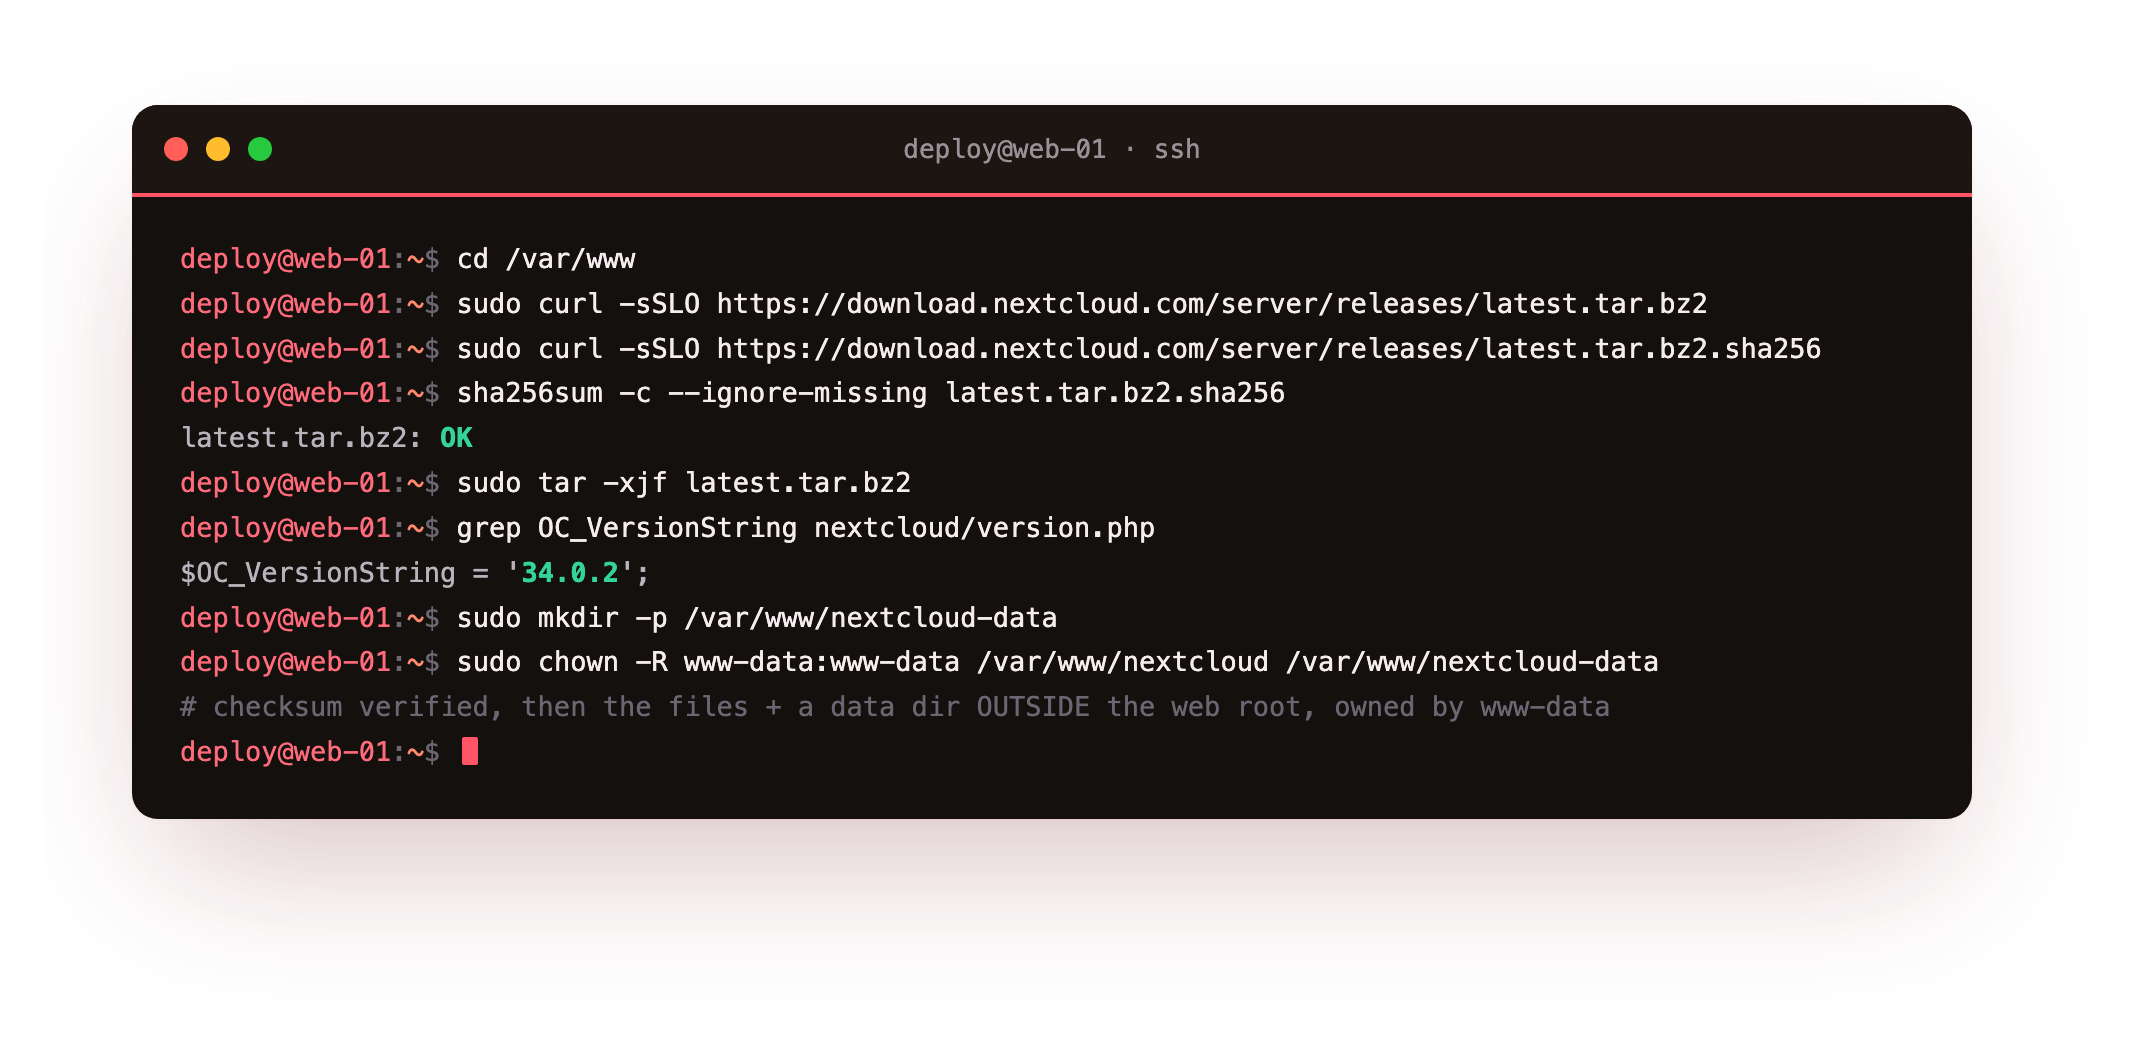
A line reading latest.tar.bz2: OK means the download matches the checksum the Nextcloud project published. Now unpack it, create a data directory outside the web root, and give both to the web server user.
sudo tar -xjf latest.tar.bz2
sudo mkdir -p /var/www/nextcloud-data
sudo chown -R www-data:www-data /var/www/nextcloud /var/www/nextcloud-data
Keeping the data directory outside /var/www/nextcloud matters: it means your files can never be served directly by the web server even if a rule is misconfigured, because they do not live under the web root at all. The version.php file inside the unpacked folder confirms exactly which release you have, in our case Nextcloud 34.0.2.
Point your domain and turn on real HTTPS
Nextcloud is on the slice, but nothing answers your domain yet. In your DNS, add an A record for the hostname you want (a subdomain like cloud) pointing at your slice's public IP, and give it a few minutes to propagate.
Next, create the nginx server block. Nextcloud publishes a recommended nginx configuration, and it is worth using in full because it does real security work: it refuses to serve the data and config directories, routes every request through the front controller, sends the security headers Nextcloud expects, and serves the .mjs JavaScript modules the interface needs with the correct MIME type. The heart of it looks like this.
# /etc/nginx/sites-available/your-domain
server {
    listen 443 ssl http2;
    server_name your-domain;

    ssl_certificate     /etc/letsencrypt/live/your-domain/fullchain.pem;
    ssl_certificate_key /etc/letsencrypt/live/your-domain/privkey.pem;

    root /var/www/nextcloud;
    index index.php index.html /index.php$request_uri;
    client_max_body_size 512M;

    add_header Strict-Transport-Security "max-age=15768000; includeSubDomains" always;
    add_header X-Content-Type-Options "nosniff" always;
    add_header X-Frame-Options "SAMEORIGIN" always;

    location ~ ^/(?:build|tests|config|lib|3rdparty|templates|data)(?:$|/) { return 404; }

    location / { try_files $uri $uri/ /index.php$request_uri; }

    location ~ \.php(?:$|/) {
        fastcgi_split_path_info ^(.+?\.php)(/.*)$;
        include fastcgi_params;
        fastcgi_param SCRIPT_FILENAME $document_root$fastcgi_script_name;
        fastcgi_param PATH_INFO $fastcgi_path_info;
        fastcgi_param HTTPS on;
        fastcgi_pass unix:/run/php/php8.3-fpm.sock;
    }

    location ~ \.(?:css|js|mjs|woff2?|svg|gif|png|jpg|ico|wasm)$ {
        try_files $uri /index.php$request_uri;
        location ~ \.mjs$ { default_type text/javascript; }
        access_log off;
    }
}
The one line that trips up most first installs is the index directive: including /index.php$request_uri is what lets a request for a real directory like /apps/files/ fall through to the front controller instead of returning a 403. To get the free, auto-renewing certificate those ssl_certificate lines point at, install Certbot with sudo apt install -y certbot python3-certbot-nginx and run sudo certbot --nginx -d your-domain. Then enable the site and reload.
sudo ln -s /etc/nginx/sites-available/your-domain \
     /etc/nginx/sites-enabled/
sudo nginx -t
sudo systemctl reload nginx
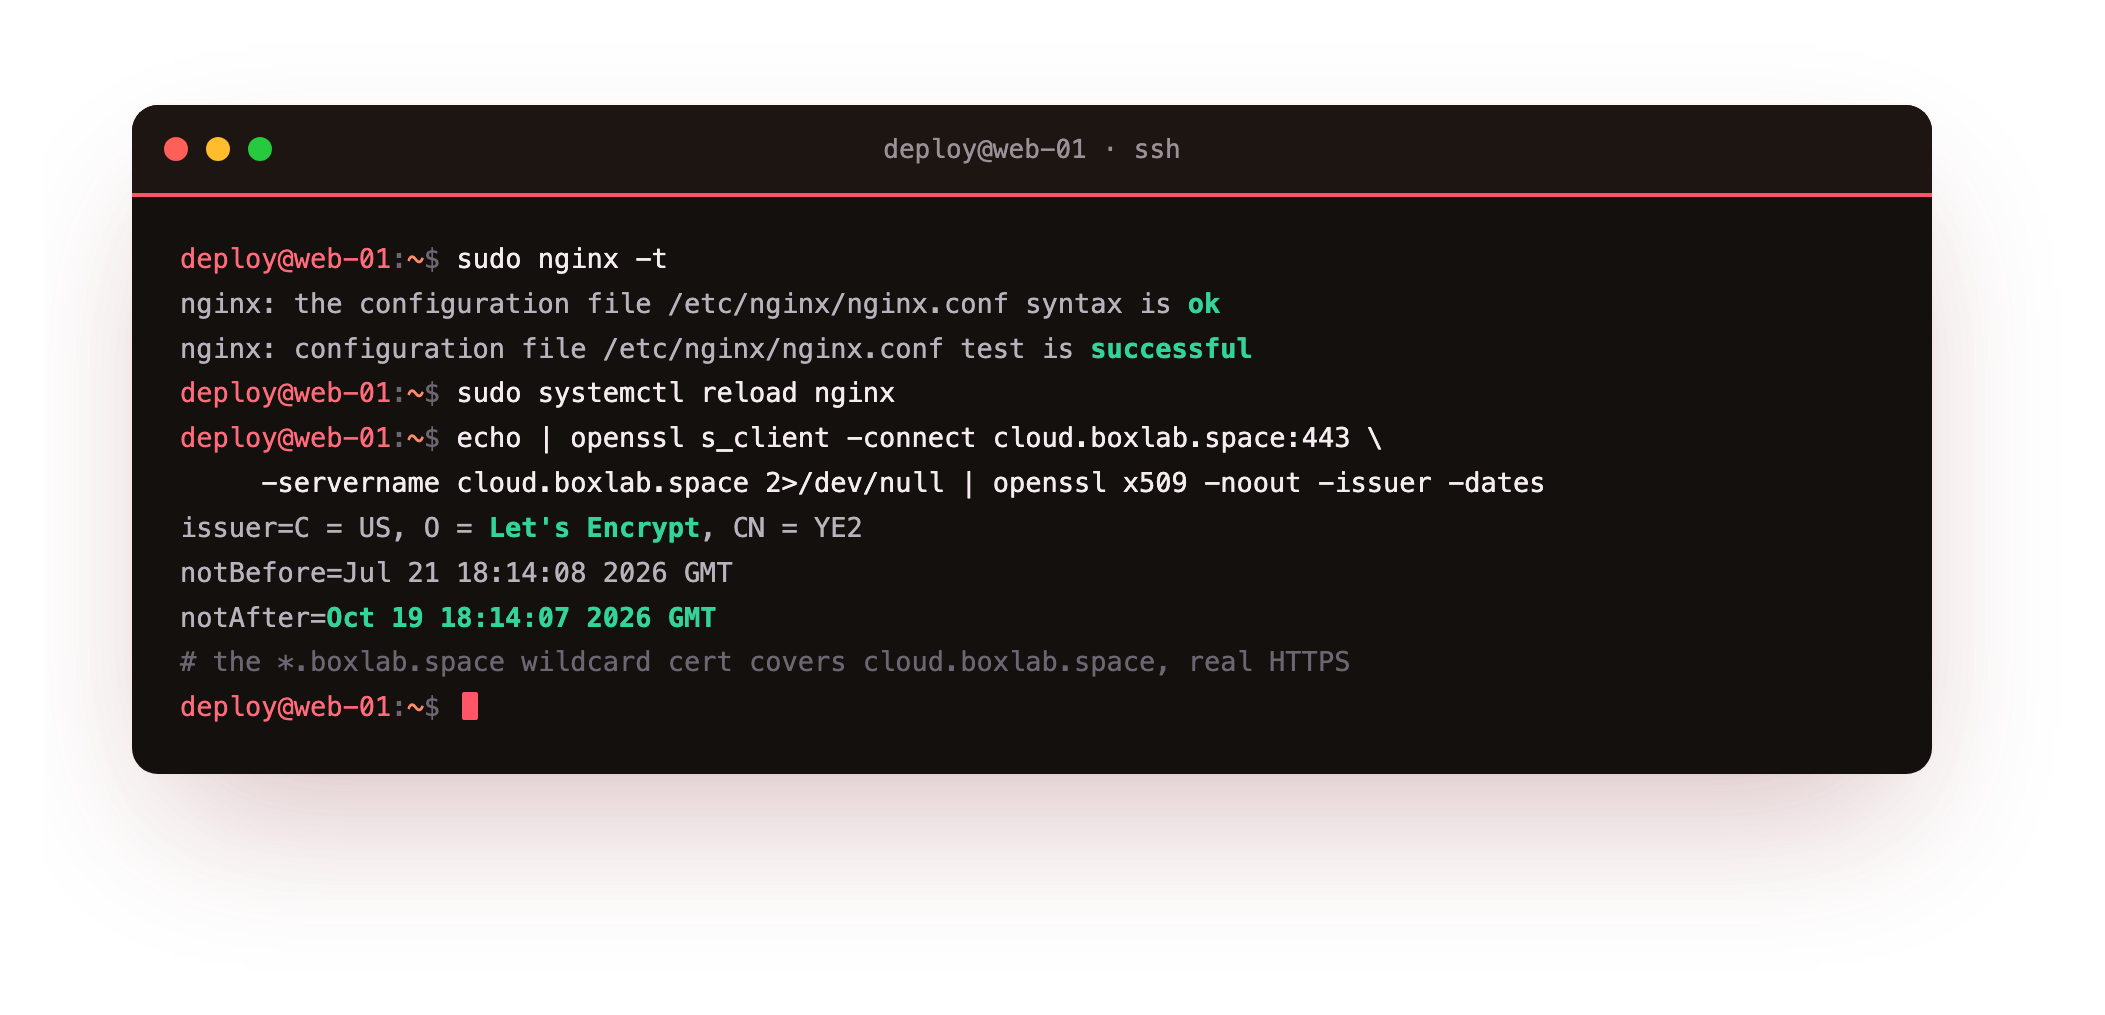
A test is successful from nginx -t is the gate; nginx will not reload a broken config, so never skip it. With the certificate in place the padlock is real, issued by a public authority and trusted by every browser.
Install Nextcloud on a VPS with the setup wizard
You could finish the install by opening the site in a browser and filling in the web wizard. The command line is faster and more reliable, and it is the same tool you will use to run Nextcloud for years: occ. Run its maintenance:install and it creates the database tables, writes the config, and sets up your admin account in one pass.
cd /var/www/nextcloud
sudo -u www-data php occ maintenance:install \
     --database mysql --database-name nextcloud \
     --database-user ncuser --database-pass '<db-password>' \
     --admin-user ncadmin --admin-pass '<admin-password>' \
     --data-dir /var/www/nextcloud-data
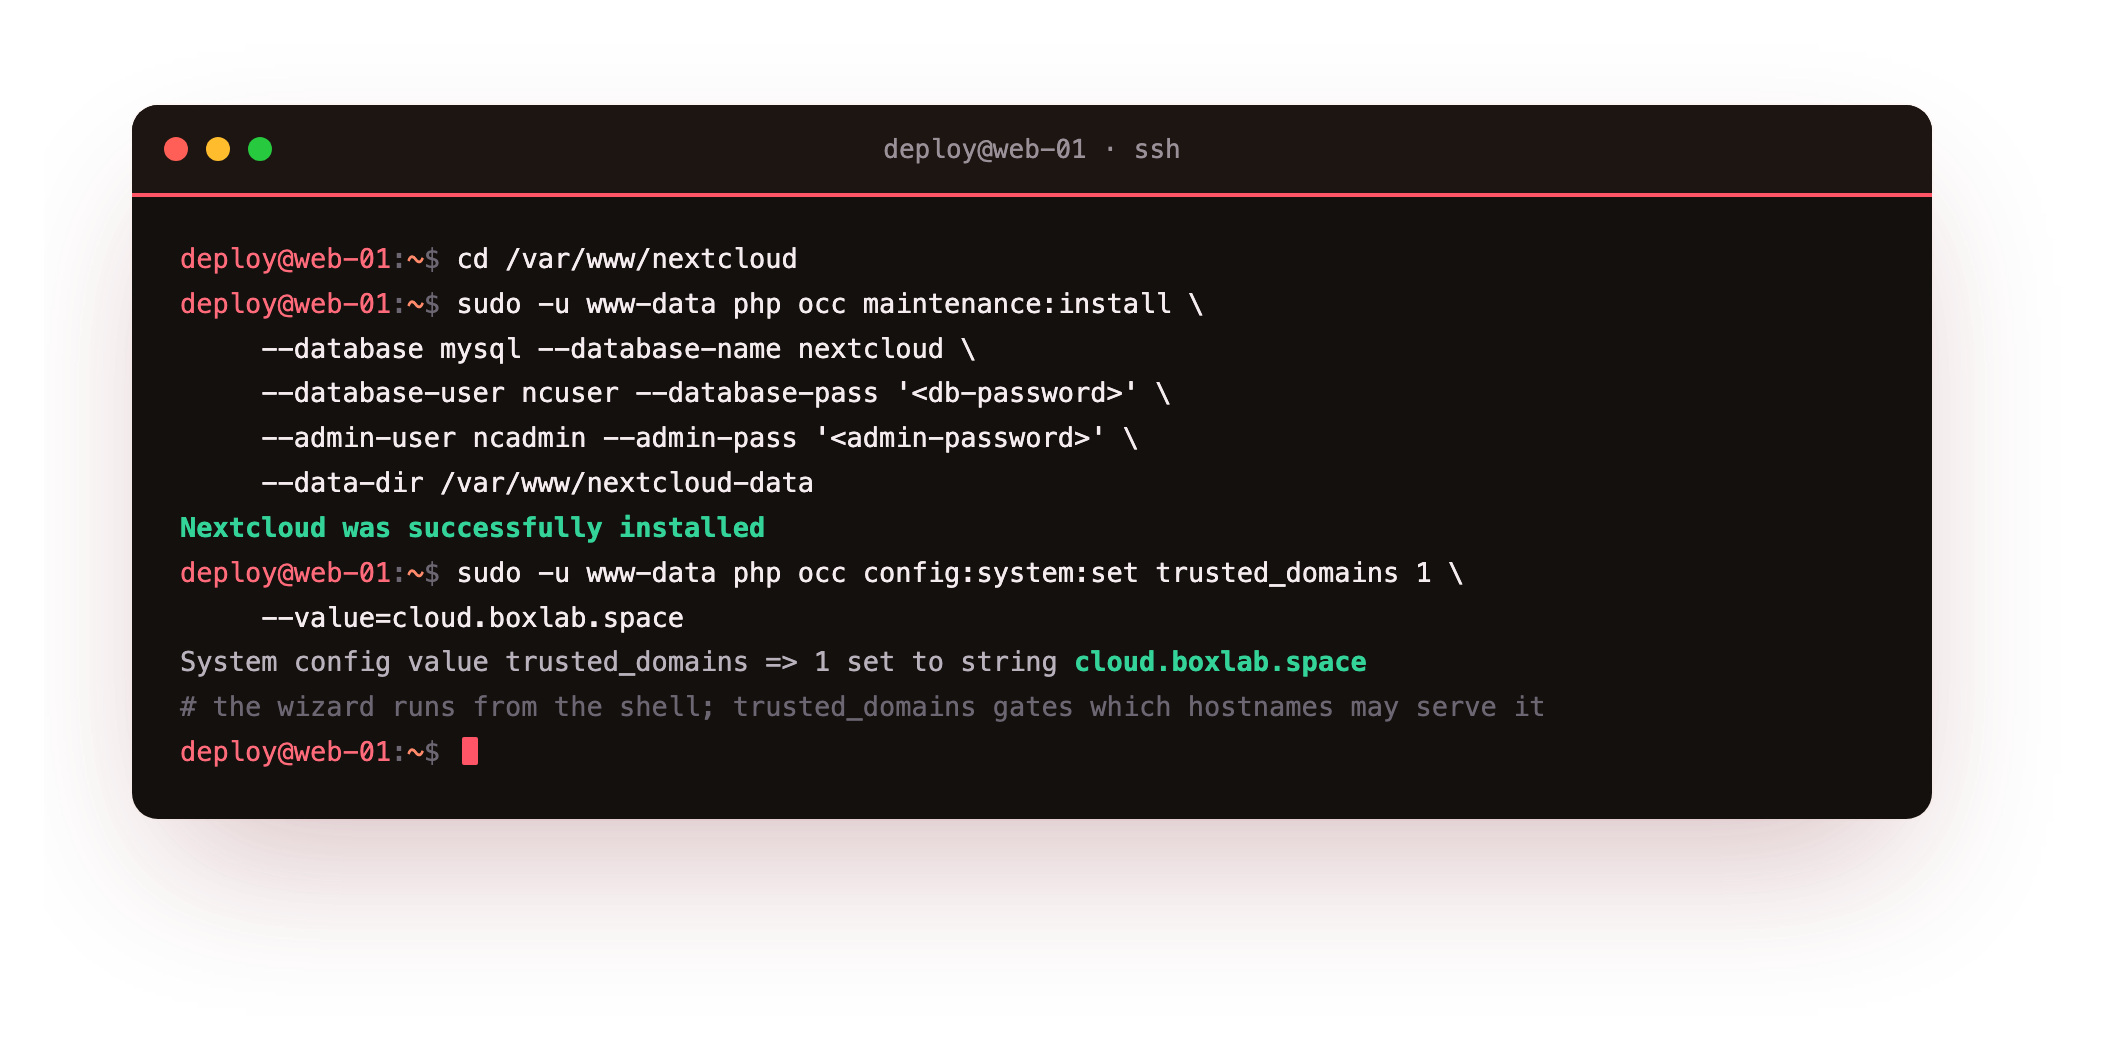
Nextcloud was successfully installed is the line you are waiting for. One more setting before you log in: tell Nextcloud which hostname is allowed to serve it, by adding your domain to trusted_domains. Nextcloud refuses to answer on any hostname not in this list, which is a deliberate defence against host-header attacks.
sudo -u www-data php occ config:system:set trusted_domains 1 \
     --value=your-domain
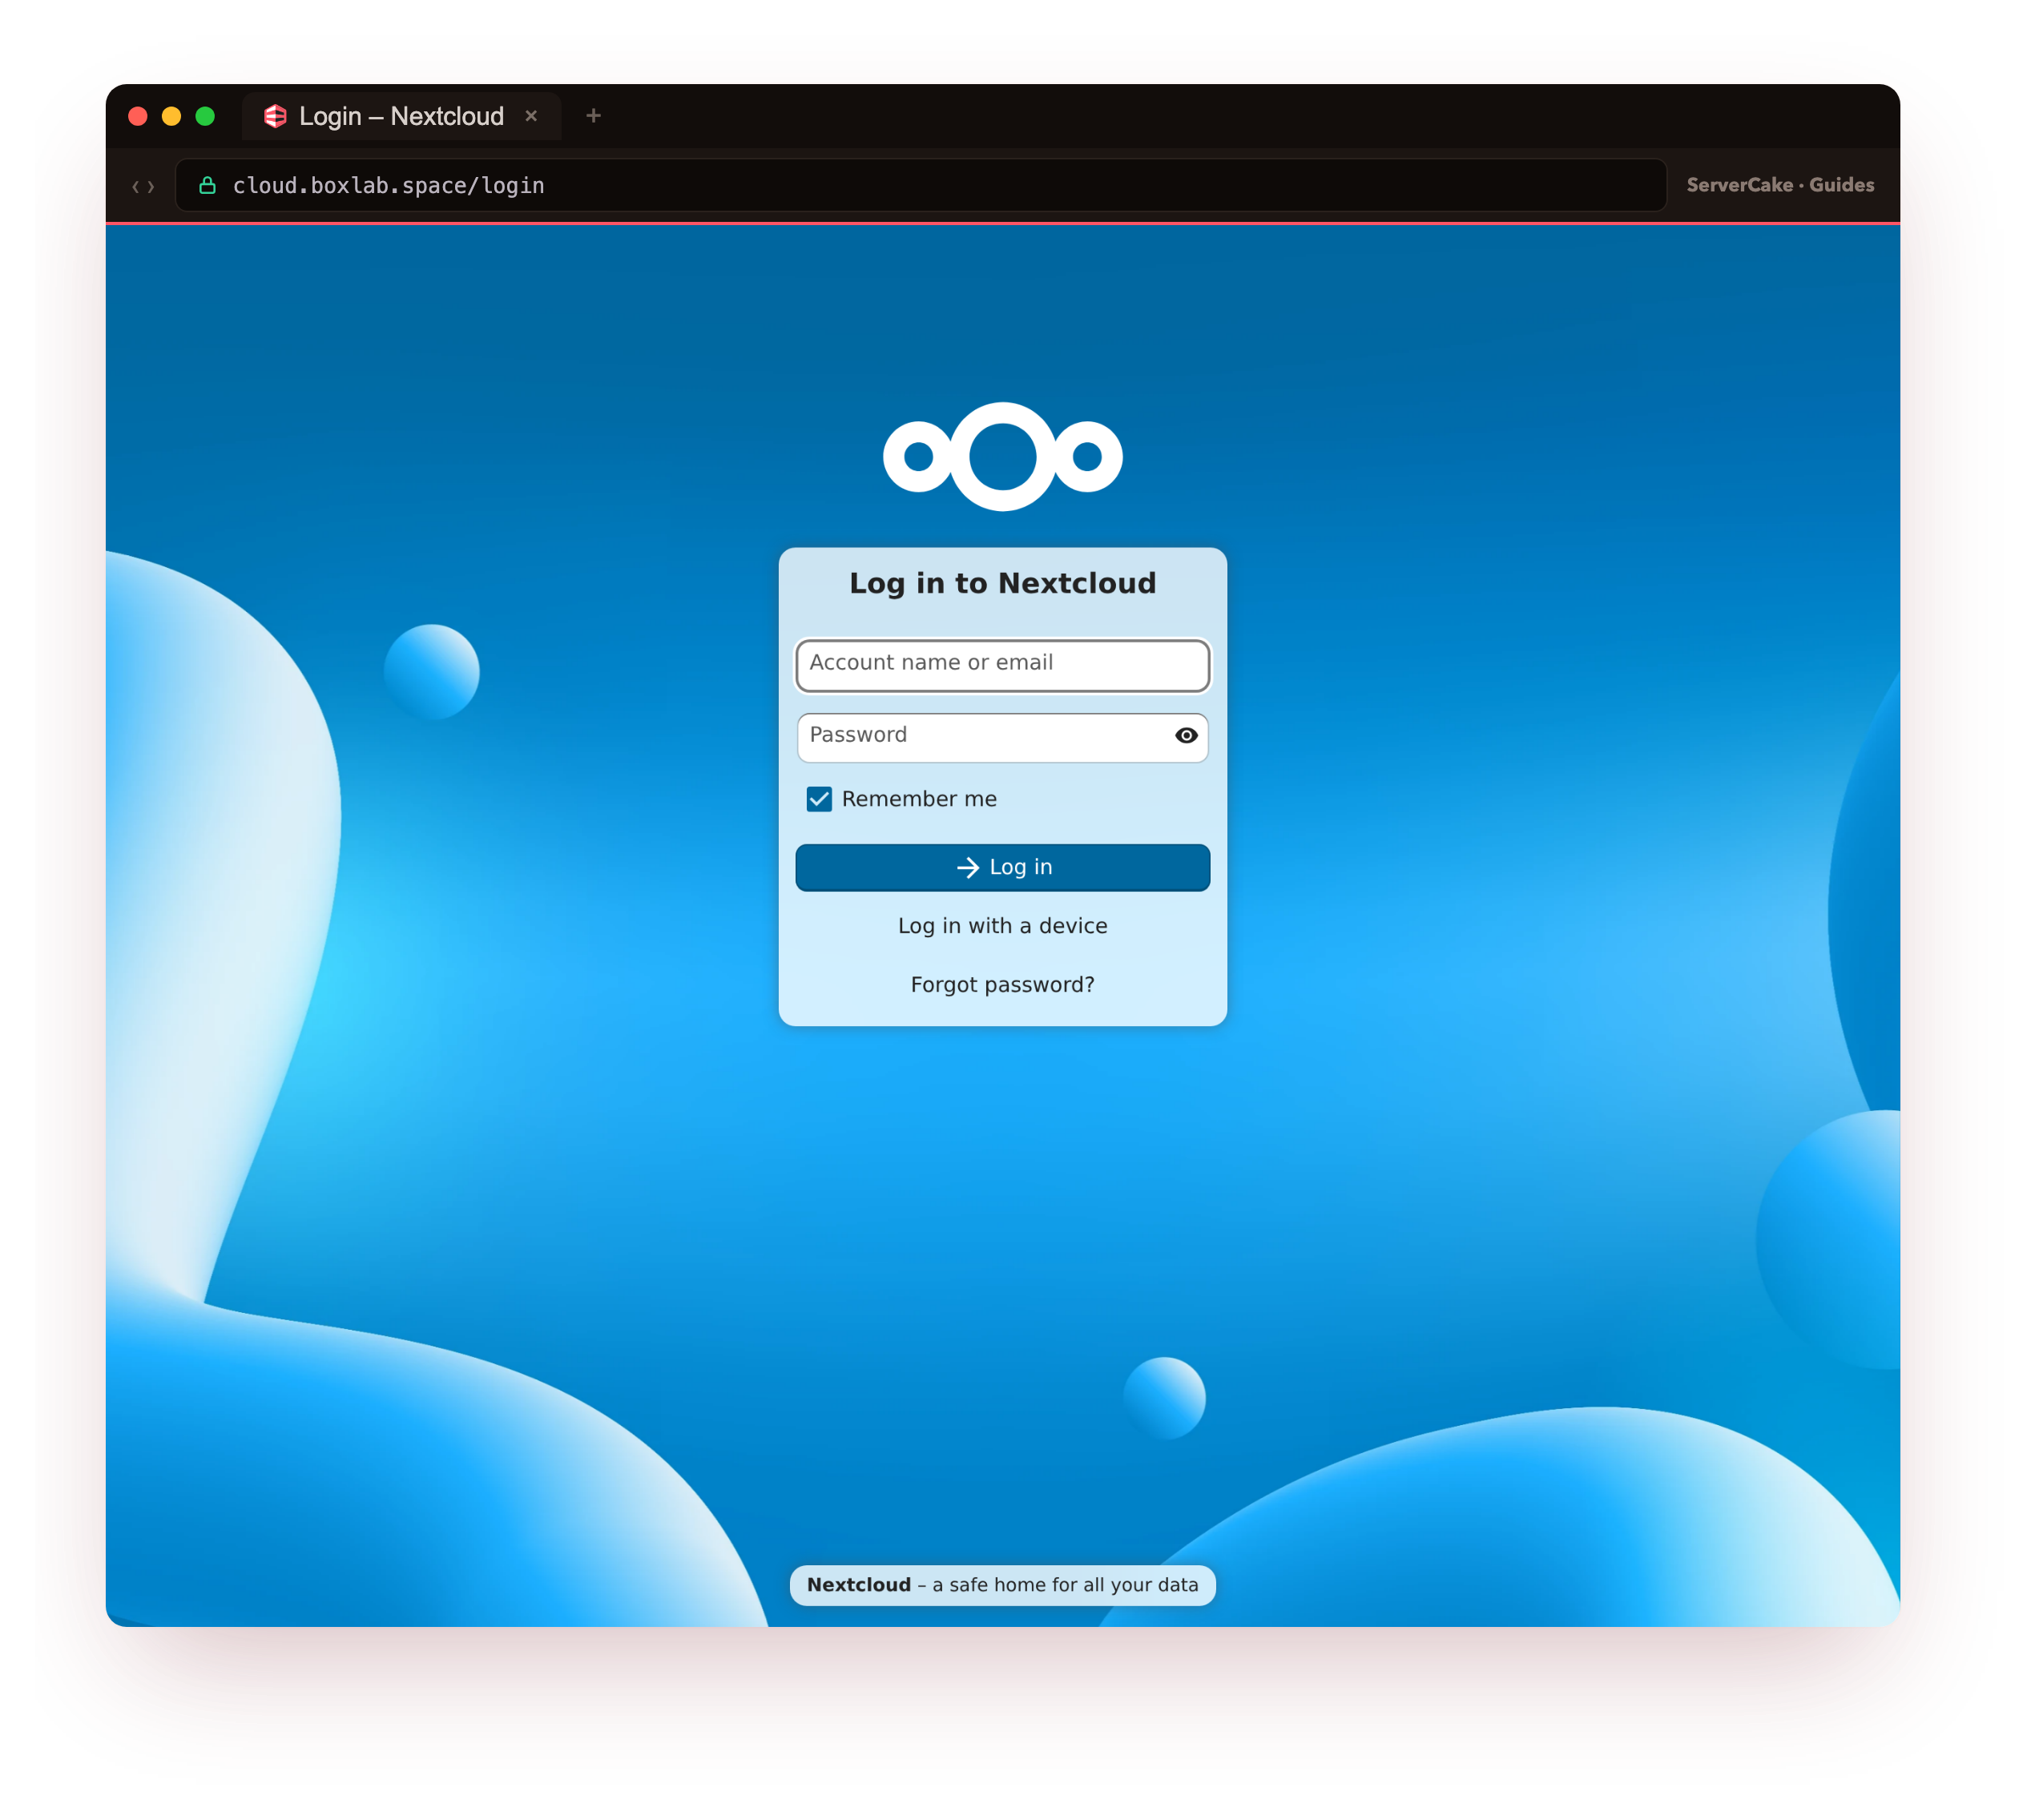
Open your domain in a browser now and you will land on the Nextcloud login page, served over your own certificate.
First login and the files UI
Log in with the admin user you just created. Nextcloud drops you into the Files app, pre-populated with a few sample documents and a Photos folder. This is the payoff: your own cloud drive, in your browser, over your own domain.
Before you trust it, confirm from the shell that the pieces line up: plain HTTP is pushed to HTTPS, your domain is trusted, and the admin account exists.
curl -skI http://your-domain/ | head -2
sudo -u www-data php occ config:system:get trusted_domains
sudo -u www-data php occ user:list
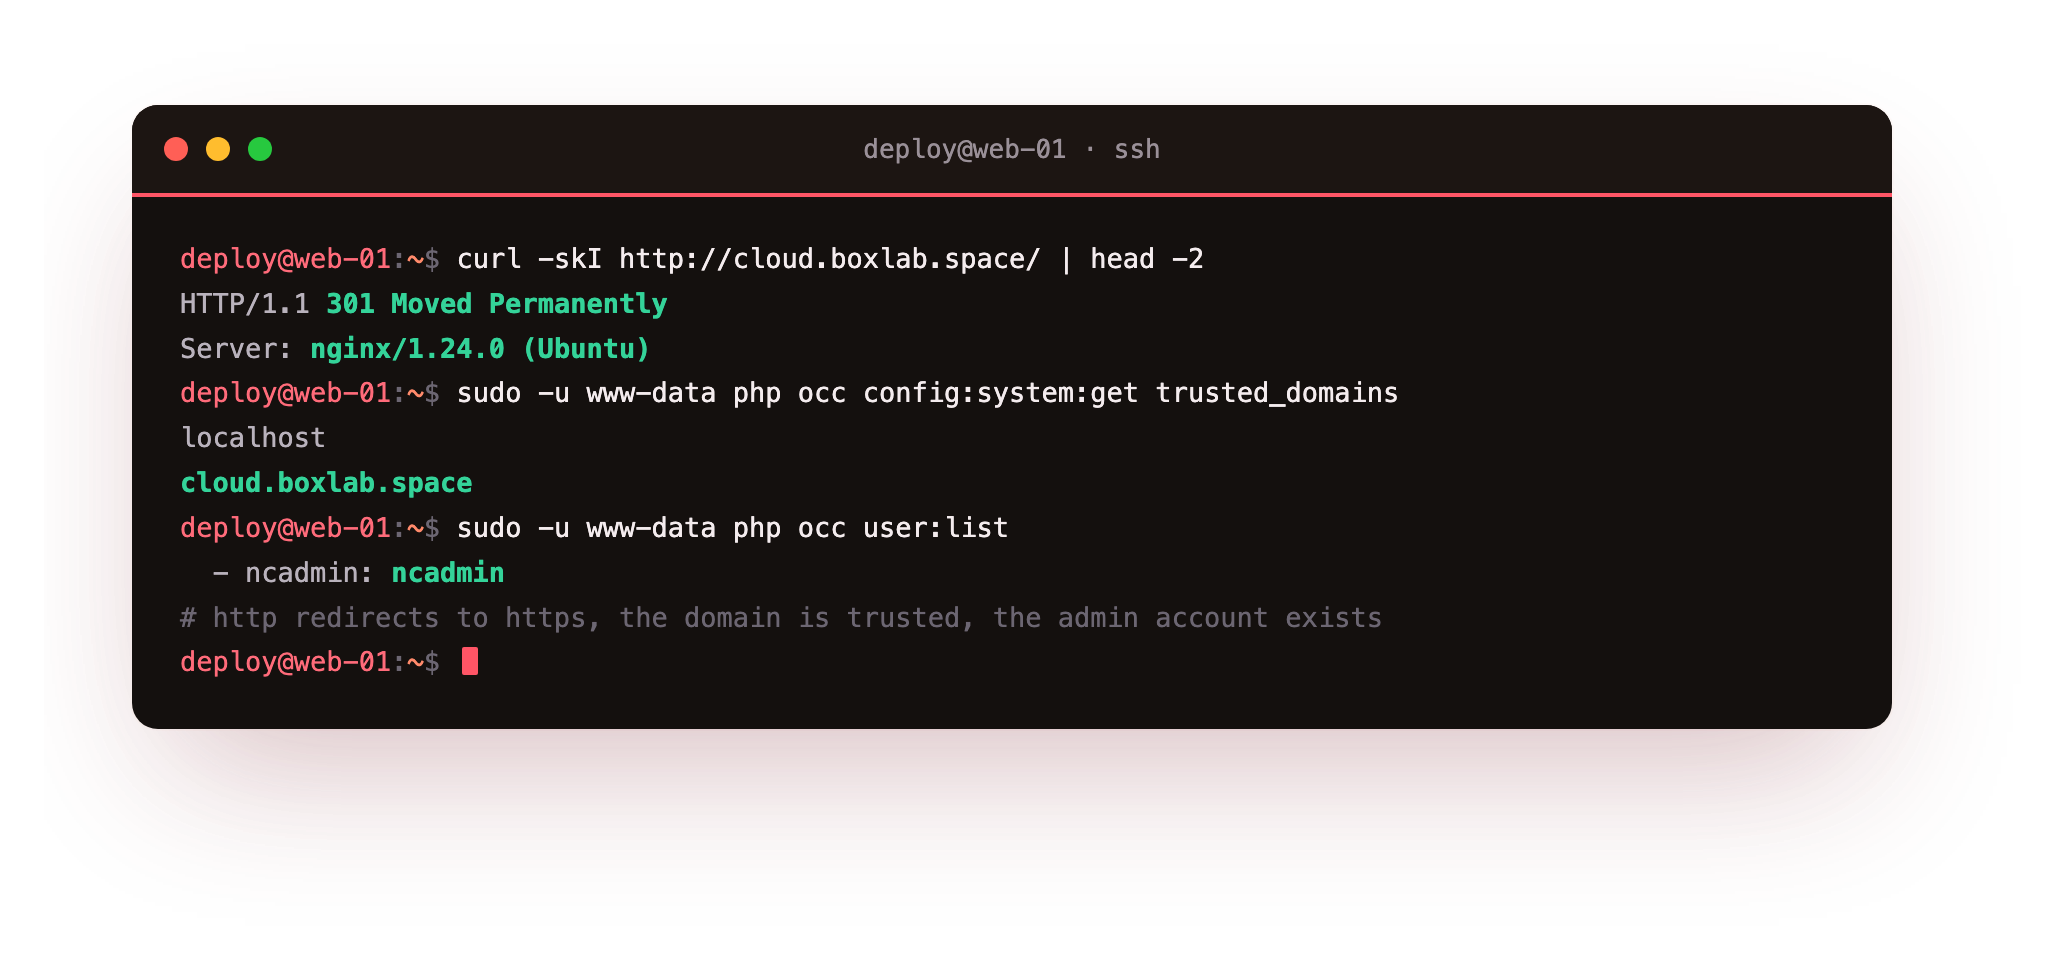
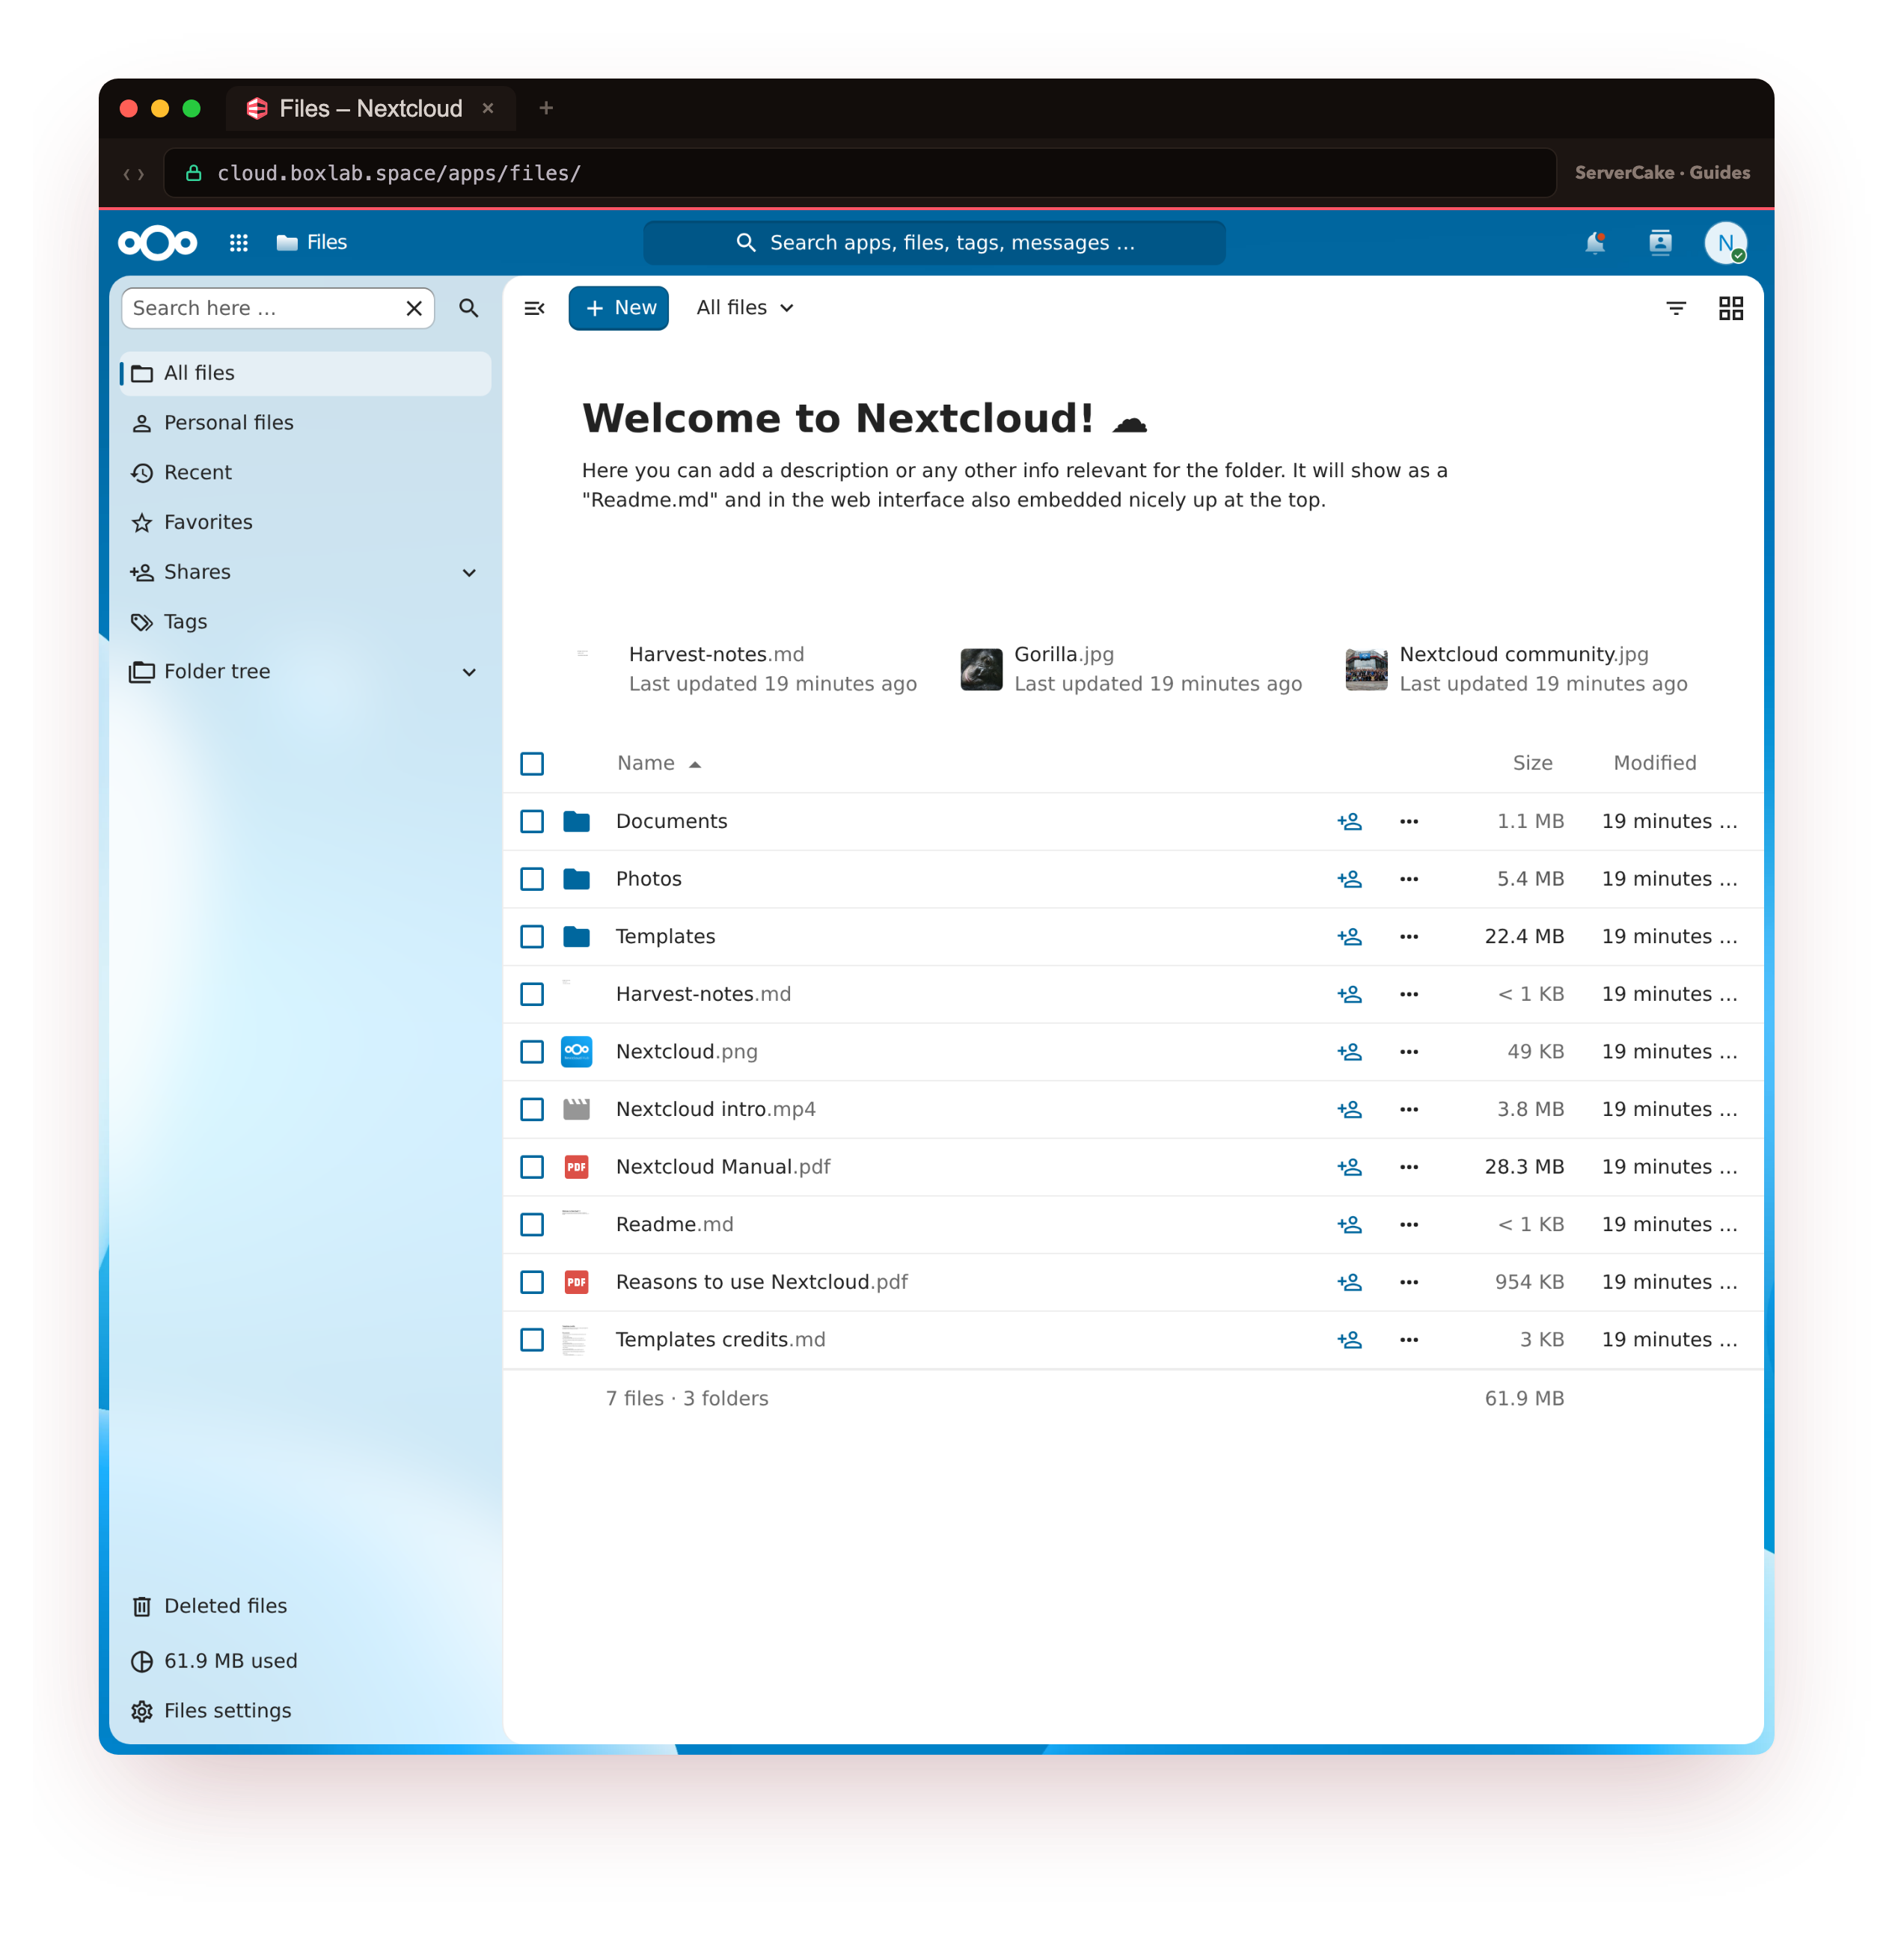
Now try the thing the whole install exists for. Drag a file into the browser window to upload it, and it appears in the list immediately, then click it to open it in place. The screenshots below show a real file we uploaded to the lab instance, Harvest-notes.md, sitting in the file list and then opened in the built-in viewer. Nothing left the slice; the file went straight into your data directory and Nextcloud served it back.
trusted_domains value against the hostname in your address bar.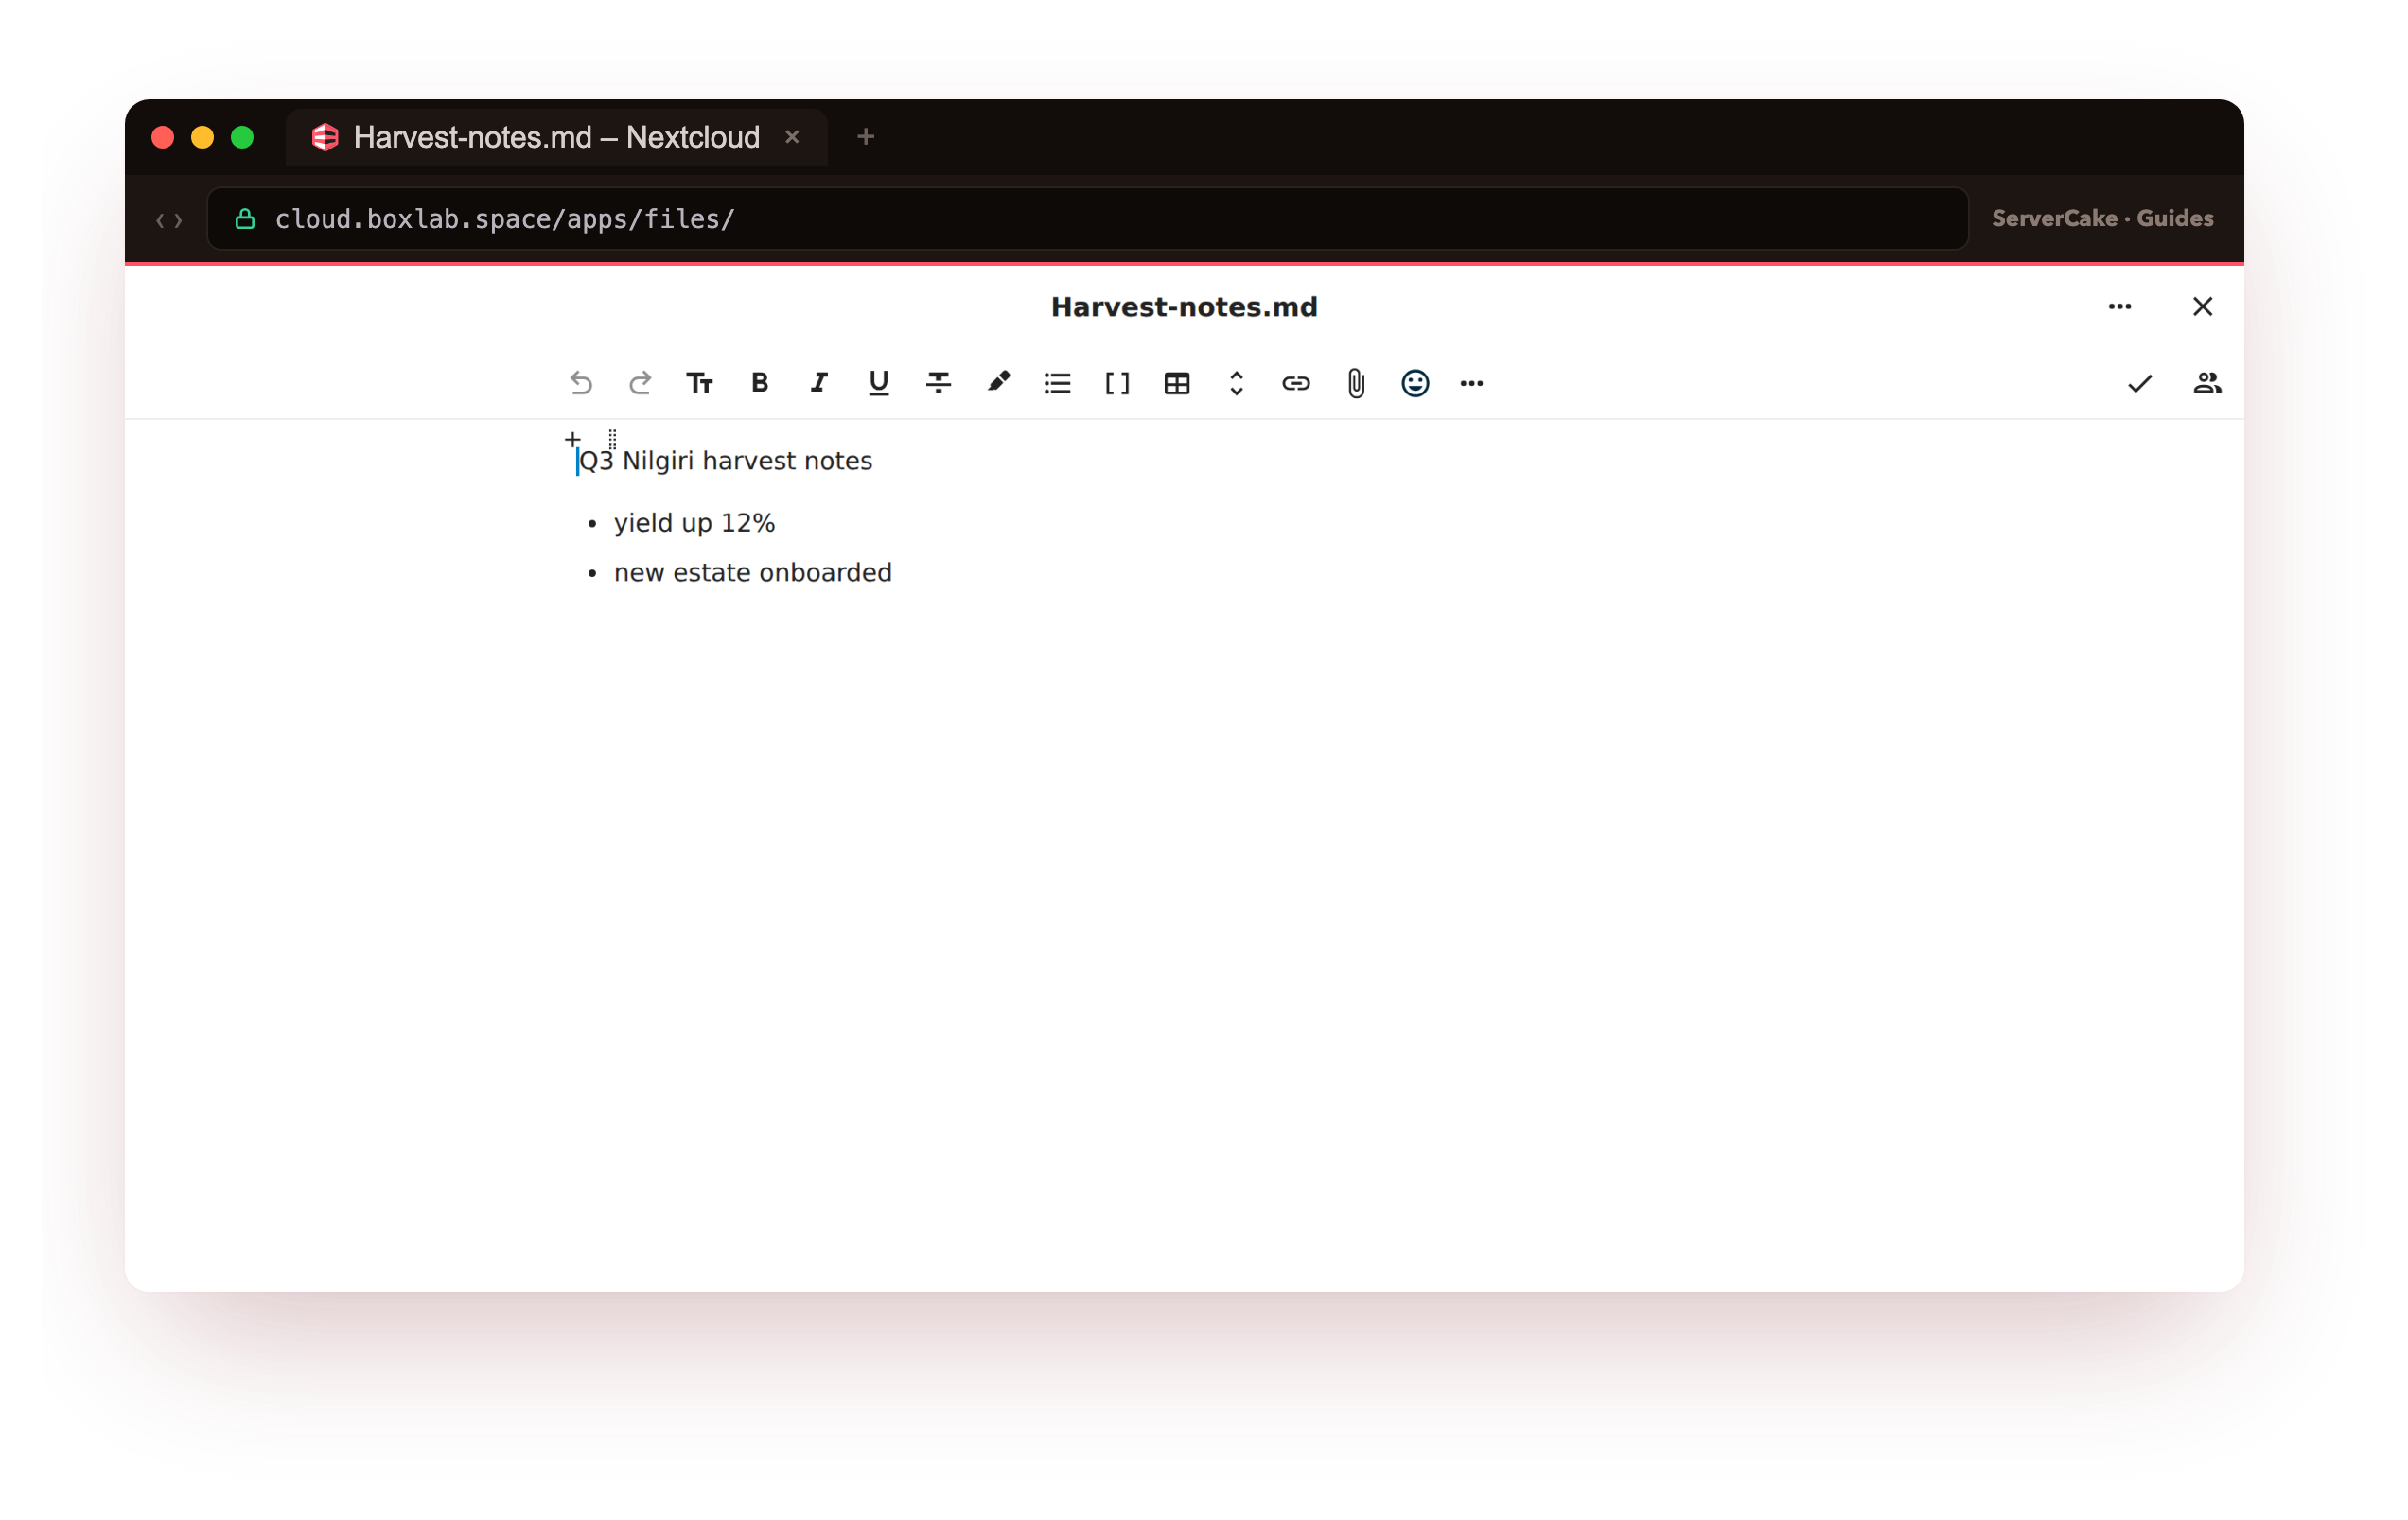
Make the recommended settings green
A fresh Nextcloud runs, but its admin overview will flag a handful of recommended settings. These are not cosmetic: they are the difference between a sluggish, warning-covered instance and a fast, correct one. Open Settings, then Administration, then Overview to see them, and fix them from the shell.
First, give PHP room and add a memory cache. Nextcloud wants PHP's memory_limit at 512M, and it wants a local memory cache so it is not hitting the database for everything it can hold in RAM. APCu, which you installed earlier, is the simplest one.
grep '^memory_limit' /etc/php/8.3/fpm/php.ini
sudo -u www-data php occ config:system:set memcache.local \
     --value='\OC\Memcache\APCu'
sudo -u www-data php occ config:system:set default_phone_region --value=IN
sudo -u www-data php occ db:add-missing-indices
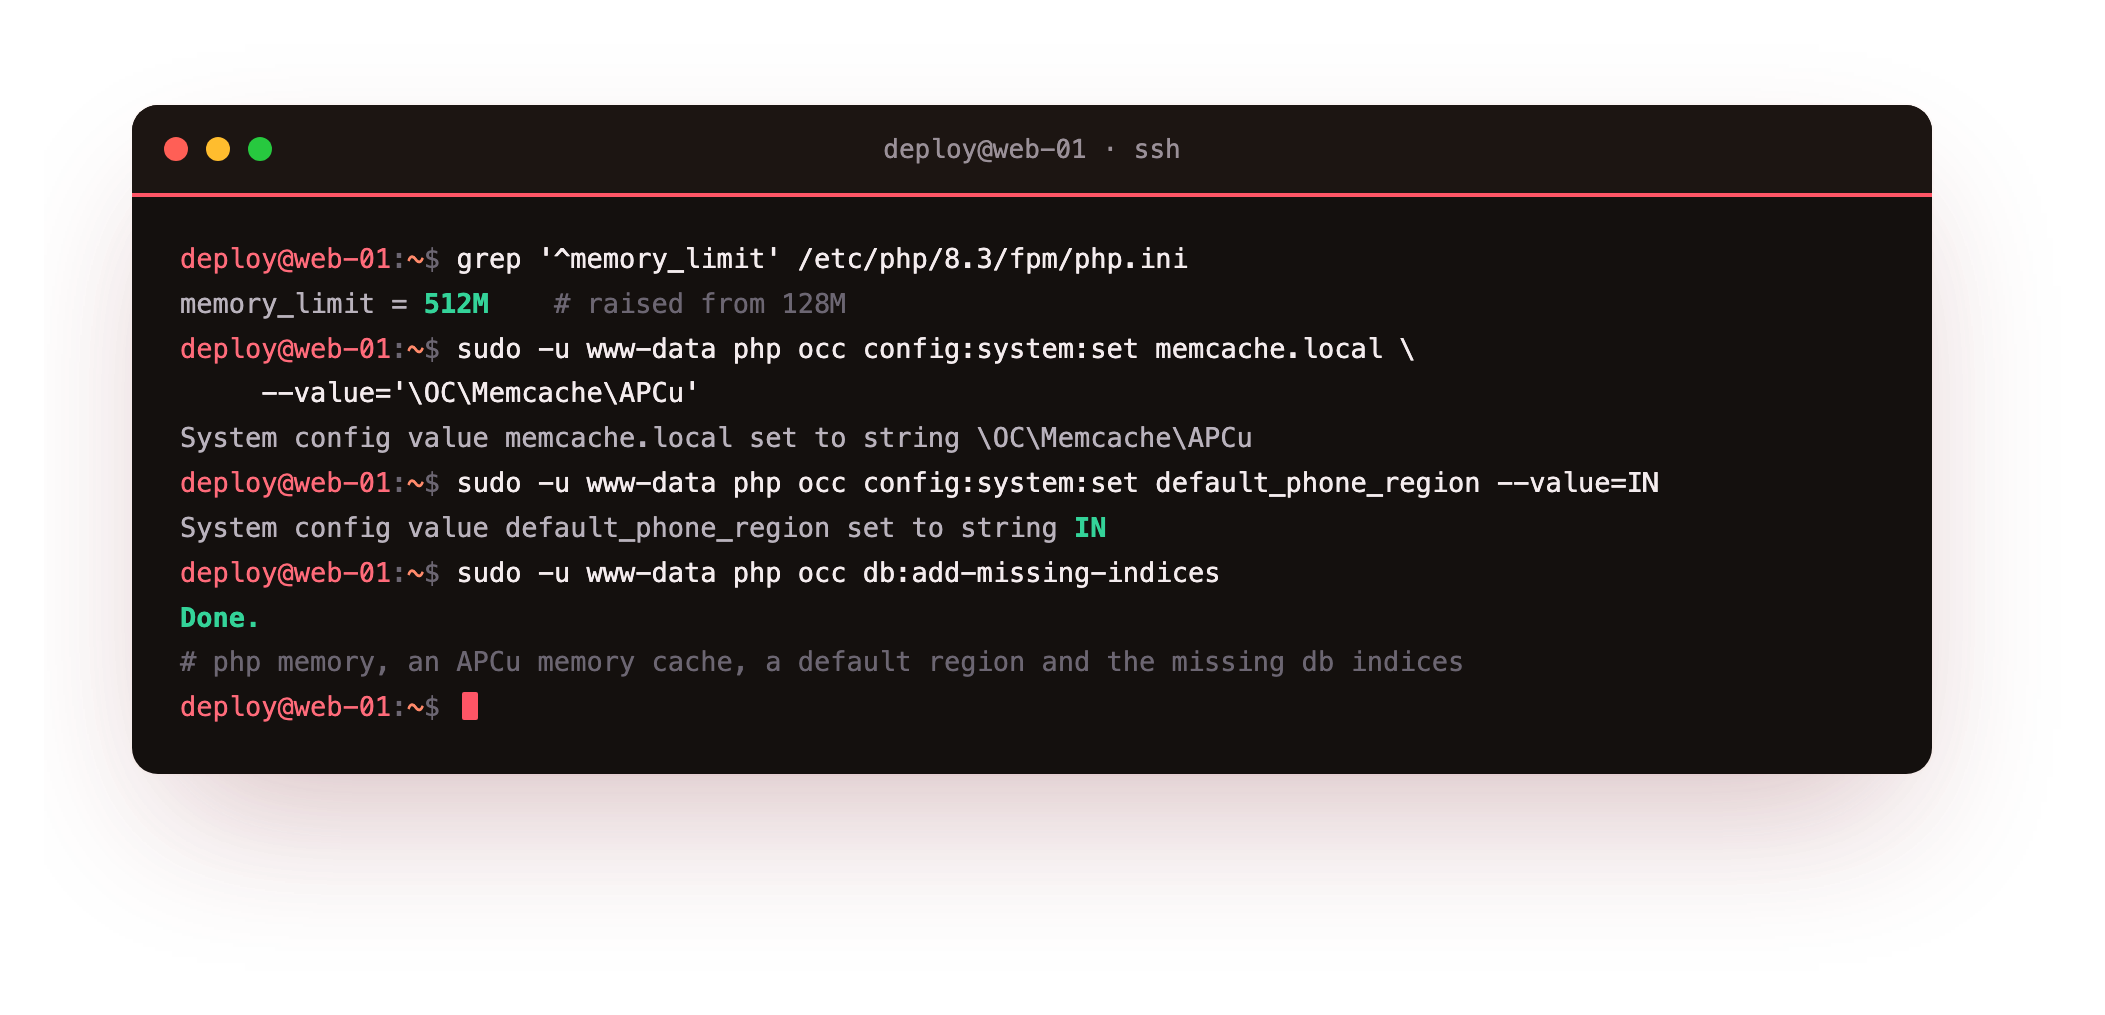
That block clears four separate warnings at once: the memory limit, the missing memory cache, the missing default phone region (Nextcloud needs one to parse phone numbers, and IN is India), and the database indices that speed up common queries. Set memory_limit = 512M in /etc/php/8.3/fpm/php.ini and restart php8.3-fpm so the new limit takes effect.
The other big one is background jobs. By default Nextcloud runs its housekeeping through the browser (AJAX), which is unreliable. Switch it to real system cron and let a timer run cron.php every five minutes.
sudo -u www-data php occ background:cron
sudo systemctl enable --now nextcloudcron.timer
sudo -u www-data php occ setupchecks
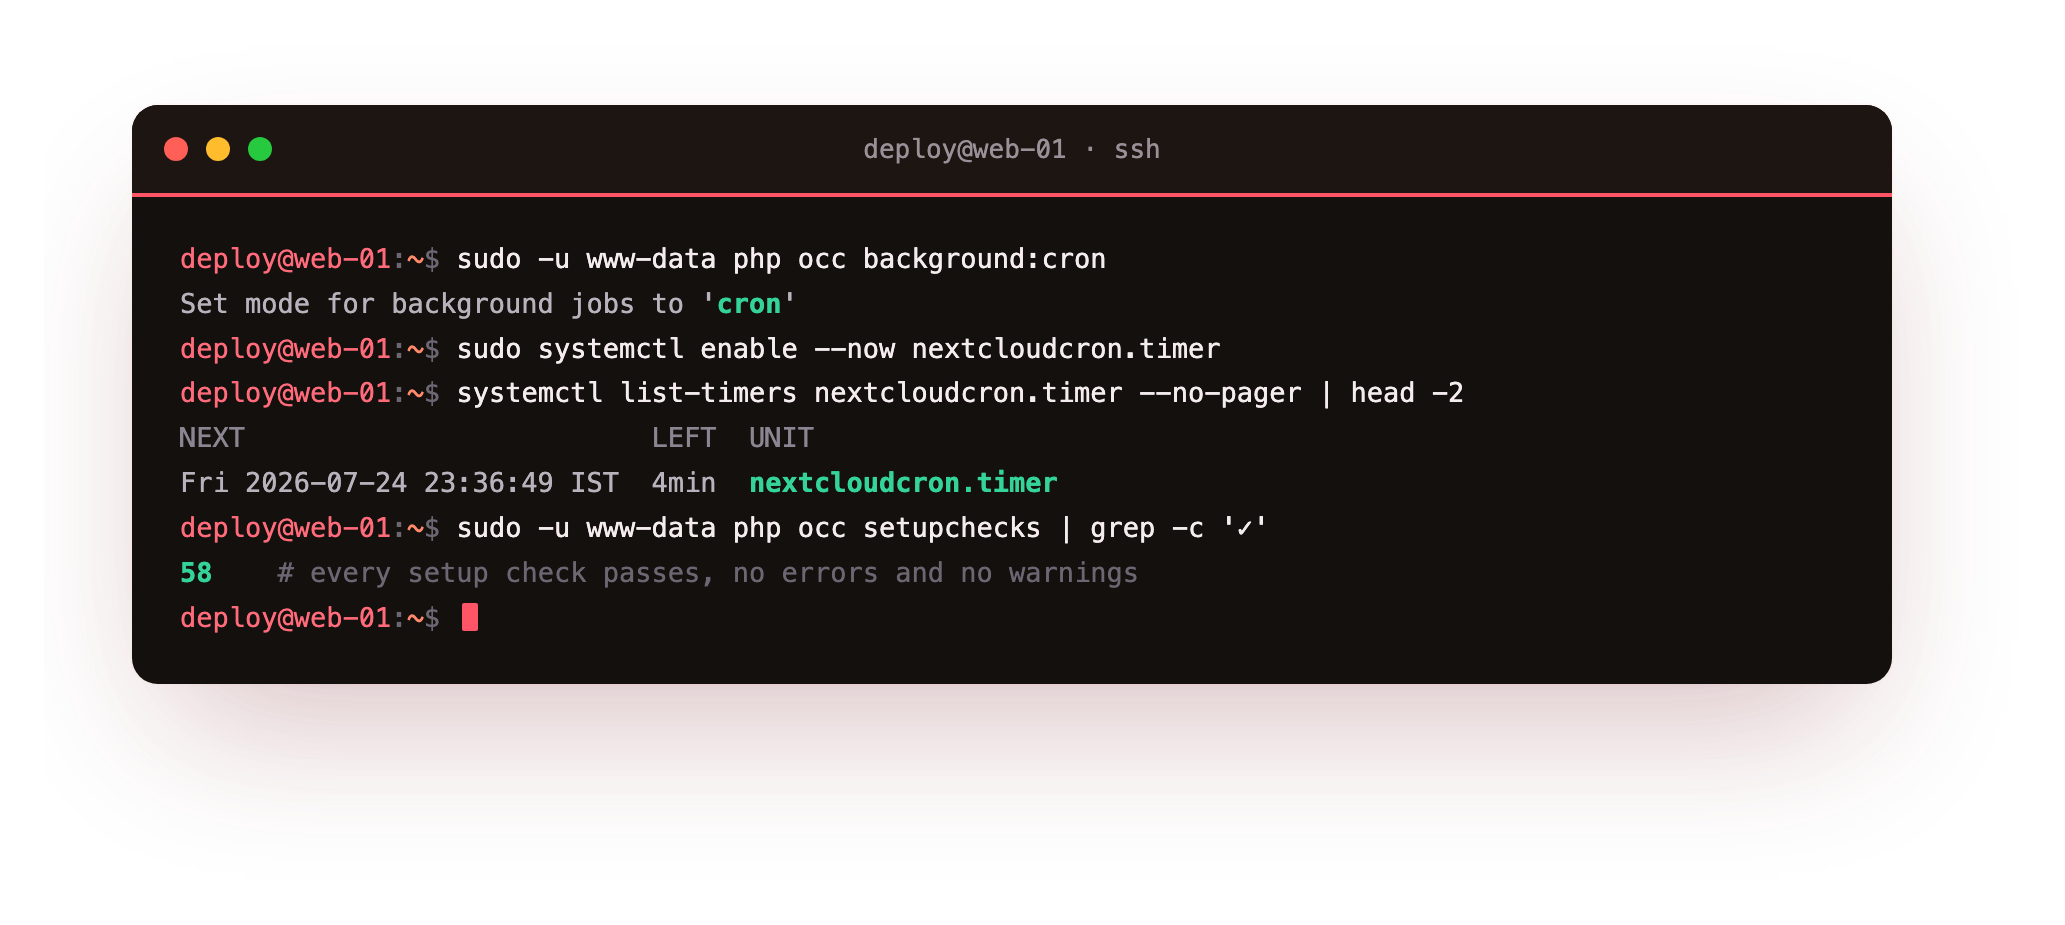
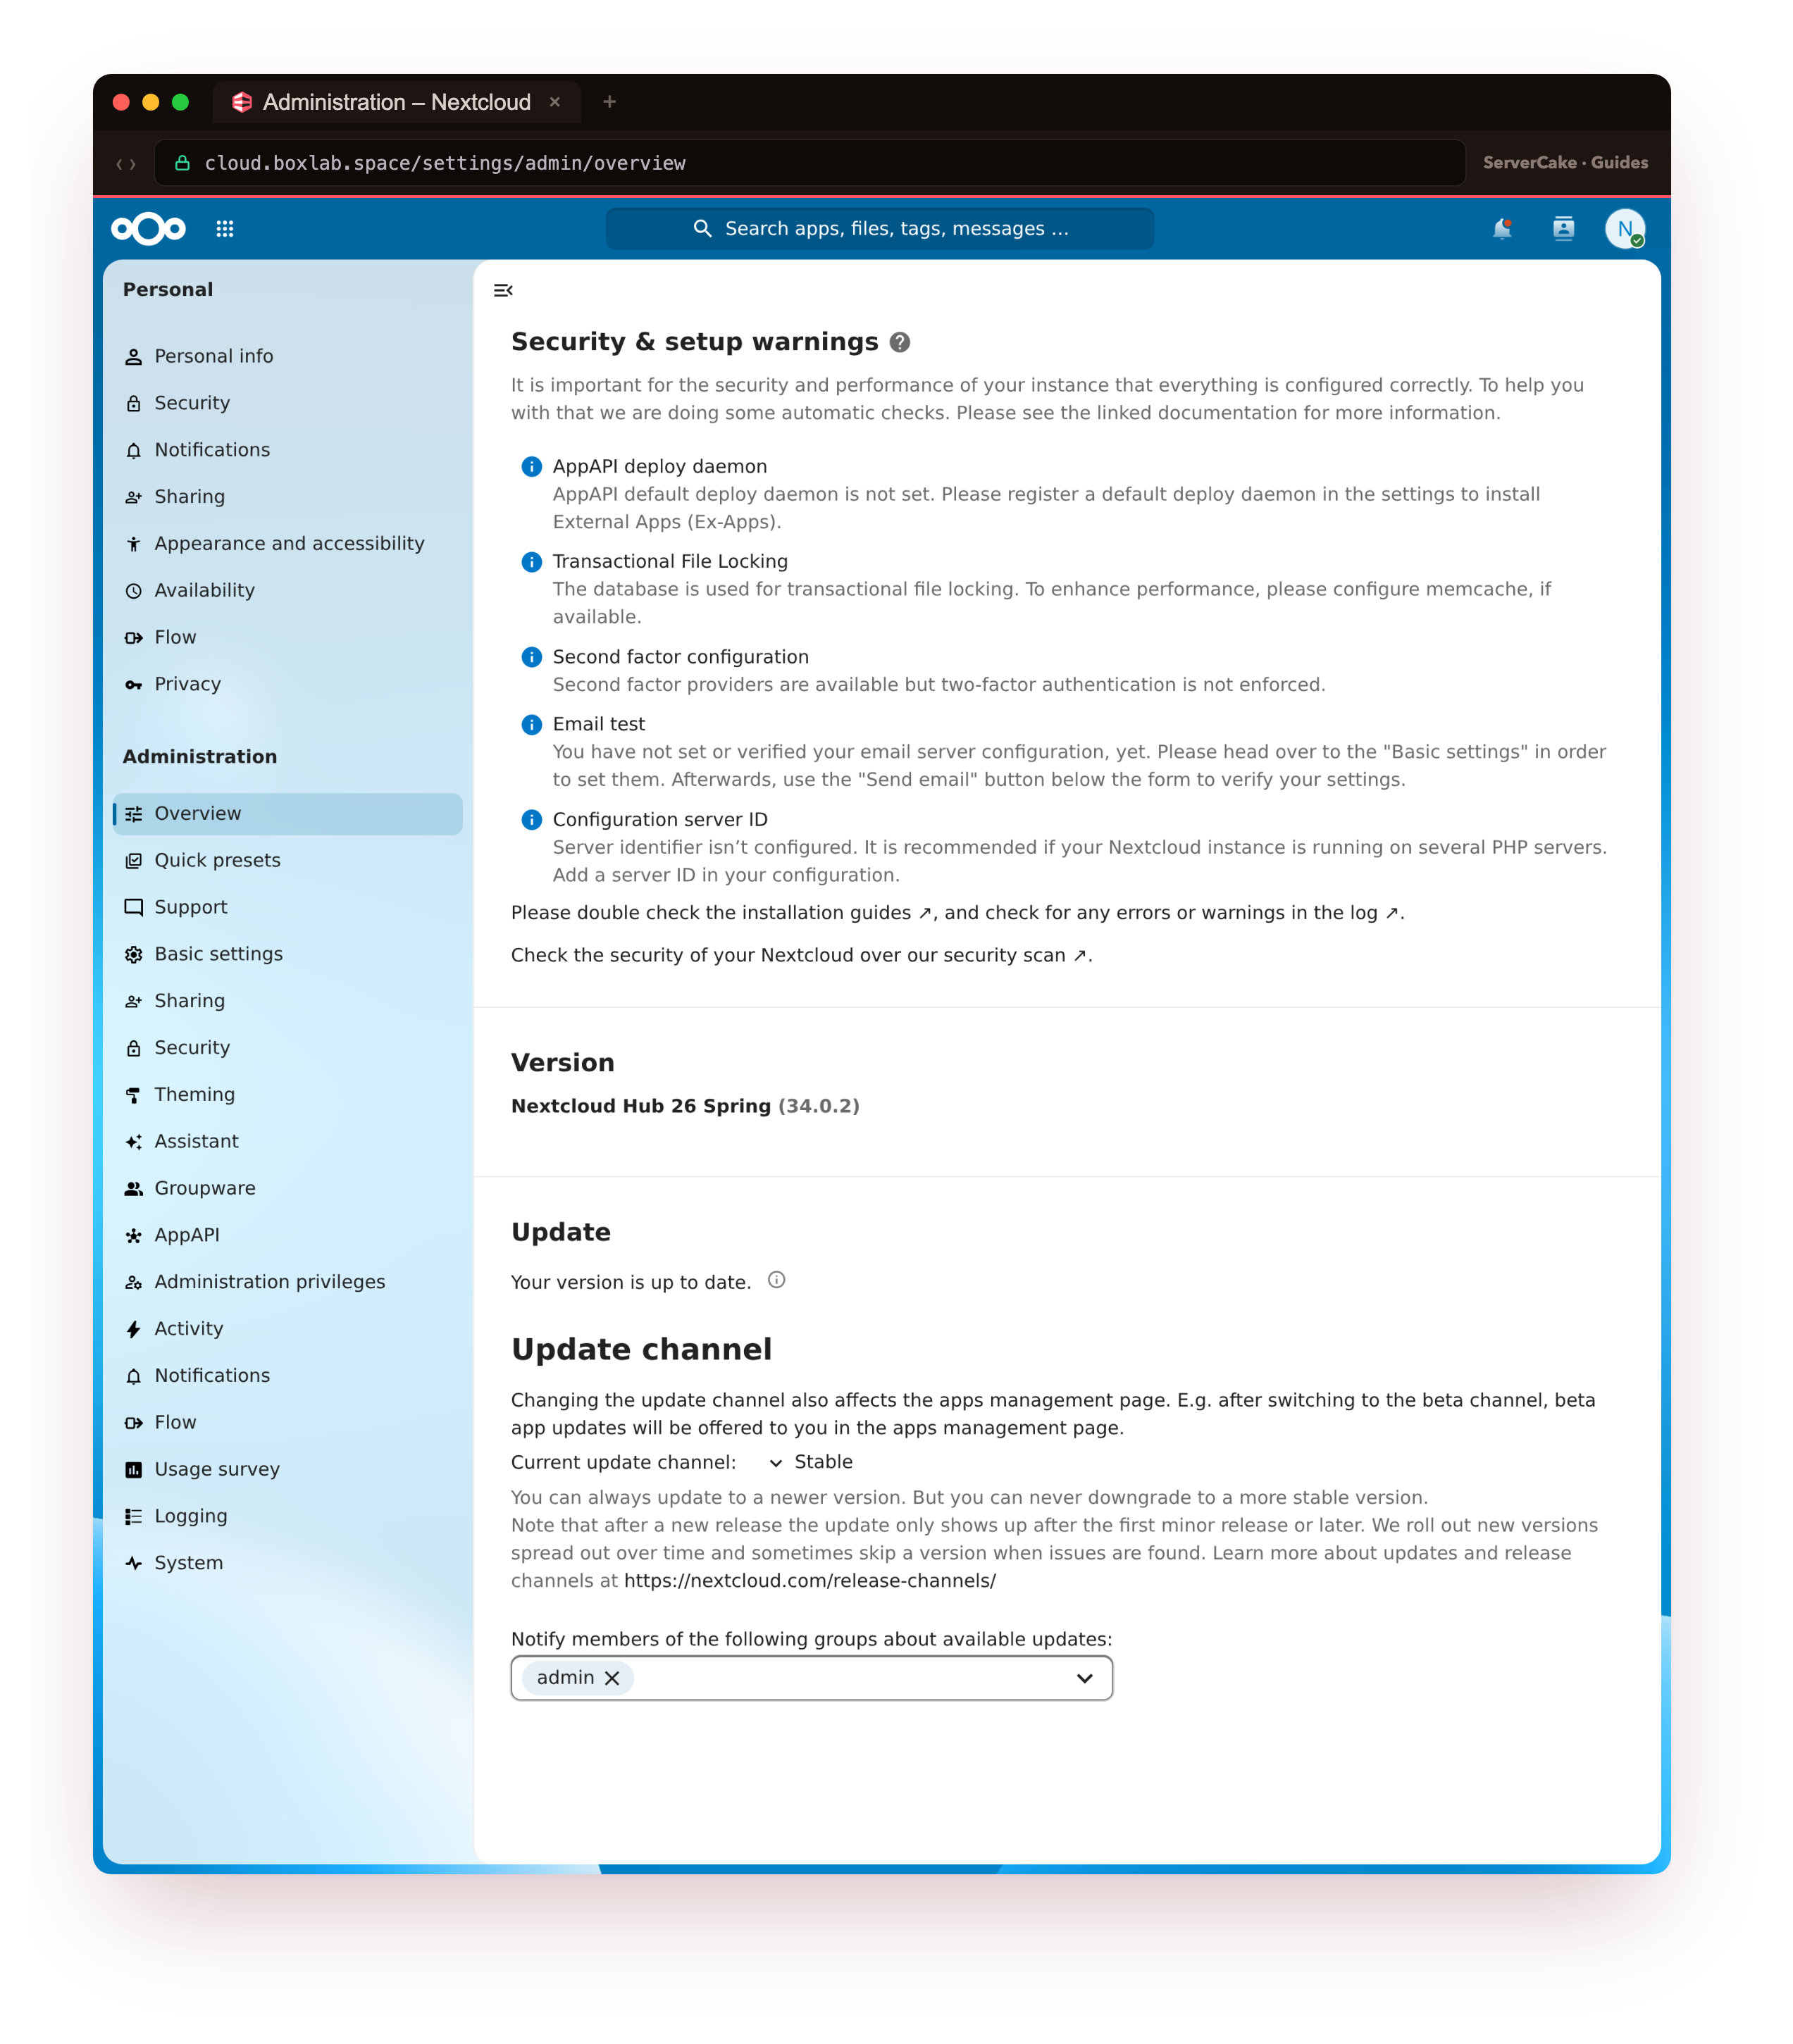
The setupchecks command runs the same checks the admin overview shows, from the shell. When it reports every line green, with no errors and no warnings, your instance is set up the way Nextcloud wants. The admin overview page then shows the same clean result, which is the last screenshot in this guide.
Keep it running and updated
Nextcloud ships fixes often, and occ is your control panel for staying current. occ status tells you the version and whether maintenance mode is on, and occ app:update --all keeps your installed apps patched. Nextcloud will also offer major-version upgrades through its built-in updater when they are ready for you.
sudo -u www-data php occ status
du -sh /var/www/nextcloud-data
sudo -u www-data php occ app:update --all
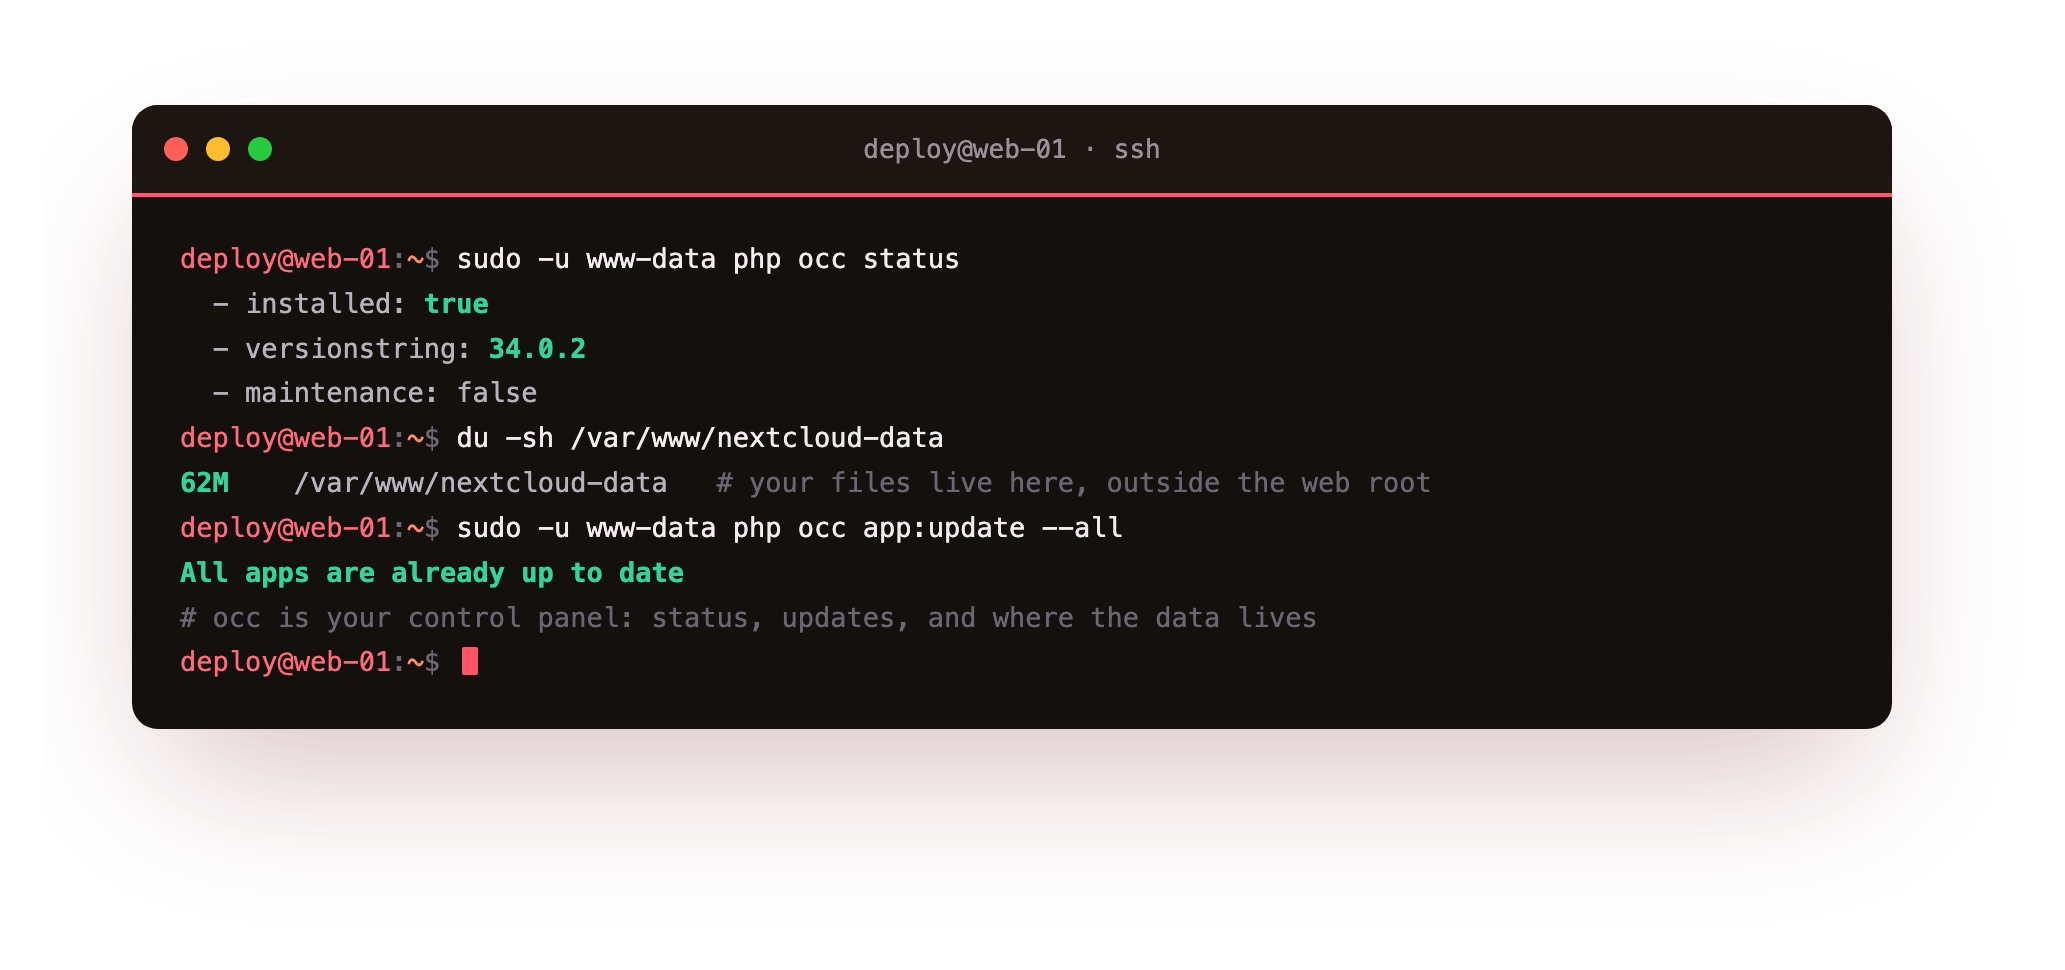
Two habits keep a Nextcloud instance healthy for years. First, know where your data lives: the nextcloud-data directory holds every file your users upload, so that directory plus the database plus config.php is what a real backup must capture. Second, take those backups off the slice, because a backup that lives on the same machine is not a backup.
That is a complete, hand-built Nextcloud install: the stack, a least-privilege database, a verified download, your domain over real HTTPS, the installer, and every recommended setting fixed and green. Because you built every layer yourself, you can also fix every layer when something needs attention.
Two follow-ups turn this into a proper home cloud. The first is speed, a Redis cache plus PHP tuning, and our Redis guide is a good next read for that layer. The second is a backup and restore drill you have actually tested. And if you already run WordPress, this same slice will host it happily alongside Nextcloud, following our WordPress on a VPS tutorial.
Frequently asked questions
How big a VPS do I need to run Nextcloud?
For a personal or small-family instance, two vCPUs and 2 GB of RAM is a comfortable starting point, which is why this guide targets roughly that. What grows the requirement is not Nextcloud itself but concurrent users, thumbnail generation for large photo libraries, and server-side apps like Collabora for document editing. Start modest, watch memory and response times in the admin overview, and resize the slice up only when the numbers say so. Storage is the resource you are most likely to add first, and on a VPS that is a straightforward volume attach.Should I use MariaDB or PostgreSQL for Nextcloud?
Both are fully supported and both run Nextcloud well, and this guide uses MariaDB because it is the most common choice and pairs naturally with the LEMP stack. PostgreSQL is an equally solid option and some administrators prefer it for larger instances. What matters far more than the engine is that you use a real database rather than the SQLite default, which Nextcloud only recommends for testing, and that you keep the database user scoped to the Nextcloud database alone.Why keep the data directory outside the web root?
Security in depth. If your files live under/var/www/nextcloud and a web server rule is ever misconfigured, those files could be served directly over HTTP. By putting the data directory at /var/www/nextcloud-data, outside the folder nginx serves, that whole class of mistake becomes impossible: the web server has no path to your files at all, and every download must go through Nextcloud's own access checks. It is a one-time decision at install that removes a permanent risk.
Is my data really private on a self-hosted Nextcloud?
Yes, in the sense that matters: the files live on a slice you control, in a data centre you chose, under an account only you hold. No third party indexes your documents or mines them for advertising, and for anyone handling data under India's DPDP rules, keeping personal data on Indian infrastructure you operate is a meaningful compliance advantage. Privacy still depends on you doing the basics, a strong admin password, HTTPS as set up here, and regular updates, but the ownership question, who can reach your data, has a clear answer: only you.Running Nextcloud on your own slice means you own the whole stack: the storage, the privacy posture, and the bill, with no per-seat pricing and no black box. To take it live, pick up a ServerCake slice, a clean Ubuntu 24.04 box hosted in India and billed in rupees with GST, and walk straight through the steps above on infrastructure that is yours end to end.