From running someone else's image to shipping your own
This chapter builds a Docker image for your own Node app from a Dockerfile: a short recipe that packages your code and its dependencies into one portable unit. You build it once and run it identically anywhere Docker runs.
- A Dockerfile is a recipe: choose a base image, copy code in, install dependencies, set the command that runs.
- Copy
package*.jsonand runnpm cibefore copying source, so a code change reuses the cached dependency layer. USER noderuns the app as an unprivileged user, so a breakout does not hand over root on the host.- A
.dockerignorekeepsnode_modulesand.gitout of the build, so the image stays small and correct.
Last chapter you ran nginx, an image someone else built. Now you build one of your own on a live Ubuntu 24.04 LTS server, containing your application, so that your app becomes a sealed, portable unit you can run identically on your laptop, your server, and anywhere else. The instructions for building an image live in a plain text file called a Dockerfile, and it reads like a recipe: start from a base, copy your code in, install dependencies, say how to run it.
A good Dockerfile is short. A thoughtful Dockerfile, one that builds fast and produces a small, safe image, is only a little longer, and the difference between the two is worth understanding because you will build images hundreds of times. This chapter writes a proper one for a Node app and explains the two ideas that separate a naive Dockerfile from a good one: layer caching and running as a non-root user.
Let's build.
Prerequisites
- Docker installed on your Ubuntu 24.04 LTS server, and comfort running a container from the previous chapter.
- A small Node app in the current directory with a
package.json, a committedpackage-lock.json, and aserver.jsentry point. - The app listening on a port (this example uses 3000) so a container can map it.
The Dockerfile, line by line
Here is the whole thing for our app. It is six instructions, and every one has a reason:
FROM node:18-alpine
WORKDIR /app
COPY package*.json ./
RUN npm ci --omit=dev
COPY server.js ./
EXPOSE 3000
USER node
CMD ["node", "server.js"]
FROM node:18-alpine starts from an official Node image on the tiny Alpine Linux base, so you inherit a working Node without installing anything, and the Alpine variant keeps the result small. WORKDIR /app sets the working directory inside the image, creating it if needed. EXPOSE 3000 documents the port the app listens on. USER node switches to an unprivileged user so the app does not run as root inside the container, which we will come back to. And CMD ["node", "server.js"] is the command that runs when a container starts.
The two COPY lines look almost redundant, and the order of them is the single most important thing in this file.
Why does COPY order matter for layer caching?
Every instruction in a Dockerfile creates a layer, and Docker caches layers. When you rebuild, Docker reuses the cached result of any instruction whose inputs have not changed, and only re-runs from the first thing that did change. This is why a good Dockerfile copies the dependency manifest before the source code:
COPY package*.json ./     # 1. just the dependency list
RUN npm ci --omit=dev     # 2. install deps (the slow step)
COPY server.js ./         # 3. then the actual source
Think about what happens when you change one line of your app and rebuild. Your package.json has not changed, so Docker reuses the cached npm ci layer, skipping the slow dependency install entirely, and only re-copies your source. The rebuild takes a second.
Now imagine the naive version that copies everything first and then installs: every source change busts the cache and reinstalls every dependency from scratch, turning a one-second rebuild into a two-minute one. Same image, wildly different developer experience, decided entirely by the order of two lines.
npm ci, not npm install, matters too: it installs exactly what your lockfile pins, so the image is reproducible instead of drifting.
.dockerignore: do not ship your junk
Before you build, add a .dockerignore file. It works like .gitignore and keeps things out of the image that have no business being there:
node_modules
npm-debug.log
.git
The most important line is node_modules. Without it, Docker copies your local node_modules into the build, which is slow, bloats the image, and worse, can overwrite the dependencies you carefully installed for the container's platform with the ones from your laptop, causing native modules to break in confusing ways. Ignore it and let npm ci install fresh inside the image. Ignoring .git keeps your whole repository history out of the image, which is both smaller and safer.
Build the Node image from your Dockerfile
Now build the image and tag it with a name and version:
docker build -t shopapp:v1 .
Docker runs each instruction, caching as it goes, and finishes with your image. Then look at what you produced:
docker images shopapp
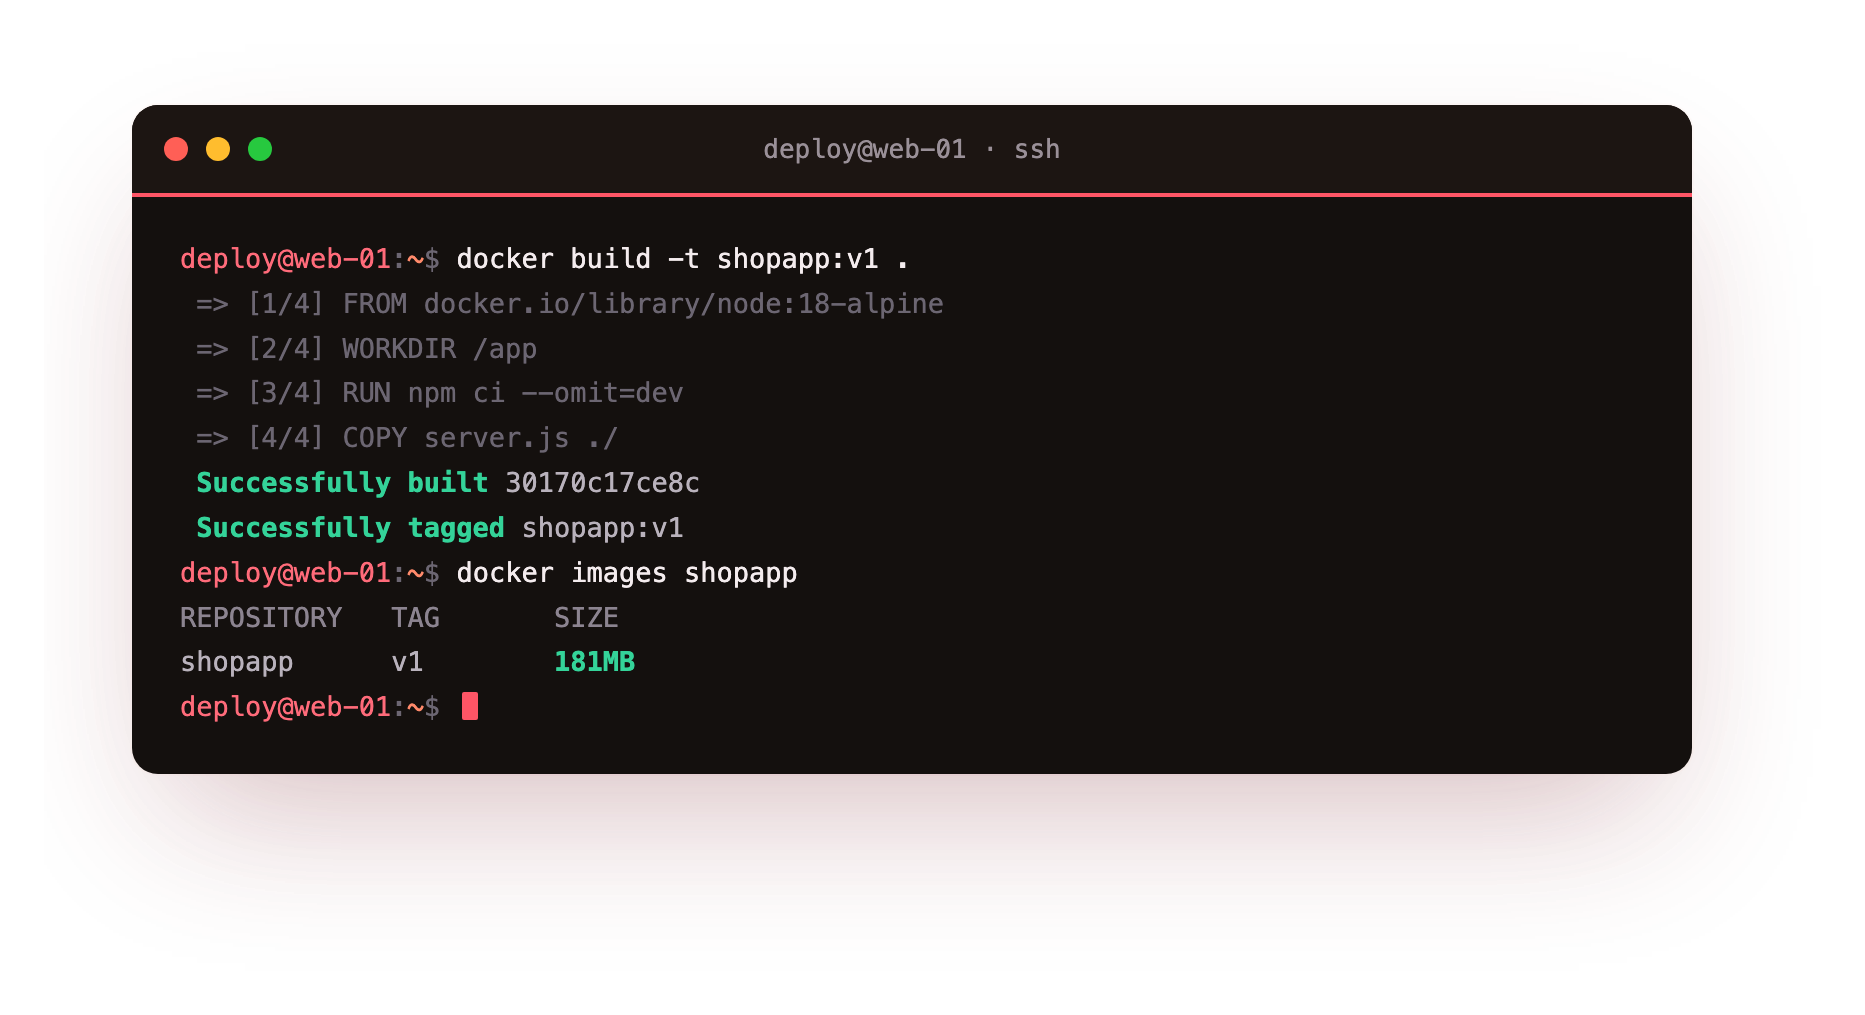
The build succeeds and tags shopapp:v1, and the image is 181 MB. Almost all of that is the Node runtime and the Alpine base; your actual code is a rounding error on top.
That is a perfectly reasonable size for a Node app, and it is small precisely because you started from -alpine rather than the full Node image, which is several times larger. If you were shipping a Go or Rust binary, you could get this into the low tens of megabytes with a multi-stage build, which brings us to the one technique worth knowing next.
Multi-stage builds, briefly
For compiled languages or apps with a build step (a frontend that runs npm run build, say), you do not want the compiler, the dev dependencies, and the build tools shipped in your final image. A multi-stage build uses one stage to build and a second, clean stage that copies out only the finished artifact:
FROM node:18-alpine AS build
WORKDIR /app
COPY package*.json ./
RUN npm ci
COPY . .
RUN npm run build

FROM node:18-alpine
WORKDIR /app
COPY --from=build /app/dist ./dist
COPY package*.json ./
RUN npm ci --omit=dev
CMD ["node", "dist/server.js"]
The first stage does the heavy work; the second copies only dist out of it and installs just the production dependencies. The build tools never reach the final image, which stays small and has less installed to go wrong or be attacked. You do not need this for a simple app, but the moment you have a build step, reach for it.
Run your own image
The image is just a template until you run it, exactly like the nginx one:
docker run -d -p 127.0.0.1:3100:3000 --name shopapp shopapp:v1
Your app is now running in a container built entirely from your Dockerfile, listening on port 3000 inside, mapped to 3100 on the server's localhost. It will run identically anywhere Docker runs, with no "works on my machine" left to argue about.
Troubleshooting the image build
npm ci fails with "package-lock.json not found." npm ci needs a committed lockfile to install from. Run npm install once locally to generate package-lock.json, commit it, and confirm the COPY package*.json ./ line actually copies it into the build.
COPY failed: no such file or directory. The file is not in the build context, or .dockerignore excludes it. Confirm the path is relative to the directory you passed to docker build, and that you did not ignore something you meant to copy.
The image is much larger than the 181 MB above. You are probably copying your host's node_modules into the build. Add it to .dockerignore and rebuild so npm ci installs fresh dependencies inside the image.
The container exits at once with a permissions error. USER node cannot write where the app expects. Write only to paths the node user owns, or chown the directory in an earlier build step that still runs as root.
Frequently asked questions
What is the difference between npm ci and npm install in a Dockerfile?
npm ci installs the exact versions pinned in package-lock.json and fails if the lockfile is out of sync, so builds stay reproducible. npm install can update the lockfile and pull newer versions, which lets an image drift over time.
Why copy package*.json separately instead of copying everything at once?
So Docker can cache the dependency install. When only your source changes, the cached npm ci layer is reused and the rebuild finishes in about a second, instead of reinstalling every package from scratch.
When do I actually need a multi-stage build?
When your app has a compile or bundle step, or ships a compiled binary. The first stage does the heavy build; the second copies out only the finished artifact, so compilers and dev dependencies never reach the image you run.
Should I tag my image latest?
Prefer an explicit version such as shopapp:v1. The latest tag is a moving target that makes rollbacks and "which build is running" hard to answer. Tag each build with a version or a commit reference.
What you have, and the missing piece
You can now package your own application into a small, reproducible, non-root image that builds fast thanks to sensible layer ordering. That is a real, shippable artifact.
But a real application is rarely just one container. Yours needs a database, and right now running the app container and a Postgres container and wiring them together by hand, with the right network and the right environment and the right startup order, would be tedious and error-prone. The next chapter introduces Docker Compose, which describes your whole stack, app and database and how they connect, in one file you can bring up with a single command.