The day it actually happens
A server incident response plan is the set of steps you follow the hour a breach is discovered: snapshot, contain, triage, rebuild rather than clean, and report on the clock. This chapter is that plan, written before you need it.
- The first hour decides how bad it gets, and the common instinct (wipe, reboot, delete the file) is usually the wrong first move.
- Snapshot the running machine before you touch it, then contain at the network by isolating it rather than shutting it down, which destroys memory evidence.
- Triage with a few commands (
w,last,ps aux,ss -tnp) plusauditdand the auth logs; a truly rooted server is rebuilt from clean, not cleaned. - Report on the clock: CERT-In within 6 hours, DPDP breach notification to the Board and affected people, then write a short post-mortem.
Every chapter until now has been preparation. This one is about the moment the preparation is tested: you have found something. An alert fired, a bill spiked, a customer reported spam from your domain, a process you cannot explain is pinning the CPU.
What you do in the next hour decides how bad it gets. And the instinct almost everyone has, wipe it, reboot it, delete the suspicious file, is usually the wrong first move. Panic destroys the evidence you need and often does not even remove the attacker. The people who come through an incident well are not calmer by nature. They have a plan, written before they needed it. Here is that plan.
Prerequisites
- The logging from Chapter 4 (
auditdand retained auth logs) already running, so there is a record to triage against. - Tested, off-server backups taken before any breach, so a rebuild has clean data to restore.
- A provider that can snapshot the running VM and isolate it at the network, plus
sudoaccess to the host.
Rule one: do not destroy the evidence
Your first instinct will be to reboot or rebuild immediately. Resist it for sixty seconds.
A running compromised server holds evidence that vanishes the moment you touch it: what is in memory, what is connected, what is running, how they got in. If you wipe first, you lose the answer to "how did this happen?", which means you will make the same hole again on the clean server. So before anything else, if your provider supports it, take a snapshot of the running machine. It freezes the crime scene. You can investigate the copy at leisure while you deal with the live one.
Rule two: contain, without tipping your hand
Now stop the bleeding. The goal is to cut the attacker's access and any harm they are doing (data leaving, spam sending, other machines being attacked) while keeping the server alive enough to investigate.
The cleanest containment is at the network: have your provider or firewall isolate the server so it can no longer talk to the outside, rather than shutting it down (which destroys memory evidence). If the compromise is a single known account or process, you can also just cut that, but network isolation is the surest way to stop ongoing damage without alerting an attacker who might otherwise burn everything on their way out.
Rule three: find out what is actually happening
With a snapshot taken and the bleeding stopped, triage. A handful of commands, shown here on Ubuntu 24.04, tell you most of the story. Start with who is on the machine right now:
w
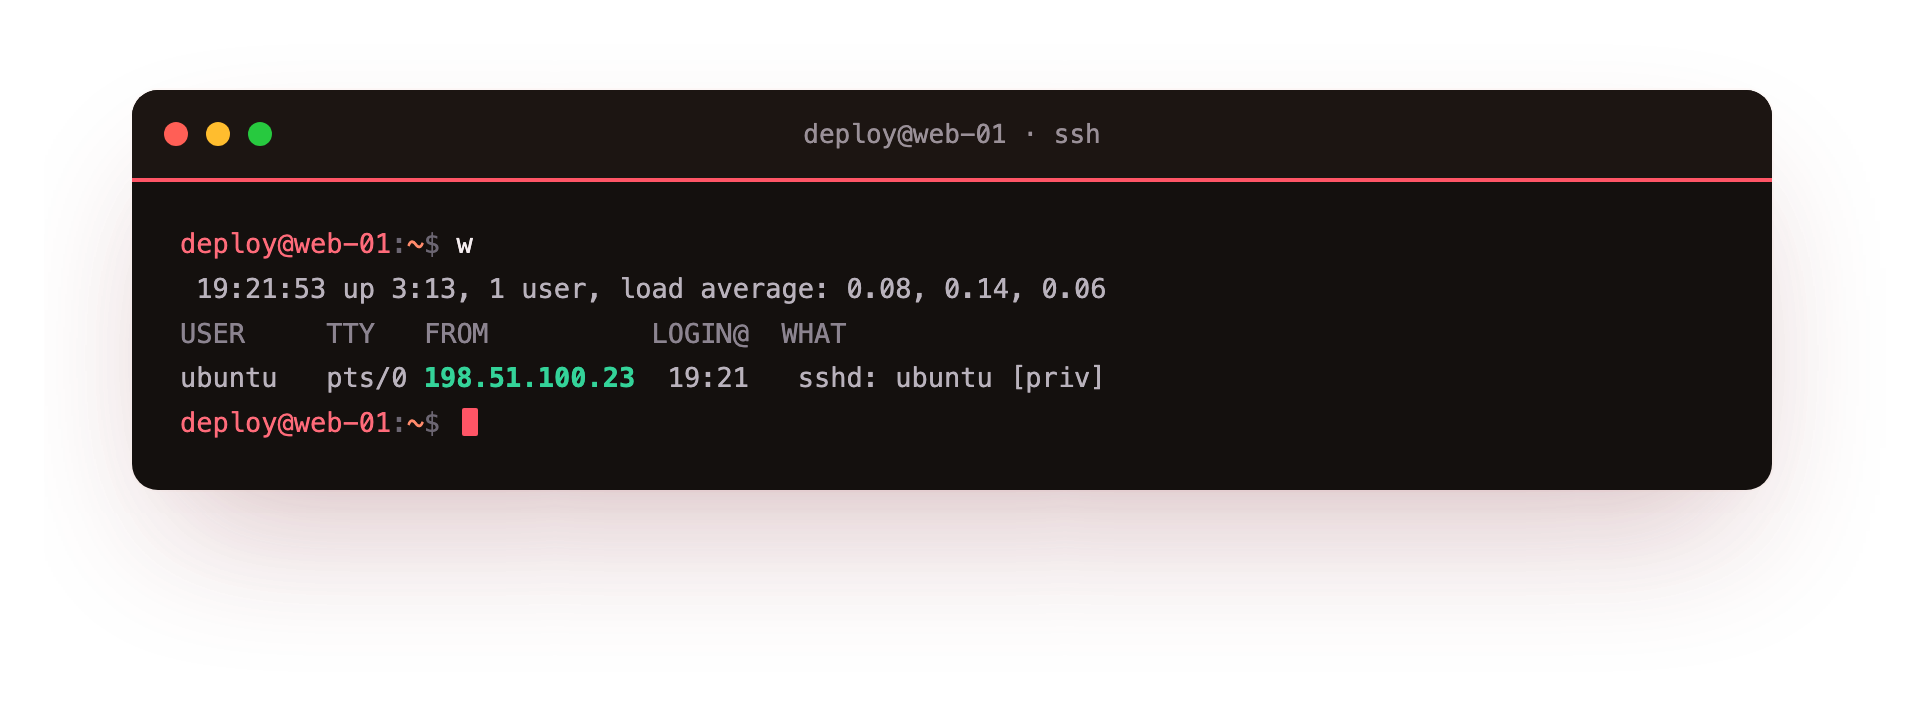
You expect to see yourself and no one else. An unknown user, or a session from an IP you do not recognise, is a live intruder. Then the recent login history:
last -a
Look for successful logins you cannot account for. Then what is running, sorted by the resource attackers usually burn:
ps aux --sort=-%cpu | head
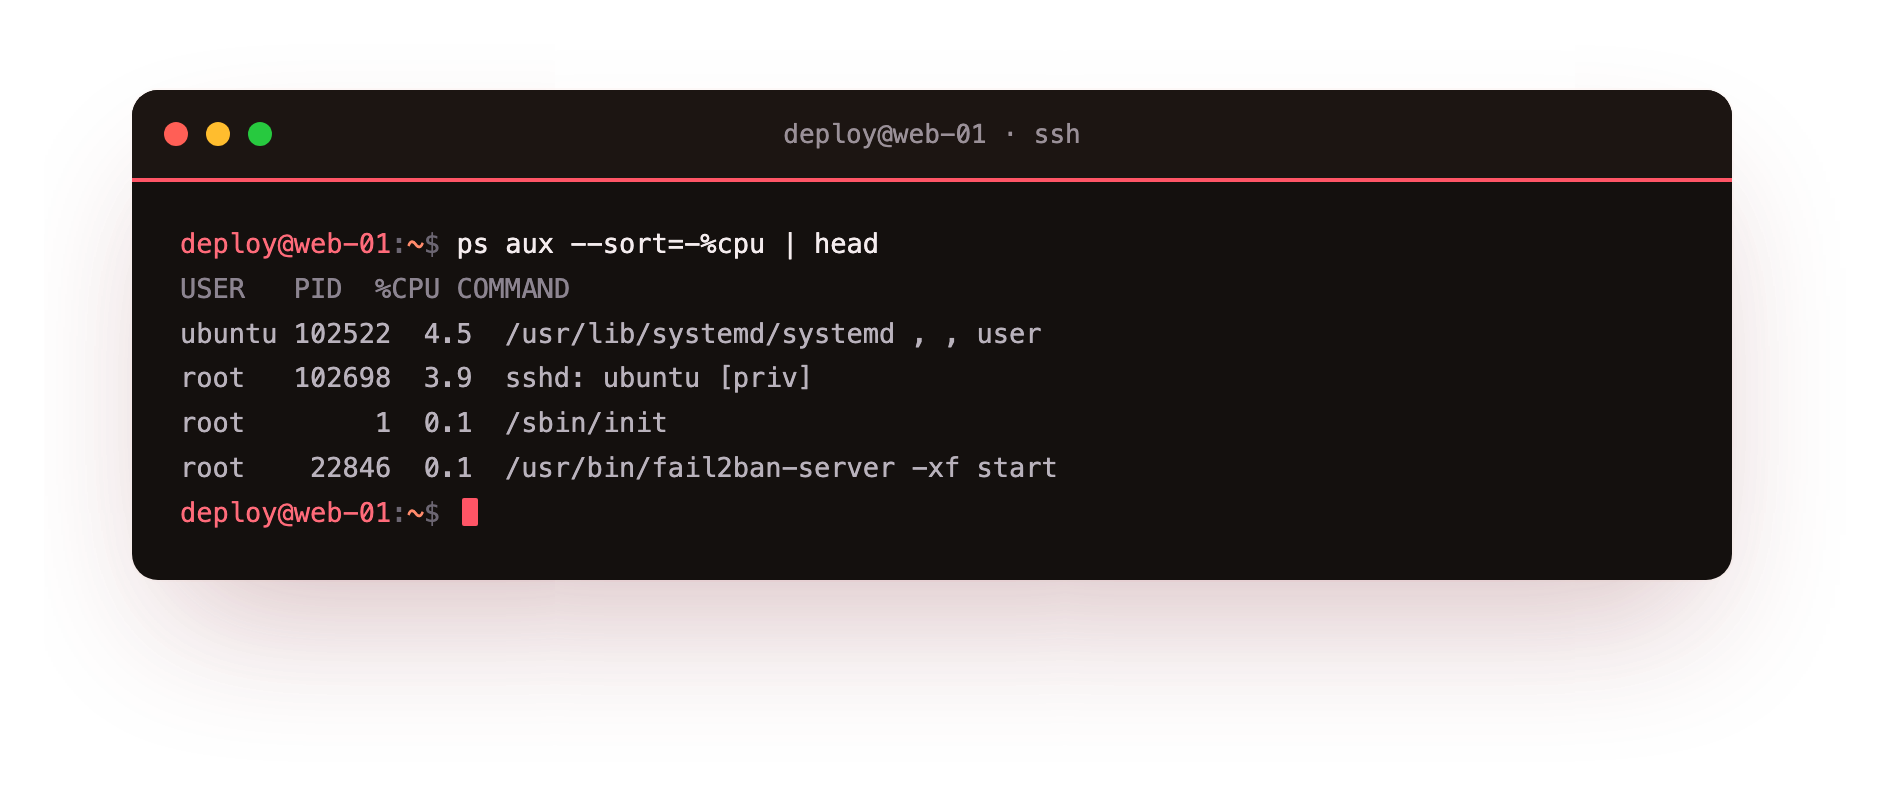
A process you cannot name, especially one eating CPU, is the classic sign of a crypto-miner riding your server. Then what the server is talking to:
sudo ss -tnp state established
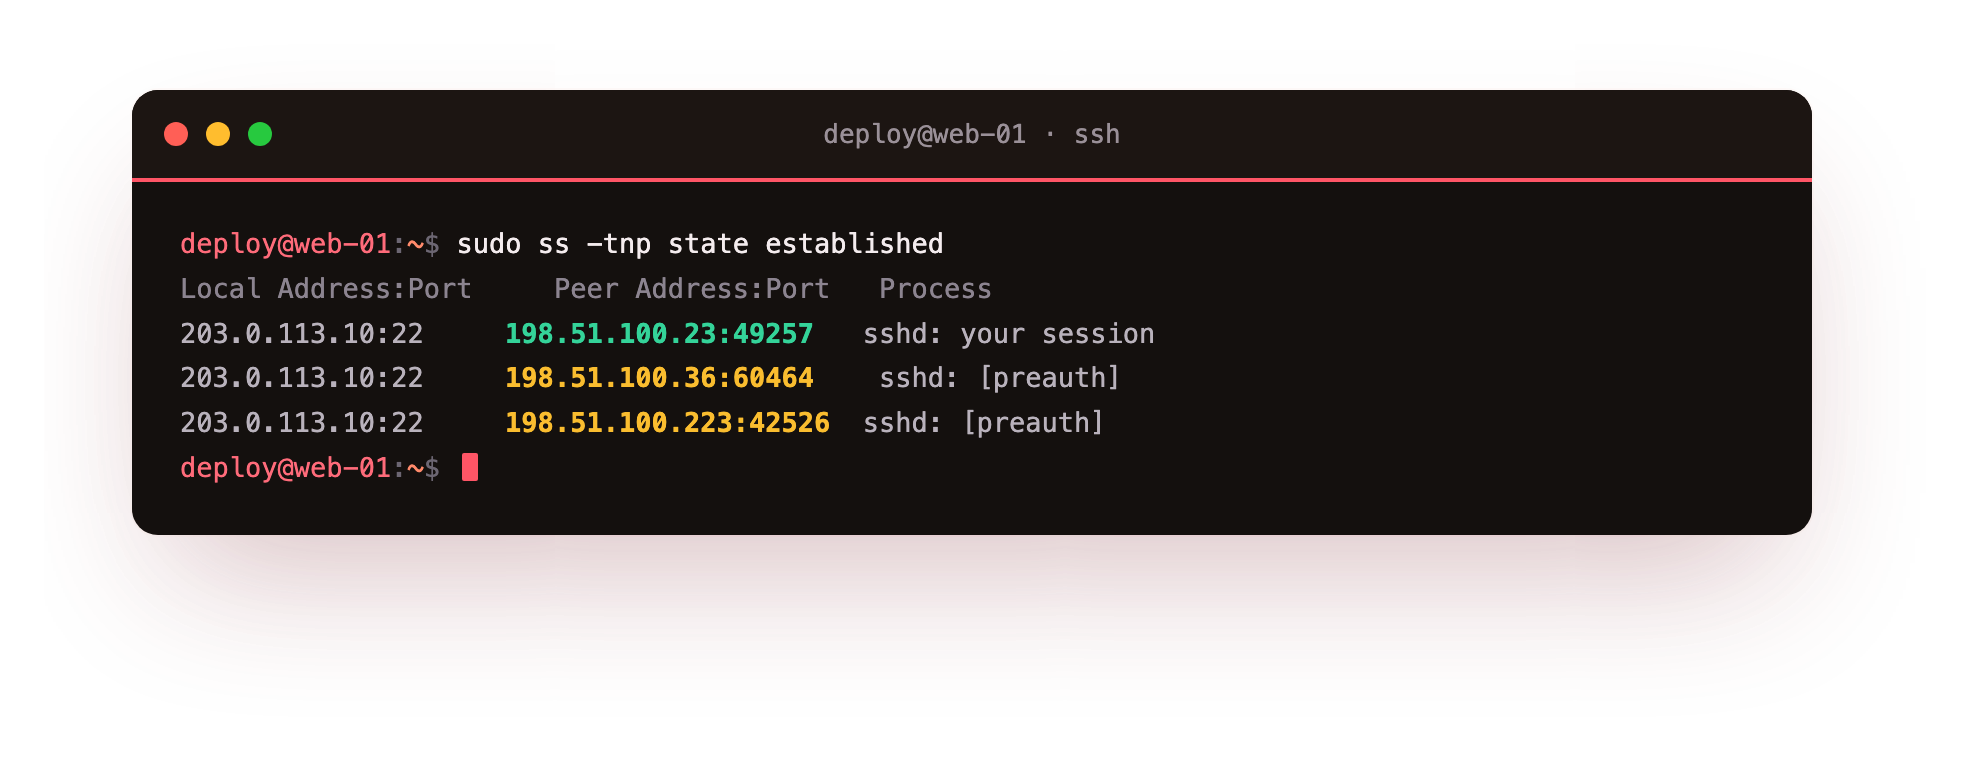
Every connection should have an explanation. An established connection to a foreign IP you do not recognise, from a process you did not start, is data walking out the door. Finally, cross-check against the record from the detection chapter: auditd and the auth logs will show what changed and when. This is where all that earlier logging pays for itself, or where its absence leaves you guessing.
When one of those checks points at something suspicious, go deeper on it before you act. Three commands take you from "something is wrong" to "here is exactly what":
sudo lsof -p <pid>
sudo find / -newermt "24 hours ago" -type f 2>/dev/null | grep -vE "^/proc|^/sys|^/run"
sudo systemctl list-unit-files --state=enabled | grep -vi "$(dpkg -l | ...)"
lsof shows every file and connection a suspicious process has open, often revealing what it is reading, writing, or talking to. The find shows everything that changed on disk in the last day, which frequently surfaces the dropped payload or the modified config. And checking enabled services against what you actually installed catches the persistence mechanism, the thing they set up so that killing the process does not remove them. Persistence is what turns a one-time break-in into a resident, so finding it is not optional.
Rule four: you cannot clean a rooted server, you rebuild it
Here is the hard truth people least want to hear. If an attacker had root, you can no longer trust anything on that machine. Not the binaries, not the logs on it, not your "I think I removed it." A modern rootkit can hide from the very tools you would use to find it.
Deleting the suspicious file and moving on feels like resolution. It is not. The only reliable recovery from a real root compromise is to rebuild from a known-clean base, restore data from a backup taken before the breach (this is why the backup chapter insisted on tested, off-server backups), rotate every credential the server ever touched, and apply the fix for the hole that let them in. Painful, but it is the only version that actually ends the incident instead of pausing it.
Rule five: tell the people you are obliged to tell
Technical recovery is not the whole job. If personal data was exposed, you have legal duties, and the clock is short.
Under the CERT-In directions, certain security incidents must be reported within 6 hours of you becoming aware. Under the DPDP Act, a personal-data breach requires notifying the Data Protection Board and the affected people. You cannot do either accurately without the investigation above, which is the whole reason the detection and compliance chapters exist. A breach you handled quietly and never disclosed can turn a technical problem into a legal one.
Rule six: close the hole and write it down
The incident is not over when the server is clean. It is over when the thing that let them in cannot let anyone in again. Find the root cause, the unpatched service, the leaked key, the weak password, the exposed port, and fix that specific thing. Then write a short post-mortem: what happened, how you found it, what you did, what you changed. Not for blame. So the next person, possibly you in a year, does not relearn it the hard way.
You do not need a heavy template. Five headings are enough, and writing them while it is fresh takes twenty minutes:
- What happened. A plain-language summary and a timeline: when it started, when you noticed, when it was contained.
- How they got in. The specific root cause, not "a vulnerability" but the exact door.
- What was affected. Which data, which systems, and, honestly, what you cannot be sure about.
- What you did. The containment, investigation, and recovery steps, in order.
- What changed so it cannot recur. The specific fix, plus any monitoring you added to catch it faster next time.
That document is worth more than it looks. It is what you hand a customer who asks what happened, it is the seed of the compliance evidence from the last chapter, and it is the reason the same hole does not get reopened in six months by someone who never knew it existed.
Why server incident response is the chapter you never want to need alone
You can read all six rules and still freeze when it happens at 3am, because incident response is not knowledge, it is a capability under pressure. The commands are easy. Staying methodical while your business is down, knowing when to snapshot versus isolate versus rebuild, reading the logs correctly the first time, meeting a 6-hour clock, that is the part that does not come from a checklist.
This is the whole reason we built ServerCake the way we did, and it is the honest end of this series. Everything in these six chapters, you can do yourself, and for many servers you should. But the day it goes wrong, the question is not "do I know the commands?" It is "is there a team that has done this before, watching, ready, who treats my 3am as their job?"
We have sat with a founder whose site was down and whose data was walking out, and the thing that mattered was not a document. It was a person on the other end who had done it a hundred times and knew exactly what to do next.
That is not a feature you configure. It is people, and it is the part we carry so that you never have to face the worst hour alone.
You have hardened the server, the web layer, the database. You can detect trouble, prove your posture, and respond when it comes. That is a genuinely secure system, and the knowledge to run one. The only thing left is deciding how much of the keeping it secure you want to carry yourself, and how much you would rather hand to a team whose whole job it is.
Key facts
- Do not wipe or reboot first. Snapshot the running server to preserve evidence, then investigate the copy.
- Contain at the network (isolate the server) rather than shutting it down, which destroys memory evidence.
- Triage with a few commands:
w(who is on now),last(recent logins),ps aux(unexpected processes),ss -tnp(unexplained connections), plusauditdand auth logs for what changed. - A truly rooted server cannot be cleaned, only rebuilt from a known-good base, with data from a pre-breach backup and every credential rotated.
- Report on the clock: CERT-In within 6 hours, DPDP breach notification to the Board and affected people.
Frequently asked questions
Shouldn't I just reboot to get rid of it?
No. Rebooting destroys the evidence in memory and rarely removes a persistent attacker, who has usually set up something that survives a reboot. Snapshot first, investigate, then rebuild deliberately.
Can't I just delete the malicious file and carry on?
If the attacker only ever had limited access, sometimes. If they had root, no: you cannot trust anything on the machine afterward, including your own checks. The safe path is a rebuild from clean plus a pre-breach backup.
How fast do I really have to report?
Under CERT-In, within 6 hours of becoming aware of a qualifying incident. That is faster than most people expect, which is why having the detection and logging in place beforehand matters so much; you cannot investigate in time if you are starting from nothing.
Is it worth planning for this if I've never been breached?
That is exactly when to plan for it. Writing the steps down when you are calm is the difference between a controlled response and a panicked one that makes things worse. The worst time to design your incident response is during the incident.