The second front door
nginx security headers are response headers that tell the browser to switch on protections your web server would otherwise leave off. This chapter sets them up on Ubuntu 24.04, together with the rate limiting and TLS that close the app layer.
- A default nginx leaks its exact version and ships none of the browser-side protections on; a handful of config lines close that gap.
- Five headers do most of the work: X-Frame-Options, X-Content-Type-Options, Content-Security-Policy, Referrer-Policy, and Strict-Transport-Security.
- Rate limiting with
limit_reqcaps requests per IP, so one script cannot exhaust the server for everyone else. - Always run
nginx -tbefore reloading, and remember every header is meaningless without real HTTPS, which is free and automatic through Let's Encrypt.
You hardened the server. SSH is locked, the firewall is up, fail2ban is watching. Most people stop there and feel safe.
Then they install a web server, and quietly open a brand new door to the whole internet.
A hardened server running a wide-open web server is like a bank vault with the front window left unlatched. Ports 80 and 443 are meant to be open, that is the point of a web server. But an unconfigured web server tells attackers what it is running, ships none of the browser protections that stop common attacks, and will happily absorb a flood of requests until it falls over. This chapter closes that second door.
Everything here is nginx on Ubuntu 24.04. The ideas map directly to Apache and Caddy; only the syntax changes.
Prerequisites
- A server already hardened as in Chapter 1: a non-root sudo user, key-only SSH, and a firewall.
- nginx installed and serving at least one site on Ubuntu 24.04, with
sudoaccess to edit its configuration. - For the TLS step, a real domain whose DNS A record already points at this server's public IP.
Stop announcing what you run
By default, nginx tells everyone its exact version in every response:
curl -sI http://your-server/ | grep -i server
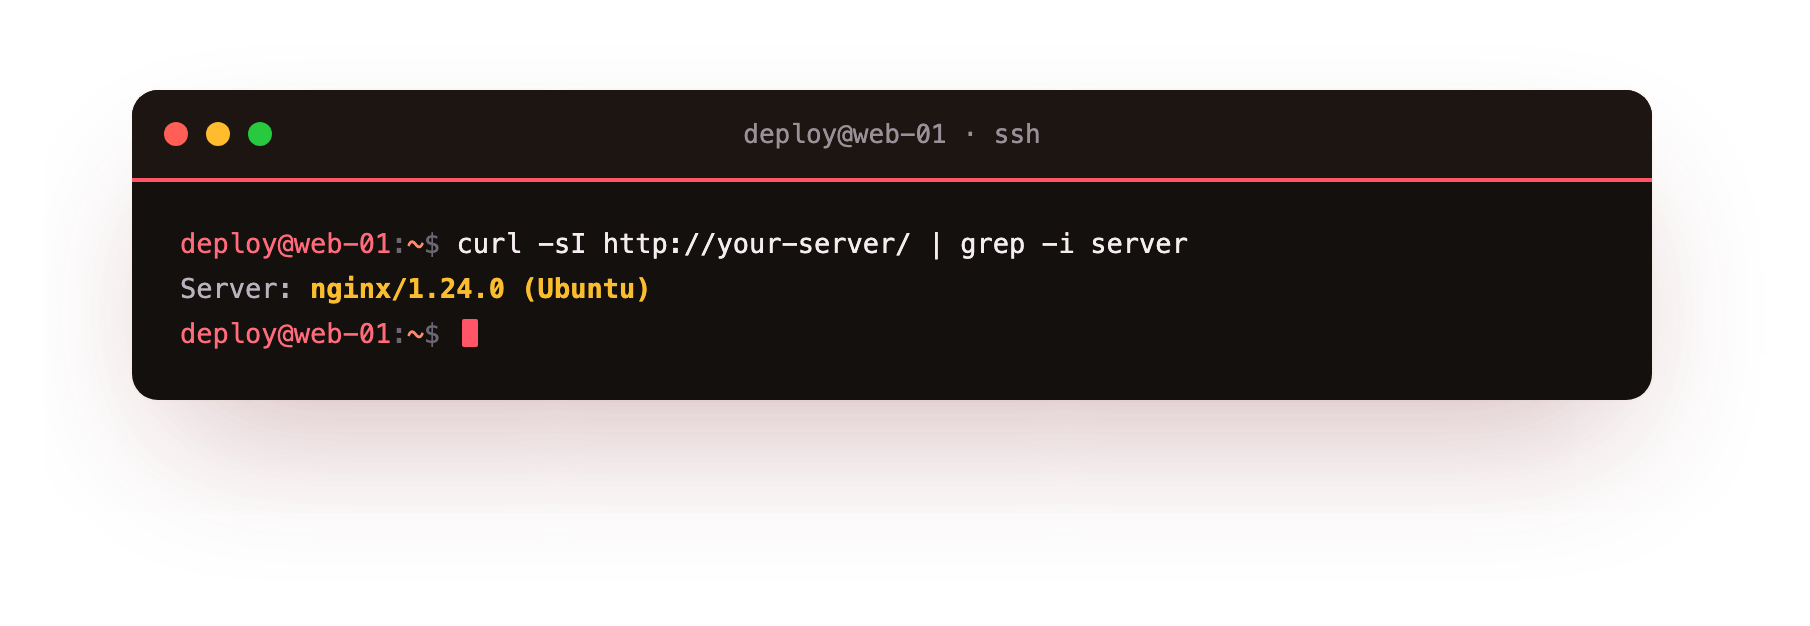
On a fresh install you get back Server: nginx/1.24.0 (Ubuntu). That looks harmless. It is not. The moment a new vulnerability is published for a specific nginx version, scanners sweep the internet for servers advertising that exact version, and yours just put its hand up. You are not obliged to make their job easy.
One line turns it off. Add it to a new config file:
sudo tee /etc/nginx/conf.d/hardening.conf >/dev/null <<'EOF'
server_tokens off;
EOF
Now the response says only Server: nginx, with no version to match against.
Add the nginx security headers a browser is waiting for
A browser will enforce a surprising amount of security for you, but only if your server tells it to. These instructions travel as HTTP response headers, and an unconfigured server sends none of them. The five that matter most:
- X-Frame-Options stops your site being loaded inside an invisible frame on an attacker's page (clickjacking).
- X-Content-Type-Options stops the browser guessing a file's type and running it as something it is not.
- Content-Security-Policy controls exactly what the page is allowed to load, the strongest defence against cross-site scripting.
- Referrer-Policy stops your URLs leaking to third parties.
- Strict-Transport-Security forces every future visit over HTTPS, so a user is never silently downgraded to plain HTTP.
Add them alongside the version line:
add_header X-Frame-Options "SAMEORIGIN" always;
add_header X-Content-Type-Options "nosniff" always;
add_header Referrer-Policy "strict-origin-when-cross-origin" always;
add_header Content-Security-Policy "default-src 'self'" always;
add_header Strict-Transport-Security "max-age=31536000; includeSubDomains" always;
The Content-Security-Policy above is deliberately strict (default-src 'self' allows only your own domain). Real applications usually need to loosen it for fonts, analytics, or a CDN, so treat it as a starting point you tighten around your actual app, not a copy-paste final answer.
Put a limit on the flood
Nothing stops one script from sending your server thousands of requests a second, exhausting it for everyone else, unless you set a limit. nginx can cap requests per IP with two directives. Define the zone once, then apply it:
limit_req_zone $binary_remote_addr zone=req_limit:10m rate=10r/s;
Then inside your site's location block:
limit_req zone=req_limit burst=20 nodelay;
This allows ten requests a second per IP with a short burst, and returns a 503 to anything faster. A normal visitor never notices. A brute-force script or a scraper hits the wall immediately.
Do not take that on faith. Fire thirty requests at the server as fast as the shell can, and count what comes back:
for i in $(seq 1 30); do curl -s -o /dev/null -w "%{http_code}\n" http://localhost/; done | sort | uniq -c
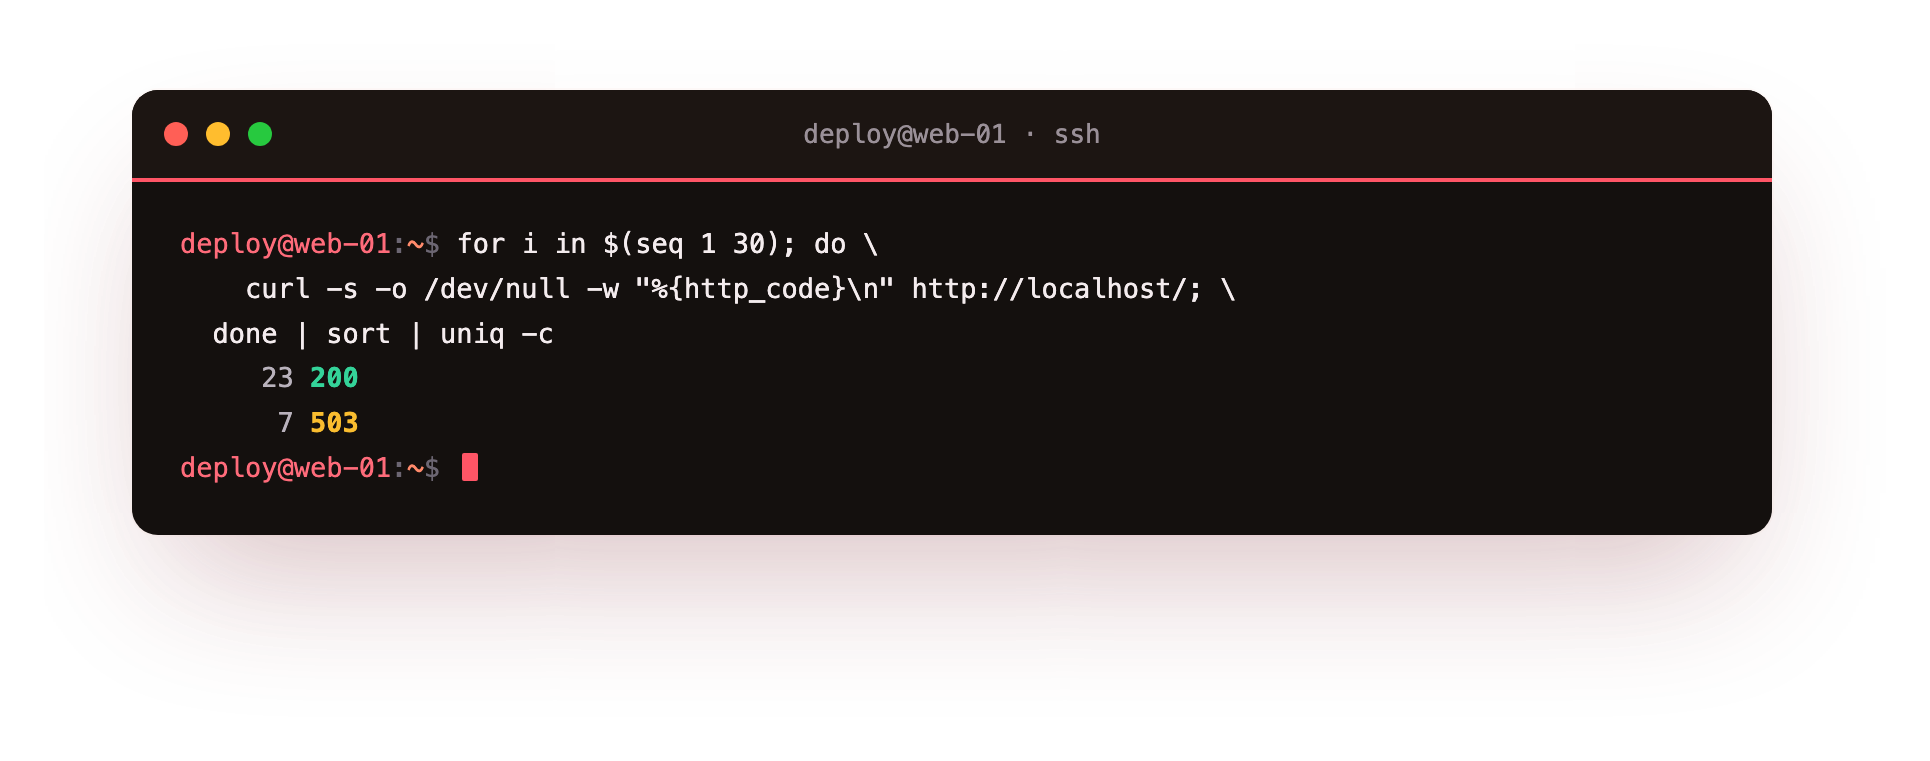
On our test server, twenty-three came back 200 and seven came back 503. That is the limiter working exactly as designed: the first burst is served, and the flood beyond it is turned away.
The two numbers you want to understand are rate (the steady requests-per-second you allow) and burst (how many can queue in a short spike). Set them from your real traffic: a login endpoint deserves a tight limit, a public homepage a looser one. Start conservative and loosen if real users ever hit the wall, which, at ten a second, they almost never will.
Do not stop at the five headers
The five above are the load-bearing ones, but two more are worth adding once you understand them. Permissions-Policy lets you switch off browser features your site does not use, so a compromised script cannot quietly reach for the camera, microphone, or geolocation:
add_header Permissions-Policy "camera=(), microphone=(), geolocation=()" always;
And if your application framework leaks its own identity in an X-Powered-By header (PHP, Express, and others do this by default), strip it. The same logic as hiding the nginx version applies: do not tell an attacker exactly what to look up.
proxy_hide_header X-Powered-By;
Why test before you reload?
The same discipline as the SSH chapter applies here: never reload a config you have not validated. A broken nginx config can take your site offline. Check it first:
sudo nginx -t
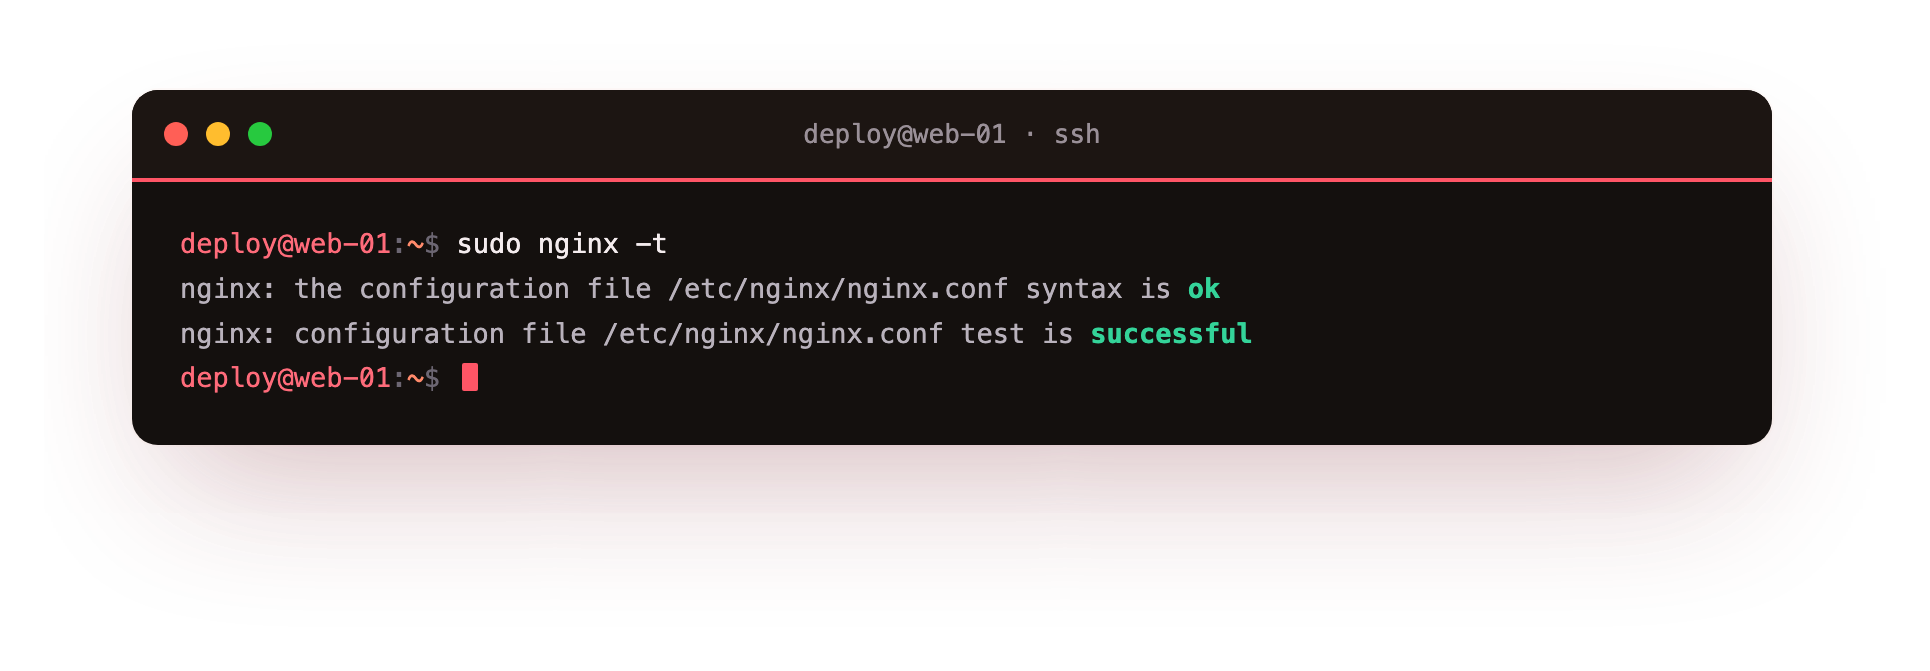
When it reports the syntax is ok and the test is successful, apply it:
sudo systemctl reload nginx
reload swaps the config without dropping a single connection, unlike restart.
Confirm it worked
Ask the server what it now sends:
curl -sI http://your-server/ | grep -iE "server|x-frame|x-content|referrer|content-security|strict-transport"
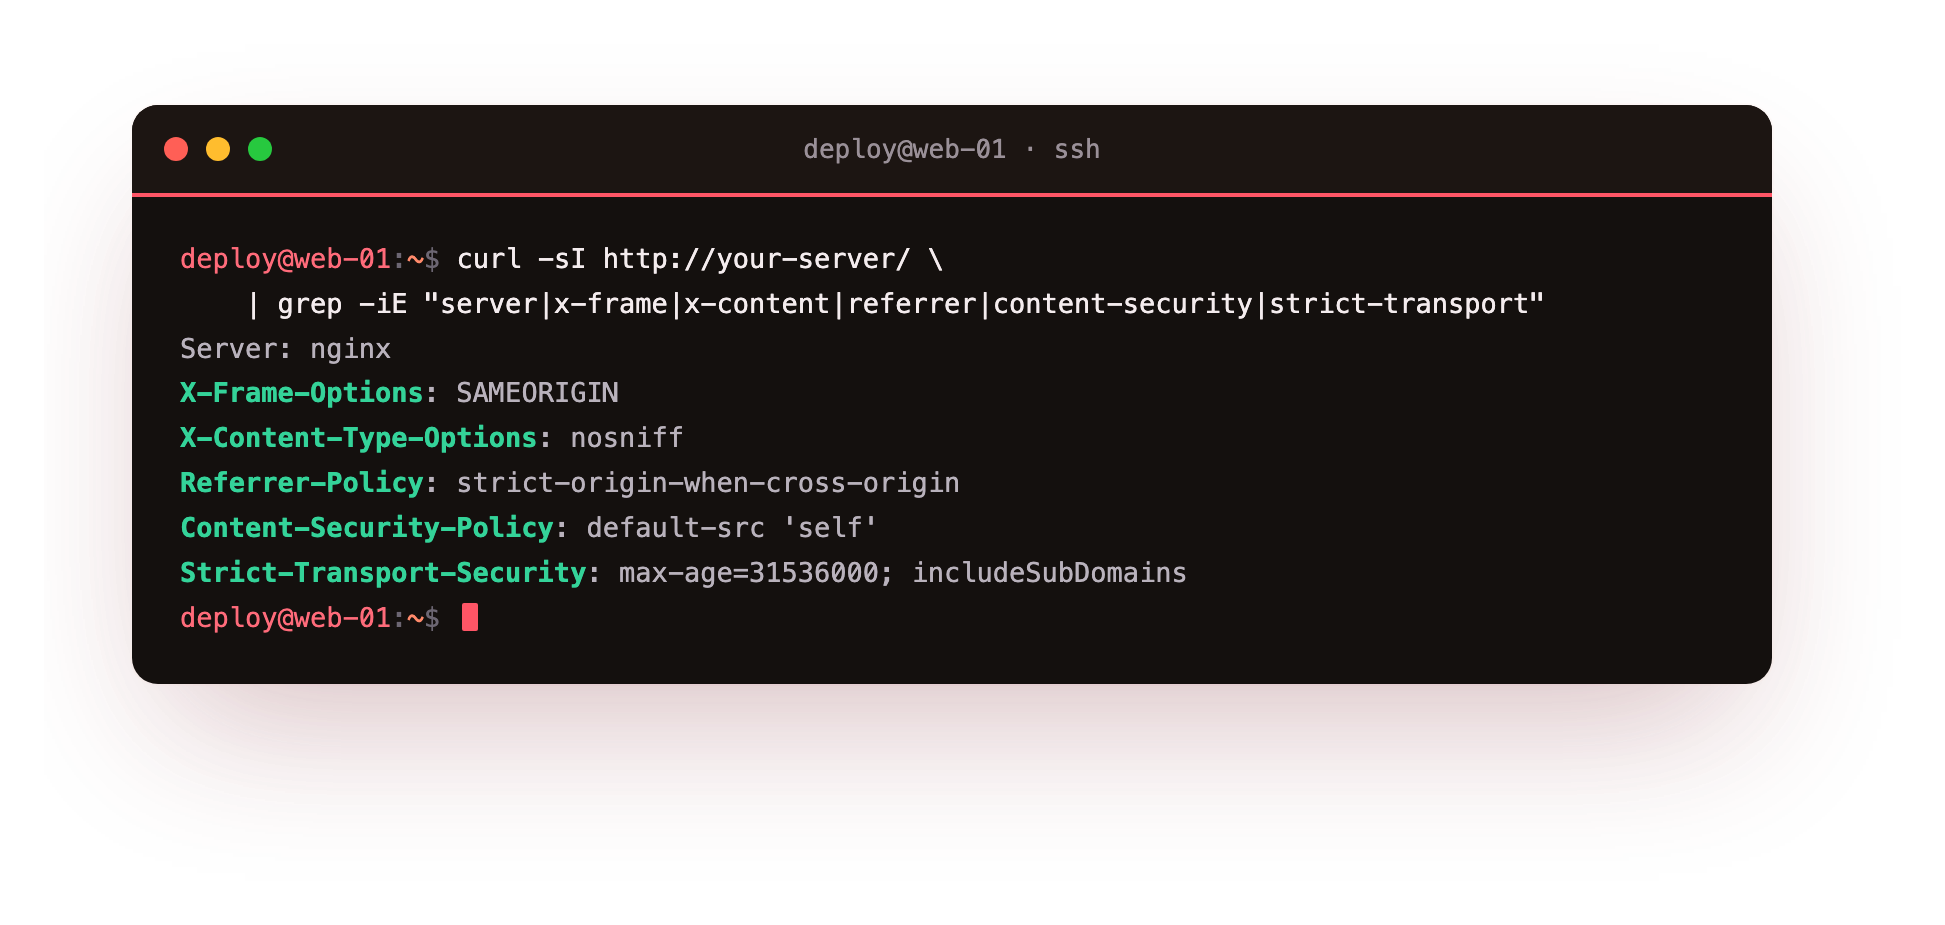
Before, this returned a single line leaking the version. After, it returns the five protections above and a version-free Server: nginx. If you want a second opinion, our free HTTP security headers checker grades any public URL and tells you what is still missing.
The one thing you cannot skip: real HTTPS
Every protection above assumes the connection is encrypted. Strict-Transport-Security is meaningless over plain HTTP, and a login form on http:// sends passwords in the clear for anyone on the path to read.
You do not pay for this any more. Let's Encrypt issues free, auto-renewing certificates, and certbot configures nginx for you in one command:
sudo apt install certbot python3-certbot-nginx
sudo certbot --nginx -d your-domain.com
This needs a real domain pointed at your server, which is why it is the one step you finish once the site has a name, not on day one. Once it runs, certbot rewrites your config to redirect all HTTP to HTTPS and renews the certificate automatically before it expires. Check the certificate any time with our SSL / TLS checker.
One detail people miss: getting the certificate is not the end of it. A weak TLS configuration can still let an attacker downgrade the connection or exploit an old protocol. After certbot runs, make sure old, broken protocols are off (anything before TLS 1.2) and that your Strict-Transport-Security header is actually being sent over the HTTPS site, not just the redirect. The SSL checker grades all of this, protocols, cipher strength, chain, and expiry, so you are not guessing.
Test it like an attacker would
You have configured the edge. Now look at it from the outside, the way someone probing you would. Two free checks tell you almost everything:
- The HTTP security headers checker fetches your site and grades every header, telling you exactly what is present, what is missing, and how to fix each gap. A green grade here is a real, external confirmation, not your own config file telling you what you hoped you set.
- The SSL / TLS checker does the same for your certificate and encryption.
Run both after every meaningful change. The gap between "I added the header" and "the header is actually being sent on every response" is where subtle mistakes live, an add_header in the wrong block, a location that overrides it, a redirect that strips it. An external check closes that gap.
Troubleshooting nginx
A header you added is not showing up. add_header does not accumulate. The moment a location or server block defines its own add_header, it drops every header inherited from the parent. If your five headers vanish on one path, that block needs its own copy of them, or the directives have to move somewhere they are not overridden. Re-check with curl -sI against that exact URL, not the homepage.
sudo nginx -t fails after editing. The test names the file and line. The usual causes are a missing semicolon, a directive in the wrong context (limit_req_zone belongs in the http block, not server), or an unbalanced brace. Fix what it points to and re-test; nginx will not reload until the test is clean, which is exactly what stops a typo from taking the site down.
The site broke after adding Content-Security-Policy. A strict default-src 'self' blocks fonts, analytics, and any CDN. Open the browser console, read the blocked-resource messages, and add only the specific origins you actually use. Loosen deliberately, one source at a time, rather than reaching for unsafe-inline or a wildcard.
certbot cannot obtain a certificate. The HTTP-01 challenge needs the domain's DNS pointed at this server and port 80 reachable from the internet. Confirm the A record resolves to your IP and that sudo ufw status allows 80/tcp, then re-run sudo certbot --nginx -d your-domain.com. A certificate cannot be issued for a name that does not yet resolve to the box.
What the web layer still does not solve
Headers, rate limits, and TLS harden the edge. They do nothing about the application behind it.
If your app has a SQL-injection hole, a leaked API key in a public repo, or a dependency with a known CVE, none of this touches it. The web server can be flawless and the app still be the way in. Edge hardening buys you a great deal, it removes the entire category of "misconfigured server" attacks, but it is a layer, not the whole wall.
This is the pattern that runs through everything we do at ServerCake. Security is not a switch you flip once. It is layers, kept current, watched. We told a client once that we had added every header, tuned the rate limits, and passed every scanner, and he asked the only question that matters: "so we are done?"
No. You are never done. You are just harder to hit than you were yesterday, and you stay that way only if someone keeps watching. That watching, across the edge, the app, and everything under it, is the part we take off your desk.
Key facts
- An unconfigured web server leaks its exact version, which is the first thing a scanner uses to match a known exploit.
server_tokens offremoves it. - Five response headers (X-Frame-Options, X-Content-Type-Options, Content-Security-Policy, Referrer-Policy, Strict-Transport-Security) let the browser enforce protections the server would otherwise skip.
limit_reqcaps requests per IP, stopping one script from exhausting the server for everyone.- Always run
nginx -tbefore reloading; a broken config can take the site down. - HTTPS via free Let's Encrypt is non-optional; every header protection assumes an encrypted connection.
Frequently asked questions
Do these headers slow the site down?
No. They are a few bytes added to each response and are enforced by the browser, not computed by your server. The performance cost is effectively zero.
Will a strict Content-Security-Policy break my site?
It can, if your pages load fonts, scripts, or images from other domains. Start with default-src 'self', watch the browser console for what it blocks, and add only the sources you actually use. Tightening CSP around a real app is normal and expected.
Is rate limiting going to block real users?
Not at sensible limits. Ten requests a second per IP is far above what a human browsing generates. It only bites automated floods.
I am on Apache, not nginx. Does this still apply?
Yes. The concepts are identical: hide the version, send the same five headers, rate-limit, and use HTTPS. Only the config syntax differs (Apache uses Header set and mod_evasive or mod_ratelimit).