Connect your laptop to the tunnel
Now you connect your laptop to the WireGuard server you built. The steps are symmetric to the server: install the app or tools, generate a keypair, register the laptop as a peer on the server, write a short client config, and bring the tunnel up. Then you prove it works with a real handshake and a ping across the internet, not on a lab bench. To connect your laptop is the first time the VPN carries live traffic, so this is where the earlier setup pays off.
- The laptop needs its own keypair; only its public key goes to the server.
- You register the client with one
wg setline and a/32address, applied live. - A split-tunnel client sets
AllowedIPs = 10.99.0.0/24so only VPN traffic uses the tunnel. - A live
latest handshakeplus non-zero transfer is proof the tunnel is up.
Install the WireGuard app on your laptop
On macOS, install WireGuard from the App Store; on Windows, download the installer from wireguard.com; both give you a GUI where you import a config and toggle the tunnel on. On Linux, install the same wireguard-tools you used on the server and drive it from the command line with wg-quick.
Whichever path you take, the laptop needs a keypair. On Linux or macOS you can generate one at the terminal, and the GUI apps make one for you when you create an empty tunnel.
wg genkey | tee client_private.key | wg pubkey
That prints the laptop's public key, here rcktfd2JnVcCxSWPowDvP7UI9EF45EXThqJ0rpYMyRs=. Keep the private key on the laptop and copy only the public key to the server for the next step.
Add the laptop as a peer on the server
On the slice, register the laptop by its public key and give it a single tunnel address. wg set applies to the running interface, so no restart is needed.
sudo wg set wg0 peer rcktfd2JnVcCxSWPowDvP7UI9EF45EXThqJ0rpYMyRs= allowed-ips 10.99.0.2/32
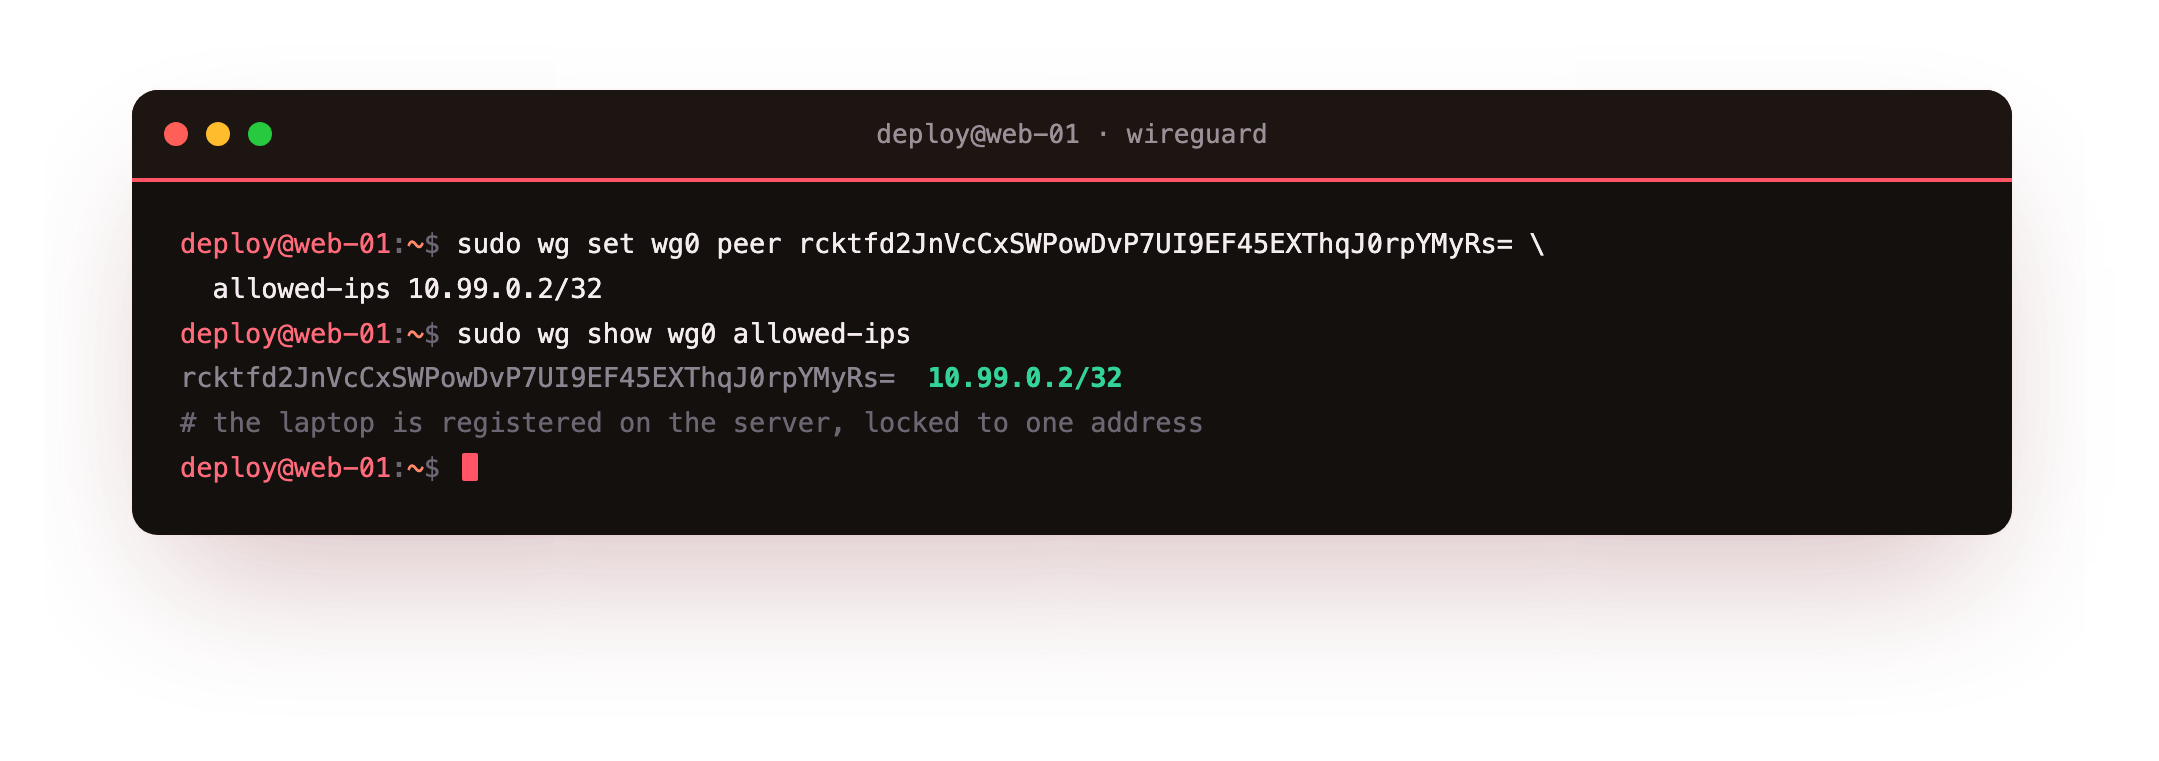
The allowed-ips 10.99.0.2/32 locks the laptop to exactly one address: the server will route only 10.99.0.2 to it and accept only that source from it. This is least privilege, and it is why a stolen client key cannot impersonate another device.
Run sudo wg show wg0 on the server. The laptop's public key should now appear as a peer with allowed ips: 10.99.0.2/32, though with no handshake yet, since the laptop has not dialled in.
Write the client config
The client config names the laptop's own address and private key, then a single [Peer] block for the server. Point Endpoint at the slice's public IP and port, set AllowedIPs to the whole tunnel subnet for a split tunnel, and add a keepalive so the link survives home NAT.
[Interface]
PrivateKey = <contents of client_private.key>
Address = 10.99.0.2/24

[Peer]
PublicKey = pvrDkgmOe3T2dotd5eA3M9oWtfc7cQJ1k2l40JMunxo=
Endpoint = 203.0.113.10:51820
AllowedIPs = 10.99.0.0/24
PersistentKeepalive = 25
AllowedIPs = 10.99.0.0/24 is the split-tunnel choice: only traffic for the tunnel subnet goes over WireGuard, and normal browsing stays on the local link. PersistentKeepalive = 25 sends a tiny packet every 25 seconds so the NAT in front of the laptop keeps its mapping open. Import this into the GUI app, or save it as wg0.conf and run wg-quick up wg0 on Linux.
Bring it up and prove the handshake
Toggle the tunnel on in the app, or bring it up at the terminal, then read the status on the laptop.
sudo wg show
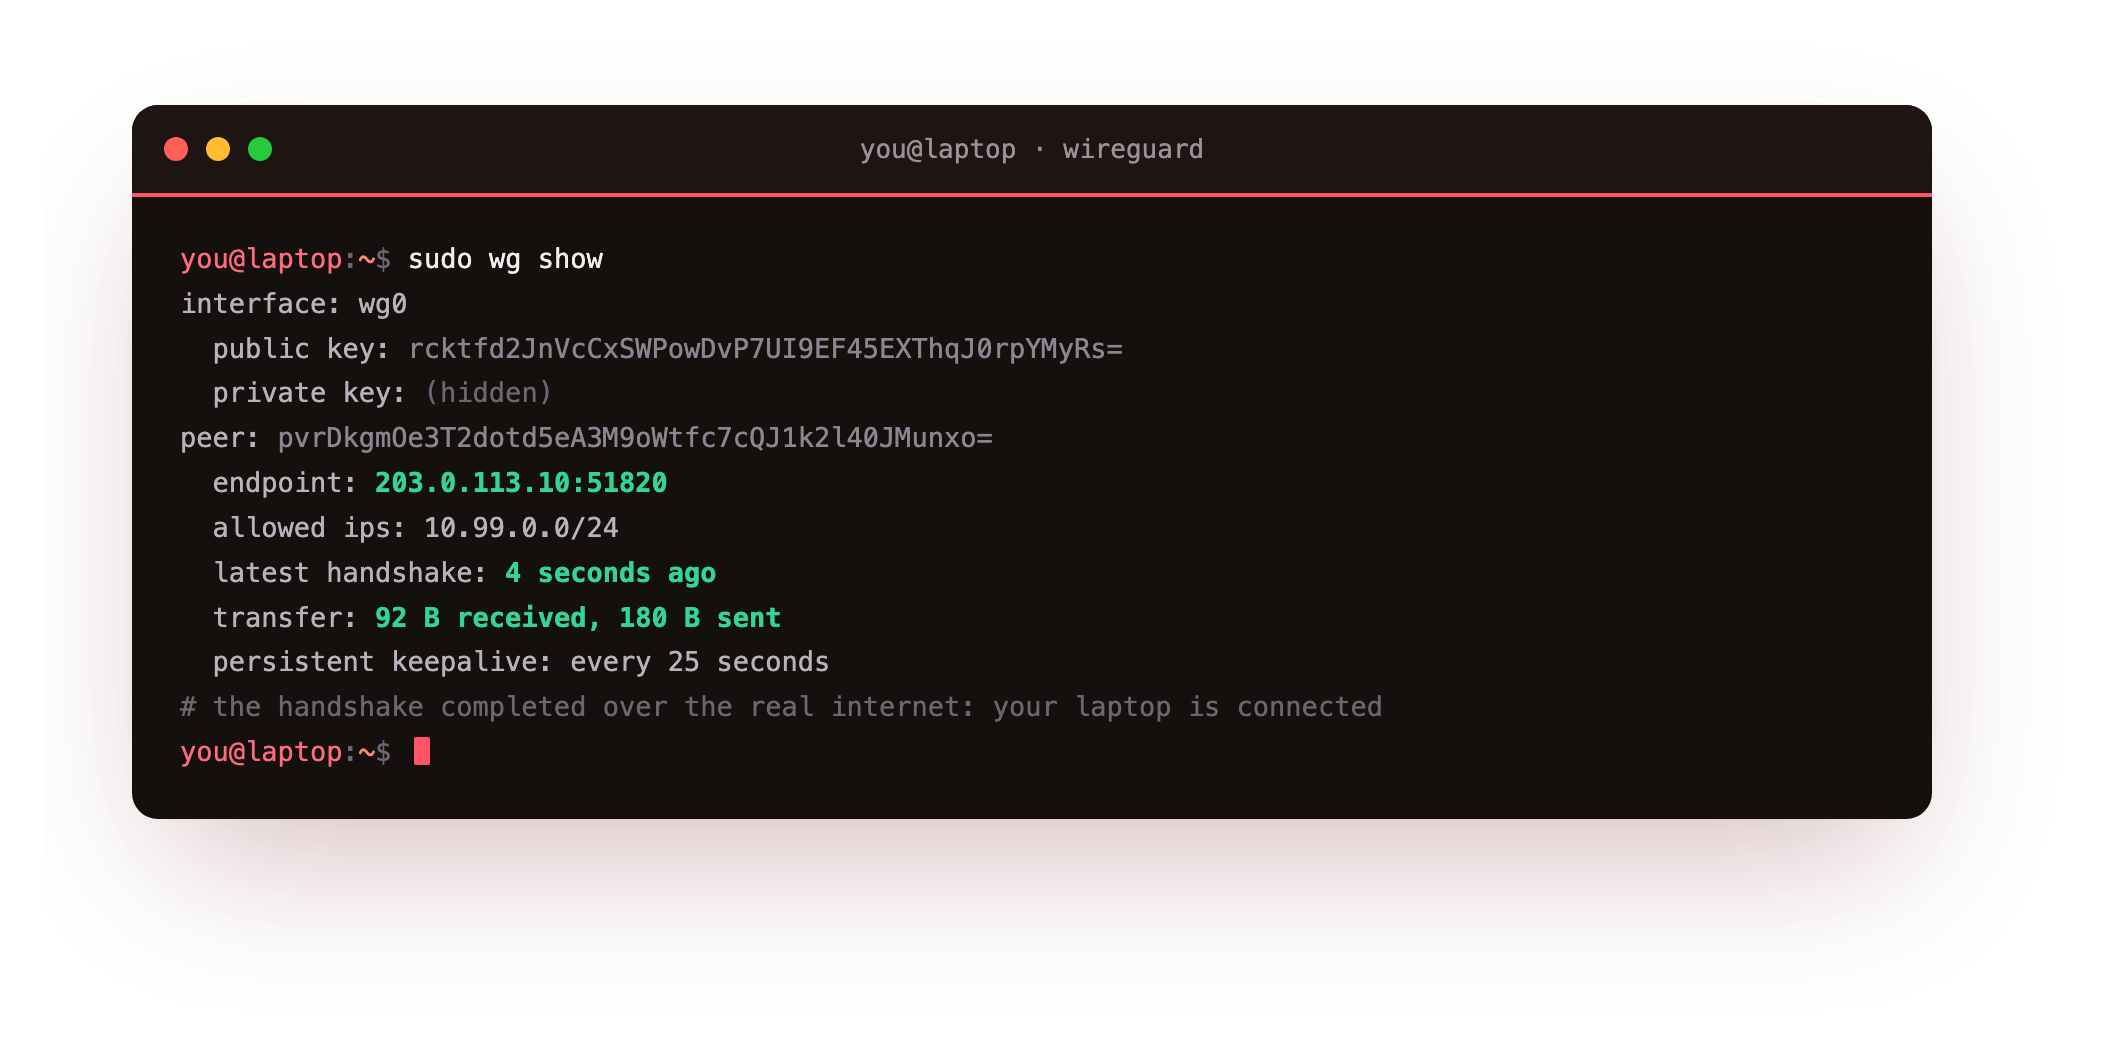
You should see the server peer with endpoint: 203.0.113.10:51820, a latest handshake a few seconds ago, transfer counters such as 92 B received, 180 B sent, and persistent keepalive: every 25 seconds. That handshake is the encrypted key exchange completing over the internet.
If there is no handshake, the cause is almost always below WireGuard: an unreachable endpoint, UDP 51820 blocked along the path, or an AllowedIPs that does not include the address you test. WireGuard stays silent until traffic starts, so trigger it and re-read.
Ping across the tunnel
Send three packets to the server's tunnel address. The first packet triggers the handshake if it has not happened yet, and the replies confirm encrypted traffic flows both ways.
ping -c 3 10.99.0.1
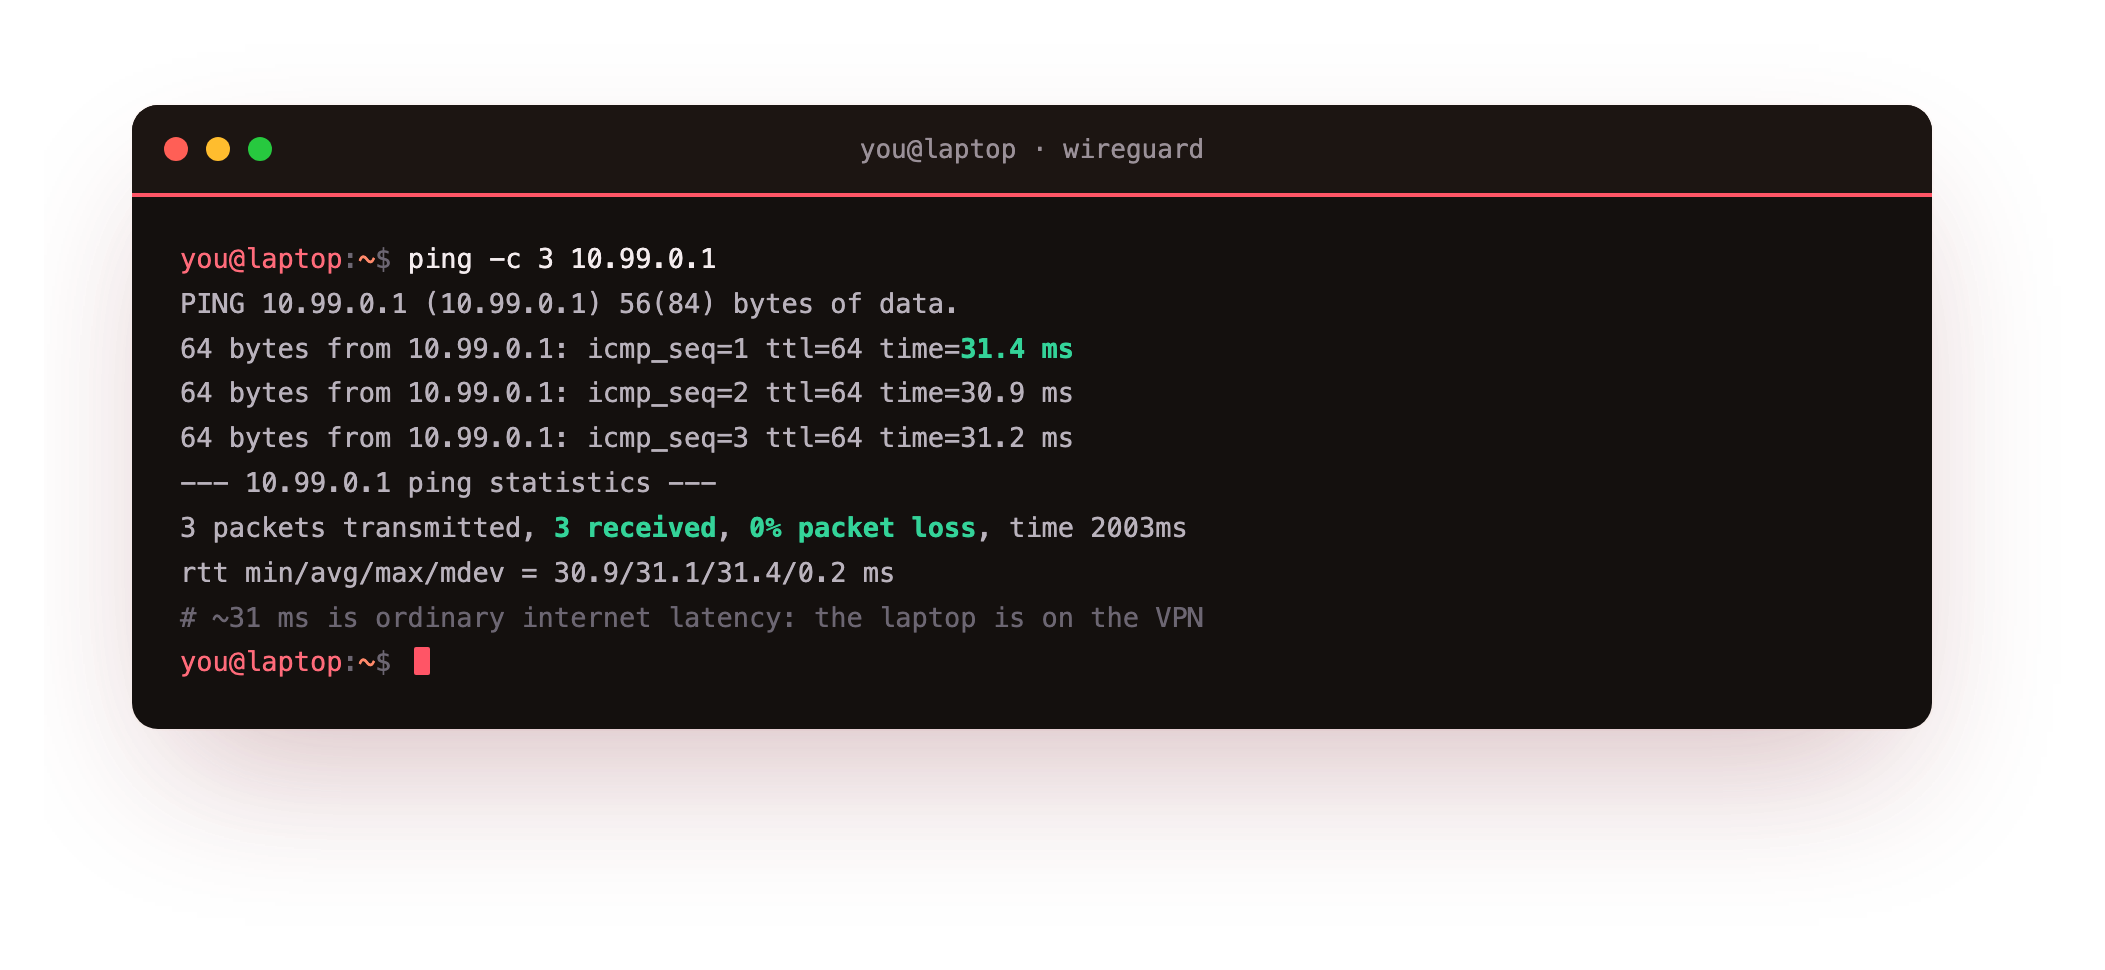
Three packets transmitted, three received, zero loss, with a round-trip around 31 ms over the real internet. Your laptop is now on the VPN. The latency is ordinary internet latency, not the sub-millisecond figure a local test would show.
Frequently asked questions
Does my laptop need a public IP to connect?
No. Only the server needs a reachable Endpoint. The laptop can sit behind home or cafe NAT with no fixed address: when it sends its first packet, the server learns its current source and replies there. This is why a roaming device connects to a server without the server knowing its address in advance, and why the keepalive matters behind NAT.
What is the difference between split tunnel and full tunnel here?
With AllowedIPs = 10.99.0.0/24 the laptop sends only tunnel-subnet traffic over WireGuard and browses normally on its local link, a split tunnel. Setting AllowedIPs = 0.0.0.0/0 would send all traffic through the server, a full tunnel, which the last chapter covers along with the NAT the server then needs. Start split; it is the least surprising default.
Why does wg show report no latest handshake?
A missing handshake means no encrypted packet completed the key exchange. Check the Endpoint is the server's real public IP and port, that UDP 51820 is open along the path, and that AllowedIPs includes the address you are pinging. Trigger traffic with a ping, then re-read wg show, since WireGuard is silent until there is something to send.
Can I edit the peer without dropping the tunnel?
Yes. wg set applies changes to a running interface live, so adding a peer or adjusting an AllowedIPs does not tear the tunnel down. To reload a full config file, wg syncconf applies only the differences. Reserve wg setconf, which replaces the whole configuration at once, for a deliberate reset.
Recap and what is next
Your laptop is connected. You generated a client keypair, registered the laptop on the server with a /32, wrote a split-tunnel config pointing at the slice, and proved a live handshake plus a clean ping over the internet. The latest handshake and transfer counters in wg show are the evidence the tunnel is real.
The next chapter is the payoff: you generate the phone config as a QR, scan it with the WireGuard app, stand up a private service on the slice, and reach it from your phone, working through the firewall pitfall that trips almost everyone.
Connecting a laptop needs a server with a stable public IP to dial. Launch a slice and run your own WireGuard VPN, then bring your real devices onto a private network you control end to end.