What you will build
By the end of this series a real site runs on Caddy the way a modern web server should: HTTPS on from the first request, a reverse proxy in front of your app, PHP wired to php-fpm, and a hardened production config with headers, logs and rate limiting. This opening chapter installs Caddy on a bare Ubuntu 24.04 slice from nothing, shows the finished HTTPS shape first, and teaches the Caddyfile so the rest of the series has a config you can read.
- A fresh slice has no web server pinned to your app, so the honest first step is to install Caddy from its own apt repository.
- Caddy is one static binary with its batteries built in, so there are no modules to compile before you can serve a site.
- The Caddyfile is a short block per site, not a tree of includes, which is the sharpest difference from an nginx setup.
- The whole reason to reach for Caddy is that a site address in that block is enough to get a real certificate automatically.
- An Ubuntu 24.04 slice reachable over SSH, with a sudo-capable login, and ideally nothing yet bound to ports 80 and 443.
- A domain name you can point at the slice later, because Caddy issues a public certificate against a real hostname in chapter two.
- Outbound internet from the box, since the install pulls Caddy from its package repository and later fetches certificates.
- Enough comfort with curl to read a response back, as the proof at every step is what the request prints.
See the destination first
Before a single package is installed, look at where this lands. The request below asks the finished site for its headers, and the reply comes back over a connection that Caddy secured on its own, with a certificate you never ran a command to obtain.
curl -sI https://tidepool.example.com:8443/
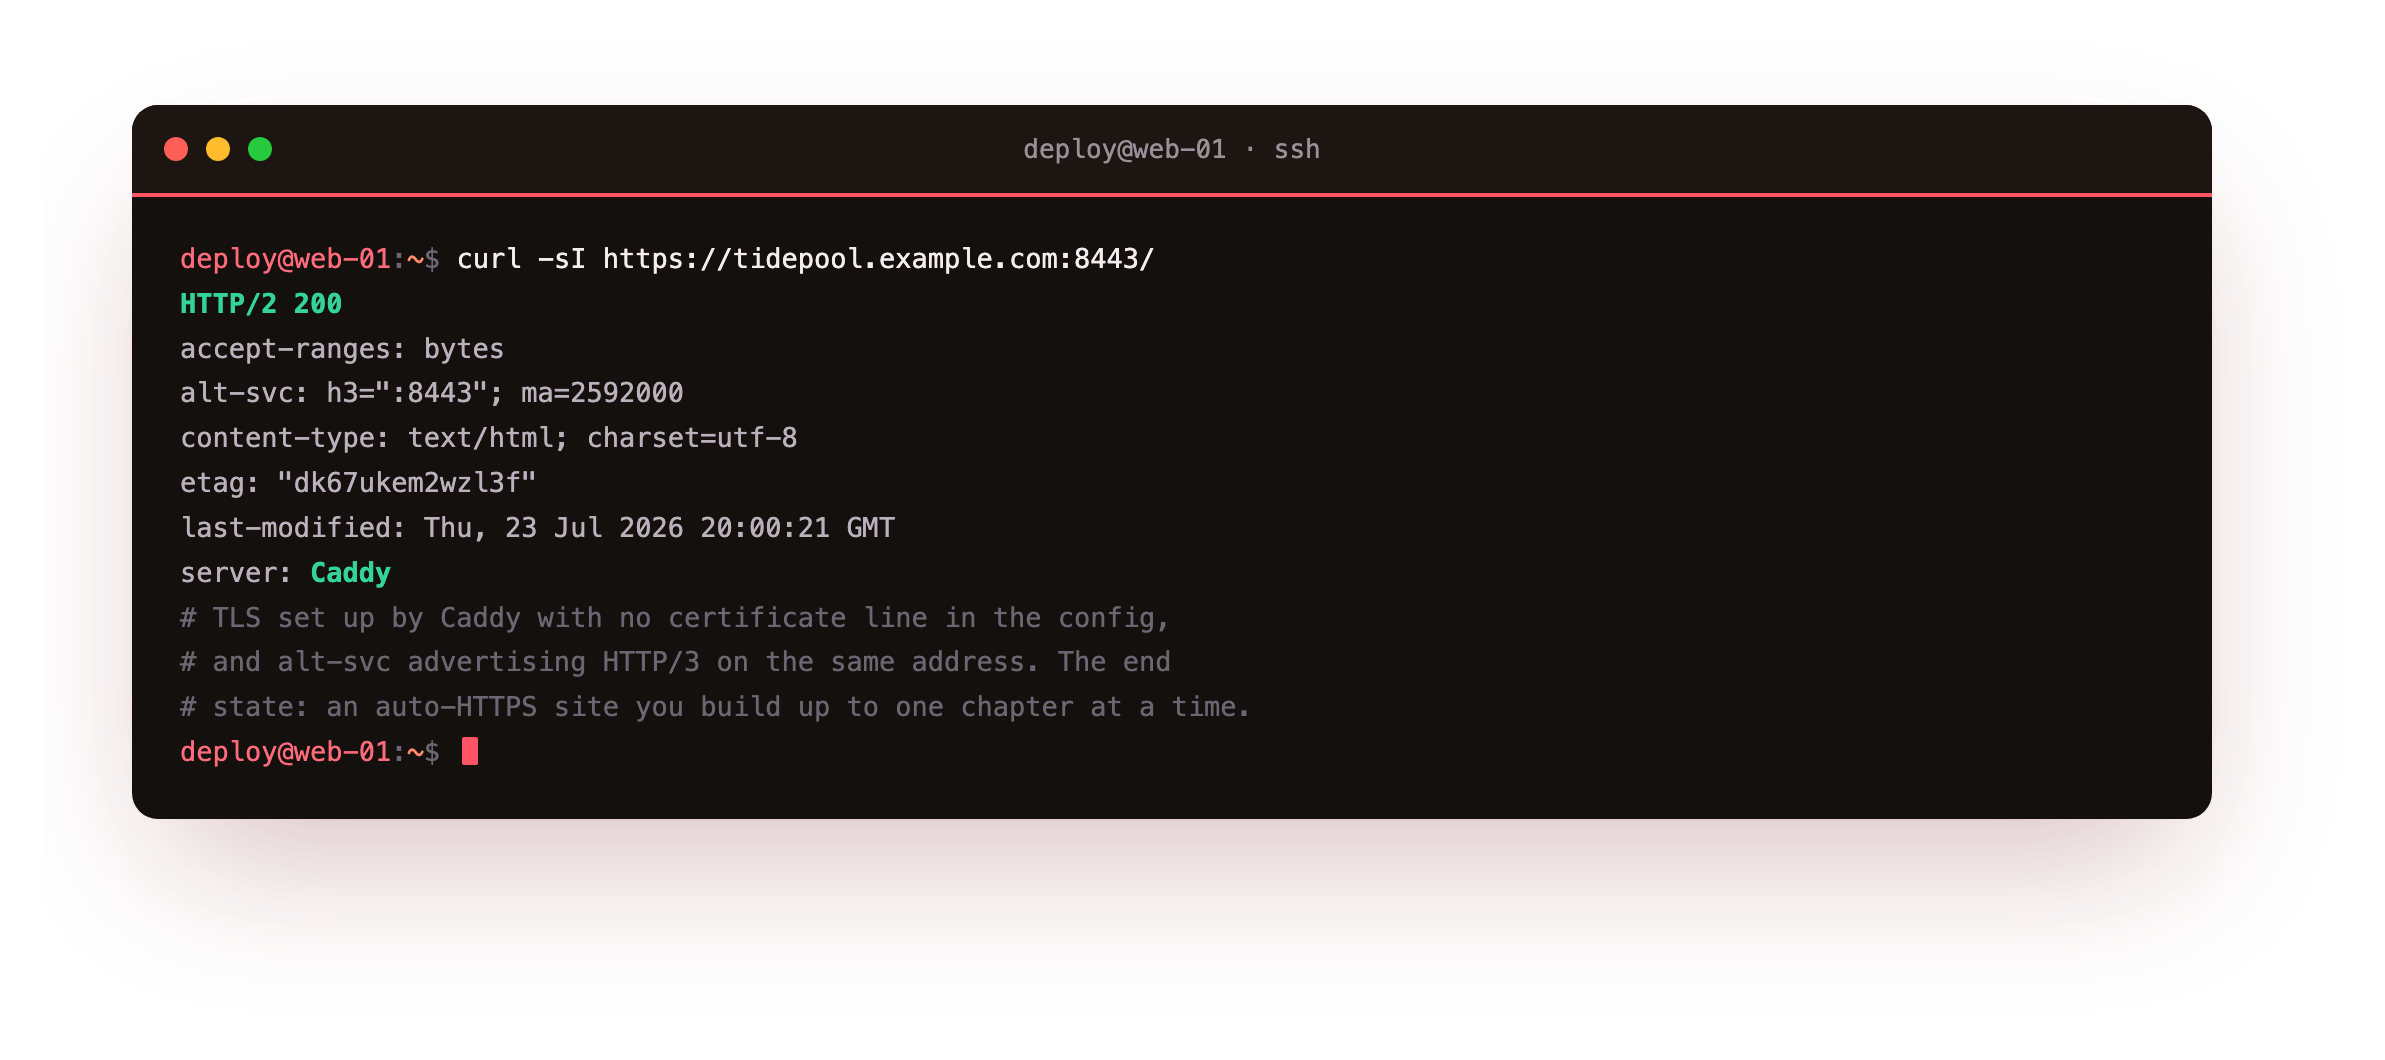
The HTTP/2 200 is served over TLS that Caddy set up without a single certificate flag in the config. The alt-svc line advertises HTTP/3 on the same address, and server: Caddy is the only banner. On this box nginx already holds ports 80 and 443, so the demo listens on 8080 and 8443 instead, which is the only reason a port appears in the URL.
On your own bare slice you drop the port and Caddy uses the standard ones. That automatic certificate is the whole point of the tool, and the next four chapters build a real site on top of it.
Who this is for
You run a site or an app and you are tired of the certificate dance: the issue command, the renewal cron, the config reload you forgot. You want a server where HTTPS is simply on. Being a TLS expert is not required. Every command is written out, and a checkpoint after each one tells you what a correct result looks like before you move on.
What the whole thing needs is a machine with a public address that stays up, because a certificate is issued against a name that resolves to your server. A slice is that always-on address, and the next section brings Caddy up on one from a clean install.
Install Caddy from the official repository
On a fresh slice there is no Caddy binary yet. Caddy publishes a Debian and Ubuntu repository, so the clean way in is to add its signing key and package list, then install. This pins you to the stable line and lets apt keep it patched with everything else.
sudo apt install -y debian-keyring debian-archive-keyring apt-transport-https curl
curl -1sLf 'https://dl.cloudsmith.io/public/caddy/stable/gpg.key' \
  | sudo gpg --dearmor -o /usr/share/keyrings/caddy-stable-archive-keyring.gpg
curl -1sLf 'https://dl.cloudsmith.io/public/caddy/stable/debian.deb.txt' \
  | sudo tee /etc/apt/sources.list.d/caddy-stable.list
sudo apt update && sudo apt install caddy
caddy version
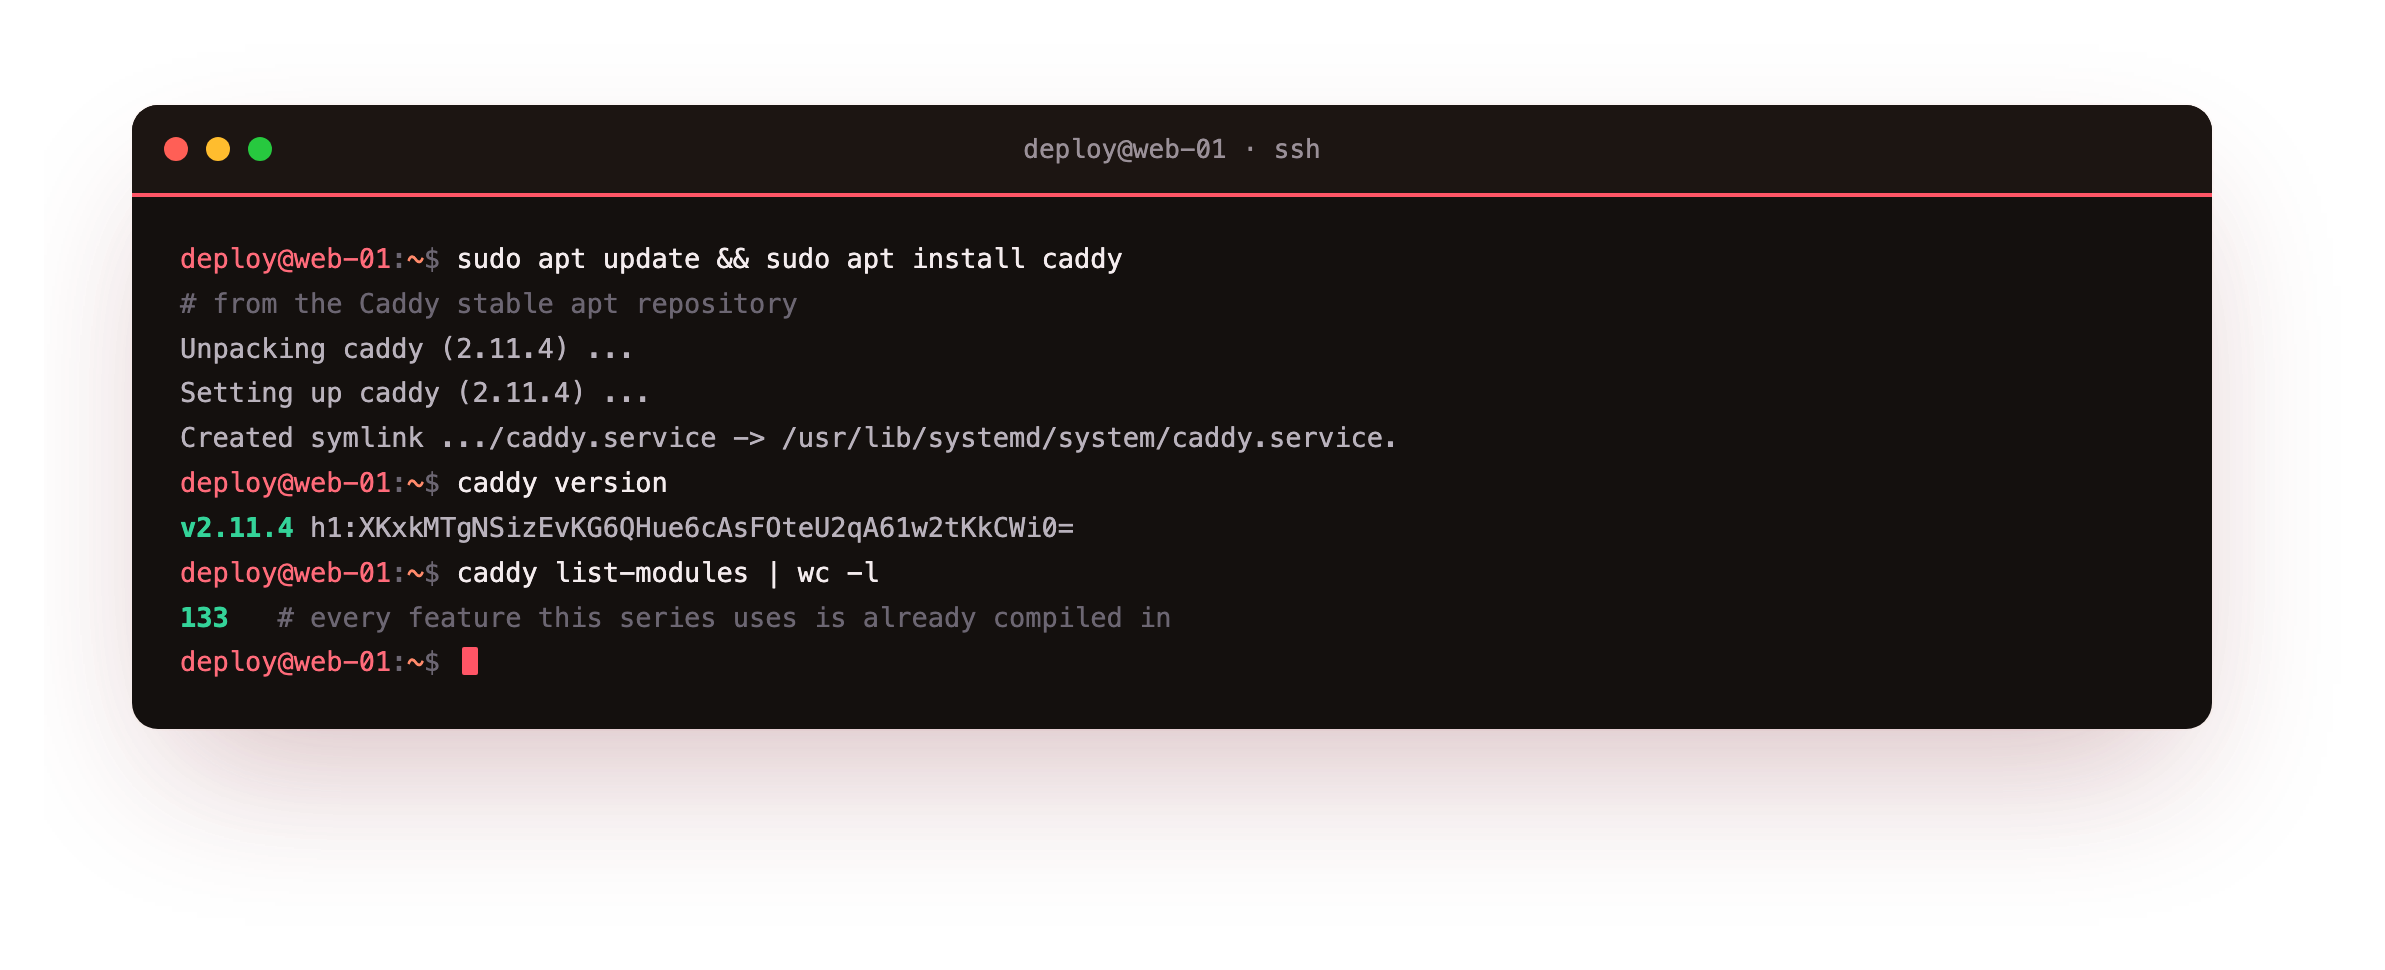
Reading caddy version back, rather than trusting the package name, confirms the exact build that will serve your traffic. This slice reports v2.11.4. There is nothing else to add: caddy list-modules shows the binary already carries well over a hundred modules, the static file server, the reverse proxy, the FastCGI transport and the certificate manager among them, so the features later chapters use are compiled in from the start.
caddy version should print a v2.11 line. If the command is not found, the package list did not apply, so rerun the apt update after adding the repository file and try the install again before continuing.
The service Caddy installs for you
Installing the package registers and starts a systemd service that runs Caddy as its own unprivileged caddy user and reads its config from /etc/caddy/Caddyfile. On a clean slice it comes straight up. On this box it could not bind port 80 because nginx already owns it, which is expected here and harmless once the demo moves to alt ports. Look at the service.
systemctl status caddy
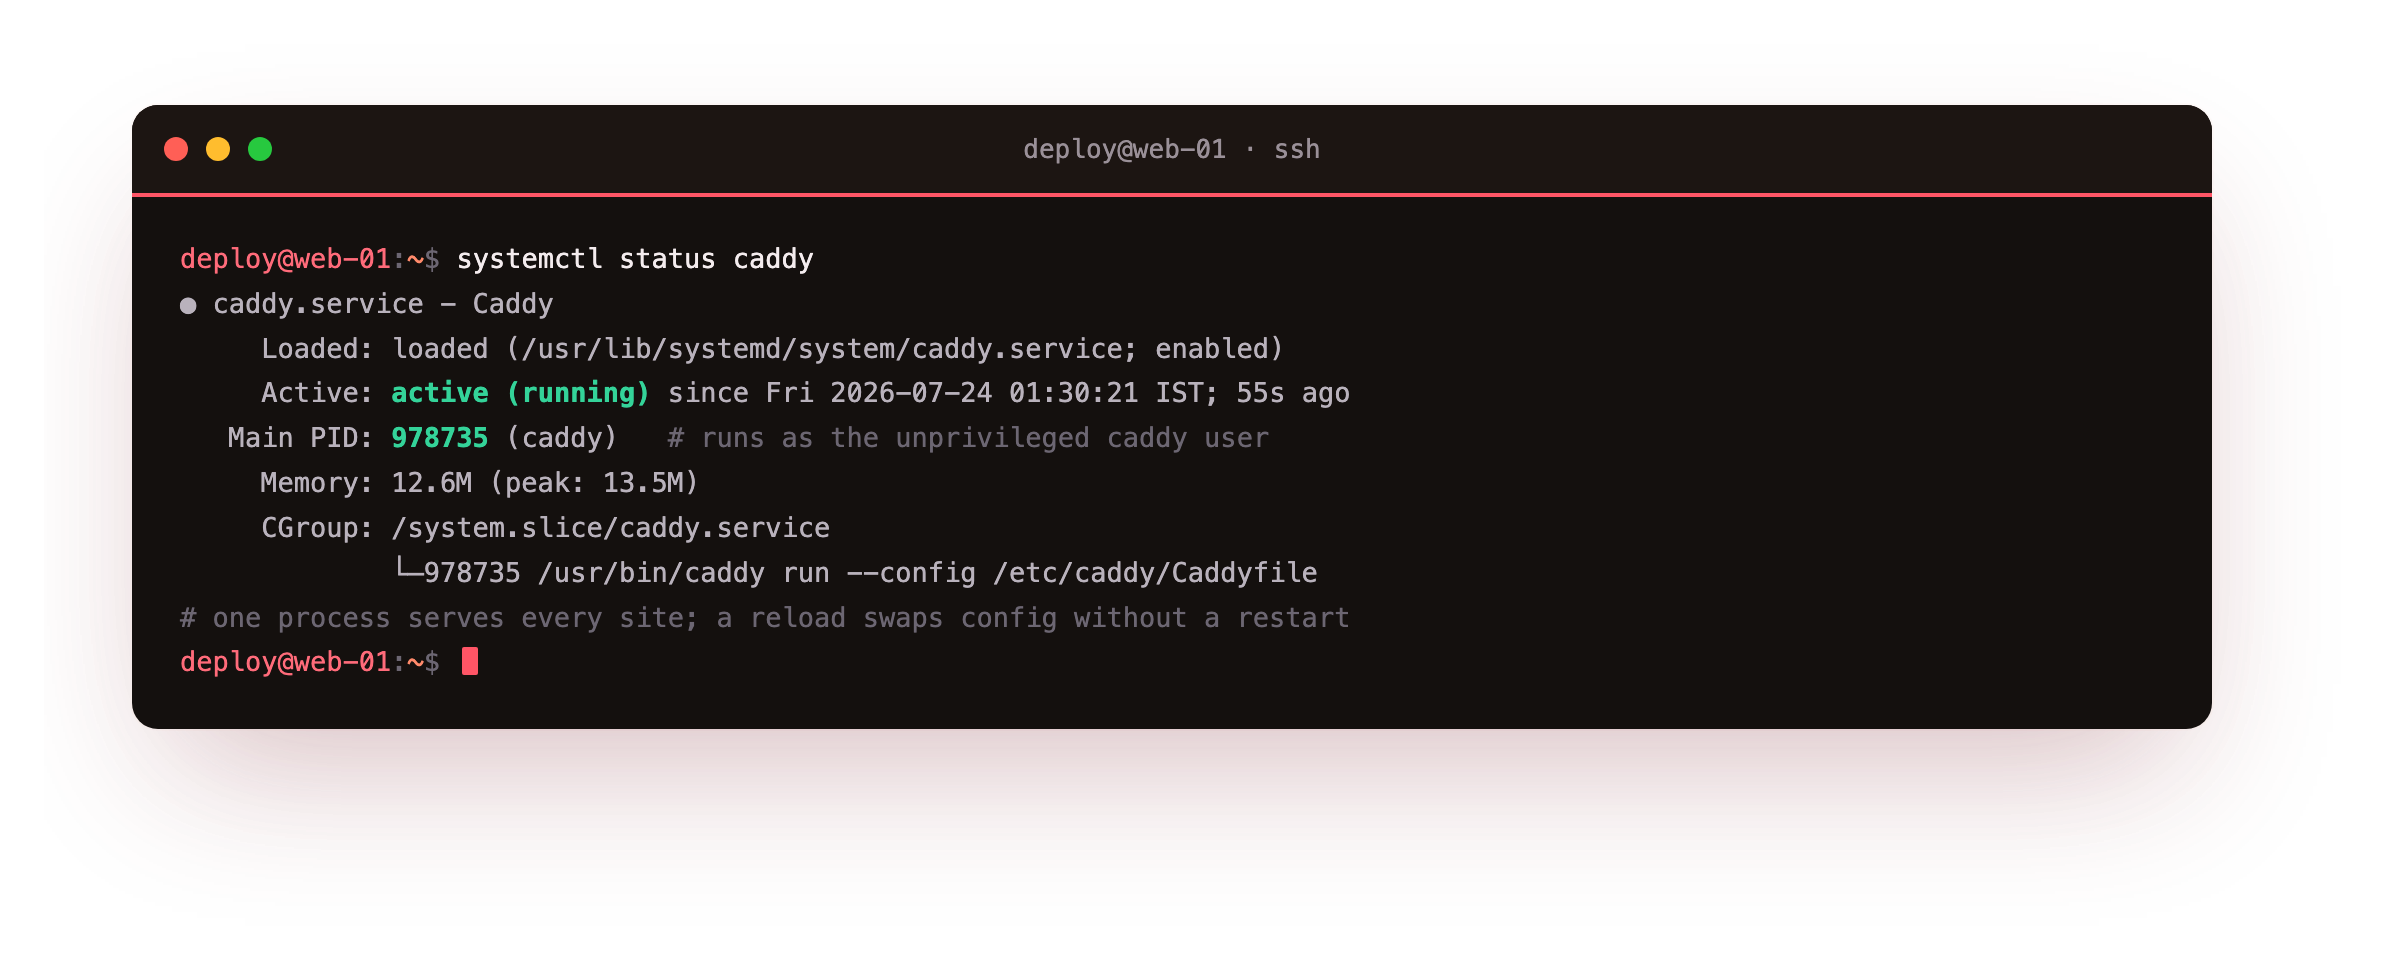
The unit reads active (running), launched as caddy run --config /etc/caddy/Caddyfile, holding a single process at a few megabytes of memory. One process serves every site in your Caddyfile, and a reload swaps the config inside that process without dropping a connection, which chapter five leans on. Because the service runs as the caddy user and not root, a bug in a handler cannot touch files that user does not own.
The Caddyfile model, and how it differs from nginx
Here is the shape you write. A Caddyfile is a set of site blocks. Each block starts with an address, the name and optional port the site answers on, and inside it a few directives say what to do. This is the config for the static site the destination shot served.
{
    http_port 8080
    https_port 8443
}

tidepool.example.com {
    root * /srv/tidepool
    file_server
    tls internal
}
The block at the top with no address is the global options, where the two lines move the demo off nginx's ports. The site block names the host, points root at a directory and turns on the file_server. The tls internal line is the one concession this box needs: it has no public DNS for the demo name, so Caddy signs with its own local authority instead of a public one.
On a real slice you delete that line, and the same block fetches a public certificate. That is the entire config for a working HTTPS site.
Compare that with an nginx site: a server block, a listen 443 ssl, two ssl_certificate paths you filled in by hand, a location for the files, and a separate tool to get and renew the certificate. Caddy folds the certificate work into the server, so the lines about TLS that fill an nginx file simply are not here. You can check a Caddyfile before you load it, and reformat it to the canonical style.
caddy fmt --overwrite /etc/caddy/Caddyfile
caddy adapt --config /etc/caddy/Caddyfile
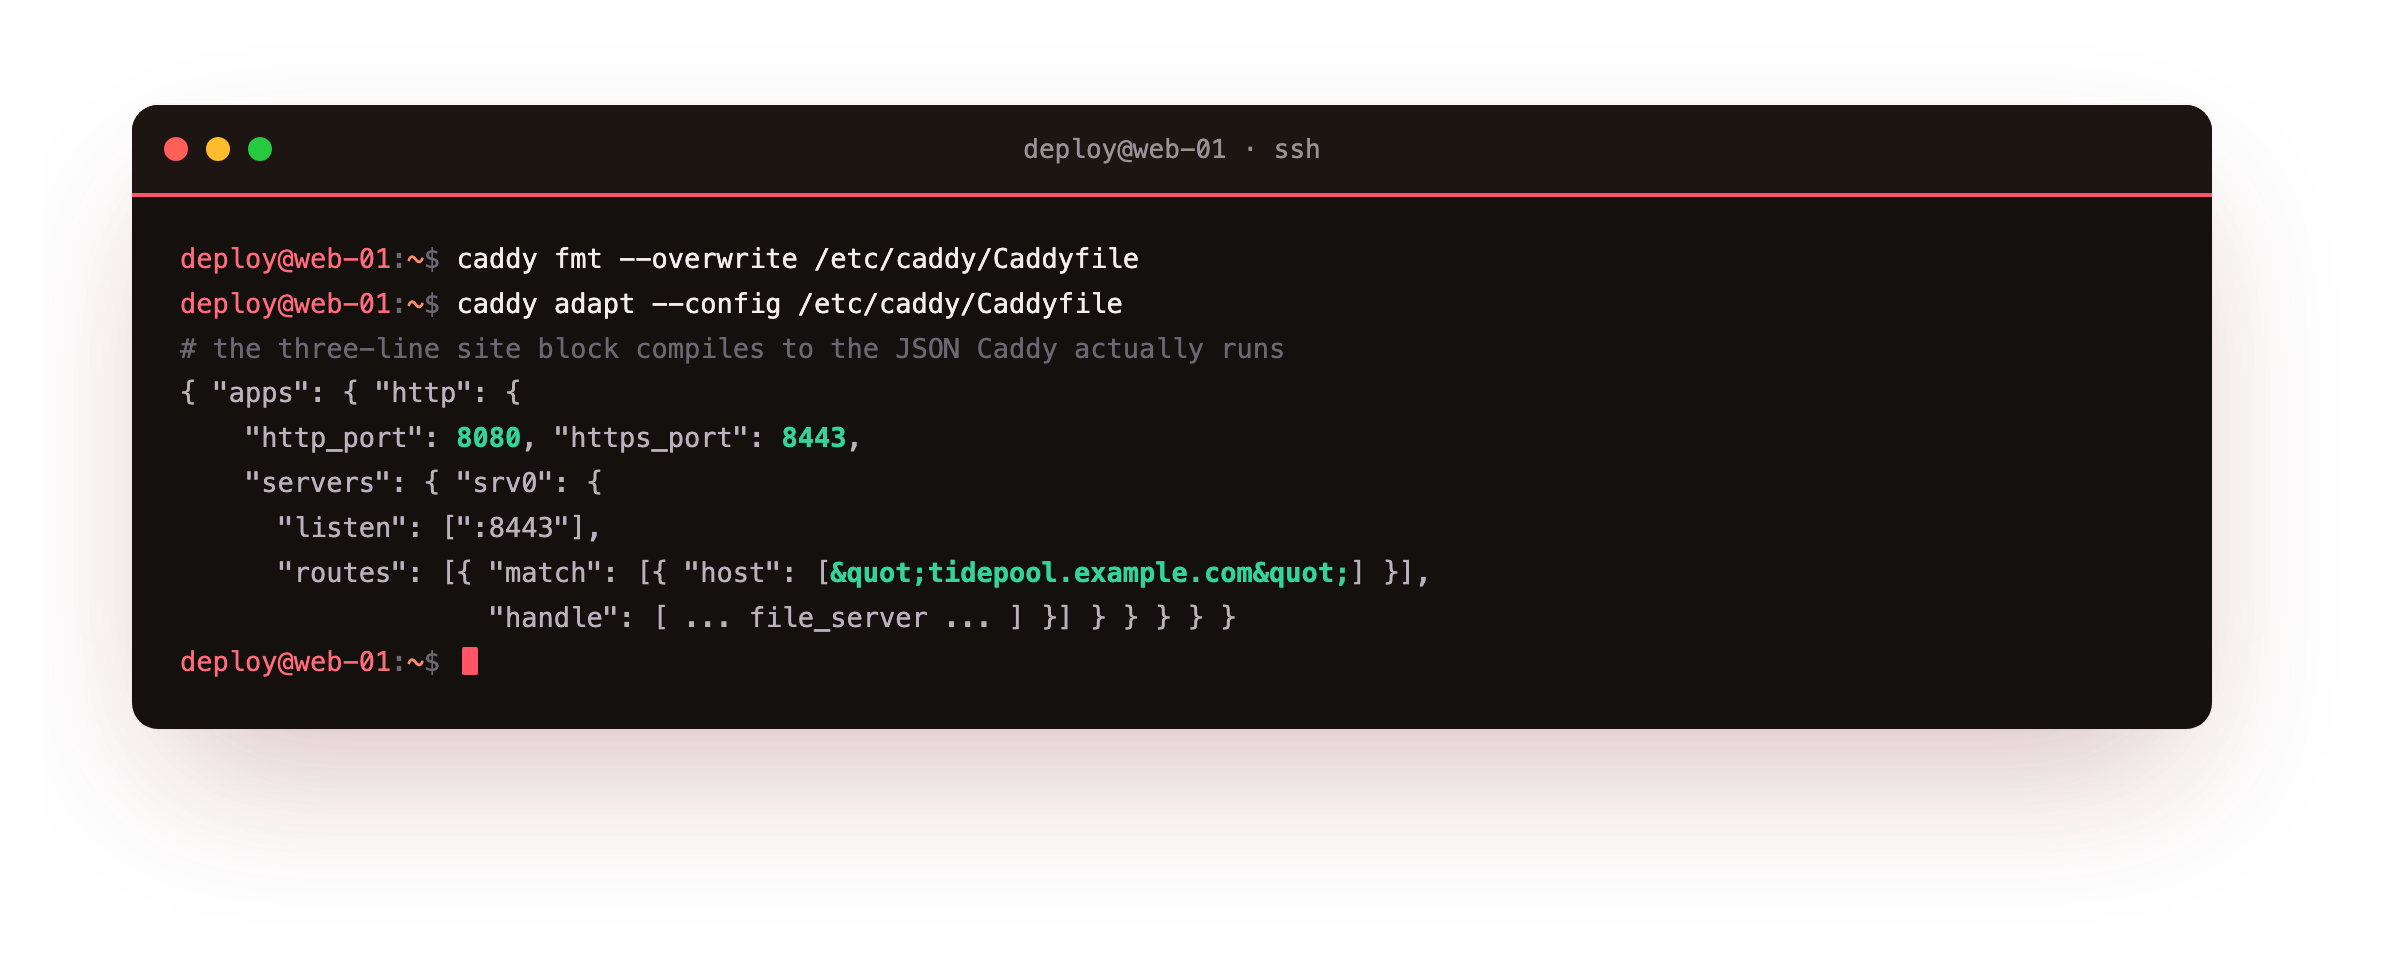
caddy fmt is the gofmt of Caddyfiles: one true layout, tabs and all, so config never drifts into style arguments. caddy adapt shows the secret underneath: the Caddyfile is a friendly front end that compiles to a JSON config, the format Caddy actually runs and exposes over an admin API. You almost never write the JSON by hand, but seeing the block expand into it makes clear that a directive is shorthand for a set of handlers.
caddy adapt should print a JSON document with an apps.http section and your site under servers. If it reports an error with a line number instead, a directive is misspelled or a brace is left open, so fix the named line and adapt again before reloading the service.
Going further: why one binary with batteries included
Caddy is written in Go and ships as a single executable with no external dependencies, which is why the install is one package and the run is one process. The modules that give it features, the file server, the reverse proxy, the TLS issuers, are compiled into that binary rather than loaded from disk at runtime.
That design has a tradeoff worth knowing. Adding a feature that is not built in, a plugin like the rate limiter this series uses in chapter five, means getting a binary with that module compiled in, either by building with xcaddy or by downloading a custom build. In exchange you get a server with no version-skew between a core and its modules, and a config that is one readable file. For most sites the built-in set is all you touch.
Frequently asked questions
Do I still need certbot or acme.sh with Caddy?
No. Caddy has an ACME client built into the server itself, so it obtains and renews certificates as part of running, with no separate tool and no cron entry. That is the feature you install Caddy for. If you already run certbot for another server on the same box, leave it alone; Caddy manages only the certificates for the sites in its own config and keeps them in its own storage directory.
Why did the caddy service fail to start right after installing?
On a box where something already listens on port 80 or 443, the default config cannot bind and the service reports failed. That is what happened here because nginx owns those ports. It is not a broken install. Either stop the other server, or, as this series does, give Caddy its own ports in the global options block so the two coexist. Once the address is free, a restart brings it up.
Is the Caddyfile the only way to configure Caddy?
It is the friendly way, and the one this series uses. Under it, Caddy runs a JSON config that you saw with caddy adapt, and that JSON can be pushed live over an admin API on localhost. Teams that generate config from code often target the JSON directly. For a human editing a server by hand, the Caddyfile is shorter and harder to get wrong, so start there and reach for the JSON only if a tool needs it.
Can Caddy sit in front of the sites I already run on nginx?
Yes, and that is a common way to adopt it. Caddy can be the public-facing server that terminates TLS and proxies to your existing app, which chapter three sets up. On this box the two run side by side on different ports. In a real migration you would move the public ports to Caddy and let it forward to the old backend, gaining automatic certificates without rewriting the application.
What you have, and what comes next
You brought up a bare Ubuntu 24.04 slice, added Caddy's repository, installed the single binary, confirmed the build with caddy version, found the service it runs under, and read a Caddyfile that serves a site in three lines. You also saw the destination the series aims at, a page answering over HTTPS with a certificate no one requested.
That certificate is the part worth slowing down on. The next chapter points Caddy at a domain and watches it obtain a real certificate with zero configuration, then loads the static site over TLS in a browser so you can see the padlock for yourself.