What you will have at the end
By the end of this series you reach every server the professional way: with SSH keys instead of passwords, short aliases instead of long commands, a hardened daemon that a guesser cannot brute force, and tunnels and file transfer over the same trusted connection. The thread running through it is one promise, that you tighten access all the way down without ever locking yourself out, and you prove it by watching a key log in while a password is turned away.
This first chapter is for anyone who still types a password to reach a box, or reaches it with no config at all. It shows you that end state on a live Ubuntu 24.04 slice first, then switches you from passwords to your own key from nothing.
- The series destination: your key authenticates while a password attempt is refused with
Permission denied (publickey), so no one can guess their way in. - Nothing to install here. OpenSSH ships with Ubuntu, so the from-zero step is
ssh-keygen -t ed25519to make your first key, not a package install. - A key pair splits into a private half you guard on your laptop and a public half you hand to any server, which stores it in
authorized_keys. ssh-copy-idinstalls the public half over a login you already have, and a passphrase plusssh-agentkeep the private half safe yet unlocked for the session.
- One Ubuntu 24.04 slice you can already reach, today with a password is fine, since switching that password login to a key is the whole point of this chapter.
- Nothing to add with apt. OpenSSH client and server are already present, so you work entirely with
ssh,ssh-keygen, andssh-copy-idthat ship on the box. - Every command here runs against a throwaway
sshdemoaccount on a second, isolated sshd bound to port 2222, so the daemon you are logged in through is never at risk while you experiment. - A terminal on your laptop and the ability to open a second one, which is the habit that keeps a hardening exercise from ever stranding you.
See the destination first
Here is where the series lands, on one screen, before any theory. This is the hardened demo daemon from chapter three, already refusing passwords. First a guesser forces a password login the way a scanner would; then the account's own key connects with a verbose flag so you can read the authentication line.
ssh -o PreferredAuthentications=password -o PubkeyAuthentication=no -p 2222 sshdemo@web-01
ssh -v -i ~/demo_key -p 2222 sshdemo@web-01 'echo logged-in' 2>&1 | grep -E 'Authenticated to|^logged-in'
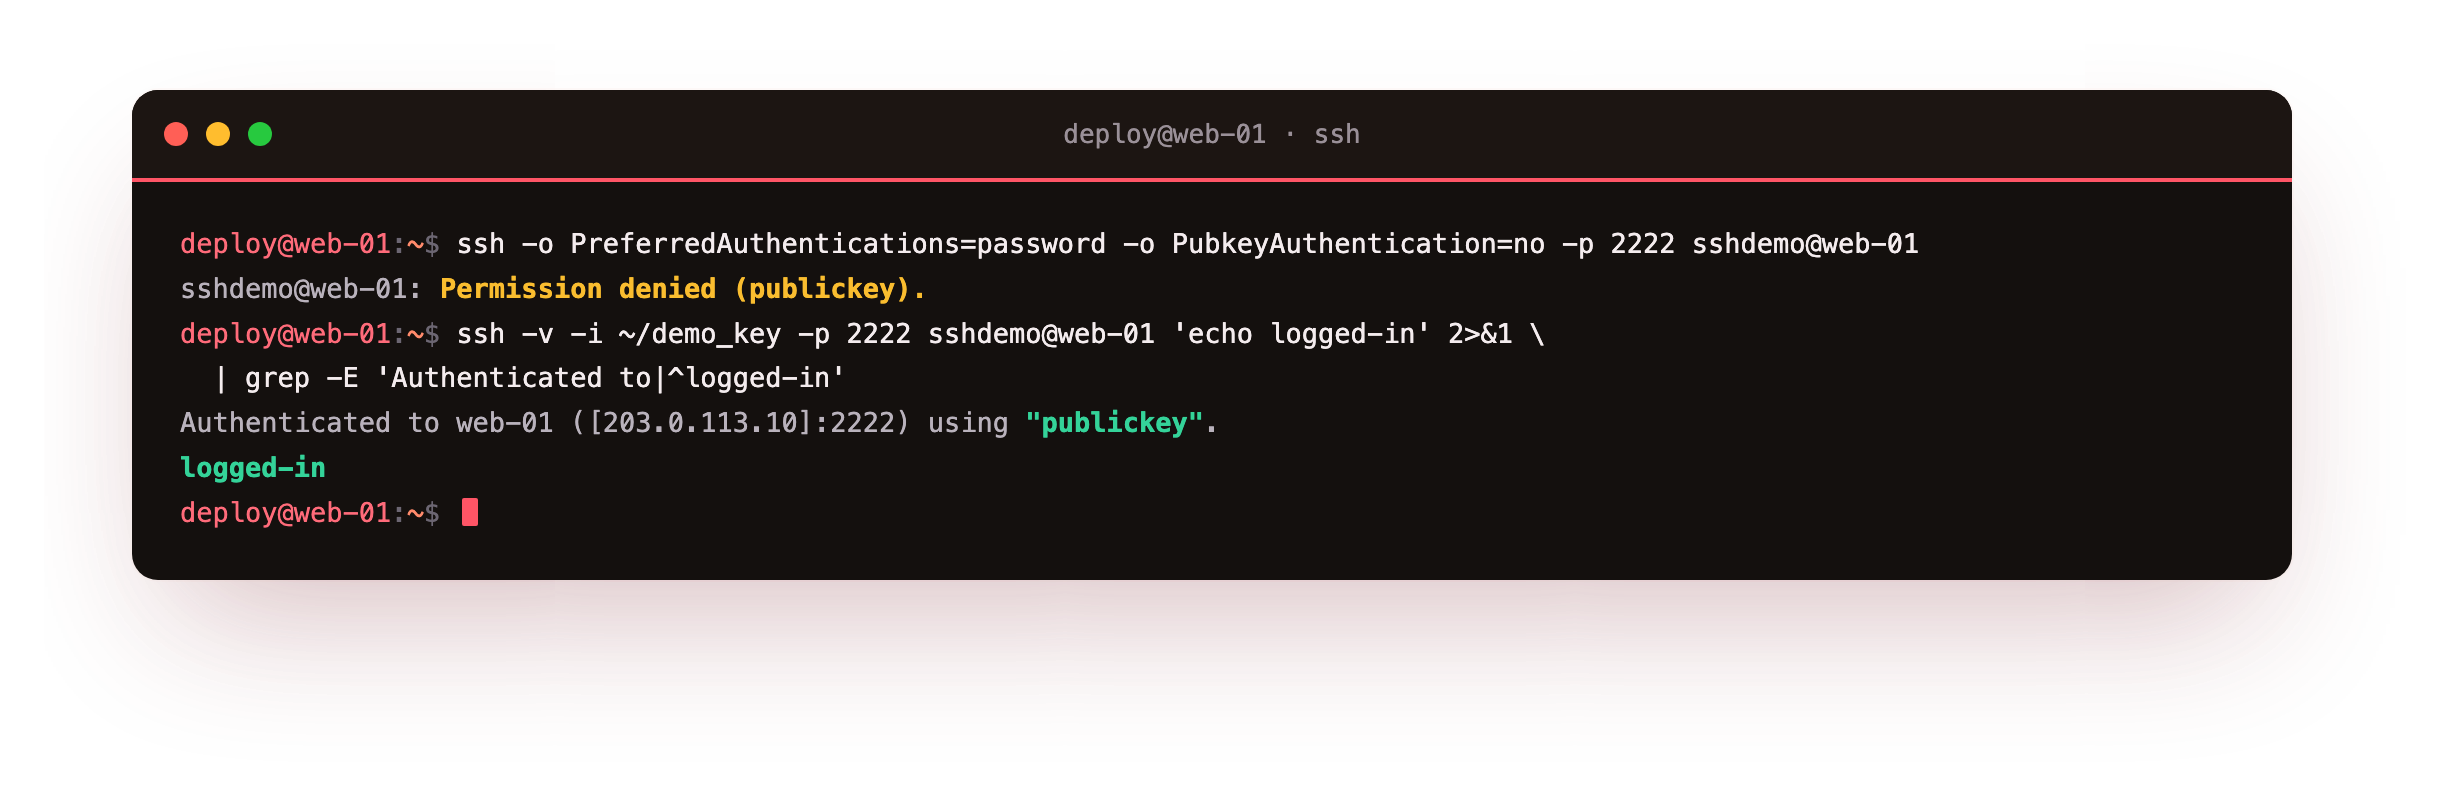
The password attempt comes back Permission denied (publickey), because the daemon offers no password method at all. There is nothing to guess, so the automated noise that fills every server's auth log simply stops working. The key login, by contrast, prints Authenticated to web-01 using "publickey" and runs its command.
That is the destination in one word: a door that opens for a key you hold and stays shut to anyone typing guesses. Right now you have none of this, because you still log in with a password. The rest of the chapter builds your side of it.
Why SSH keys beat a password
A password is a shared secret that crosses the network on every login, and whoever learns it becomes you. SSH keys replace that with a pair of files. The maths behind the pair lets a server confirm you hold the private key without that key ever leaving your machine, so there is no secret to intercept, phish, or reuse across sites.
That single property removes a whole category of attack. A password can be brute forced from the outside, which is exactly what the refused attempt above was pretending to do. A private key sits in one file on your laptop that never travels, so the only way in is to hold that file. Turn passwords off at the daemon, as the destination showed, and the guessing game is over.
From zero: generate your first key
You log in with a password today, so the switch starts by making a key of your own. ssh-keygen builds the pair. The demo below writes to a throwaway ~/demo_key so it never touches your real login key while you follow along.
ssh-keygen -t ed25519 -f ~/demo_key -N "" -C "you@laptop"
ssh-keygen -lf ~/demo_key.pub
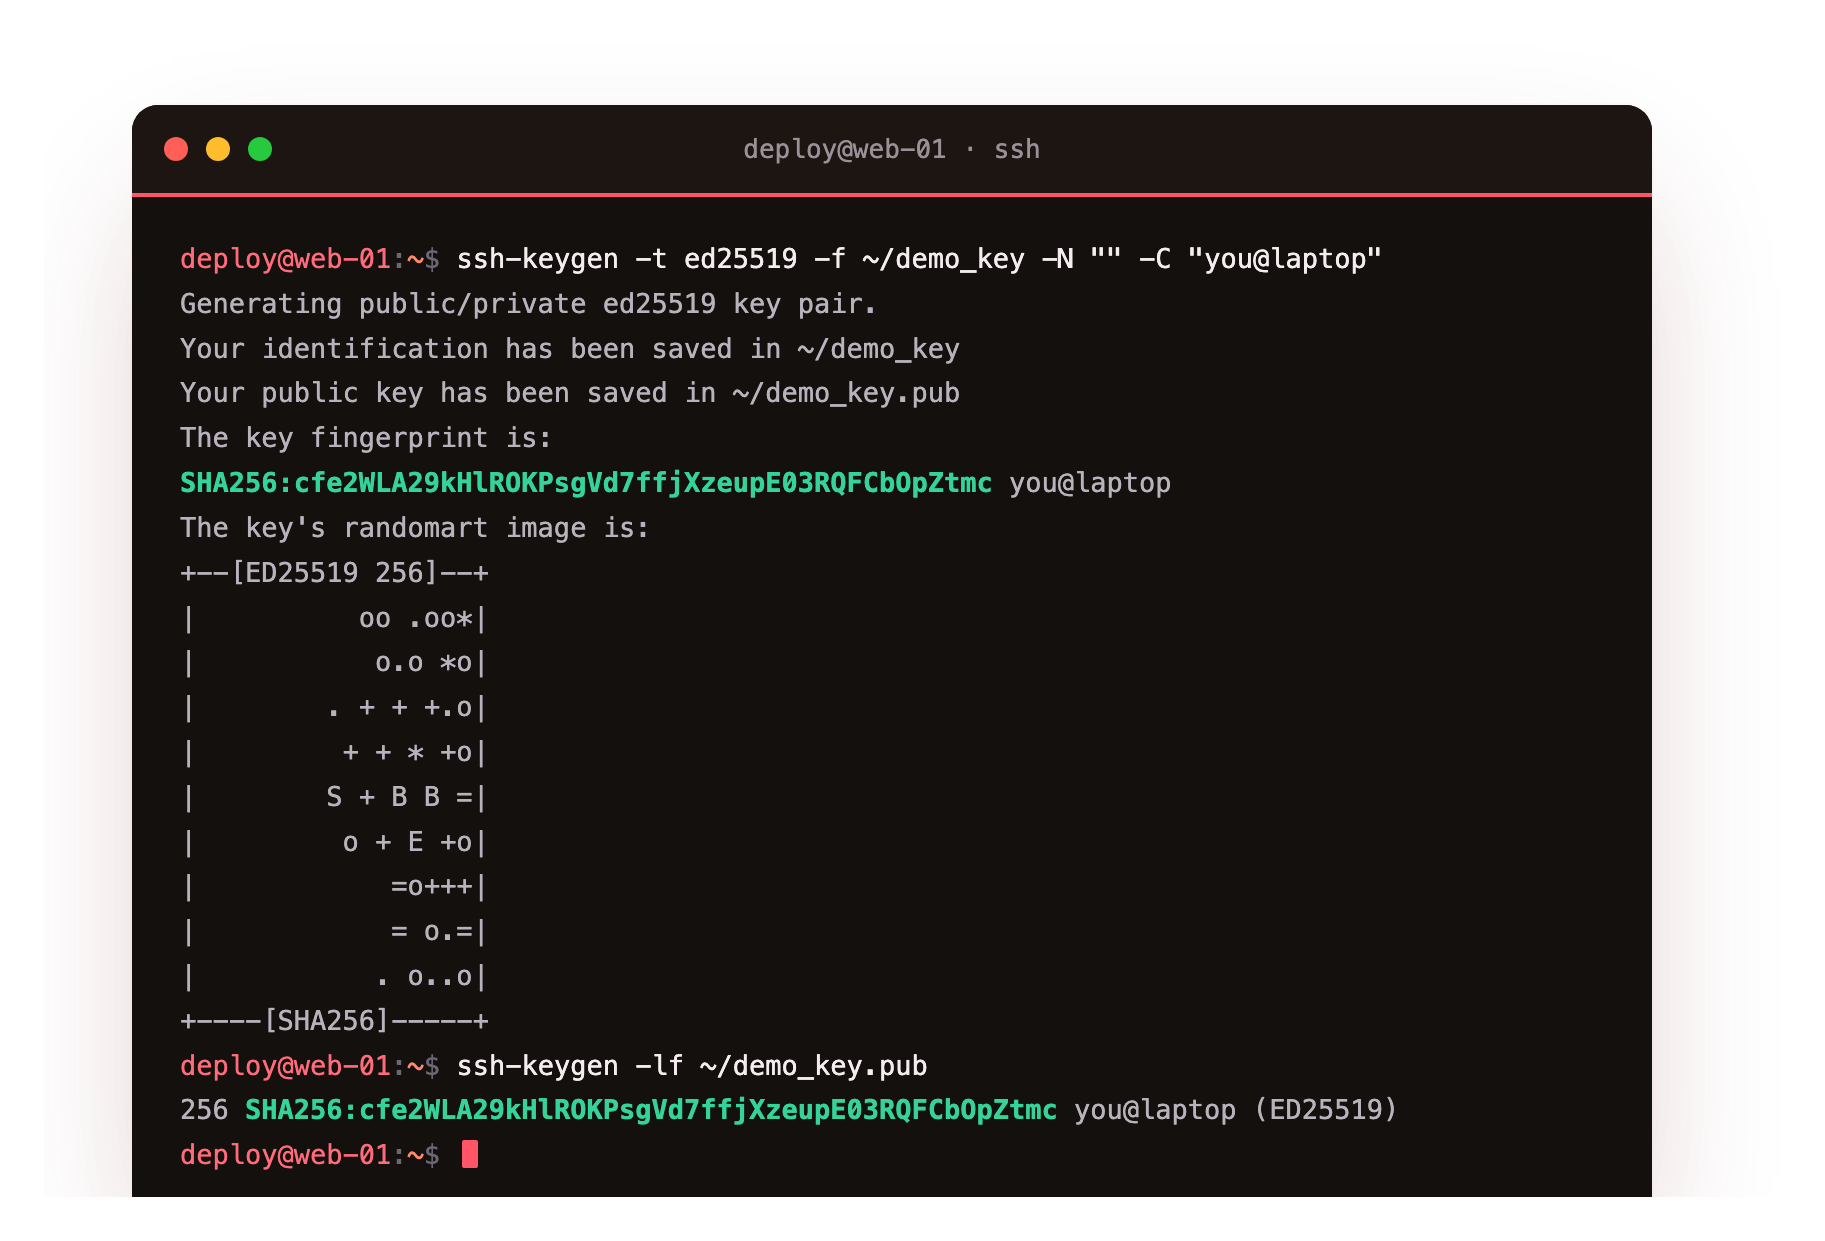
-t ed25519 selects the modern Ed25519 algorithm, the type to prefer for anything new. -f ~/demo_key names the output, giving you demo_key and the public demo_key.pub. -N "" leaves the passphrase empty to keep the walkthrough short, and -C adds a label. The second line prints the fingerprint, a short SHA256 hash that names the key. The public file is a single line starting with ssh-ed25519, safe to paste anywhere; the private file is the half you never share.
Install the key and prove the switch
A server grants key access through one file per account, ~/.ssh/authorized_keys, where every line is one public key allowed to log in. You could append the line by hand, but ssh-copy-id does it correctly, fixing the directory and file permissions in the same step. It logs in with the access you already have, a password on a fresh box, and installs the key. The demo runs against the second sshd on port 2222, hence the -p 2222.
ssh-copy-id -i ~/demo_key.pub -p 2222 sshdemo@web-01
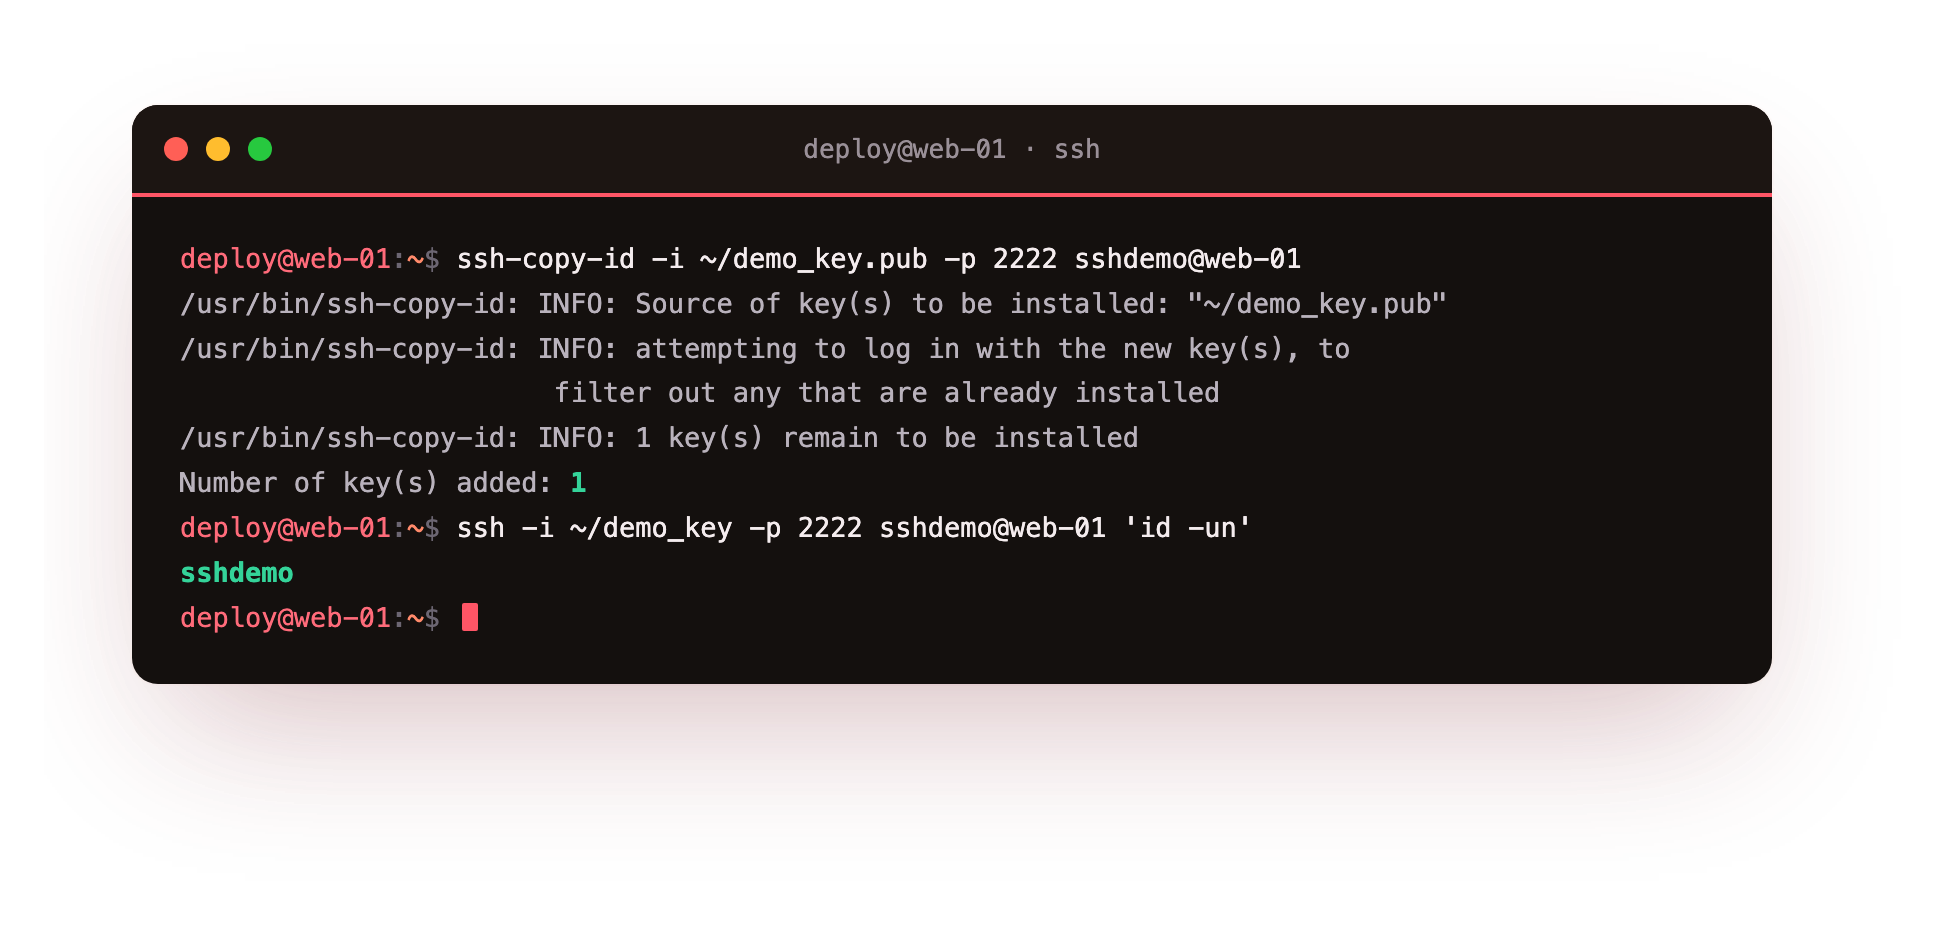
The Number of key(s) added: 1 line confirms the write. From now on the private key alone opens the door, and the login that follows returns the account name without asking for a password. You have just done the switch the destination promised: a password put the key in place once, and now the key stands on its own.
Run ssh -i ~/demo_key -p 2222 sshdemo@web-01 'id -un' and confirm it prints sshdemo with no password prompt. If it still asks for a password, the key did not install: check that ~/.ssh is mode 700 and authorized_keys is 600 on the server, since sshd silently ignores keys from loose permissions.
A passphrase and ssh-agent
An empty passphrase was fine for a demo, but a real private key should be encrypted at rest so a stolen laptop does not hand over your servers. You set a passphrase when you create the key, or add one later with ssh-keygen -p. The cost is that every connection then asks you to type it, which is what ssh-agent solves: you unlock the key once and the agent holds it in memory for the session.
eval "$(ssh-agent -s)"
ssh-add ~/demo_pass_key
ssh-add -l
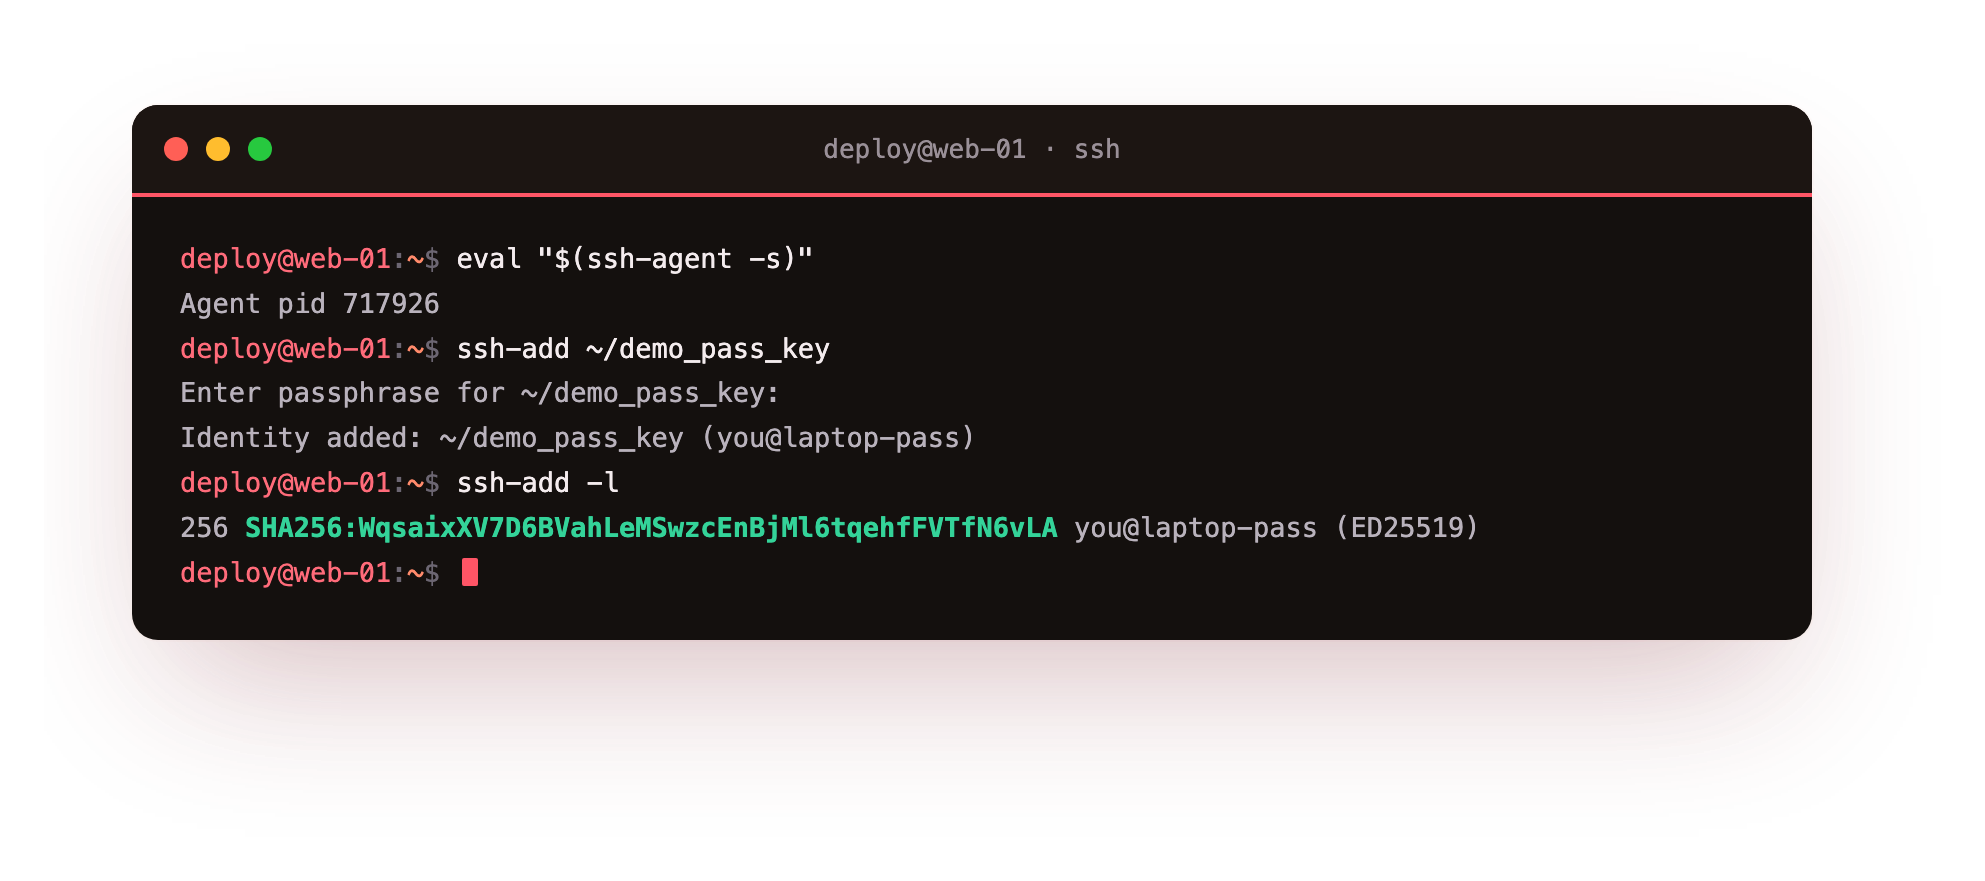
The first line starts an agent and exports its address. ssh-add loads the key, asking for the passphrase a single time. ssh-add -l lists what the agent now holds, printing each loaded key's fingerprint. With the agent running, an encrypted key gives you passwordless logins without leaving the key unprotected on disk, which is exactly what you want day to day.
Going further: the authorized_keys model
The reason key access is easy to reason about is that there is no central registry. Add a line to an account's authorized_keys and that key works; delete the line and it stops. Access is exactly the set of public keys in those files, which you can read and revoke per account without a server to consult.
That local model shapes two common choices. Some people use one key pair for every server, which is safe because the private half never leaves the laptop. Others keep one key per device, so a lost laptop is revoked by deleting its public key everywhere while the others keep working. Either is fine; what matters is knowing that a key's power ends the moment its line leaves the file.
Frequently asked questions
Ed25519 or RSA for a new key?
Prefer Ed25519. It is shorter, quicker to verify, and free of the key-size decisions RSA forces on you. Keep RSA only for an old server that predates Ed25519 support, and use at least 3072 bits if you must.
My key is ignored and I still get a password prompt.
Almost always a permissions problem. The private key must be mode 600, ~/.ssh must be 700, and the server's authorized_keys must not be group writable. sshd silently refuses keys from loose permissions.
Do I need to install anything to follow this series?
No. OpenSSH client and server ship with Ubuntu 24.04, so ssh, ssh-keygen, and ssh-copy-id are already on the box. The from-zero step is not an install; it is running ssh-keygen -t ed25519 to create your first key pair.
What happens if I lose the private key?
You lose key access from that device, so keep a second admin path such as another key or console access. Recovery is to remove the old public key from every authorized_keys and install a fresh pair.
What you can do now
You have seen the destination, a key login that works while a password attempt is refused, and you built your side of it from nothing: ssh-keygen -t ed25519 made your first key, ssh-copy-id installed the public half into authorized_keys, and a key login proved the switch. A passphrase plus ssh-agent keep that private key safe on disk yet unlocked for the day.
You can now log in with a key. The next annoyance is typing the same host, user, port, and key path on every command, so the next chapter turns those into short aliases and reaches a private host through a bastion in one line: the SSH config file, jump hosts and multiplexing.