What you will have
This tutorial shows you how to install WooCommerce on a VPS and end with a real shop, not a demo: a storefront your customers can browse, products with images and prices in rupees, and an order that has genuinely gone through the checkout. You start from a working WordPress site on a slice and finish with a store you have tested by buying from it yourself.
The screenshots here are not mockups. They come from a real store, Nilgiri Tea Co., that we stood up on our lab box at wp.boxlab.space while writing this, right down to a completed test order. Here is the destination, shown first.
# the destination: a live WooCommerce store, over HTTPS, with a real order placed through it
curl -s -o /dev/null -w 'storefront %{http_code}\n' https://your-domain/shop/     # 200
sudo -u www-data wp wc shop_order get 24 --user=admin \
  --fields=status,total,payment_method_title       # the shop is live and an order went through
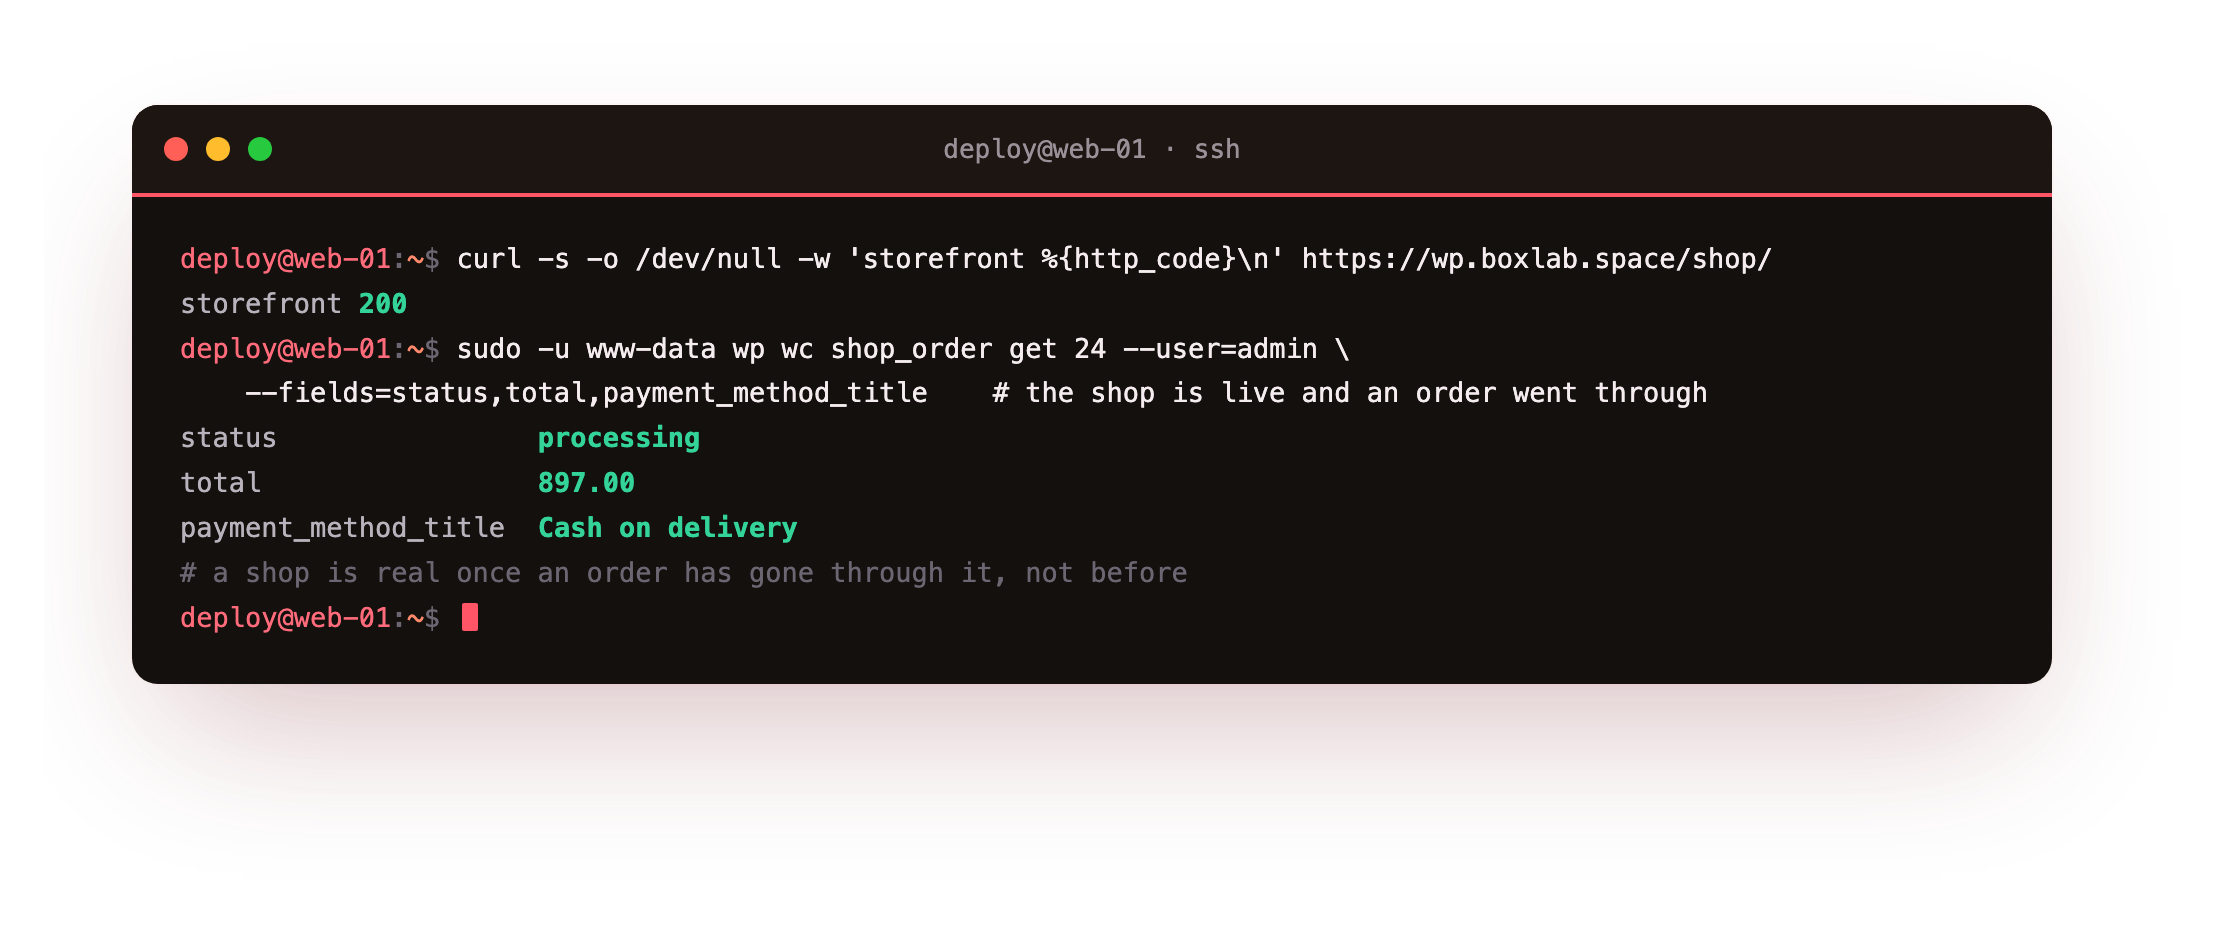
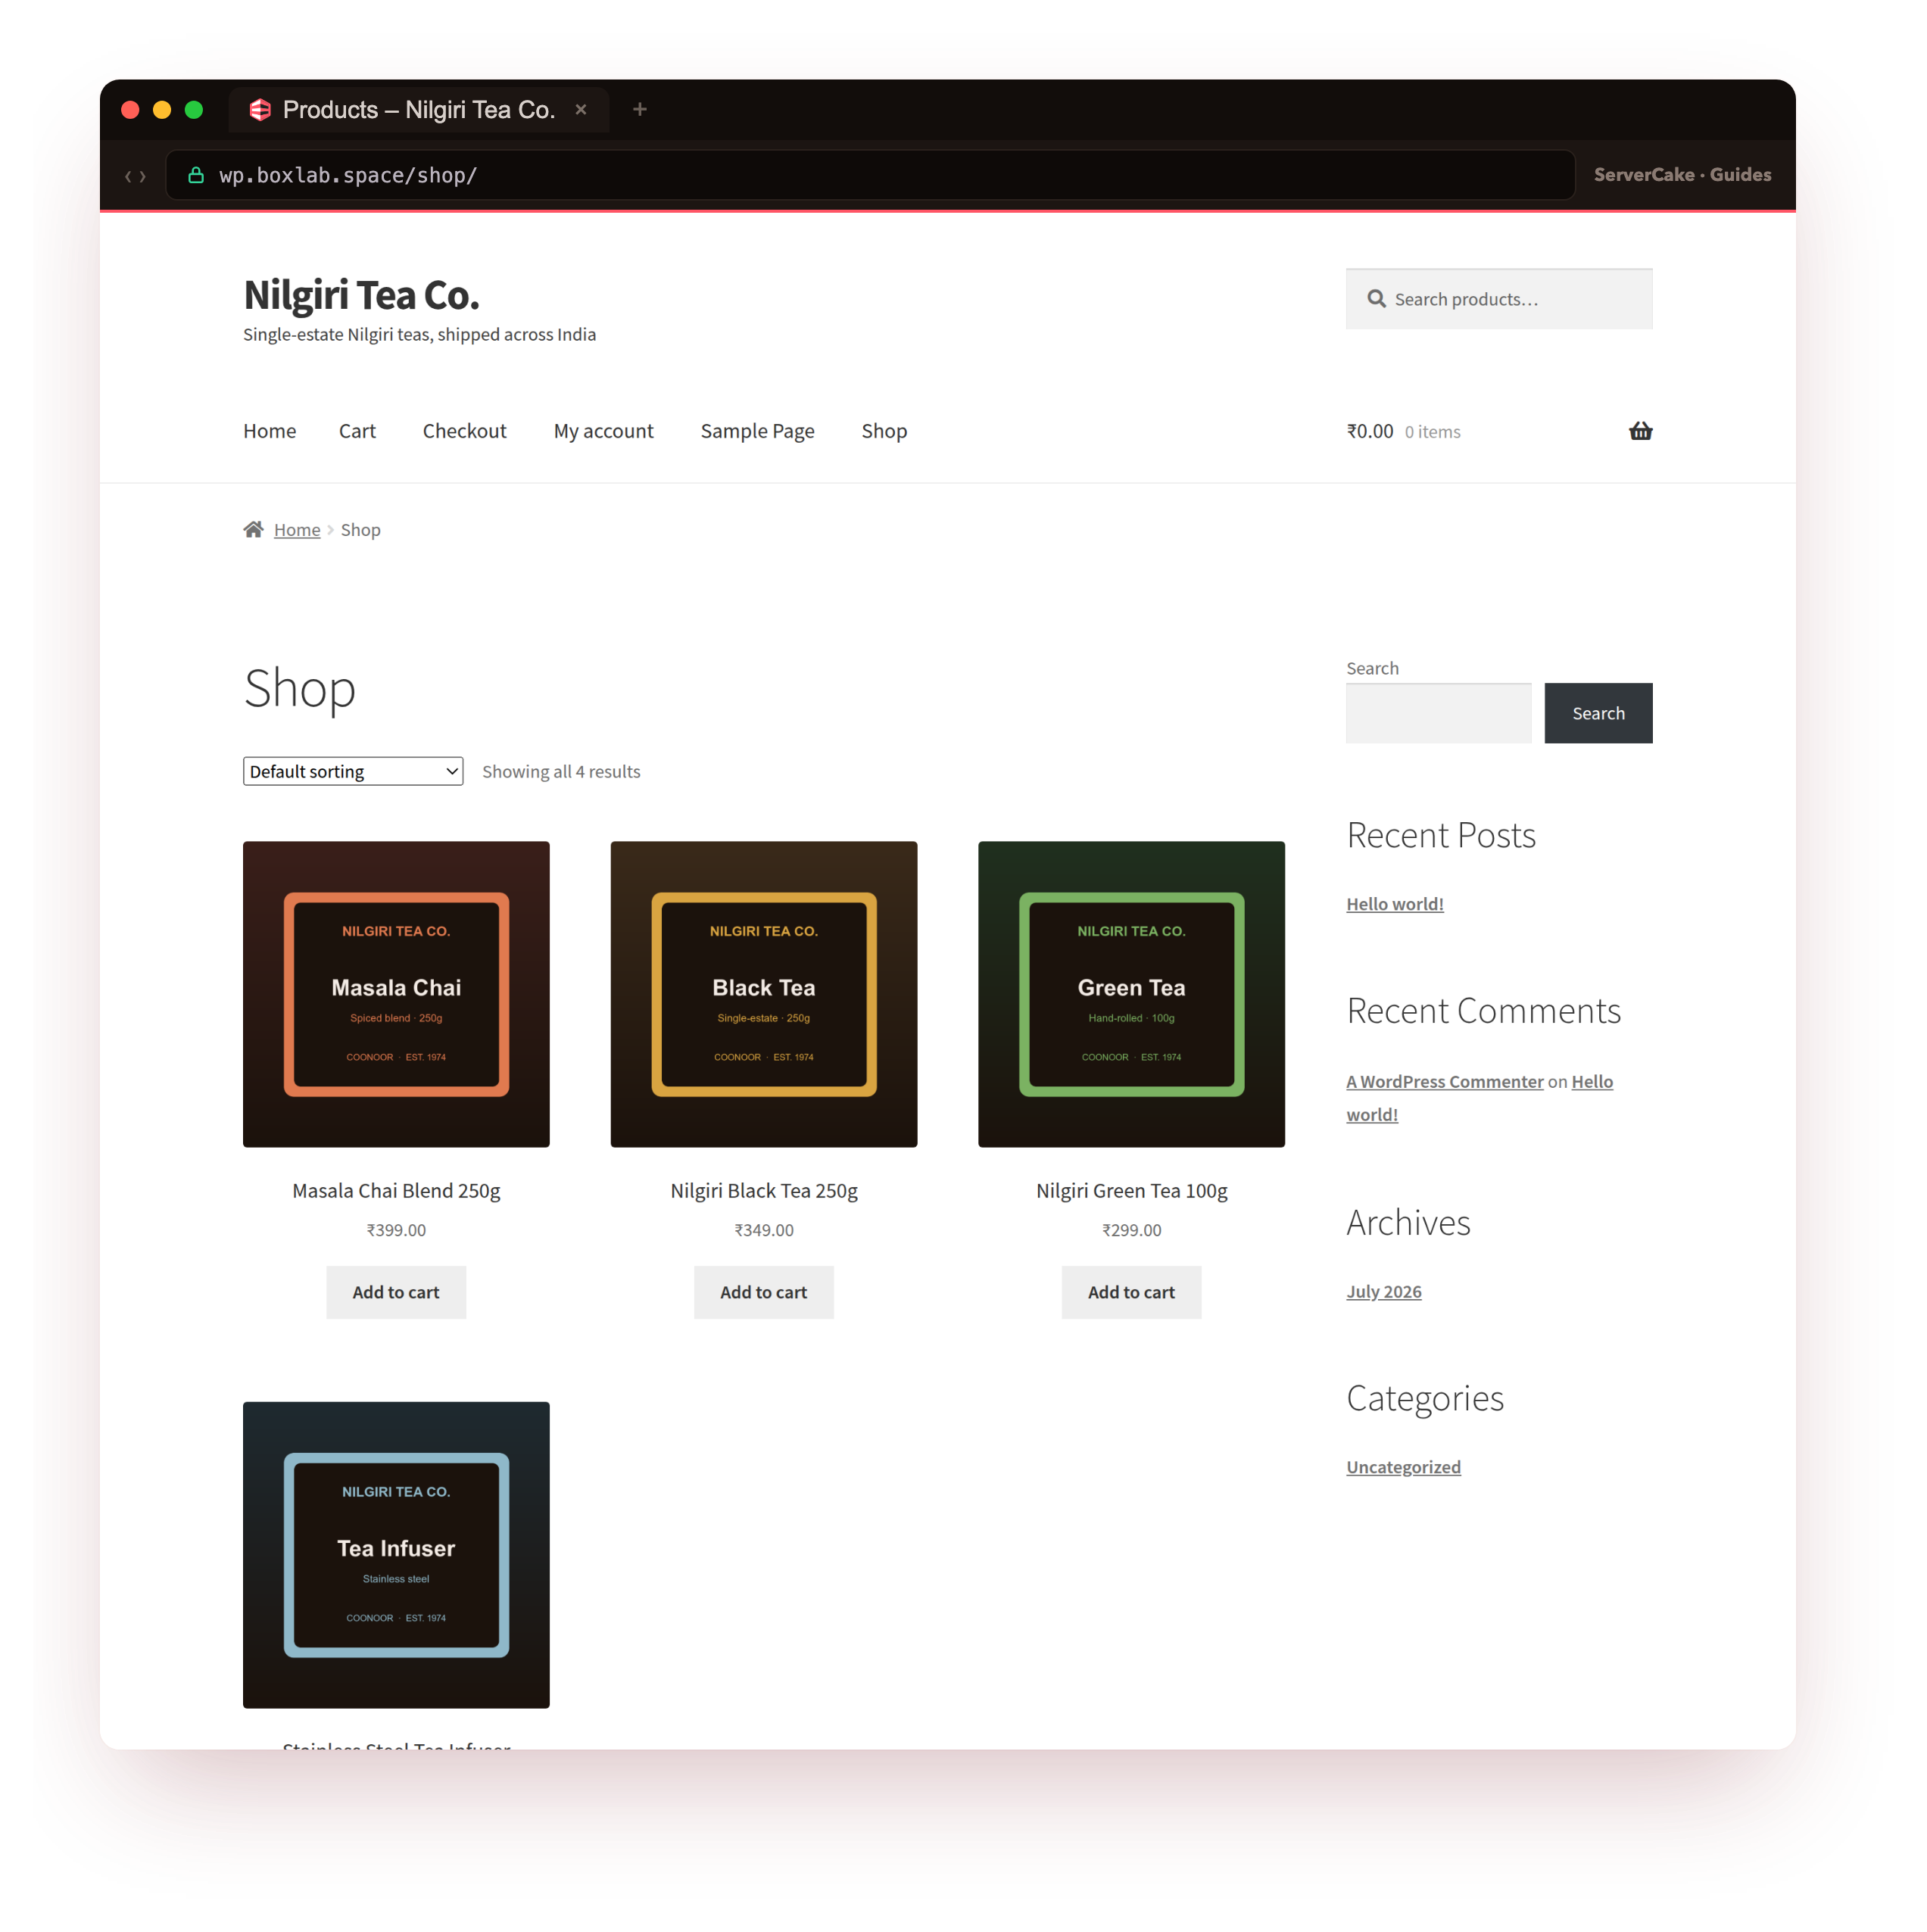
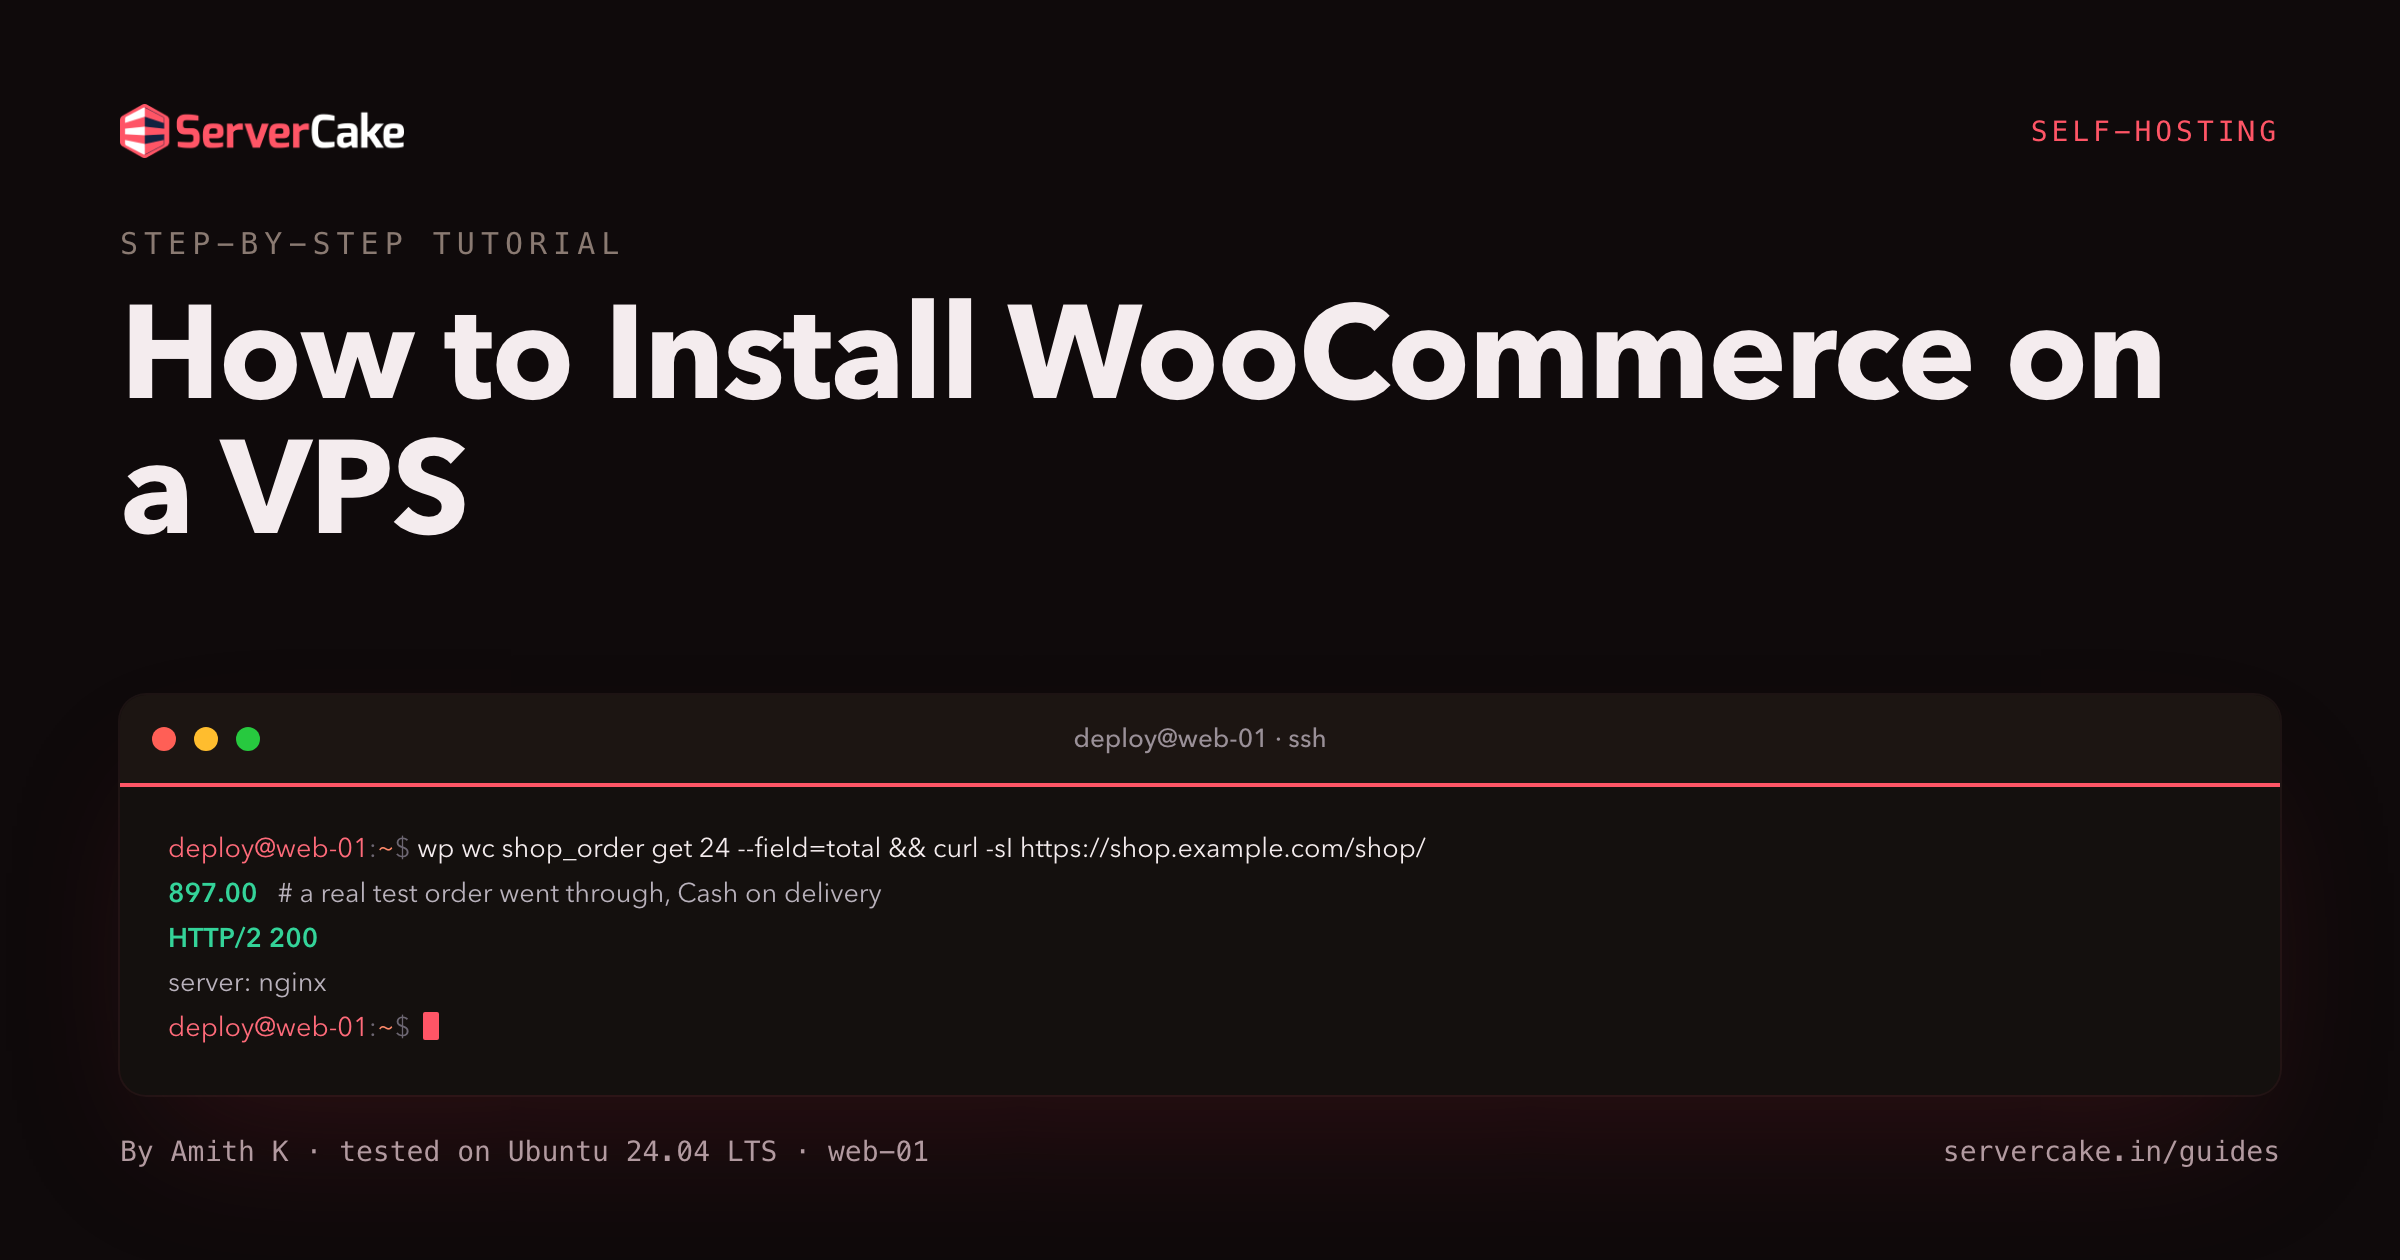
On our box the storefront answered 200, and the order we placed came back as processing, total 897.00, paid by Cash on delivery. That is the proof this tutorial is built around: a shop is only real once money (even a test rupee) has moved through it.
- Installing the WooCommerce plugin on top of your existing WordPress LEMP stack.
- Running the store setup for India: address, currency in INR, shipping and tax basics.
- Adding real products with an uploaded image, grouped into a category.
- Turning on safe offline payment gateways and placing a genuine test order end to end.
- Making a shop fast and safe: a page cache that skips cart and checkout, plus store PHP limits.
WooCommerce is a plugin, so the heavy lifting (nginx, PHP, the database, HTTPS) is already done if you have a WordPress site. What follows adds the store on top and, more importantly, proves each part works: the products render, the payment shows up, and the order lands on a real confirmation page.
Before you begin
WooCommerce runs on WordPress, so this tutorial assumes you already have WordPress live on a slice.
- A working WordPress site on a slice, served over HTTPS by nginx and PHP-FPM, set up with how to install WordPress on a VPS. A shop needs that same Ubuntu 24.04 LEMP stack of nginx, PHP 8.3-FPM and MariaDB underneath it.
- A domain pointed at the slice, on real HTTPS. A store takes payment details, so a valid certificate is not optional.
- SSH access to the slice as a normal user cleared for
sudo, and WP-CLI installed (the WordPress tutorial sets it up).
Every command below runs over SSH as an ordinary sudo user. Swap your-domain, /var/www/wp and the admin username for your own. The wp commands run as the web user with sudo -u www-data so file ownership stays correct.
How to install WooCommerce on a VPS
There is no separate server to build here, because WooCommerce reuses the WordPress stack you already have. So the job is a short, ordered sequence, and each step ends in something you can see:
- Install the WooCommerce plugin and run its store setup.
- Tell the store where it is and what currency it uses (India, INR).
- Add real products with images so the shop has something to sell.
- Turn on a safe payment method and place a real test order.
- Make the shop fast and safe, then set it up to keep running.
Work through them in order. The step that matters most is the test order, so do not treat it as optional: a store you have not bought from is a store you have not tested.
Install the WooCommerce plugin
WooCommerce is a normal WordPress plugin, so installing it is one command. Install and activate it from the WordPress plugin directory, then read the version back so you know exactly what you are running.
sudo -u www-data wp plugin install woocommerce --activate --path=/var/www/wp
sudo -u www-data wp plugin get woocommerce --field=version --path=/var/www/wp
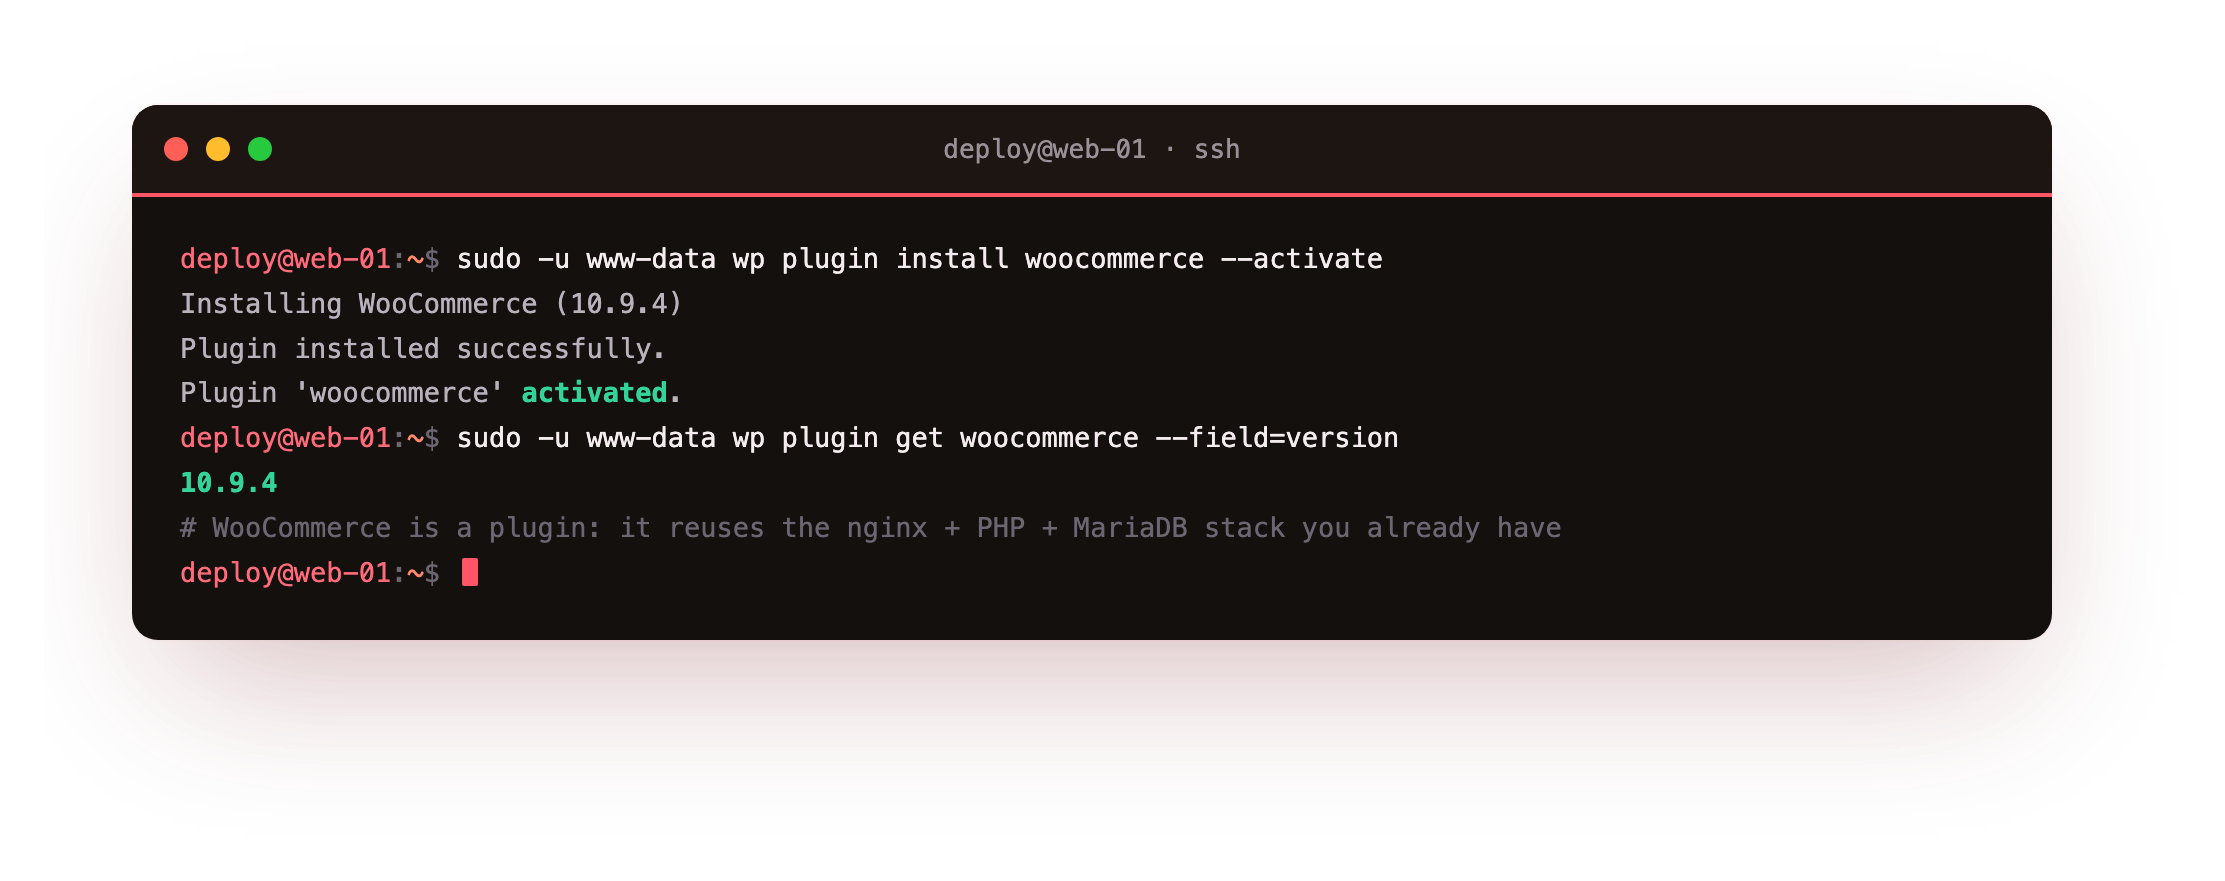
On our box that pulled WooCommerce 10.9.4 and activated it. Activation also creates the four pages a shop needs, Shop, Cart, Checkout and My account, and registers the product post type. Confirm those pages exist before moving on.
for slug in shop cart checkout my-account; do
  sudo -u www-data wp post list --post_type=page --name=$slug \
    --field=ID --path=/var/www/wp
done
Four page IDs mean the store scaffolding is in place. New installs of WooCommerce start in a private "coming soon" mode so the public cannot see a half-built shop, which is sensible. When you are ready to open, turn it off with wp option update woocommerce_coming_soon no.
wp plugin get woocommerce --field=version should print a version, and the four store pages should each return an ID. If a page is missing, run wp wc tool run install_pages --user=admin to recreate them.Set up the store for India
A store needs to know where it is, because that decides its currency, its tax rules and where it can ship. WooCommerce asks this in a setup wizard, but every answer is just an option you can set from the command line, which is faster and repeatable. Point the store at India and switch the currency to rupees.
cd /var/www/wp
sudo -u www-data wp option update woocommerce_default_country "IN:TN"   # India, Tamil Nadu
sudo -u www-data wp option update woocommerce_currency "INR"
sudo -u www-data wp option update woocommerce_store_city "Coonoor"
sudo -u www-data wp option update woocommerce_currency_pos "left"       # the rupee sign leads
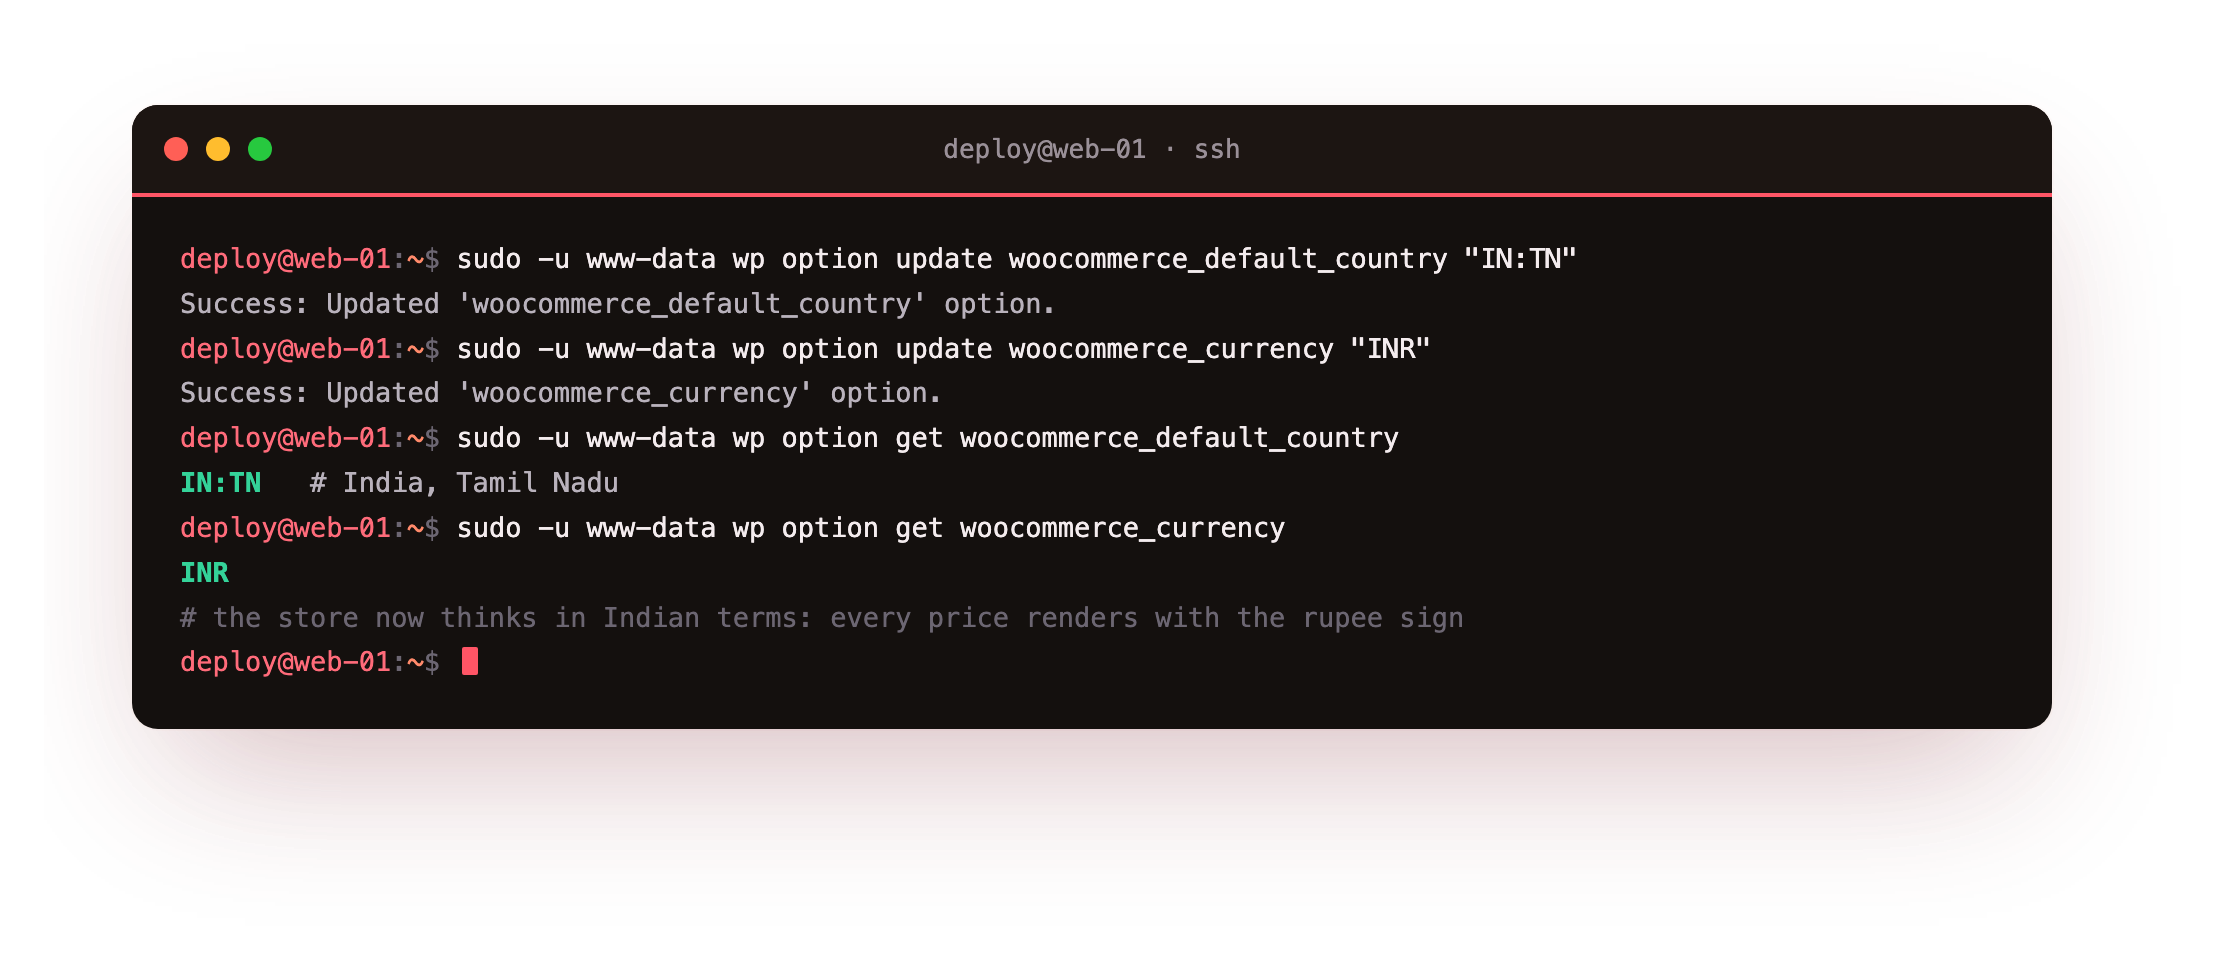
Read two of them back to confirm the store now thinks in Indian terms.
sudo -u www-data wp option get woocommerce_default_country
sudo -u www-data wp option get woocommerce_currency
On our box those returned IN:TN and INR, so every price on the shop now renders with the rupee sign. Two more basics from the wizard are worth a word. Shipping is organised into zones: you create a zone for India and add a method to it, such as free shipping or a flat rate, and only orders shipping to that zone see it. Tax is off by default; leave woocommerce_calc_taxes at no until you are ready to add GST rates, so you are not charging tax you have not configured.
wp option get commands should print IN:TN and INR. Load the shop in a browser and the prices should now carry the rupee sign, which is the quickest visual confirmation the currency took.Add real products
An empty shop is not a shop, so add something to sell. A WooCommerce product is a post with a price, so wp wc product create makes one in a line, and wp media import uploads a real image and sets it as the product photo. Create a category first, then a product that belongs to it.
CAT=$(sudo -u www-data wp wc product_cat create --name="Loose-leaf Tea" \
  --user=admin --porcelain --path=/var/www/wp)
IMG=$(sudo -u www-data wp media import black-tea.png \
  --title="Nilgiri Black Tea 250g" --porcelain --path=/var/www/wp)
sudo -u www-data wp wc product create --name="Nilgiri Black Tea 250g" --type=simple \
  --regular_price="349" --sku="NIL-BLK-250" --manage_stock=true --stock_quantity=120 \
  --categories="[{\"id\":$CAT}]" --images="[{\"id\":$IMG}]" \
  --user=admin --path=/var/www/wp
Repeat for the rest of your catalogue. On our box we ended up with four real products across two categories, each with an uploaded image, a SKU and a stock count. List them to check the shop has stock to sell.
sudo -u www-data wp wc product list \
  --fields=id,name,sku,price,stock_quantity --user=admin --path=/var/www/wp
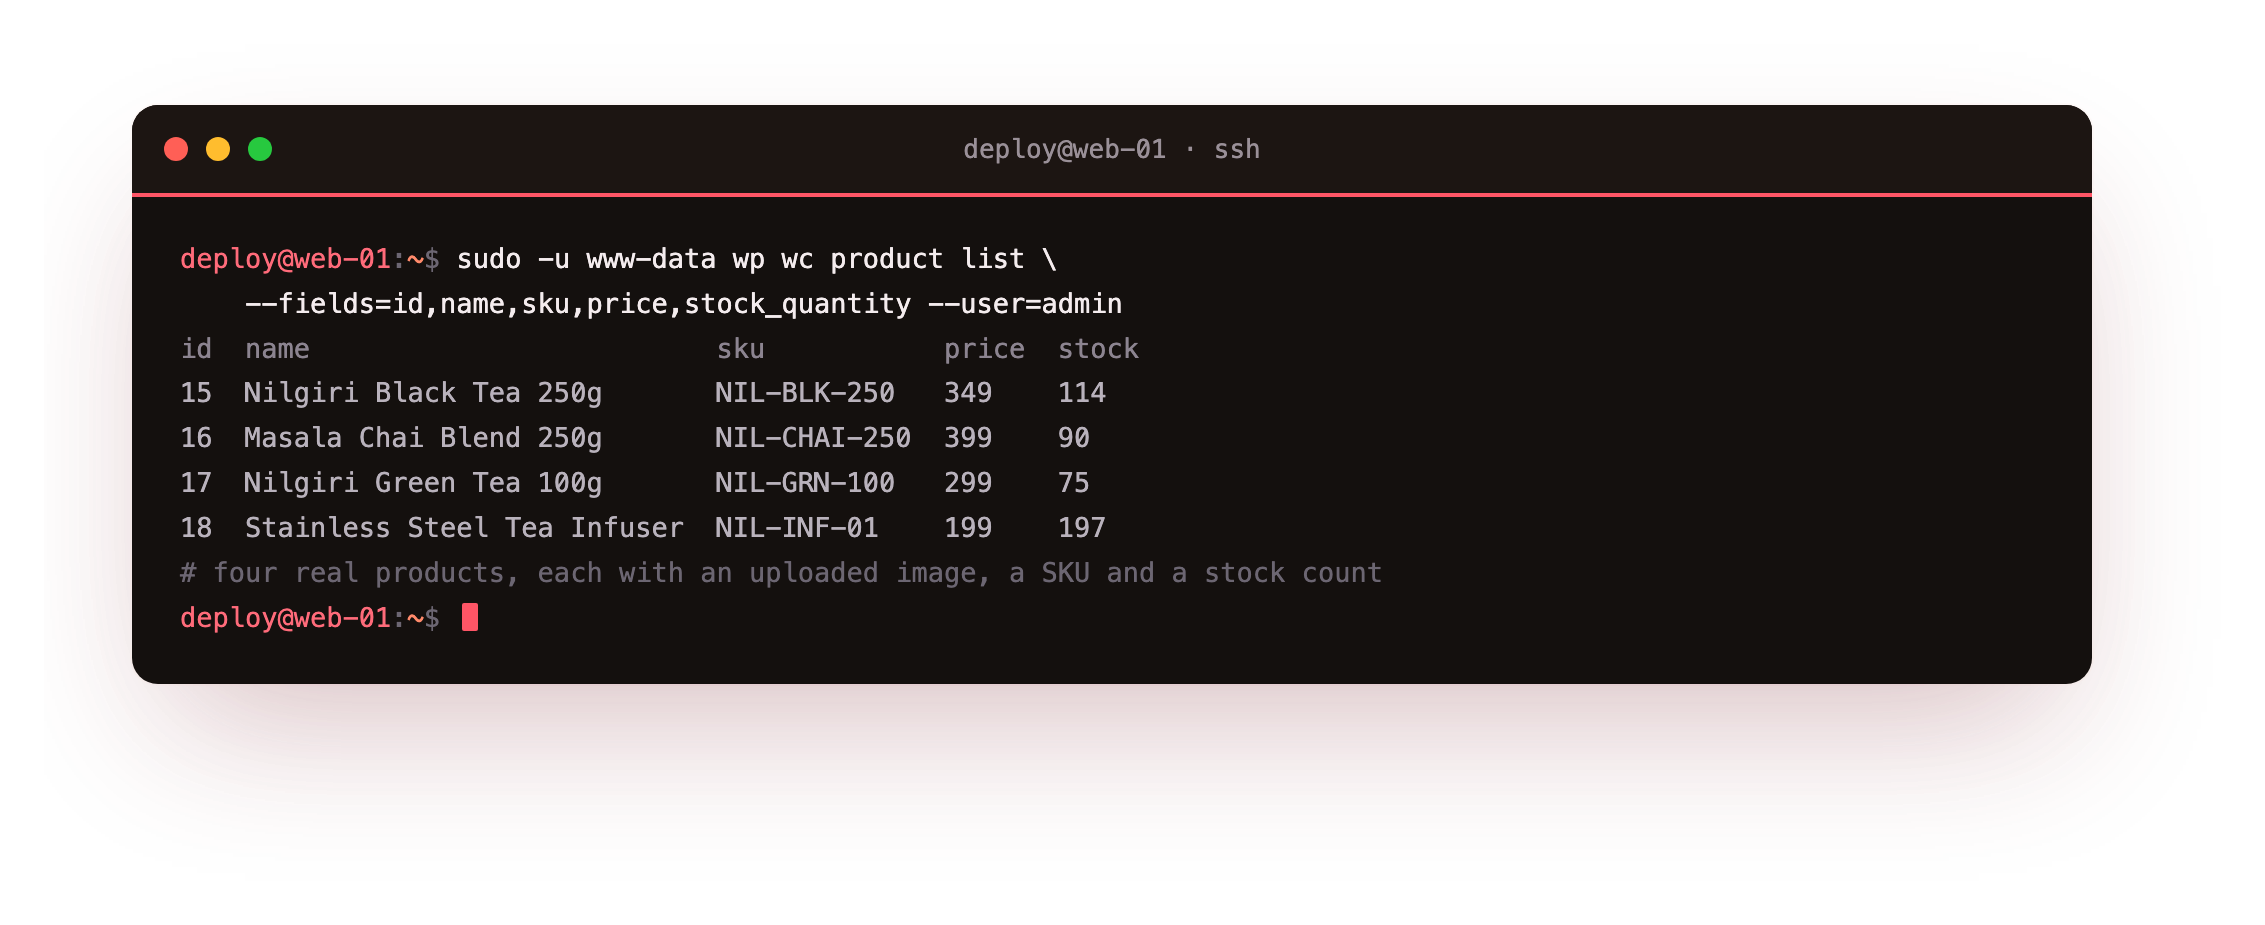
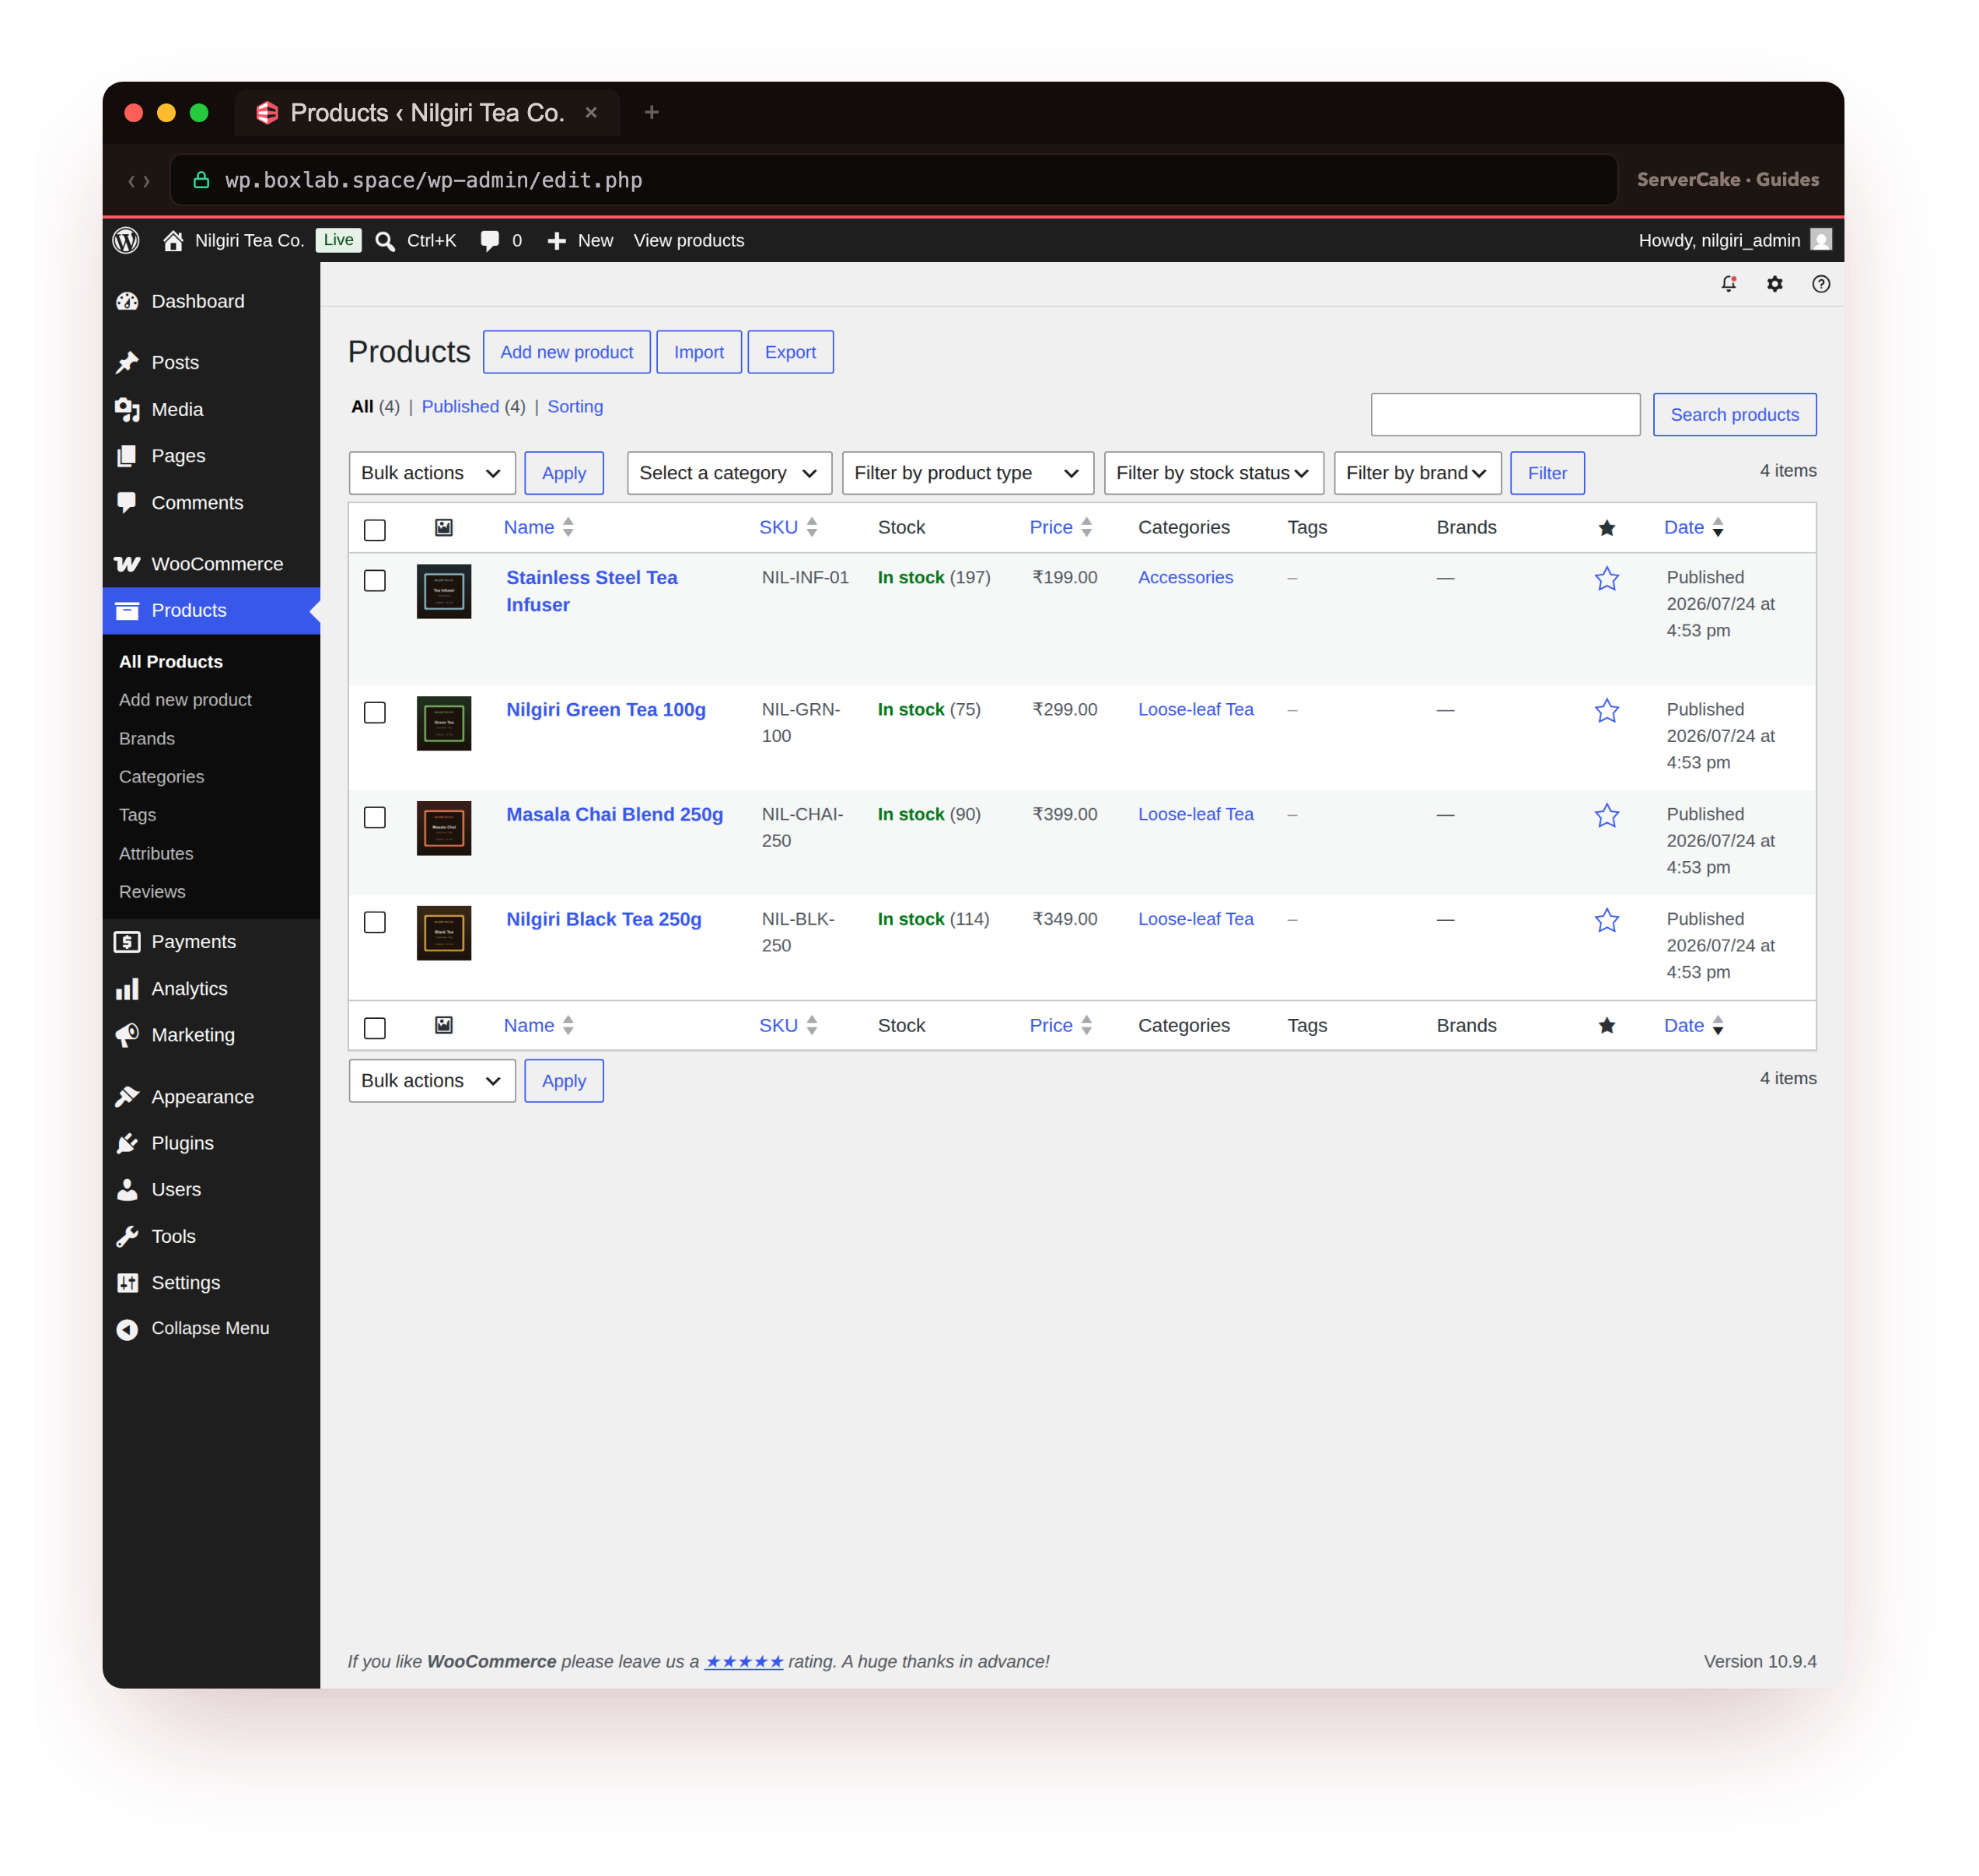
The list showed all four products in stock with rupee prices, which means the storefront now has a real catalogue rather than a placeholder. Load /shop/ in a browser and you will see the products laid out with their images and an Add to cart button under each one.
wp wc product list should show your products with a price and a stock quantity. If a product shows no price, it was created without --regular_price, so a shopper sees "Read more" instead of "Add to cart" and cannot buy it.Payments and a real test order
This is the part that proves the shop works. You are going to turn on a payment method that moves no real money, then buy something from your own store to watch the whole flow end to end. Never wire a live payment gateway with real keys just to test a checkout, because that is how you charge yourself by accident.
WooCommerce ships three offline gateways that are perfect for this: Cash on delivery, Direct bank transfer, and Check payments. Enable Cash on delivery, which is genuinely useful in India anyway, and the Check payments gateway as an explicit test option.
sudo -u www-data wp option update woocommerce_cod_settings \
  '{"enabled":"yes","title":"Cash on delivery"}' --format=json --path=/var/www/wp
sudo -u www-data wp wc payment_gateway list \
  --fields=id,enabled,title --user=admin --path=/var/www/wp
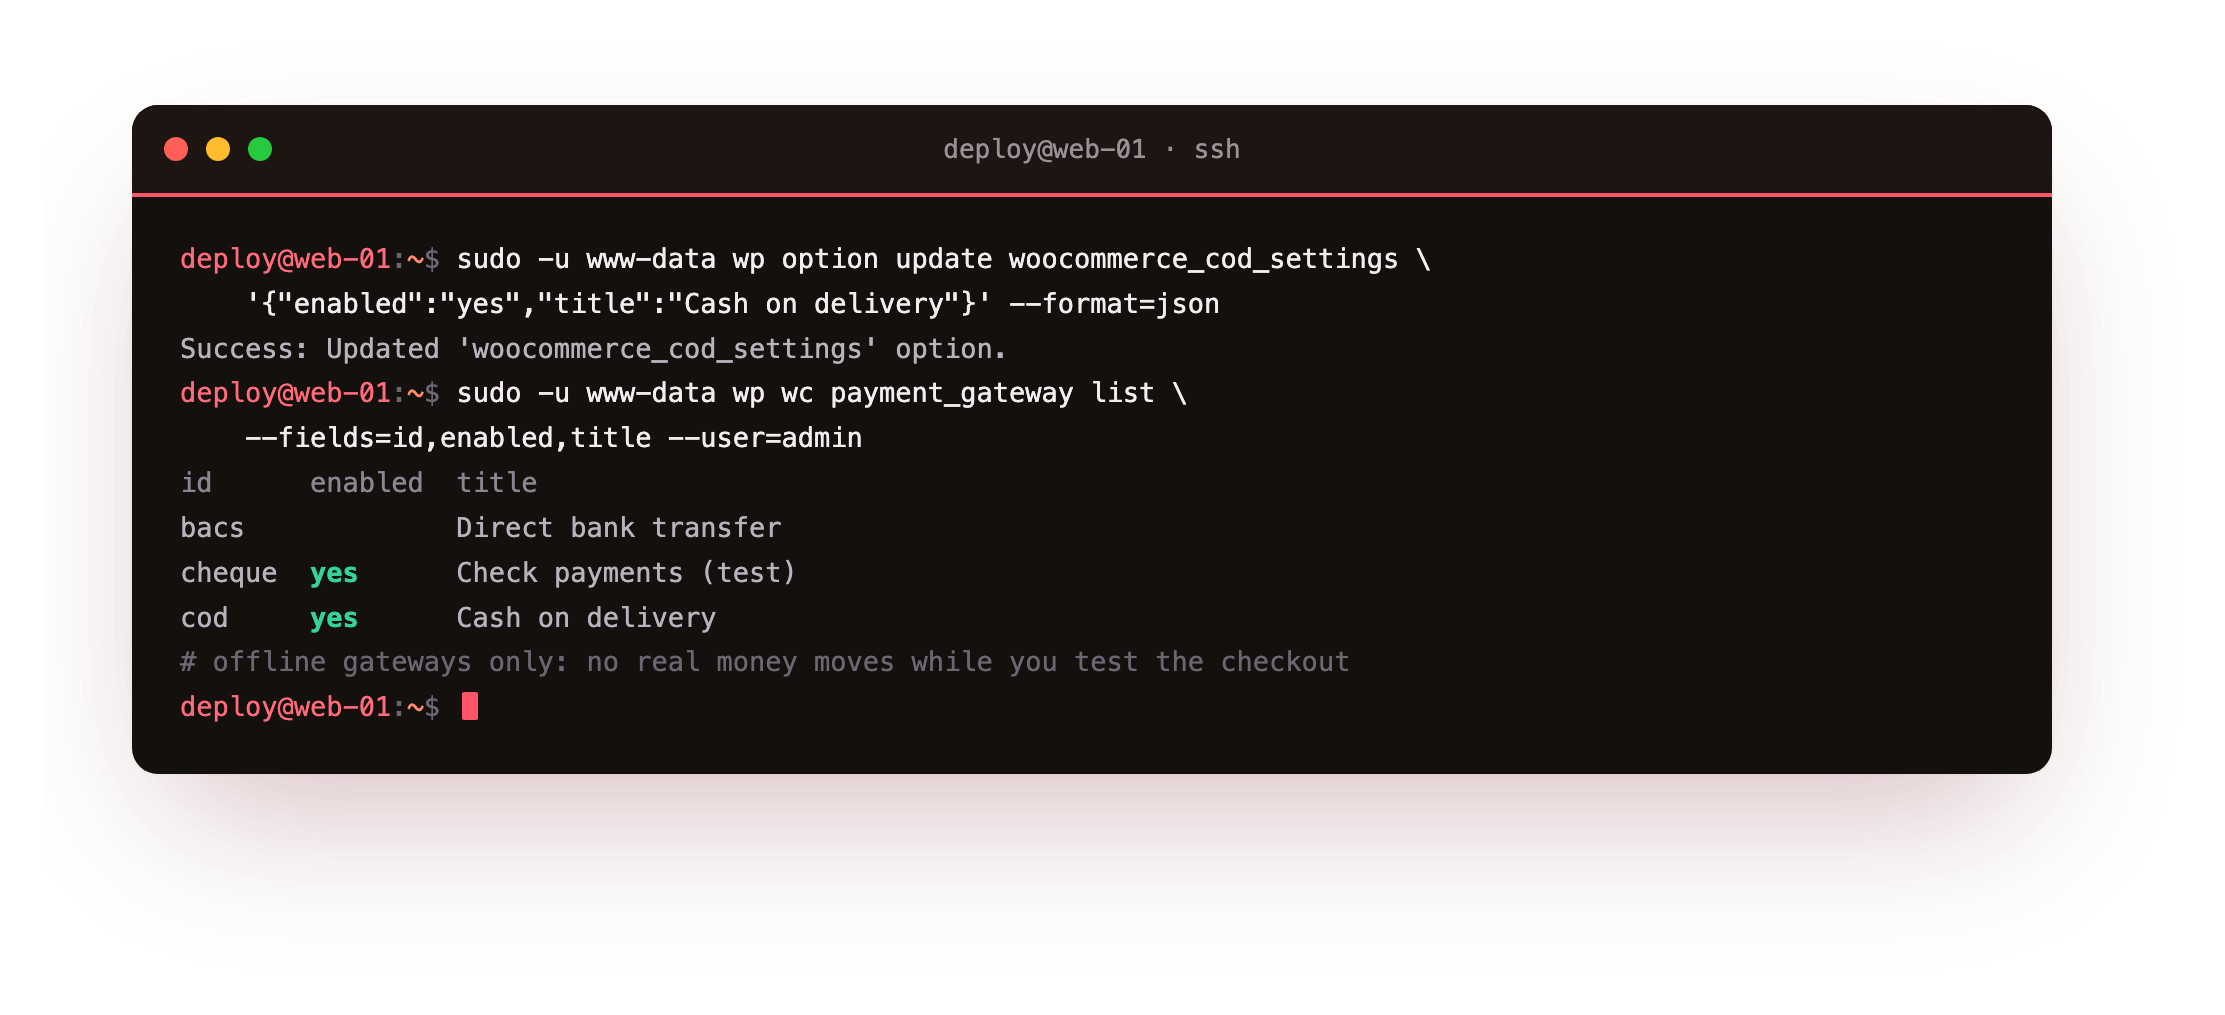
On our box the gateway list showed cod and cheque both enabled. Now place the order the way a customer would: open a product, add it to the cart, go to checkout, fill in the address, choose Cash on delivery, and place the order. We added two Nilgiri Black Tea and one infuser, then checked out as a guest. The moment you place the order, WooCommerce writes it to the database and shows the order-received page. Verify that order from the shell.
sudo -u www-data wp wc shop_order list \
  --fields=id,status,total,payment_method_title --user=admin --path=/var/www/wp
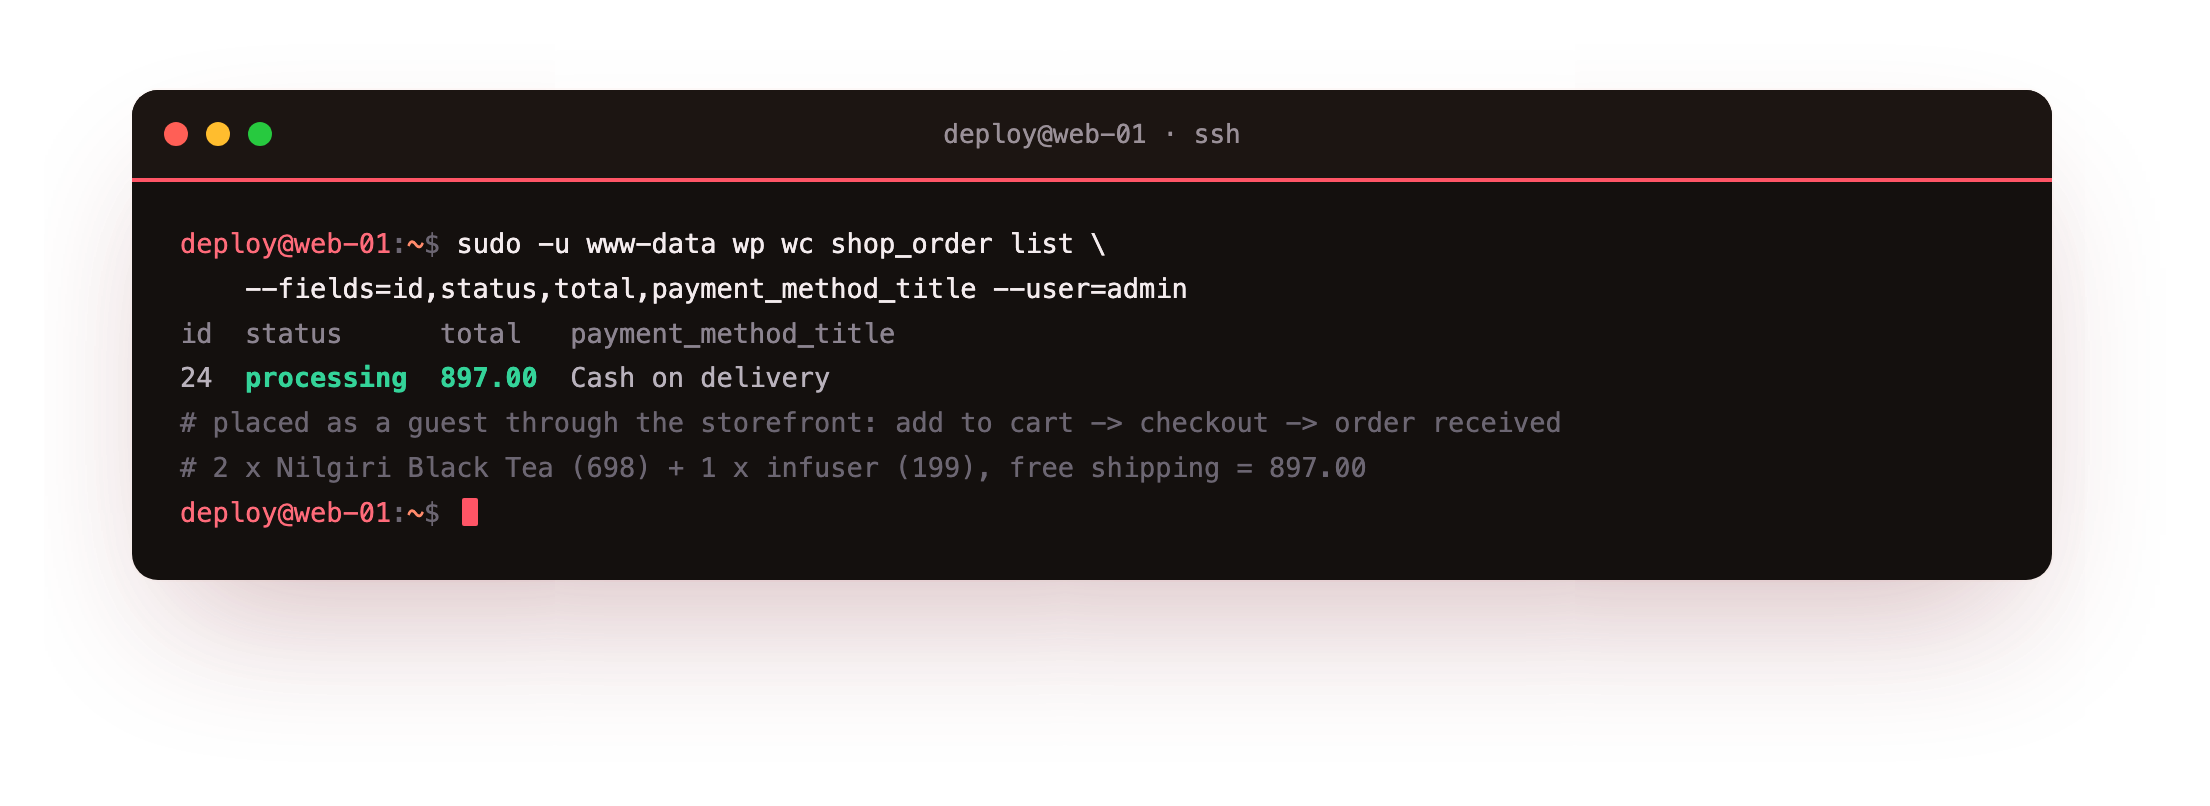
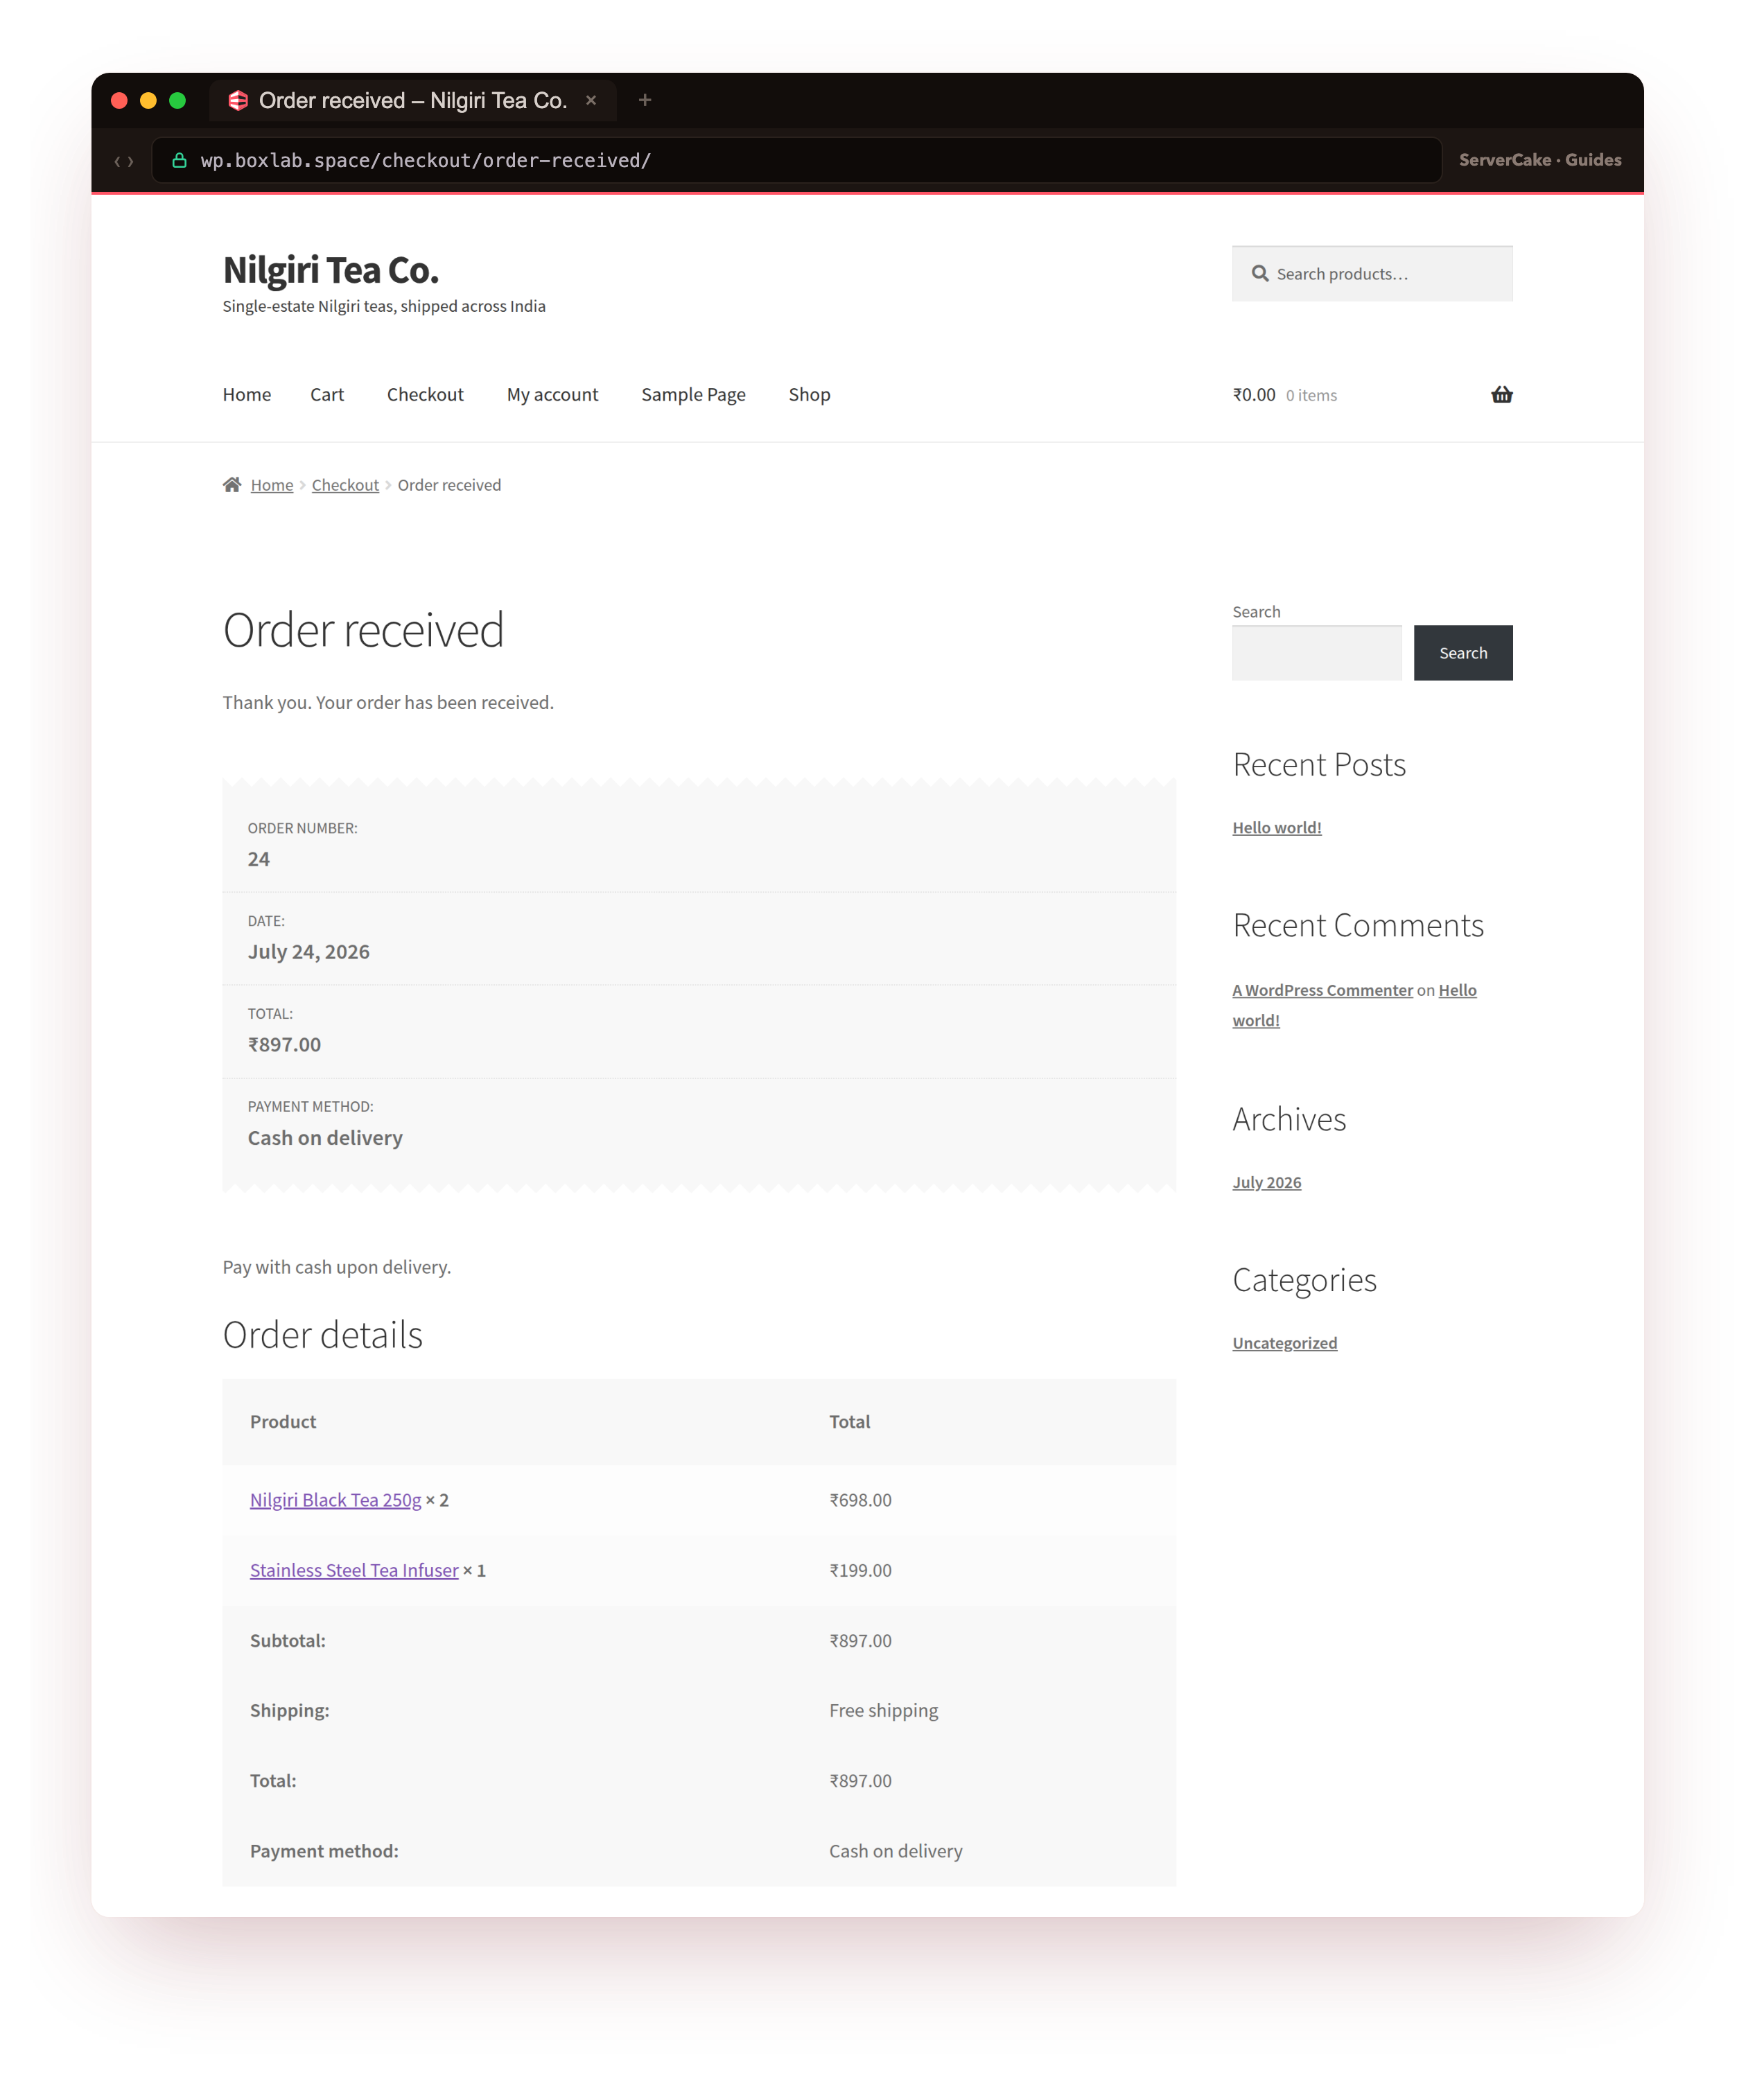
On our box that listed order 24, status processing, total 897.00, paid by Cash on delivery, matching the two teas at 349 each and the infuser at 199, with free shipping. The order-received page in the browser showed the same: an order number, the line items, and the total. That is a store you have proven, because you have completed a purchase through it yourself.
Make the shop fast and safe
A store is different from a blog in one important way: some pages must never be cached. The cart, the checkout and the my-account page are personal to each visitor, so serving a cached copy would show one shopper another shopper's basket. The fix is a page cache that caches the shop and product pages but bypasses the dynamic ones. Here is the WooCommerce-aware nginx rule: it skips the cache for those URLs and for any request that carries a cart or login cookie.
# in the http block: never cache cart, checkout, my-account, or a request with a cart/login cookie
map $request_uri $woo_skip_uri {
    default 0;
    ~*/cart 1;  ~*/checkout 1;  ~*/my-account 1;  ~*/wp-admin 1;
}
map $http_cookie $woo_skip_cookie {
    default 0;
    ~*wordpress_logged_in 1;  ~*woocommerce_items_in_cart 1;  ~*wp_woocommerce_session 1;
}

# in the PHP location:
set $woo_skip 0;
if ($woo_skip_uri)    { set $woo_skip 1; }
if ($woo_skip_cookie) { set $woo_skip 1; }
fastcgi_cache_bypass $woo_skip;
fastcgi_no_cache     $woo_skip;
add_header X-WooCache $upstream_cache_status always;
After reloading nginx, prove the bypass is doing its job. An anonymous page should cache, but the cart must always be live.
curl -sI https://your-domain/ | grep -i x-woocache          # MISS, then HIT on a repeat
curl -sI https://your-domain/cart/ | grep -i x-woocache     # BYPASS, always
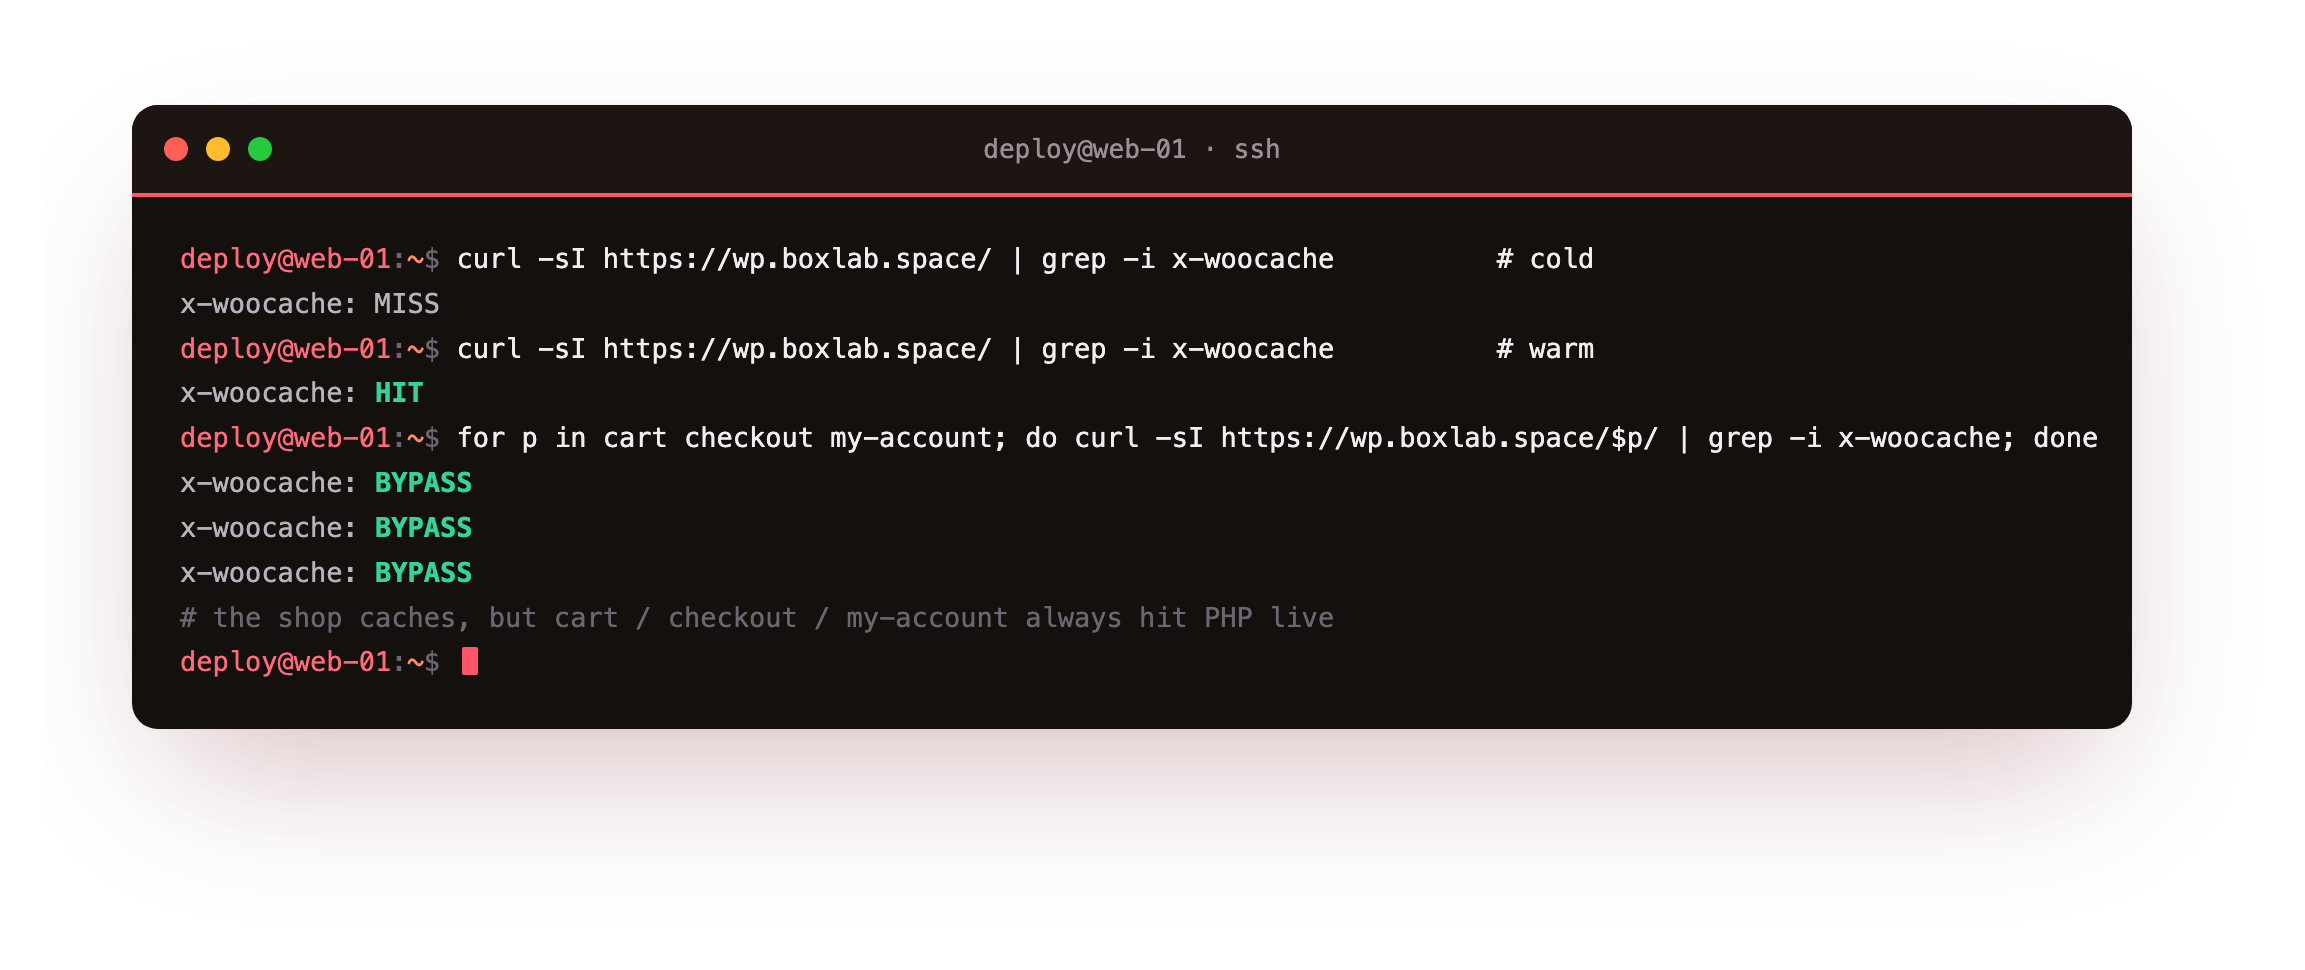
On our box the home page went from MISS to HIT on the second request while /cart/, /checkout/ and /my-account/ all returned BYPASS, exactly as they must. Two more habits keep a store healthy. An object cache such as Redis matters more for a shop than a blog, because WooCommerce runs many small database queries per page; the speed up WordPress tutorial sets that up. And HTTPS is mandatory, not optional, because the checkout collects addresses and payment details, so the valid certificate from your WordPress install is doing real work here.
A store also asks more of PHP than a blog does, so raise the limits in the FPM pool. Product images and CSV imports need a larger upload size, and a big cart or a plugin-heavy checkout needs more memory and time.
; /etc/php/8.3/fpm/conf.d/99-woocommerce.ini
memory_limit = 256M
upload_max_filesize = 64M
post_max_size = 64M
max_execution_time = 120
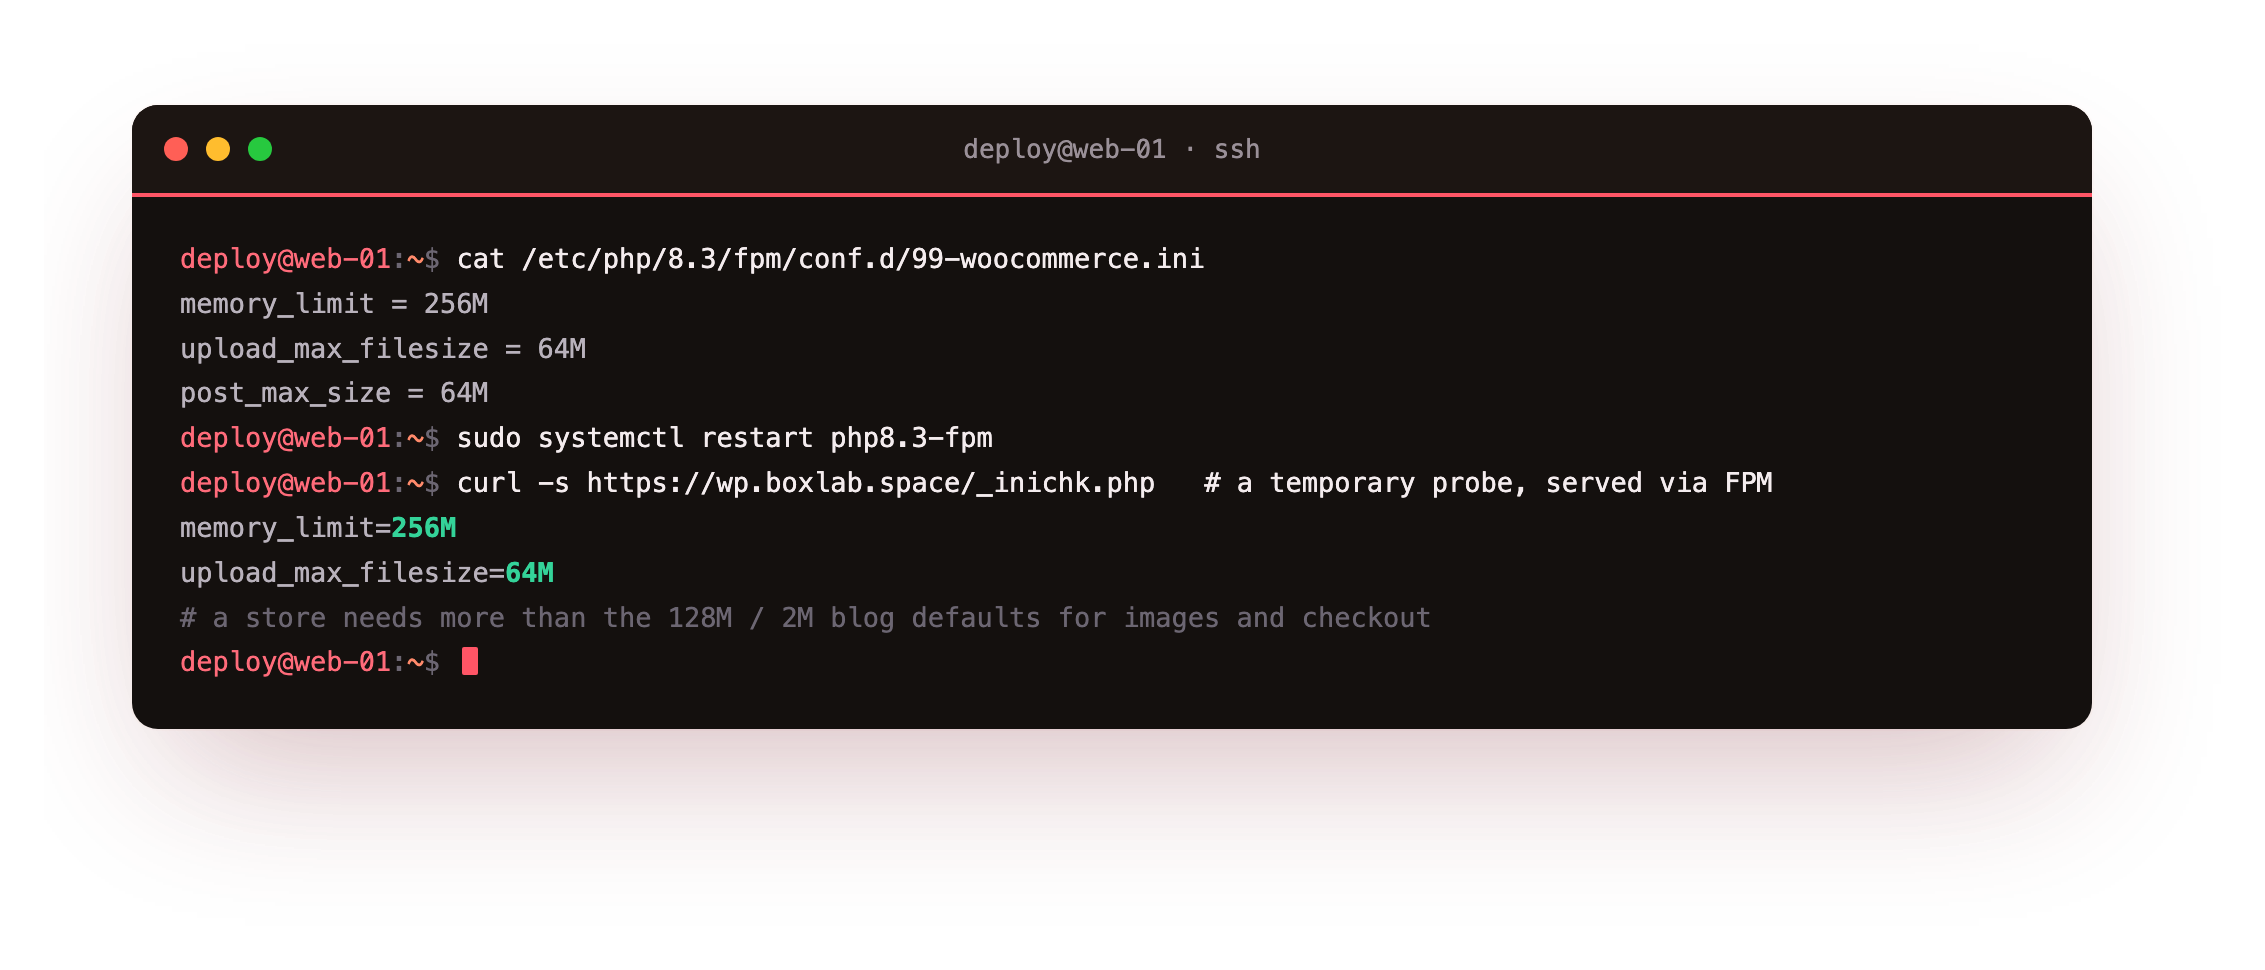
On our box, after restarting php8.3-fpm, a request served through FPM reported memory_limit=256M and upload_max_filesize=64M, up from the stock 128M and 2M, which is enough headroom for product images and a busy checkout.
x-woocache: HIT, while /cart/ returns BYPASS. If the cart ever shows HIT, your bypass rule is wrong, so re-check the map blocks before a shopper sees a stale basket.Keep the store running
A shop that takes orders is a shop you cannot afford to lose, so treat backups and updates as part of running it, not an afterthought. Back up the database and the wp-content files on a schedule and store a copy offsite, because a store's database holds every order and customer; the back up WordPress tutorial walks through a scripted backup and a real restore drill. Turn on automatic updates for WooCommerce and your theme so security fixes land without you watching.
sudo -u www-data wp plugin auto-updates enable woocommerce --path=/var/www/wp
sudo -u www-data wp theme auto-updates enable --all --path=/var/www/wp
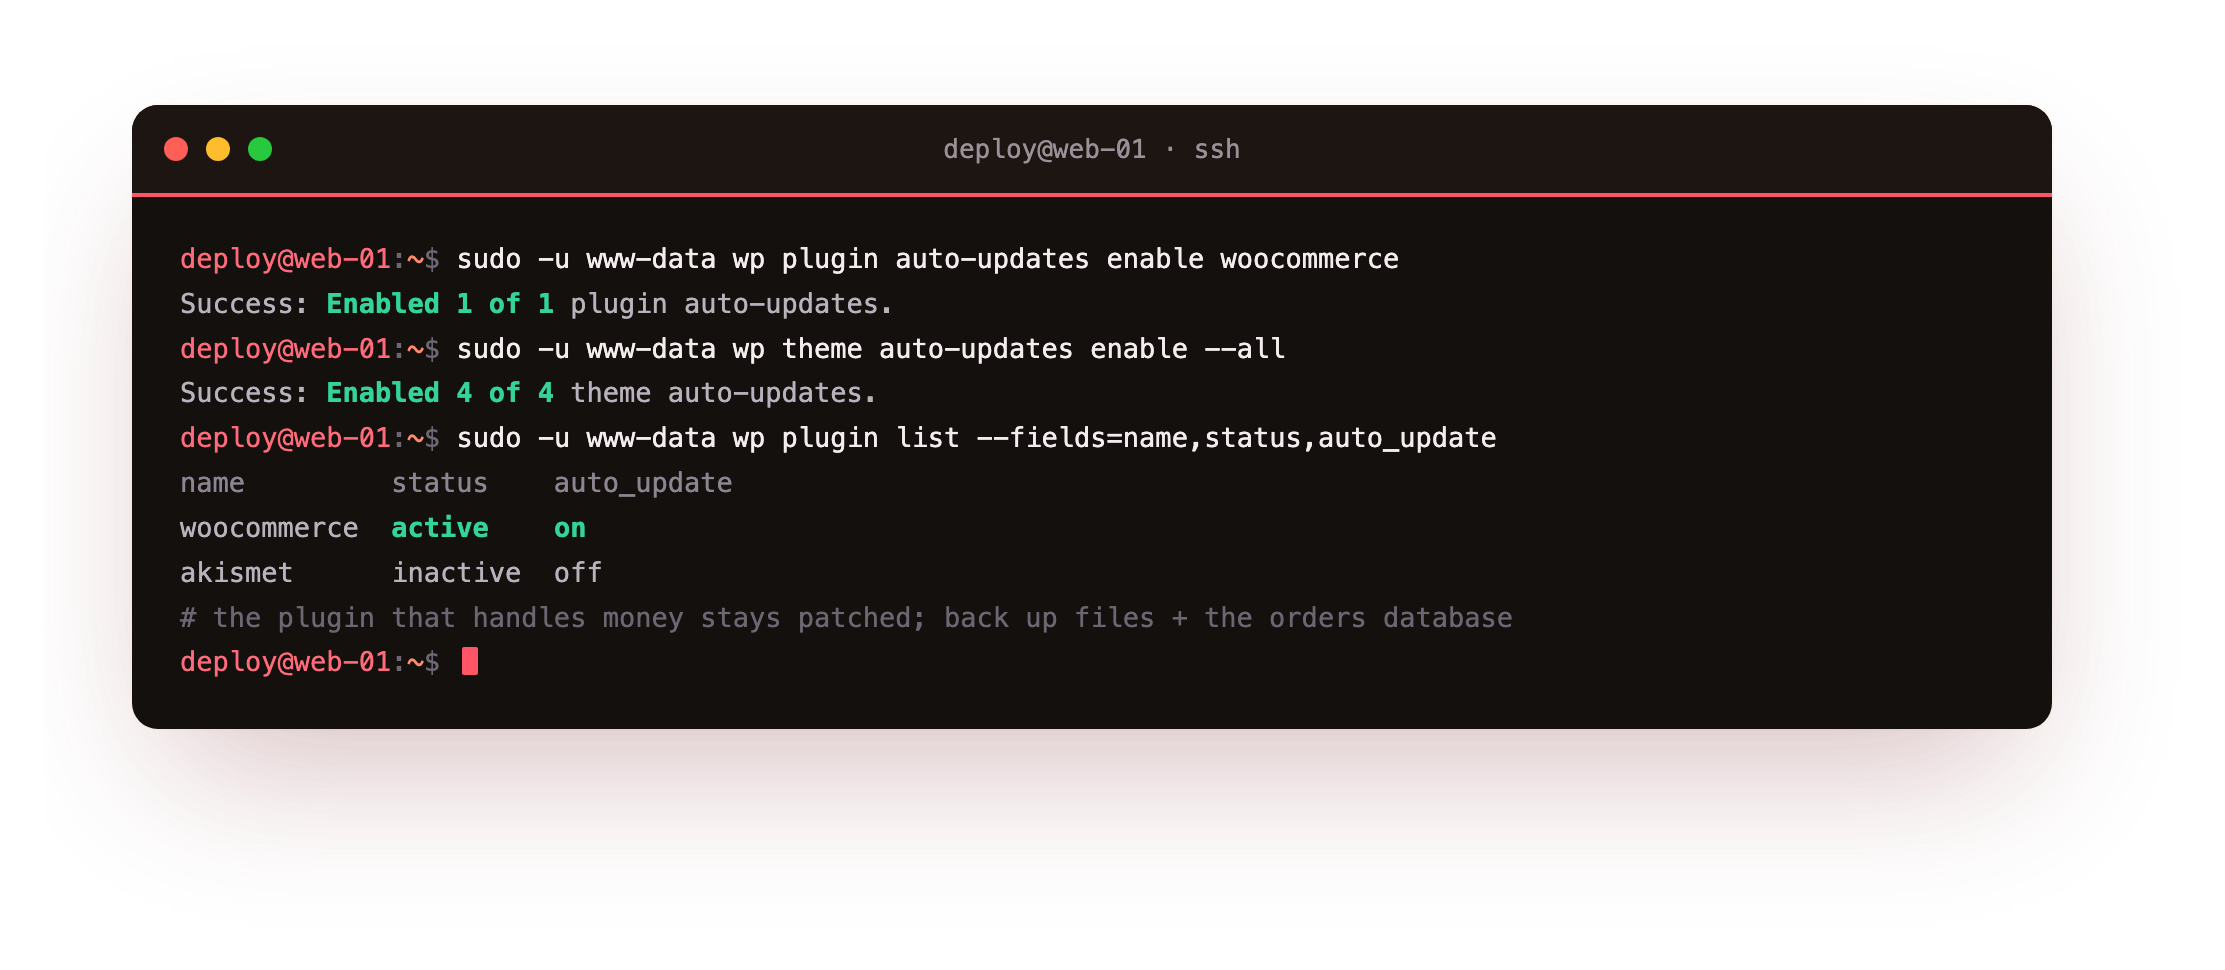
On our box WooCommerce flipped to auto_update on, so the plugin that handles money stays patched. Test a WooCommerce update on a staging copy first when you can, since a shop is the one site where a broken update costs sales directly. As traffic grows, scale the shop the way you scale any WordPress site: add the object cache, then move the size of the slice up a step when memory or response times say so, which on a VPS is one resize rather than a migration.
That is a complete WooCommerce store, built by hand on your own slice: the plugin, an India-ready setup, real products, a proven test order, a cache that respects the cart, and backups and updates to keep it alive. You own every layer, from the nginx rule to the payment gateway, so you can tune and fix every layer too.
Frequently asked questions
How much VPS do I need to run WooCommerce?
More than a plain blog, because a shop runs more database queries per page and holds an object cache, but not a lot more for a small store. A slice with 2 GB of RAM comfortably runs a WooCommerce shop with a few hundred products and light traffic, especially once Redis and a page cache are in place. What grows the requirement is concurrent checkouts and heavy plugins, not the product count alone. Start on a small slice, watch memory and checkout response times, and resize up a step when the numbers ask for it, which on a VPS is one command rather than a move.Can I take real payments in India with this setup?
Yes, by adding a payment gateway plugin once the shop is built. This tutorial deliberately uses the offline gateways (Cash on delivery and Check payments) so no real money moves while you are testing. For live cards, UPI and netbanking in India, Razorpay is the common choice and installs as a WooCommerce extension with its own test and live API keys. Keep it in test mode, run a test transaction, and only switch to live keys once the rest of the store, including tax and shipping, is finished. Cash on delivery is worth keeping enabled alongside it, since a large share of Indian shoppers still prefer it.Why must the cache skip the cart and checkout?
Because those pages are different for every visitor. The cart shows one shopper's basket, the checkout shows their address, and the my-account page shows their orders, so a cached copy would leak one person's data to the next visitor and break the buying flow. A page cache is safe only when it serves the same bytes to everyone, which is true for the shop and product pages but never for cart, checkout or my-account. The nginx rule in this tutorial handles that by bypassing the cache for those URLs and for any request carrying a cart or login cookie, so shoppers always see live prices and their own basket.Do I need a separate server for the shop and the database?
Not for a small or medium store. WooCommerce, PHP-FPM and MariaDB run comfortably together on one slice, and keeping the database local means the many small queries a shop makes never cross a network, which keeps pages quick. You split the database onto its own slice only when a single box runs out of headroom, usually at high concurrency, and at that point the object cache and a read replica matter more than physical separation. For the shop most people are building, one well-configured slice with a page cache and Redis is the right answer, and it is far simpler to back up and restore.Running your store on your own slice means the shop, the customer data and the order history are yours, hosted where you choose rather than on a platform that takes a cut of every sale. When you want a box to build this on, a ServerCake slice gives you a clean Ubuntu 24.04 server in India, billed in rupees with GST, ready for the WordPress and WooCommerce stack in this tutorial.