A Kubernetes Deployment that heals itself
A Kubernetes Deployment is the object you hand a desired state to: run this image, keep this many copies, and put it back when one dies. This chapter, run on the live k3s node from part one, turns the Beacon app into a Deployment, scales it to three pods, then deletes a pod by hand to watch the cluster replace it without any help.
In chapter one you ran a single loose pod. A loose pod has nobody to restart it. A Deployment is what turns that same container into a service that stays up, which is the first thing Beacon needs before it can face a browser.
- A Deployment declares a desired number of replicas, and a controller works to make reality match that number at all times.
- Behind each Deployment is a ReplicaSet, the object that actually creates and counts the pods.
- Deleting a pod does not reduce the service: the ReplicaSet notices the shortfall and schedules a replacement in seconds.
kubectl scaleandkubectl rollout statusare the two commands you reach for most when changing or checking a Deployment.
The shift in thinking here is from imperative to declarative. You do not tell Kubernetes to start a pod, then another, then watch them. You describe the end state you want in a file, apply it, and a control loop keeps chasing that state. When something drifts, the loop corrects it. That loop is what people mean when they say a cluster is self-healing.
Prerequisites
- The Ready k3s node from part one, with
kubectlanswering. - A ConfigMap named
beacon-htmlholding the Beacon index page, which the Deployment mounts and serves. Create one withkubectl create configmap beacon-html --from-file=index.html=./index.html. - The loose
webpod from part one removed withkubectl delete pod web, so the only thing running is what you declare here.
Write and apply a Deployment
Here is a small Deployment saved as beacon-deploy.yaml. It runs one nginx pod that serves the Beacon page from the mounted ConfigMap. The important fields are replicas, the selector that says which pods belong to this Deployment, and the template that describes the pods to create.
apiVersion: apps/v1
kind: Deployment
metadata:
  name: beacon
  labels: { app: beacon }
spec:
  replicas: 1
  selector:
    matchLabels: { app: beacon }
  template:
    metadata:
      labels: { app: beacon }
    spec:
      containers:
        - name: web
          image: nginx:1.27-alpine
          volumeMounts:
            - { name: html, mountPath: /usr/share/nginx/html }
      volumes:
        - name: html
          configMap: { name: beacon-html }
Apply it and check what the cluster made.
kubectl apply -f beacon-deploy.yaml
kubectl get deploy beacon
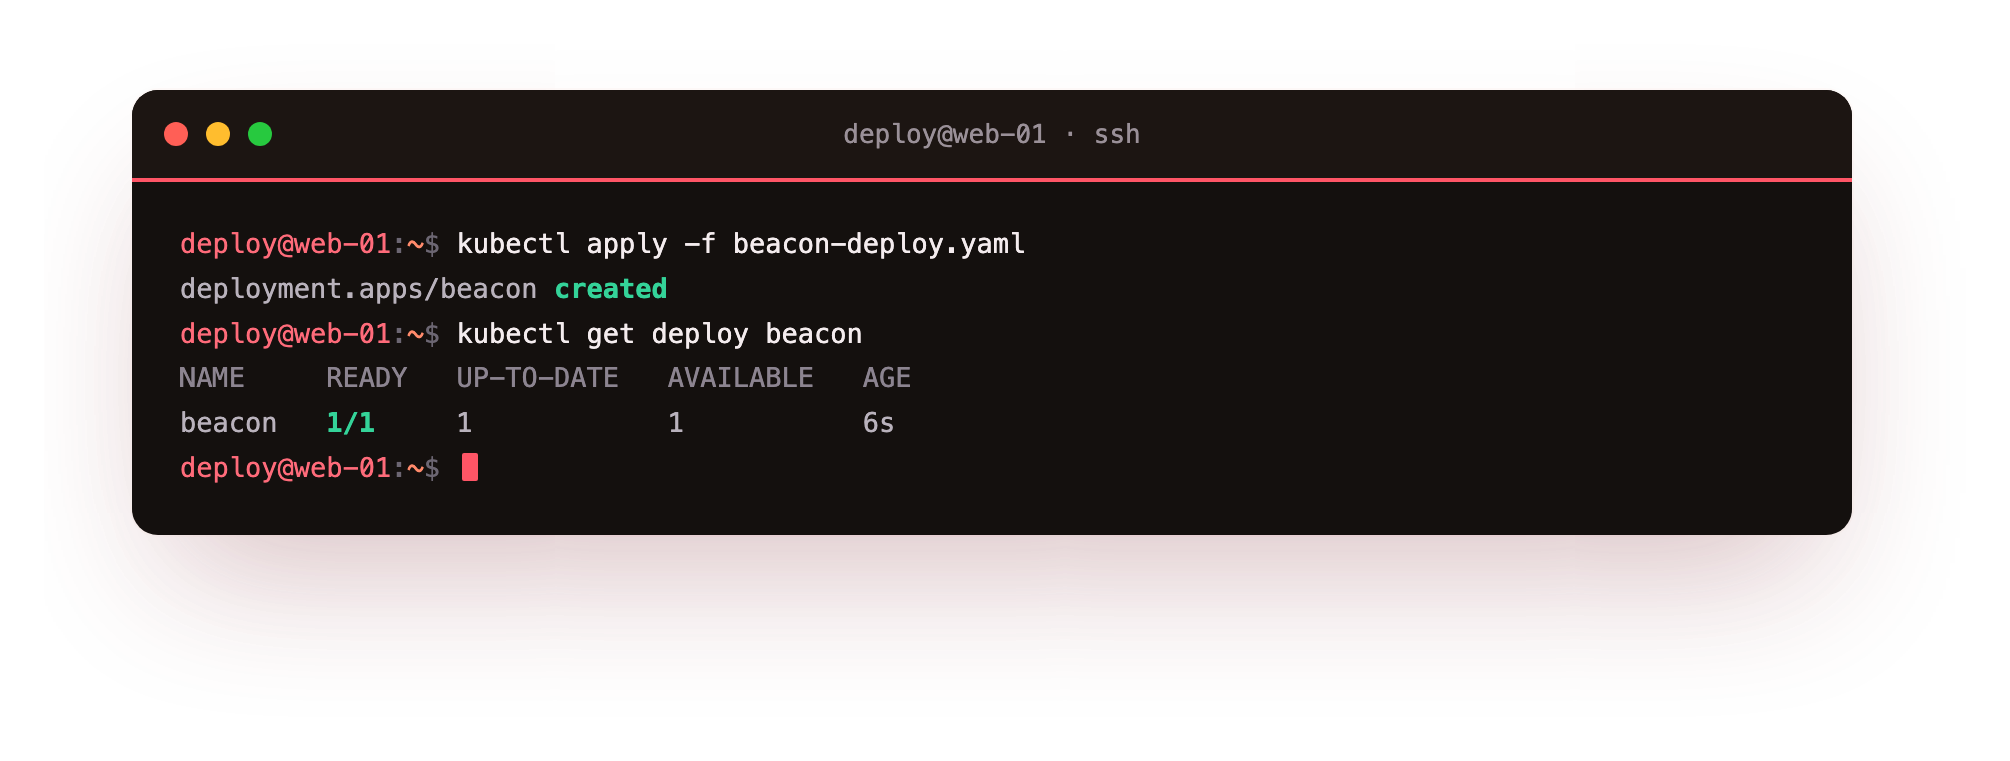
kubectl apply sends the file to the API server, which records your desired state and lets the controllers act. kubectl get deploy shows beacon with 1/1 ready. That single line means one replica is wanted and one is available. You never created a pod directly. You described a Deployment, and it created the pod for you.
You should now see beacon reporting 1/1 under READY. The app is running, but as one copy. If a pod-eating gremlin came through, the service would blink out until the copy came back. The next step removes that single point of failure.
Scale to three, and meet the ReplicaSet
Change the number of copies with one command and watch the rollout.
kubectl scale deploy beacon --replicas=3
kubectl get pods -l app=beacon -o wide
kubectl get rs -l app=beacon
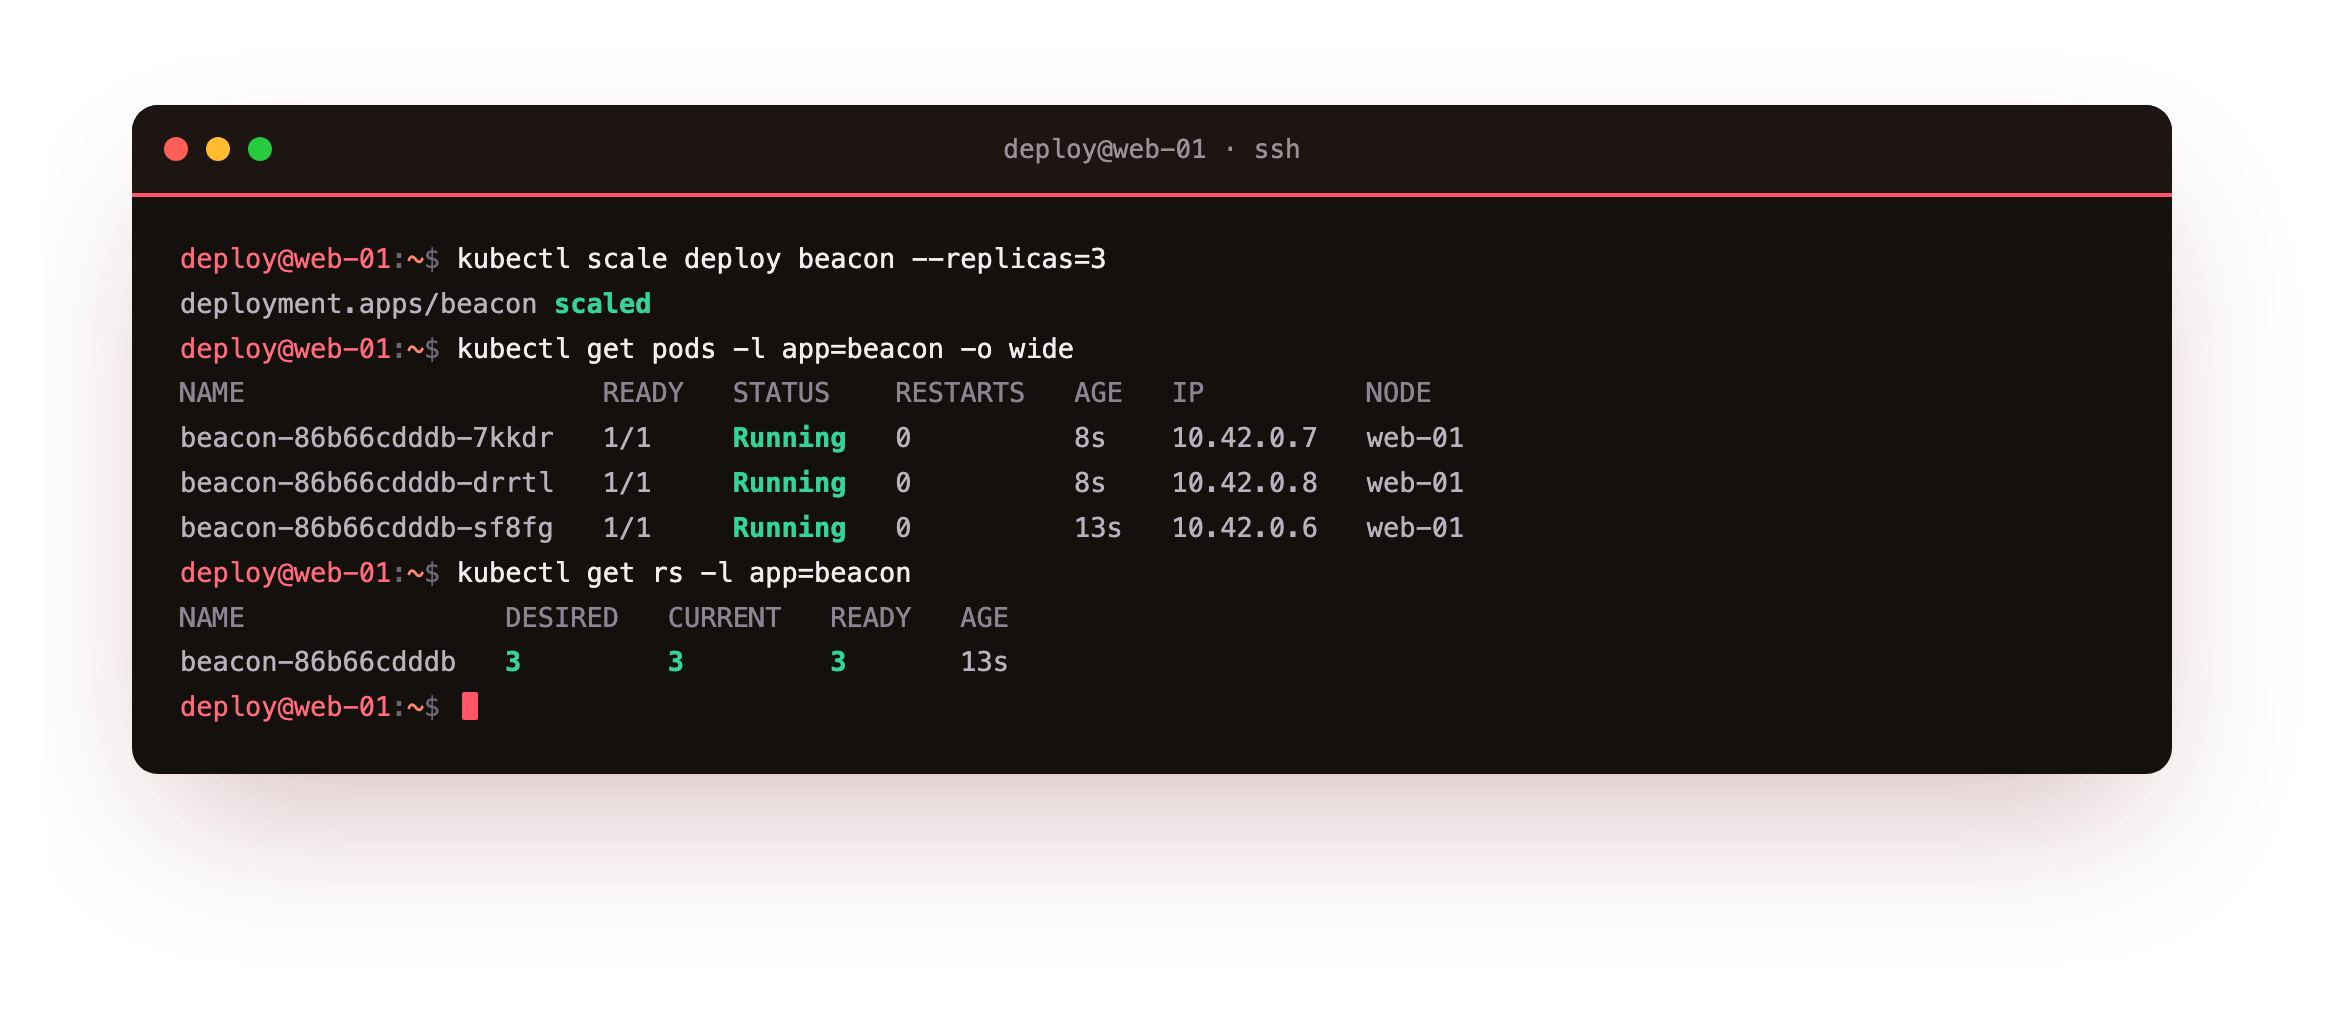
kubectl scale edits the desired replica count to three. kubectl get pods -l app=beacon lists three pods, each with its own name and pod IP on the cluster network. kubectl get rs shows the ReplicaSet, the object the Deployment owns, reporting three desired, three current, and three ready. The Deployment sets the target, the ReplicaSet does the counting and the creating, and the pods do the work.
Labels are the glue. The selector app=beacon is how the ReplicaSet knows which pods are its own. Any pod carrying that label counts toward the total, which is also how a Service will later find these same pods to send traffic to.
Delete a pod and watch it come back
This is the part worth seeing for yourself. Pick one pod and delete it, then look immediately.
kubectl delete pod beacon-86b66cdddb-sf8fg
kubectl get pods -l app=beacon
kubectl rollout status deploy/beacon
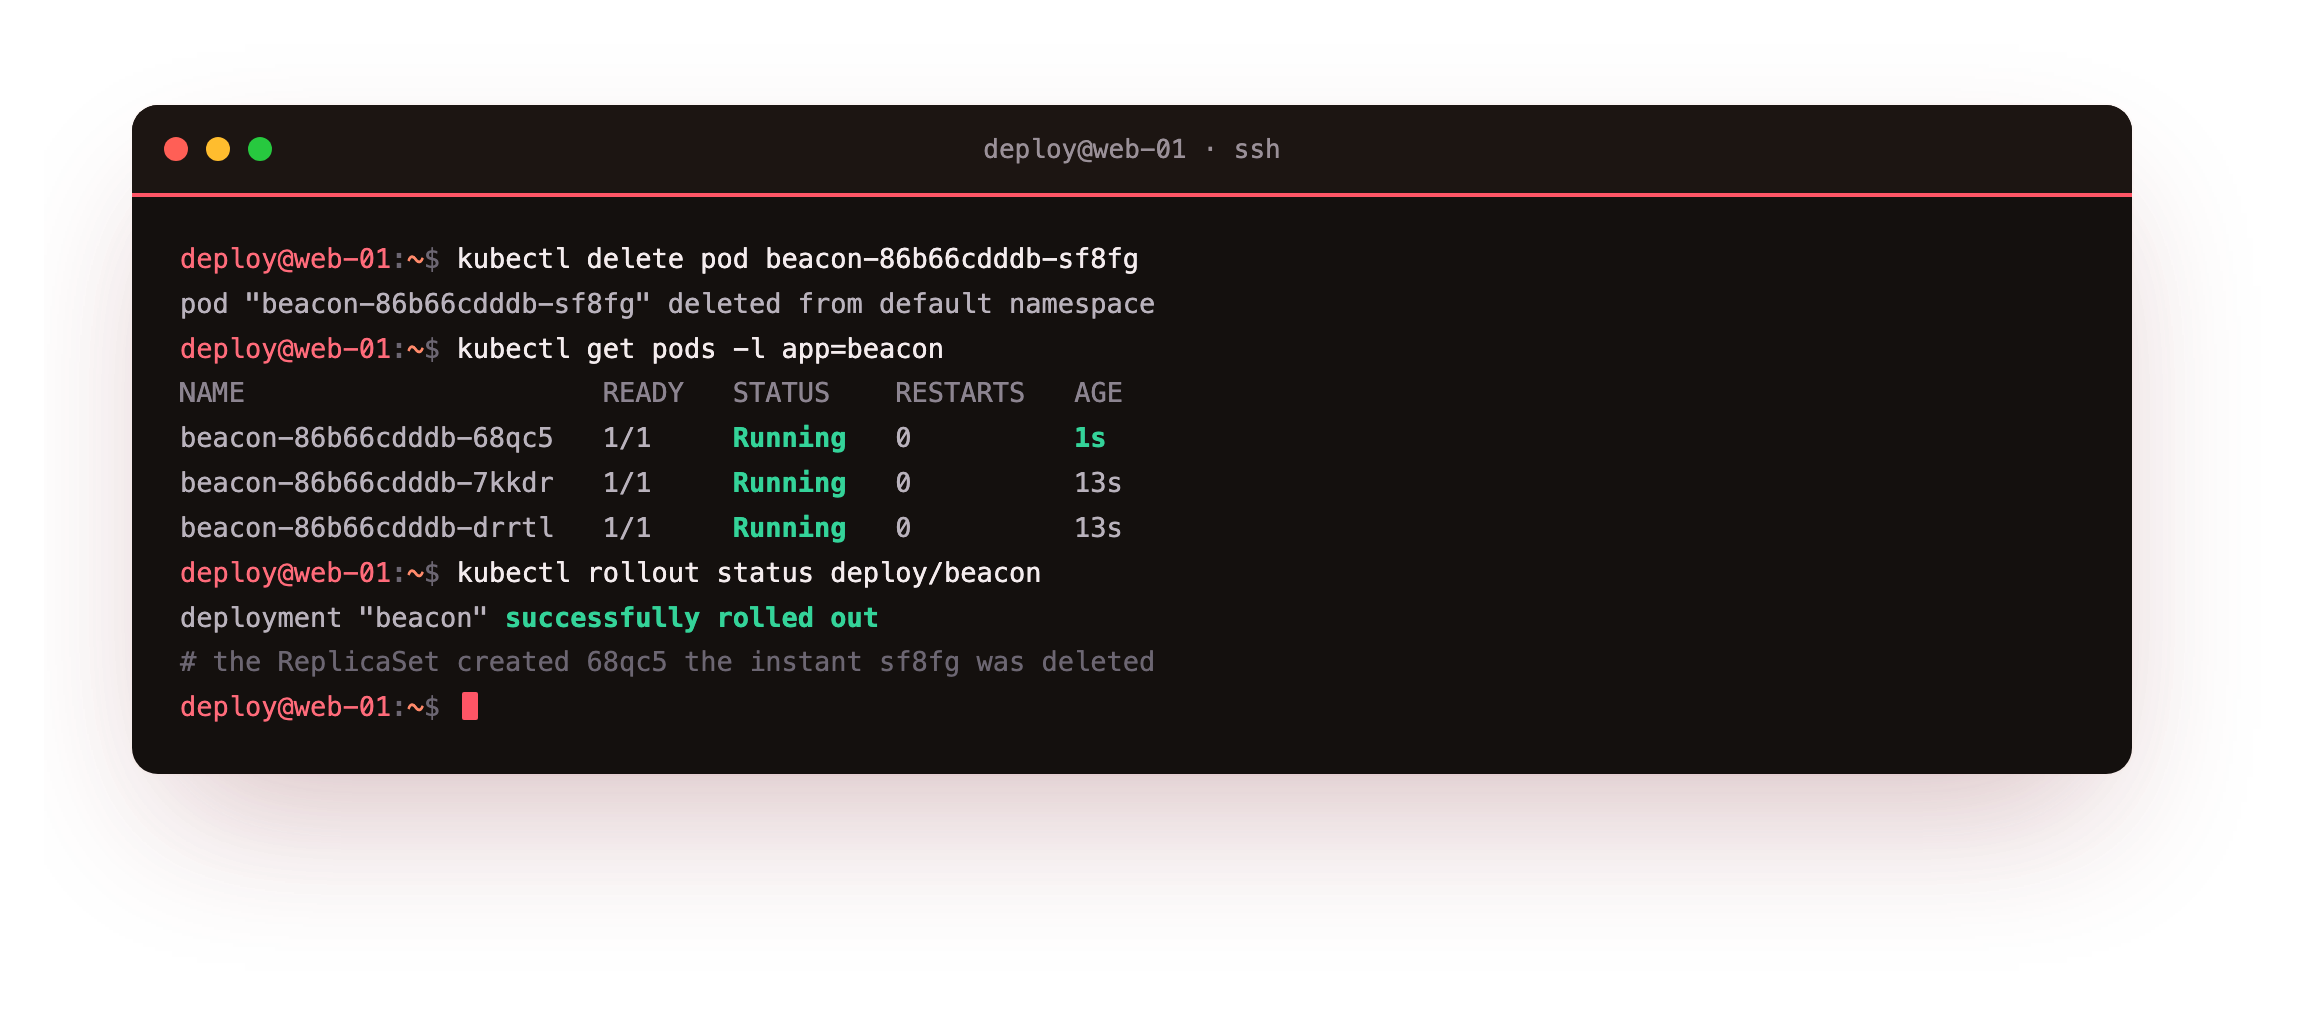
By the time kubectl get pods runs, there are still three pods, and one of them is a second old with a new name. The ReplicaSet saw the count drop to two and created a replacement without anyone asking. kubectl rollout status confirms the Deployment is back to three healthy replicas. Run kubectl describe rs -l app=beacon and the events list a fresh SuccessfulCreate right after your delete, the controller's own record of the repair.
You should see three pods again within a second or two of the delete, one of them freshly named. That is self-healing you triggered by hand: no script, no alert, no page in the night. The cluster simply kept its promise of three.
Going further: why you stop deleting pods
That repair explains why you almost never delete pods to fix things. You change the Deployment, and the cluster reconciles toward the new state. To take the app down you delete the Deployment, not its pods, because deleting a pod just makes the ReplicaSet build another.
The same loop drives a rolling update: change the image in the Deployment, and it creates a new ReplicaSet, scales it up as it scales the old one down, and never drops below your desired count. Everything you do to a Deployment is a change to the target the loop is chasing.
Frequently asked questions
What is the difference between a Deployment and a ReplicaSet?
A ReplicaSet keeps a fixed number of identical pods running. A Deployment manages ReplicaSets and adds rollout features on top, such as updating to a new image by creating a new ReplicaSet and scaling the old one down. You write Deployments and let them own the ReplicaSets for you.
Why did my new pod get a different name?
Pod names in a ReplicaSet end in a random suffix so each is unique. When a pod is replaced, the new one gets a fresh suffix. Never hard-code a pod name in scripts. Select pods by their labels instead, which stay stable across replacements.
How do I take the app down for good?
Delete the Deployment with kubectl delete deploy beacon. That removes the ReplicaSet and its pods together. Deleting individual pods does nothing lasting, because the ReplicaSet immediately recreates them to hold the replica count.
Does scaling to zero delete my configuration?
No. Scaling to zero stops every pod but keeps the Deployment, its ReplicaSet, and all settings. Scale it back up and the pods return with the same spec. It is a clean way to pause a workload without losing how it is defined.
What you have, and what comes next
You wrote a Deployment for Beacon, scaled it to three pods with one command, and watched the ReplicaSet rebuild a pod you deleted, all on a single k3s node. The declarative loop did the work: you set the target, the cluster held it.
Three pods are running, but they have no shared address yet. Each has its own IP that changes whenever a pod is replaced, which is no way to reach a service. The next chapter puts a stable Service in front of them and shows discovery by name across the cluster.