What you will build
By the end of this series a real application talks to a MariaDB you installed and secured yourself, through a login that can touch only its own data and can never wreck the schema. This first chapter takes a bare Ubuntu 24.04 slice, installs the server, secures MariaDB with one script, and shows you the destination up front so the rest of the work has a point you can see.
- The series destination: an app account that reads and writes its own rows but is refused a destructive statement, proven on the server, not promised.
- On a fresh slice nothing is installed. `apt install mariadb-server` is the real first step, and it starts the service and enables it on boot.
- On Ubuntu 24.04 the database root uses unix_socket authentication, so only the system root can log in as root, with no password to leak.
- mysql_secure_installation removes the anonymous users and the test database a first install ships with, two things production should never carry.
- A slice running Ubuntu 24.04 that you reach over SSH as a sudo user, with no MariaDB or MySQL on it yet.
- Room to run apt and to open a database shell as the system root through sudo.
- Enough SQL to read a SELECT and a SHOW statement, which is all the verification here asks of you.
- About twenty minutes, and a willingness to test each default rather than trust it.
See the destination first
Here is where this series is heading. An application connects as its own account, app, reads the orders belonging to one customer, and gets rows straight back. Then the same account tries to drop a table and the server refuses it. That pair is the whole goal in one screen.
mariadb -u app -p shopdb -e "SELECT id, status, total FROM orders WHERE customer_id = 42 LIMIT 3;"
mariadb -u app -p shopdb -e "DROP TABLE orders;"
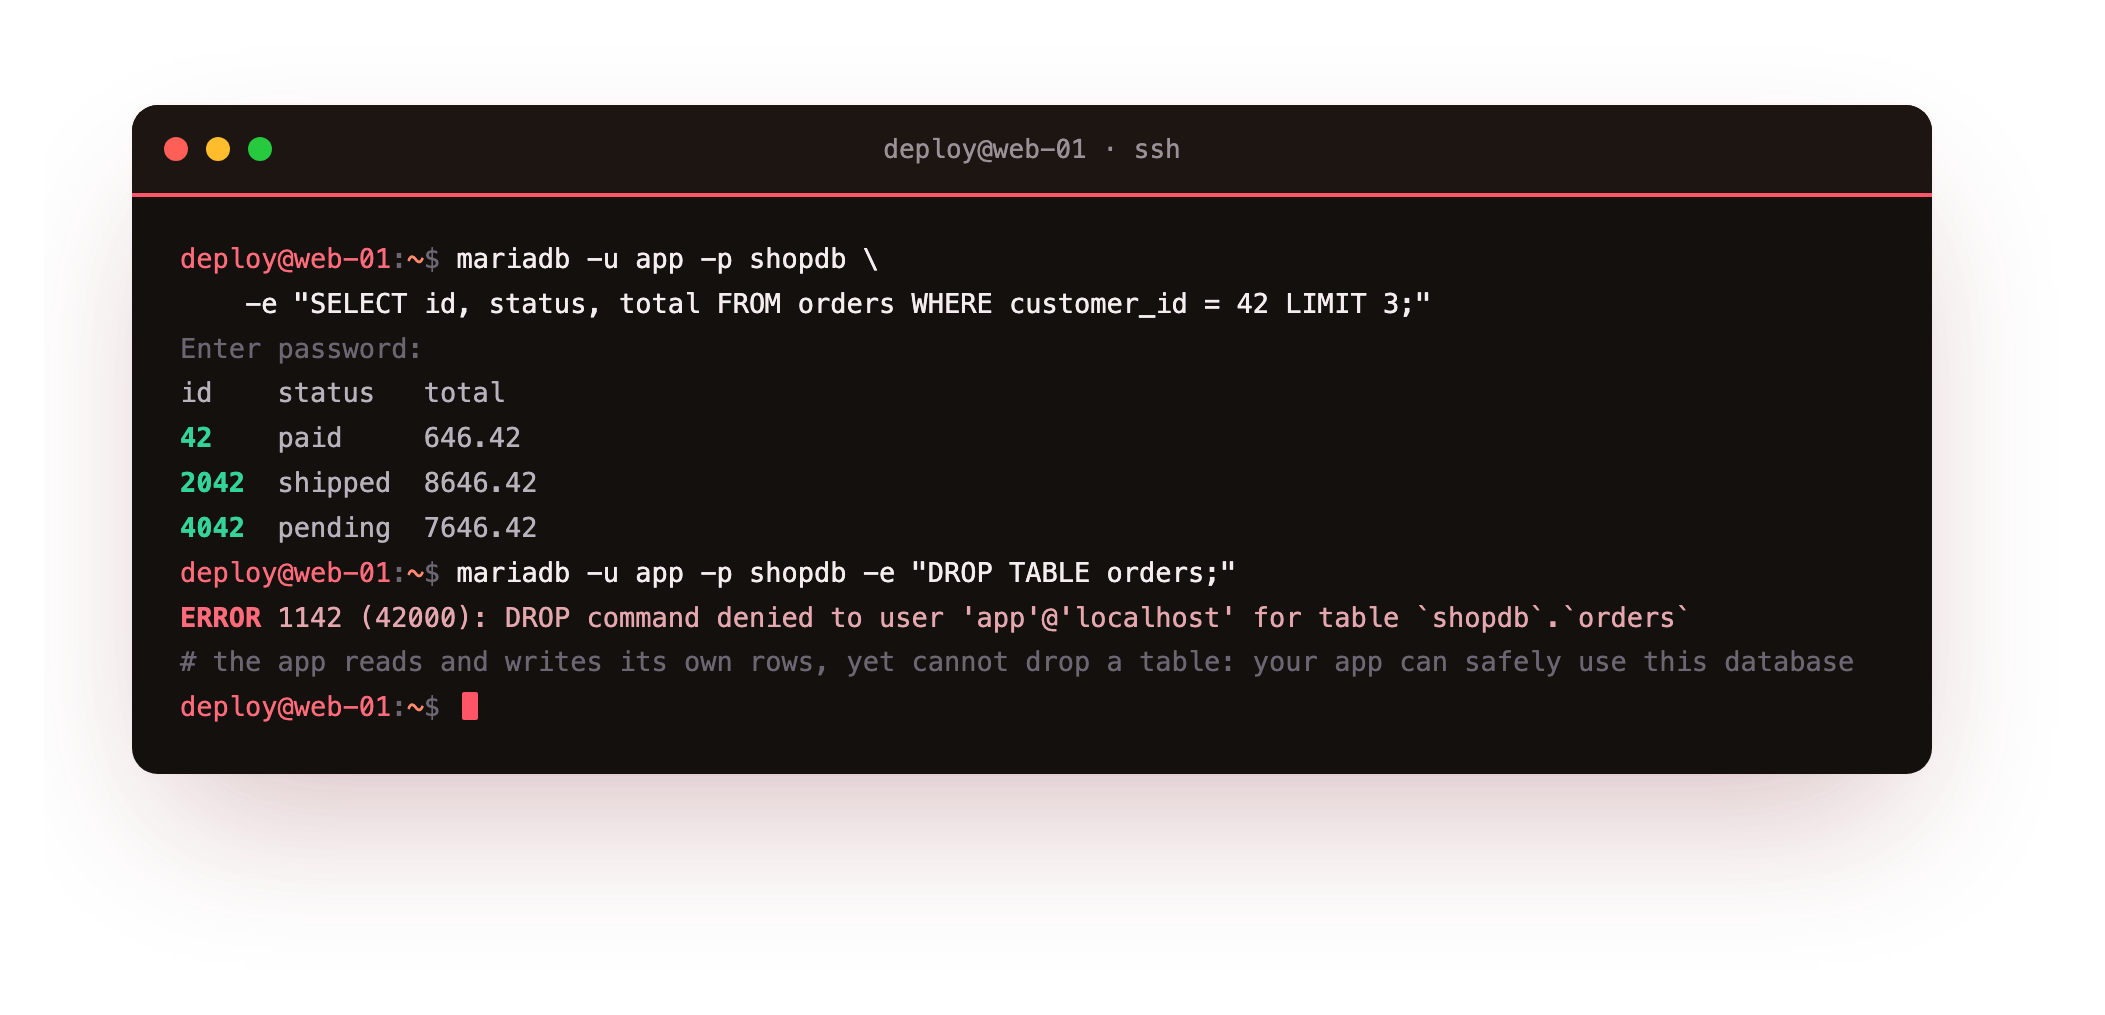
The first command returns real rows, so the application does its job with no friction. The second comes back as ERROR 1142 (42000): DROP command denied, because the app account was never granted the power to reshape the schema. Read together, they are the sentence this whole series exists to make true: your app can safely use this database. If its password leaks tomorrow, the thief can read and change rows, which is bad, but cannot add a hidden table or drop your orders, which would be ruin.
You do not have any of this yet. There is no slice with MariaDB on it, no shopdb, no app account. The rest of this chapter starts that from an empty box, and the later chapters build the account, the backups, the replica and the pooling behind it. This first one gets a secured server running.
Install MariaDB from a bare slice
On a fresh Ubuntu 24.04 slice the database is not there yet. One apt command brings it in, the from-zero step a lot of guides skip straight past on their way to the interesting part. Update the package lists, then install the server and client together.
sudo apt update
sudo apt install -y mariadb-server mariadb-client
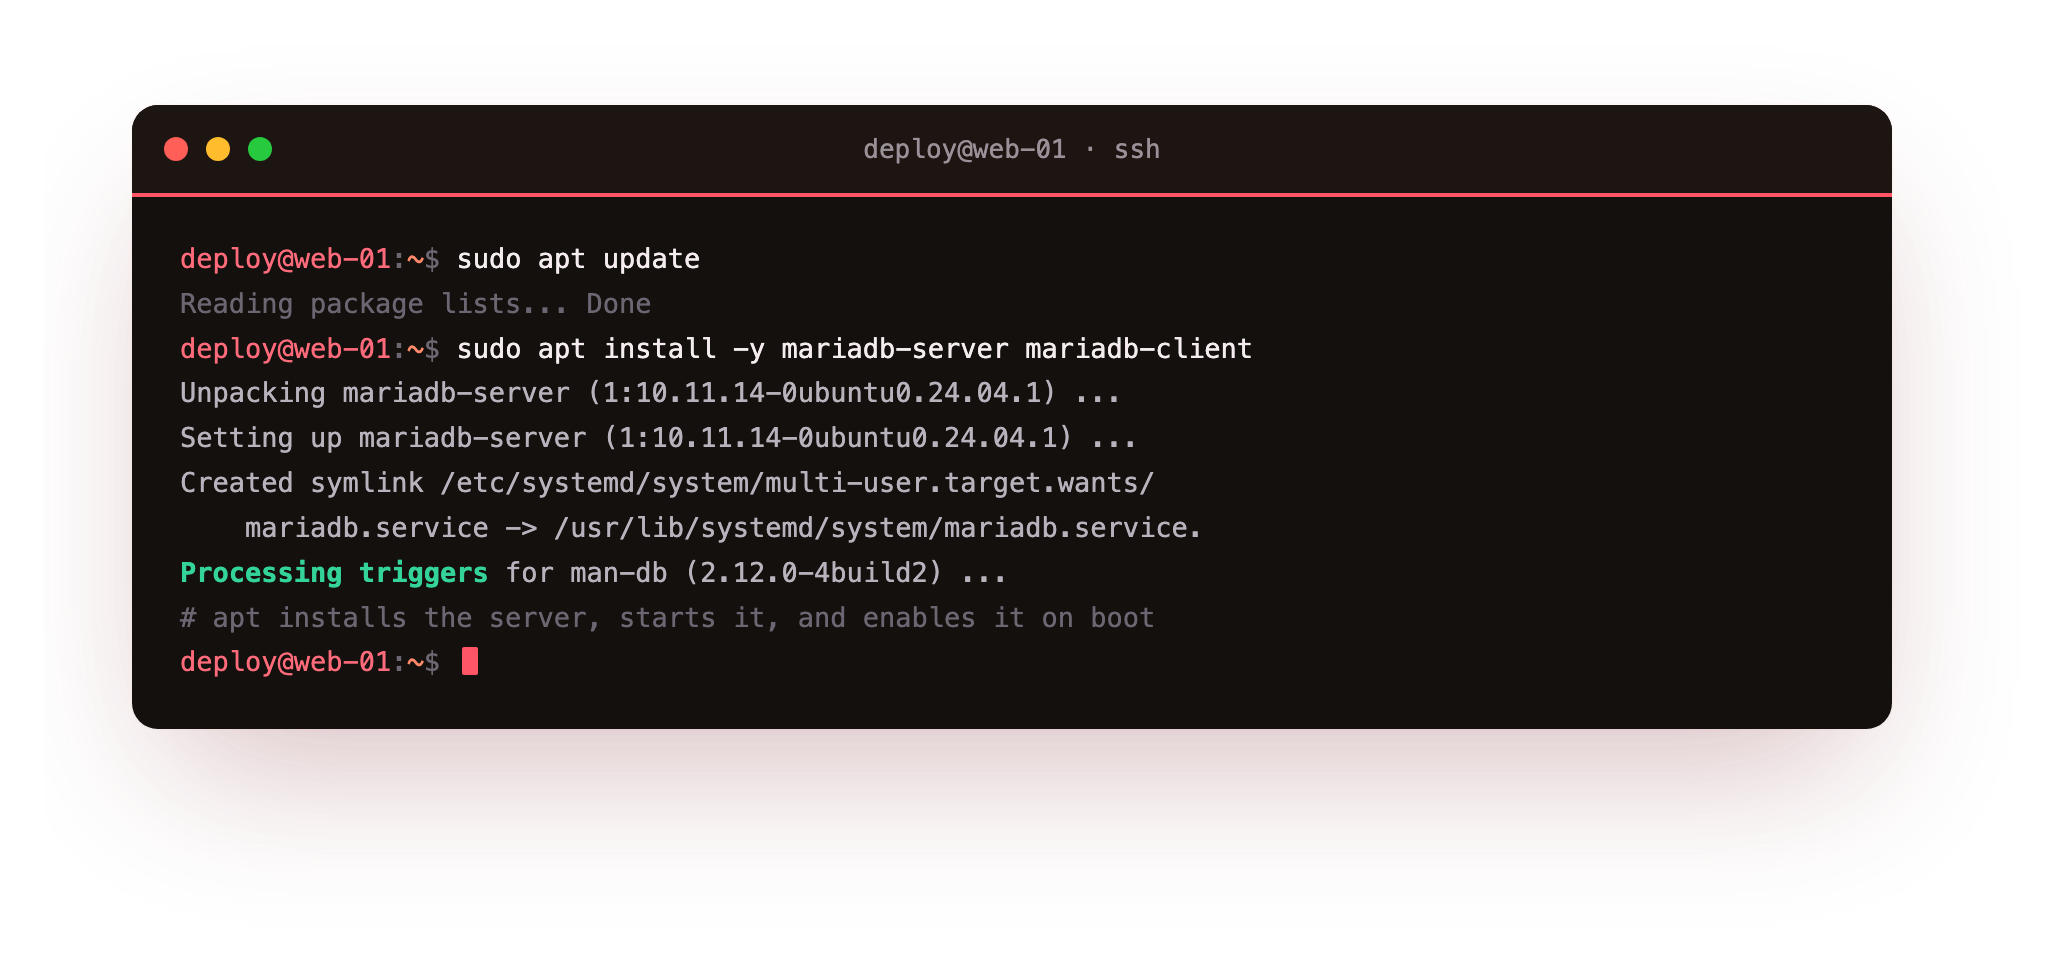
apt pulls in MariaDB 10.11.14, the long-term release Ubuntu 24.04 ships, and wires it up as a systemd service. The install does two useful things without being asked: it starts the server, and it creates the boot symlink so the database comes back up on its own after a reboot.
Run systemctl is-active mariadb. It should print active. If it prints failed instead, read systemctl status mariadb; on a small box the usual cause is too little memory for the default buffer pool, which the troubleshooting section covers.
Confirm the server is running
Reading the version back from inside the database, not just from the package, tells you the running server is the one you think it is. Ask the service, then ask the server.
mariadb --version
systemctl is-active mariadb
sudo mariadb -e "SELECT VERSION();"
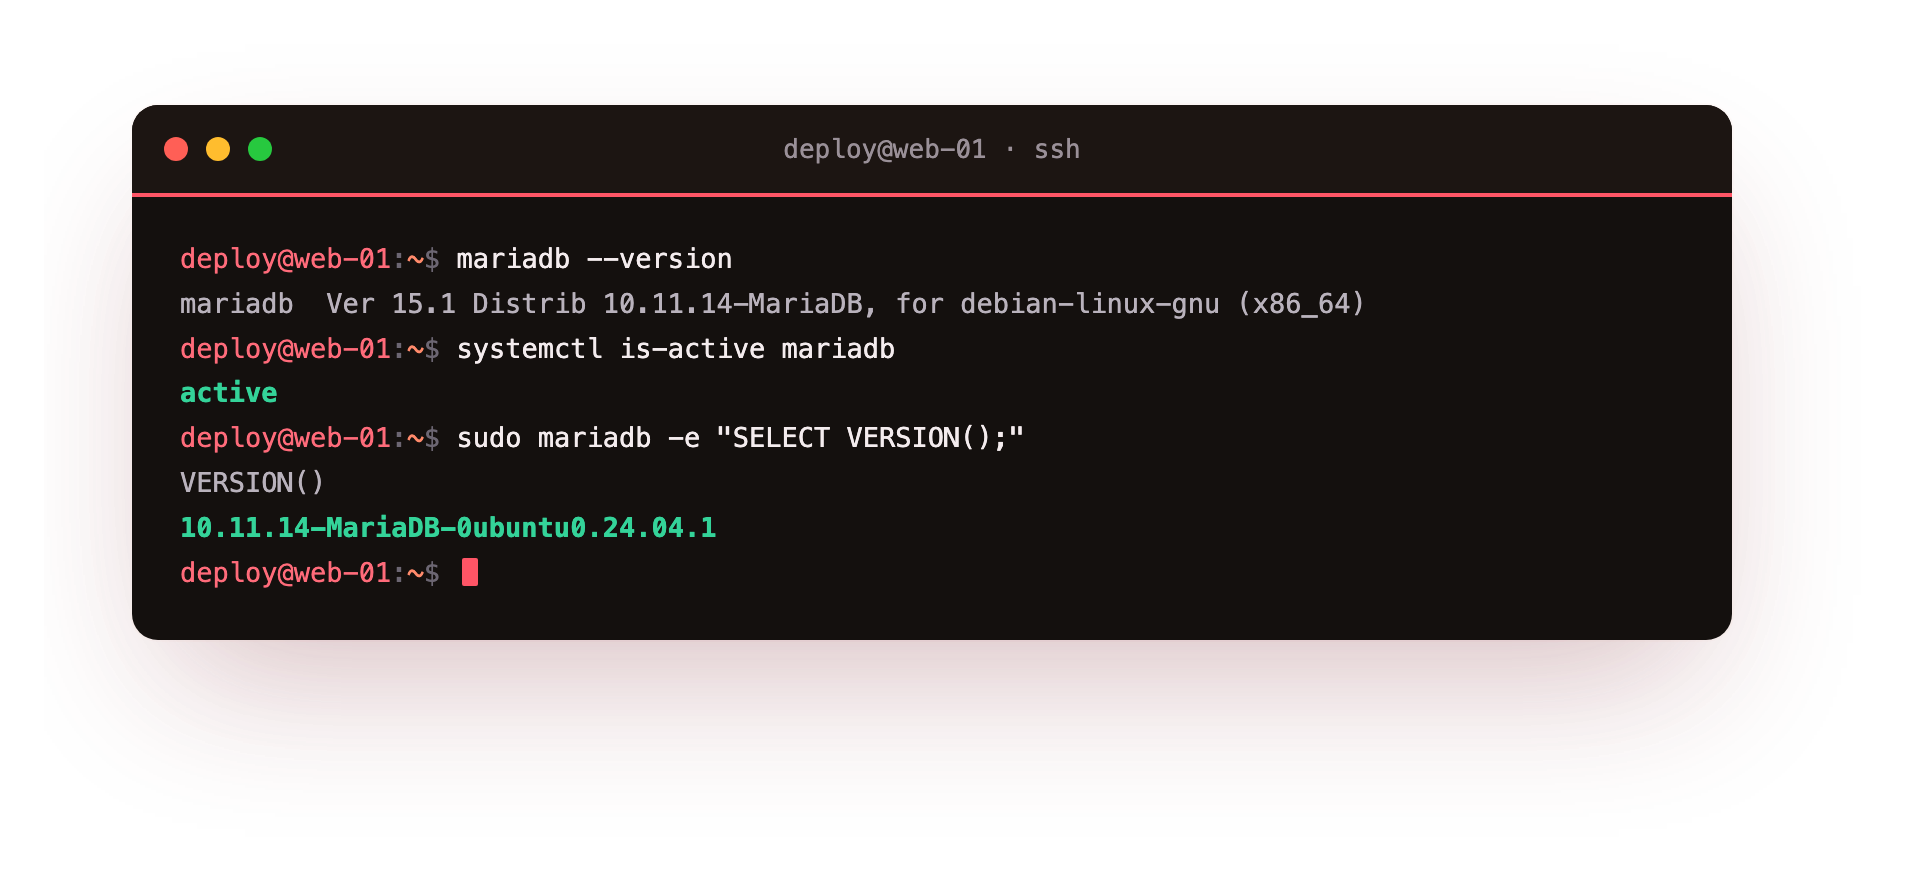
The service reports active, and sudo mariadb drops you into the server as the database root without asking for a password. That last detail is not a gap, it is the account model doing its job, which the securing step confirms next.
Secure MariaDB before it takes real traffic
A database holds the one thing you cannot re-download, your data, so the gap between "it runs" and "it is safe to run" is where the bad afternoons live. MariaDB ships a script that walks the handful of decisions that close that gap. Run it once, right after install.
sudo mysql_secure_installation
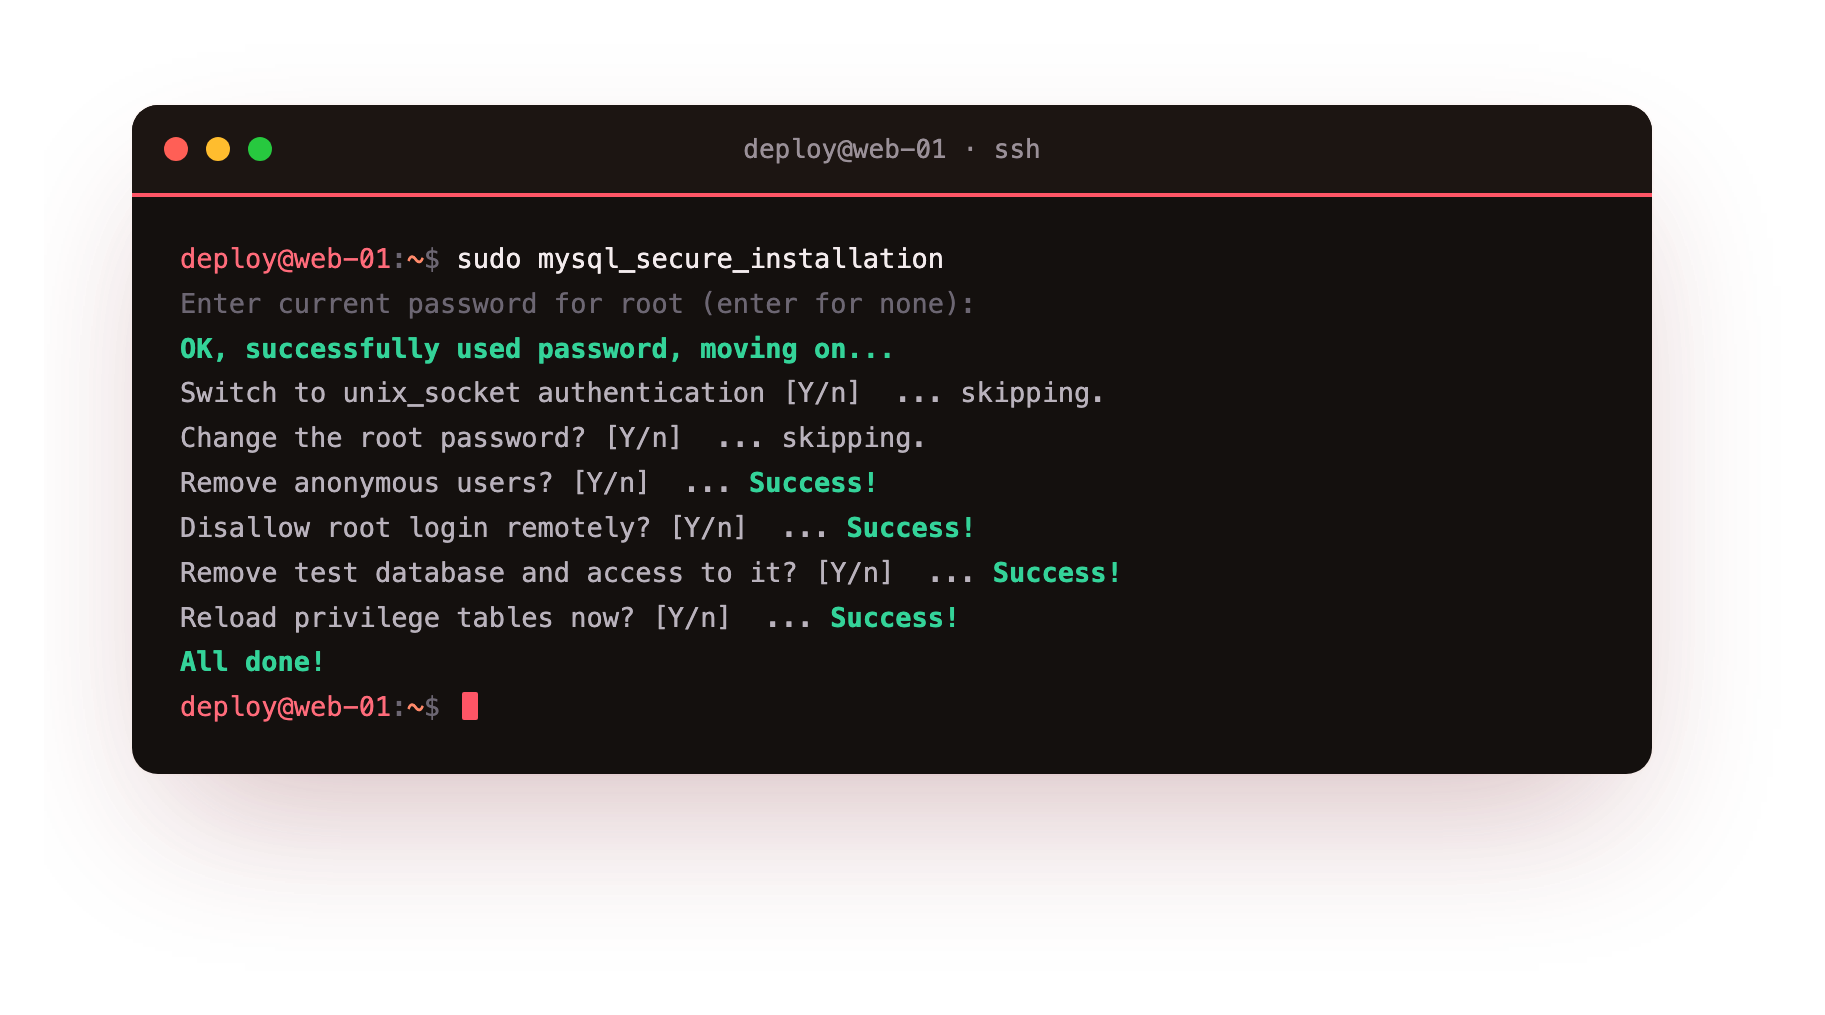
On Ubuntu 24.04 the script tells you the root account is already protected and lets you keep the unix_socket setup, so you answer no to switching authentication and no to setting a root password. Then it does the removals that matter: it clears any anonymous users and drops the test database, both of which exist only to make a first install feel friendly and have no place on a real server.
Prove the root account is not reachable by password
Hardening you did not test is a guess. The claim here is that the database root can be reached only by the system root, through the socket. Check who can log in, then try to log in as root without sudo.
sudo mariadb -e "SELECT User, Host FROM mysql.user ORDER BY User;"
mariadb -u root
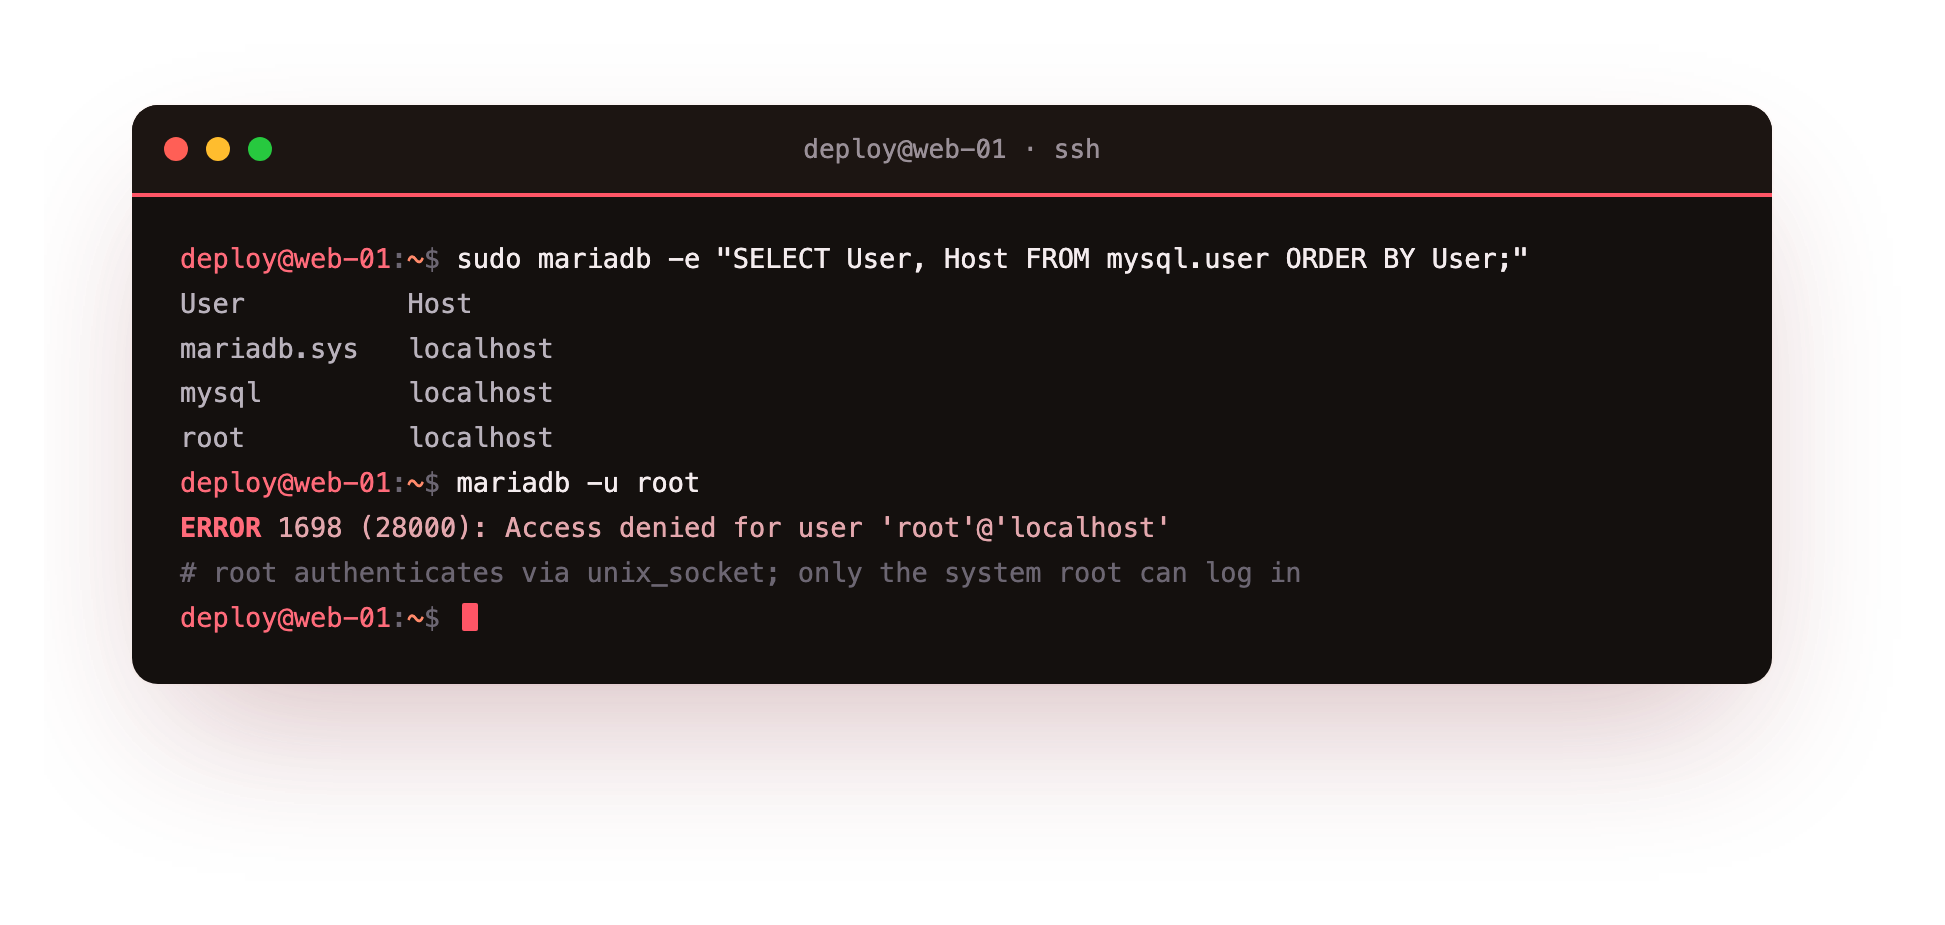
Two things land. The user list is short, root, mysql and mariadb.sys, all bound to localhost, with no anonymous account left behind. And the plain mariadb -u root attempt, run as your normal user, is refused with Access denied. That refusal is the unix_socket plugin at work. A stolen shell that is not root cannot become the database root, and there is no root password sitting in a config file to find.
Your user list should hold only those three system accounts on localhost. If you see an empty-name row or a host of %, an anonymous or remote account slipped through, so rerun mysql_secure_installation and answer yes to removing anonymous users.
Confirm the network exposure
The last question for a fresh install is who can even reach the port. A database listening on a public address with a weak account is the classic breach. Ask the server what address it binds, and confirm nothing else is listening.
sudo mariadb -e "SHOW VARIABLES LIKE 'bind_address';"
sudo ss -tlnp | grep 3306
Here bind_address is 127.0.0.1 and port 3306 listens only on loopback. The database answers the server itself and nothing else. When you later add an app on another host or a replica, you open that exposure deliberately and pair it with a firewall rule, which is the subject of the security hardening chapter that closes the series.
Going further: what unix_socket actually checks
The passwordless root login surprises people, so it is worth seeing why it is safe. The unix_socket plugin does not check a password at all. When you connect over the local socket it reads the operating-system user id on the other end of that socket and compares it to the account name. The database root matches only the system root, which is why sudo mariadb works and a bare mariadb -u root from your normal user does not.
There is no secret in the exchange to steal, phish or brute-force. The trade is that the check works only over the local socket, so the day a remote tool genuinely needs the root-level account you give it a separate, password-or-certificate login rather than widening this one.
Troubleshooting a fresh MariaDB install
sudo mariadb asks for a password. The socket plugin is not active for root, usually after a migration from an old MySQL. Reset root to unix_socket authentication, or confirm you are running the client as the system root through sudo.
The service will not start after install. Check systemctl status mariadb and the log at /var/log/mysql/error.log. A common cause on a small box is too little memory for the configured buffer pool. Lower innodb_buffer_pool_size and start again.
mysql_secure_installation cannot connect. It is trying to log in as root. Run it with sudo so it uses the socket, and press enter at the current-password prompt rather than inventing one.
Port 3306 is not listening at all. MariaDB may be configured with skip-networking or a socket-only setup. That is fine if only local clients use it; open a TCP listener only when a remote client genuinely needs one.
Frequently asked questions
Should I install MariaDB or MySQL on Ubuntu?
Ubuntu ships MariaDB in its main repositories and it is a drop-in replacement for MySQL for almost every application. This series uses MariaDB because it installs cleanly without adding a vendor repository, and the commands map directly onto MySQL where they differ.
Why does MariaDB let me log in as root with no password?
The root account uses the unix_socket authentication plugin, which checks the operating system user instead of a password. Only the system root, reached through sudo, matches, so a passwordless prompt is the secure default rather than an open door.
Do I still need mysql_secure_installation on a modern install?
Yes. Even though recent defaults are tighter, the script is the quick way to confirm anonymous users are gone and the test database is dropped. It takes under a minute and leaves the server in a known, documented state.
Is MariaDB reachable from the internet after install?
Not on this platform. The server binds to 127.0.0.1 by default, so only local clients can connect. You have to change bind_address and open a firewall port before any remote host can reach it, which should always be a deliberate step.
What you have, and what comes next
You have a running MariaDB on a slice you started from nothing, with a root account no password can reach, no anonymous users, no test database, and a port that answers only to the local machine. You have also seen the destination: an application login that uses its data and is refused the power to destroy it.
That login is the next exposure you create, the moment an application connects. If it can do anything, a leak of it can do anything. The next chapter builds the account model behind the destination screen you saw: users with only the privileges their job needs, proven by watching the database refuse the rest.