How linux mount and fstab fit together
A partition on its own is just a reserved section of a disk. Before you can store files on it, it needs a filesystem, and before programs can reach those files, it needs to be attached to a directory. Understanding linux mount and fstab is what turns that reserved section into a working part of the server. In this chapter you are still deploy on an Ubuntu 24.04 server, and the focus is how partitions become usable directories and how the system remembers those attachments across reboots.
- A partition needs a filesystem such as ext4 and a mount point directory before it can hold files.
- mount attaches a filesystem now and umount detaches it, but both last only until the next reboot.
- /etc/fstab mounts filesystems at every boot, usually by UUID so a renamed device does not break it.
- A wrong fstab line can halt the boot, so test with sudo mount -a and add nofail on non-essential disks.
A filesystem is the structure written onto a partition that organises data into files and directories and tracks where each one lives. The common default on Ubuntu is ext4, a journalling filesystem. Creating a filesystem is called formatting, and it is done once per partition with a tool such as mkfs.ext4. Once a partition has a filesystem, it still is not usable until it is mounted, which means attached to a directory called the mount point.
Prerequisites
- A server where you can run sudo, since attaching and detaching filesystems is an administrative action.
- A spare partition to practise on. The examples use /dev/sdb1, but a fresh server often has only /dev/sda, so substitute your own device name or read along.
- The filesystem's UUID for the /etc/fstab step, which you can read with the blkid command.
Mounting and unmounting by hand
The mount command attaches a filesystem to a directory. You give it the device and the target directory:
sudo mount /dev/sdb1 /mnt/data
Here /dev/sdb1 is the partition and /mnt/data is the mount point, an existing empty directory. After this runs, anything written under /mnt/data is stored on that partition. It needs sudo because attaching filesystems is an administrative action. To detach it, you use umount, noting the spelling without an "n", and give either the device or the mount point:
sudo umount /mnt/data
Detaching matters before you remove a disk or run a filesystem check, because it flushes any data still held in memory out to the disk first. A mount made this way lasts only until the next reboot.
Seeing what is mounted with findmnt
To see what is currently attached and where, use findmnt. It reads the kernel's list of mounts and prints them as a tree. You can narrow it to one mount point and pick your columns:
findmnt / -o TARGET,SOURCE,FSTYPE,OPTIONS
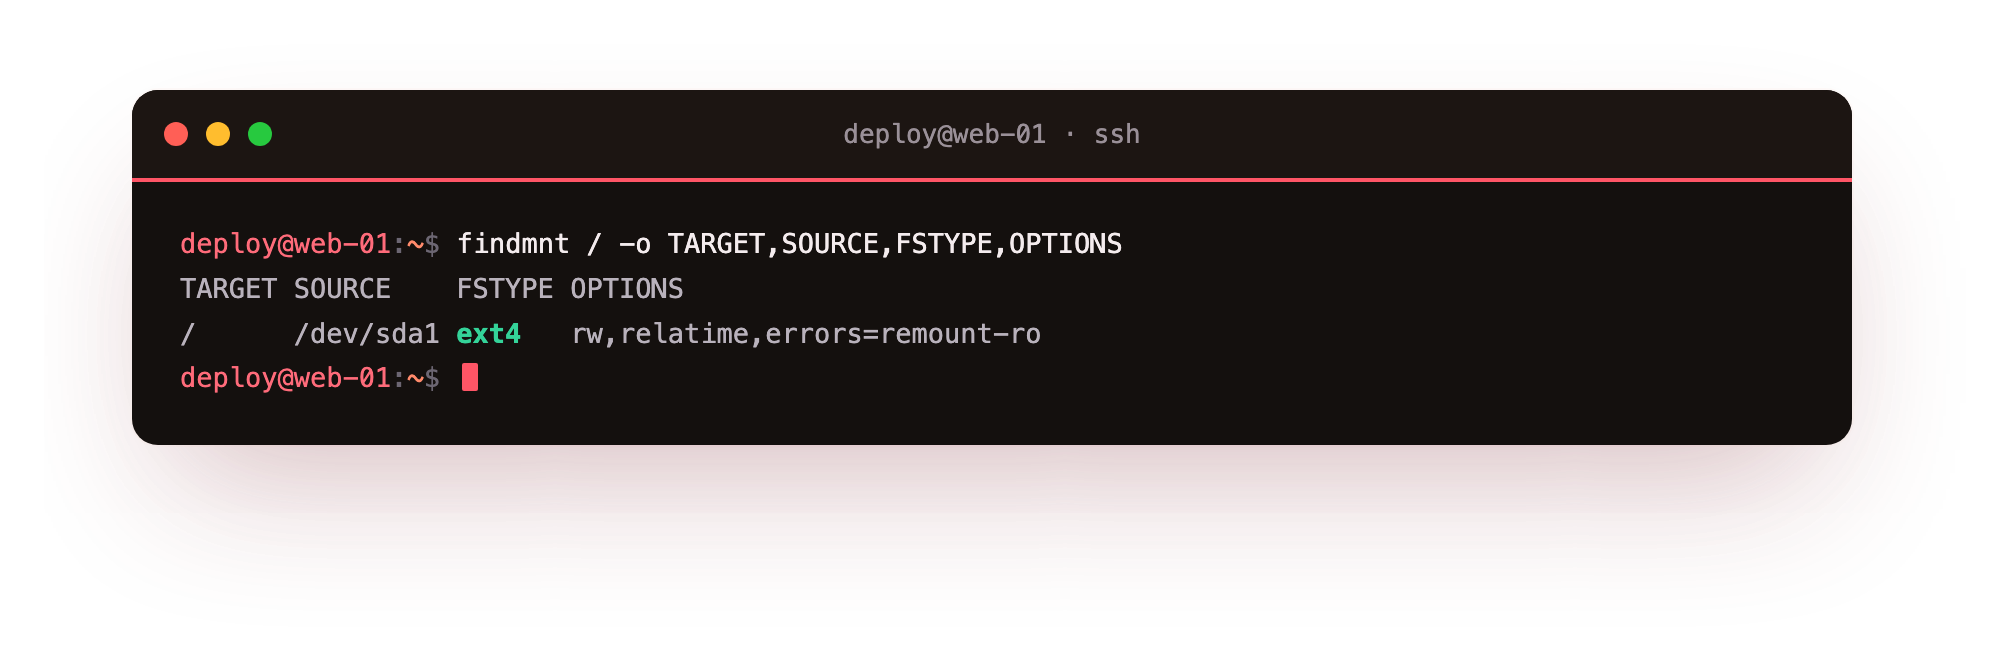
The first argument / limits the output to the root filesystem. The -o flag chooses the columns:
TARGETis the mount point, the directory the filesystem is attached to.SOURCEis the device behind it, such as/dev/sda1.FSTYPEis the filesystem type, for exampleext4.OPTIONSlists the mount options in force, such asrwfor read-write.
This one line confirms that / is served by the root partition, tells you its filesystem type, and shows how it was mounted. findmnt is safer to explore with than the raw mount table because it formats everything clearly.
How do you make mounts permanent with /etc/fstab?
A manual mount is forgotten at reboot. To attach a filesystem automatically every time the server starts, you list it in the file /etc/fstab, the filesystem table. Each line describes one filesystem: what to mount, where to mount it, its type, its options, and two numbers for dump and boot-time checking. This is the second half of linux mount and fstab: mount handles the moment, fstab handles every boot after.
Filesystems in /etc/fstab are usually identified by UUID rather than by a name like /dev/sdb1. A UUID is a long unique identifier written into the filesystem when it is created. Device names can shift if you add or reorder disks, but the UUID stays fixed to the filesystem, so mounting by UUID keeps working even if /dev/sdb1 becomes /dev/sdc1. You can find a filesystem's UUID with the blkid command.
Common mount options
The options field controls how the filesystem is attached. A few you will see often:
| Option | Meaning |
|---|---|
defaults |
A standard set, including read-write and auto-mount at boot. |
ro |
Mount read-only, so nothing can be written. |
noatime |
Do not record each file's last-access time, which reduces disk writes. |
nofail |
Do not stop the boot if this device is missing. |
Why a broken fstab stops the boot
A mistake in /etc/fstab is one of the ways a server fails to come back after a reboot. At boot the system tries to mount every line in the file. If a line points to a device that does not exist or uses a wrong option, the boot can halt and drop into an emergency prompt instead of starting normally.
This is why you add nofail to non-essential disks, and why you check a new entry before rebooting. A safe habit is to run sudo mount -a, which mounts everything in /etc/fstab right away, so any error shows up immediately while you can still fix it, rather than at the next boot.
Together, linux mount and fstab give you both one-off attachments and permanent ones that survive every reboot.
Troubleshooting mount and fstab
umount reports "target is busy". A process still has a file open on that mount, or your shell is sitting inside the directory. cd out of it first, then find what is holding it with lsof or fuser before unmounting.
mount fails with "mount point does not exist". The target directory has to exist before you mount onto it. Create it with sudo mkdir -p /mnt/data, then run the mount again.
The server drops to an emergency prompt after a reboot. A line in /etc/fstab points at a missing device or uses a bad option. Boot into the recovery prompt, comment out the offending line, and in future always test a new entry with sudo mount -a before rebooting.
mount -a reports "unknown filesystem type". The type field in the fstab line is wrong, or the partition was never formatted. Confirm the real type with blkid or lsblk -f and correct the entry.
Frequently asked questions
Should I mount by device name or by UUID in fstab?
Use the UUID. Device names like /dev/sdb1 can change when you add or reorder disks, but the UUID stays fixed to the filesystem, so mounting by UUID keeps working.
What does the nofail option do?
It tells the boot to continue even if that device is missing, so a spare disk that is unplugged does not stop the whole server from starting.
Why is the command umount and not unmount?
It is spelled umount, without the first n. This is a long-standing Unix spelling you simply have to remember.
How do I test an fstab entry without rebooting?
Run sudo mount -a, which mounts every line in the file right away, so any mistake shows up while you can still fix it rather than at the next boot.
Recap
- A partition needs a filesystem such as
ext4and must be mounted onto a directory before it is usable. sudo mountattaches a filesystem andsudo umountdetaches it, but only until the next reboot.findmnt / -o TARGET,SOURCE,FSTYPE,OPTIONSshows the source, type, and options for the root mount./etc/fstabmounts filesystems at every boot, usually by UUID so device renaming does not break it.- A wrong line in
/etc/fstabcan stop the boot, so usenofailwhere appropriate and test withsudo mount -a.