A better door than a password
When you connect to a server over SSH, you have to prove who you are, and ssh key authentication Linux servers support is the sturdier way to do it. Instead of typing a password that travels to the server and can be guessed or reused, you hold a secret file on your laptop and the server holds a matching public file. The two are generated as a pair and are useless apart.
- A key pair has a private half that stays on your laptop and a public half you copy to servers.
- ssh-keygen -t ed25519 creates a modern pair; ssh-copy-id appends the public key to authorized_keys.
- The private key must be mode 600 and ~/.ssh must be 700, or the SSH client and server refuse it.
- Once key login works, set PasswordAuthentication no to stop password-guessing attacks entirely.
This chapter builds a key pair, reads it, and explains how to put it to work. You are on your Ubuntu 24.04 server as deploy, and the commands here are safe because they create a throwaway demo key in your home directory, not your real login key.
A key pair has two halves. The private key stays on your laptop and never leaves it. Anyone who holds your private key can log in as you, so you guard it like a house key. The public key is the half you copy to servers. It can be shared freely, pinned on a noticeboard, emailed, anything, because on its own it grants nothing.
The maths behind ssh key authentication Linux uses lets the server confirm that whoever is connecting holds the matching private key, without the private key ever crossing the wire.
Generating a key pair
Create a demo pair now:
ssh-keygen -t ed25519 -f ~/demo_key -N "" -C "you@laptop"
ssh-keygen -lf ~/demo_key.pub
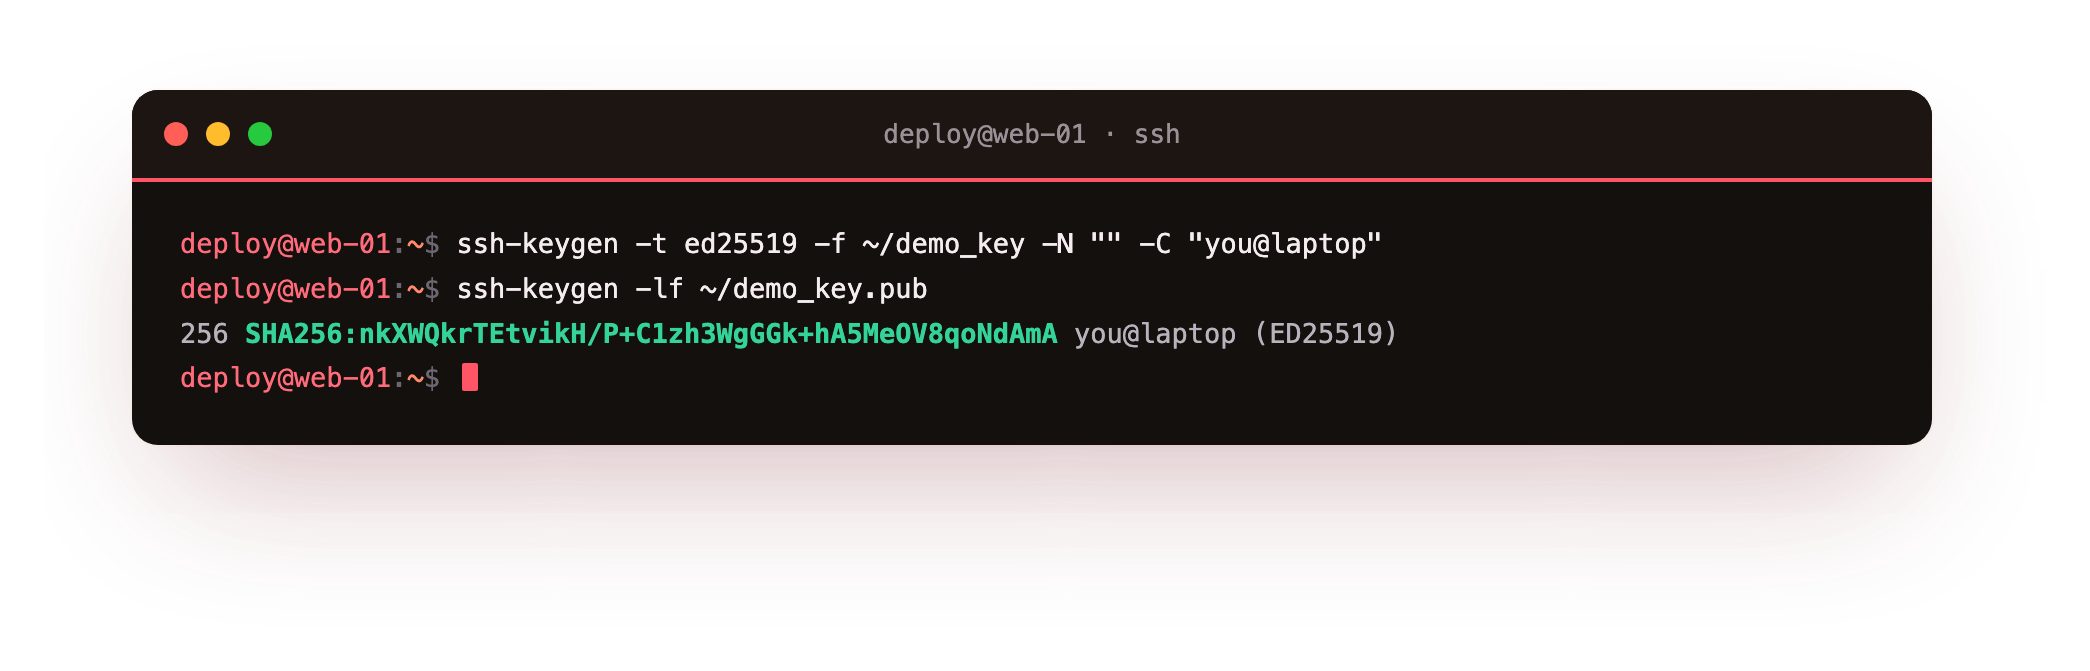
The first command builds the pair. -t ed25519 chooses the Ed25519 algorithm, a modern, short, fast key type you should prefer for new keys. -f ~/demo_key sets the output filename, so you get demo_key (private) and demo_key.pub (public) in your home directory. -N "" sets an empty passphrase to keep this demo simple, though on a real key you would type a passphrase here so the private file is encrypted at rest. -C "you@laptop" adds a comment label that helps you recognise the key later.
The second command, with -l, prints the key's fingerprint, and -f names the public file to read. In the screenshot you see the fingerprint line: a bit count, a hash, and your comment. That fingerprint is a short identity you can compare against what a server reports.
Prerequisites
- An Ubuntu 24.04 server running OpenSSH that you can currently log into, even if only with a password.
- The ssh-keygen and ssh-copy-id tools, which ship with the OpenSSH client on Linux and macOS.
ssh key authentication Linux and the authorized_keys file
For the server to trust your key, its public half has to land in a specific file: ~/.ssh/authorized_keys inside the account you want to log into. SSH reads that file on every connection and treats each line as a key that is allowed in. Look at what a public key actually contains:
cat ~/demo_key.pub
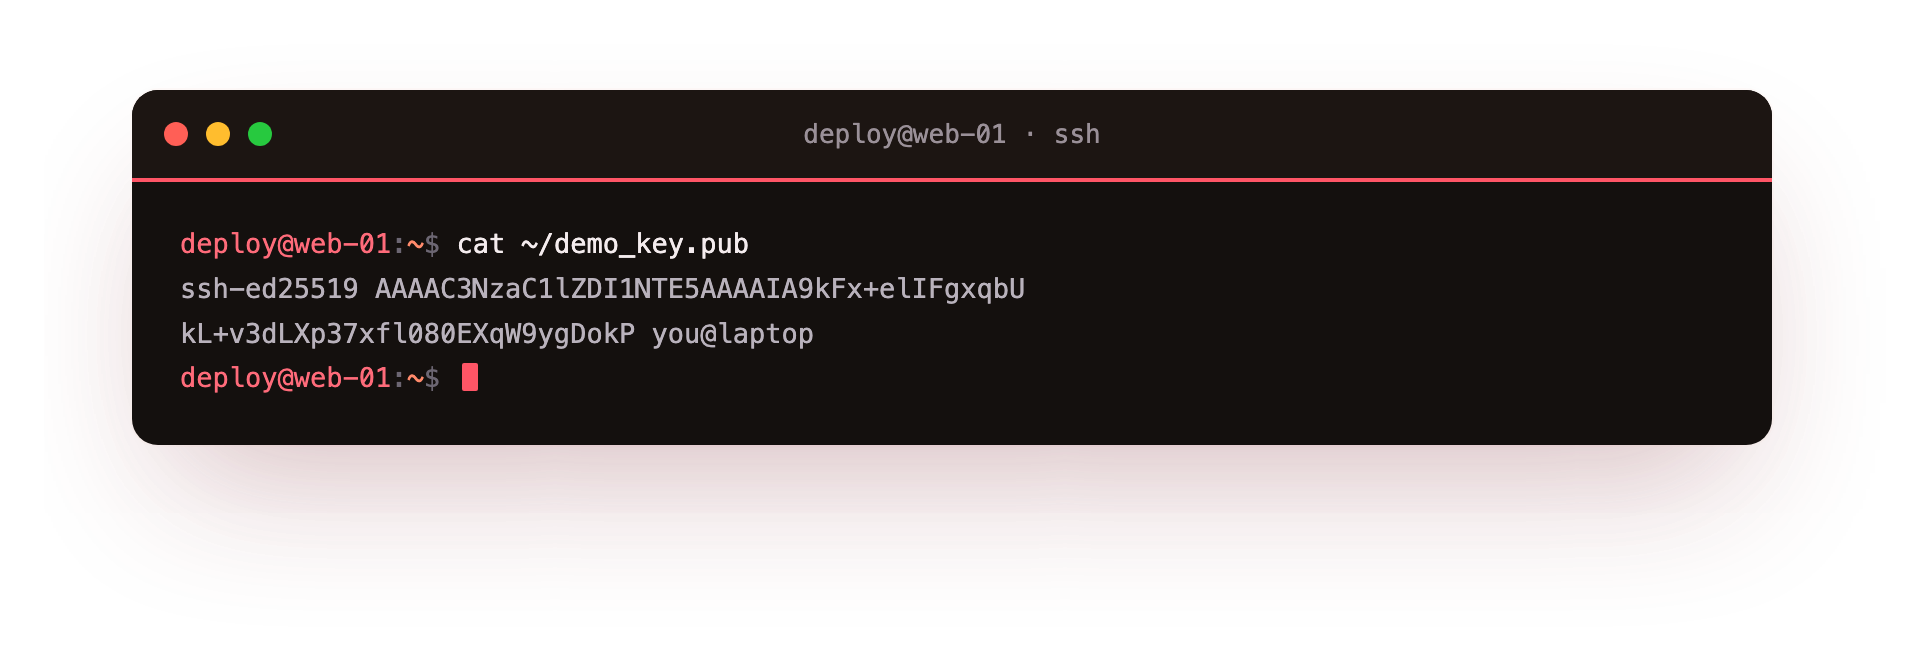
The cat ~/demo_key.pub command prints the whole public key as one line. In the screenshot you can read its three parts: the key type (ssh-ed25519), a long base64 blob that is the key material, and the comment you set. This single line is exactly what goes into authorized_keys. You can append it by hand, but the tidy way is the ssh-copy-id tool:
ssh-copy-id -i ~/demo_key.pub deploy@your-server
ssh-copy-id logs in once with your password, creates ~/.ssh if needed with the right permissions, and appends your public key to authorized_keys without you editing the file. After it runs, ssh key authentication Linux hosts will recognise your laptop and let you in with no password prompt.
Permissions and locking the door
SSH is strict about file permissions, and for good reason. If your private key is readable by other users, the SSH client refuses to use it. The private key must be mode 600, owner read and write only:
chmod 600 ~/demo_key
chmod 600 ~/demo_key removes all access for group and other, leaving just the owner. The same care applies on the server side, where ~/.ssh should be 700 and authorized_keys 600. Here is the short version to keep straight:
| File | Mode | Meaning |
|---|---|---|
| Private key on laptop | 600 | Owner reads and writes, nobody else sees it |
~/.ssh directory |
700 | Only the owner may enter |
authorized_keys |
600 | Only the owner may read the trusted keys |
Once you have logged in with your key and confirmed it works, you can close the weaker door. Open /etc/ssh/sshd_config with sudo, set PasswordAuthentication no, and reload the SSH service. From then on the server accepts keys only, and password-guessing attacks against your accounts simply stop working, an early win in hardening a Linux server. Do this only after a successful key login, so you never lock yourself out of your own machine.
Why keys beat passwords comes down to this: a good password can still be phished, reused across sites, or brute-forced given enough tries, but ssh key authentication Linux relies on a secret that never leaves your machine and is far too long to guess. You get a login that is both easier to type, since there is no password, and harder to break.
Troubleshooting SSH key login
The server still asks for a password. The public key did not reach ~/.ssh/authorized_keys, or its permissions are wrong. Re-run ssh-copy-id, then check that ~/.ssh is 700 and authorized_keys is 600 on the server. SSH ignores those files when they are group or world writable.
"Permission denied (publickey)." The server accepts keys only and cannot match yours. Confirm you copied the right .pub file, and connect with ssh -i ~/demo_key deploy@your-server so the client offers the matching private key.
"UNPROTECTED PRIVATE KEY FILE." The private key is readable by others, so the client refuses it. Tighten it with chmod 600 ~/demo_key and try again.
Frequently asked questions
Is it safe to share my public key?
Yes. The public key grants nothing on its own and is meant to be copied to servers, pinned on a noticeboard, or emailed. Only the private key must stay secret, because whoever holds it can log in as you.
Should I set a passphrase on the key?
On a real key, yes. A passphrase encrypts the private file at rest, so a stolen laptop does not hand over your access. The demo here uses an empty passphrase only to stay simple. An ssh-agent can hold the passphrase so you type it once per session.
Why prefer Ed25519 over RSA?
Ed25519 keys are short, quick to verify, and use modern cryptography, which is why ssh-keygen -t ed25519 is the sensible default for new keys. RSA still works, but if you generate one use at least 3072 bits.
What happens if I lose my private key?
You cannot recover it, and it should never be copied off the machine anyway. Generate a fresh pair, copy the new public key to your servers, and remove the old line from each authorized_keys file so the lost key can no longer be used.
Recap
An SSH key pair has a private half that stays on your laptop and a public half you copy to the server's ~/.ssh/authorized_keys. Generate one with ssh-keygen -t ed25519, check it with ssh-keygen -l, and copy it with ssh-copy-id. Keep the private key at mode 600, and once key login works, set PasswordAuthentication no to disable passwords entirely.